Healthyish Carrot Muffins

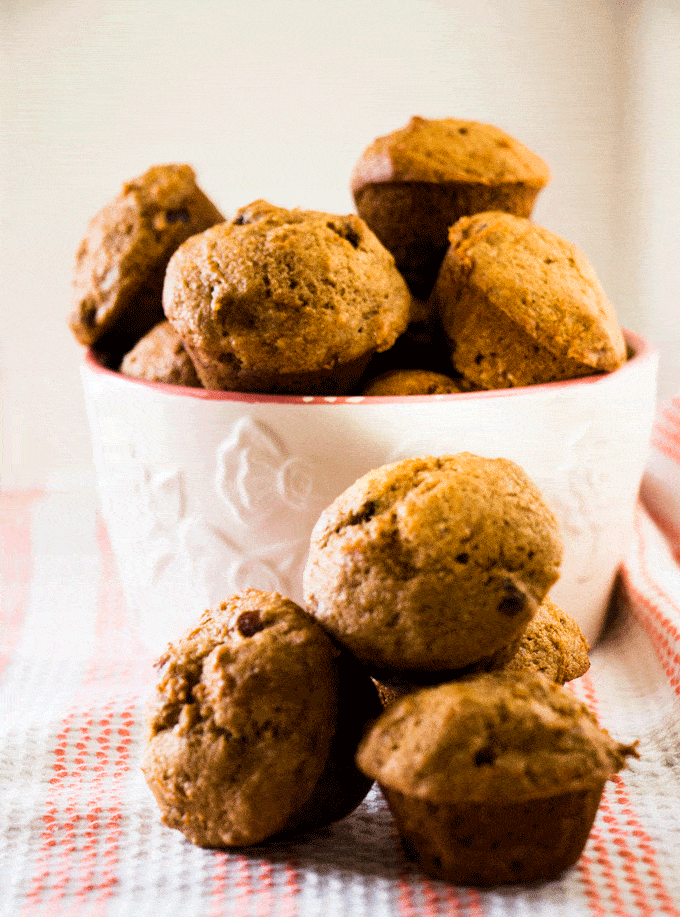
I’m going to be honest y’all… these days my culinary attention has been laser-focused on trying to come up with new, healthy meals that Sawyer wants to eat. Overall he’s a pretty good eater (there’s a reason he’s in the 80th percentile for his weight..), but he can definitely be a bit picky, especially whenever we introduce something new. One thing that I know he’ll always chow down? Muffins. Or literally any kind of baked good for that matter. So of course, I’ve made it my mission to find a muffin recipe he’ll be excited to eat, that are still healthy and chock-full of veggies. Thankfully, I found a great recipe over at the blog Yummy Toddler Food, making just a few tweaks of my own. I promise they are yummy enough that even if you don’t have a picky toddler to appease, you’ll enjoy them!

HEALTHYISH CARROT MUFFINS

INGREDIENTS

  • ¾ cup all purpose or whole-wheat flour

  • ½ cup rolled oats

  • ¼ cup brown sugar (for sugar-free, omit and sub 2-3 tablespoons maple syrup)

  • 1 teaspoon cinnamon

  • 1 teaspoon baking powder

  • ¼ teaspoon baking soda

  • 1 cup applesauce (or any kind of veggie puree – sweet potato, winter squash, etc)

  • 1 cup grated carrots

  • 2 large eggs

  • 3 tablespoons canola oil (or melted coconut oil)

  • ¼ cup raisins

  • ¼ teaspoon salt

PREPARATION

  • Preheat the oven to 350 degrees F and coat a 24-cup mini muffin tin with nonstick spray. Don’t be shy with the non-stick spray, or else the muffins will definitely stick!

  • Add all ingredients to a medium bowl and stir together to combine thoroughly but gently.

  • Add a heaping 1 tablespoon of the batter to each prepared muffin cup and bake 18-22 minutes or until lightly golden brown around the edges and a cake tester inserted into the middle comes out cleanly.

  • Remove from oven, cool in the pan for 2 minutes, and use a paring knife to loosen the edges as needed. Tilt in the pan to allow air to circulate underneath or transfer to a wire rack to cool.

  • Serve warm, at room temp, or chilled.
Roasted Winter Squash Soup with Ginger, Lime & Coconut

Got winter squash? Run, don’t walk, and MAKE THIS SOUP.

This recipe is super straightforward, uses all easy-to-source pantry ingredients, and is packed with flavor thanks to warming fall spices, zesty ginger, bright lime juice, and cooling coconut milk. I used butternut squash most recently, but use whatever local winter squash you have access to – whether it’s pumpkin, acorn, kabocha, or funkier squash varieties like koginut. A note that the ingredients list may look long/intimidating, but I promise this soup comes together super quickly and easily!

ROASTED WINTER SQUASH SOUP WITH GINGER, LIME & COCONUT

INGREDIENTS:

  • 3 lbs unpeeled winter squash (such as butternut, acorn, kabocha, etc)

  • Olive oil

  • 1 large yellow onion, diced

  • 1 tablespoon minced fresh ginger

  • 1 teaspoon ground coriander

  • 1 teaspoon ground cumin

  • ½ teaspoon turmeric

  • ½ teaspoon cinnamon

  • Pinch roasted red chili flakes

  • 4 cups vegetable stock or water

  • 1 teaspoon salt, plus more to taste

  • Freshly ground black pepper to taste

  • Juice of 1 lime (~3 tablespoons)

  • 1 14-oz can coconut milk

  • ¼ cup fresh basil leaves, plus more to garnish

INSTRUCTIONS:

  1. Preheat the oven to 425°F.

  2. Peel the butternut squash and dice the flesh into ½” pieces. Toss the diced squash on a rimmed baking sheet with a few tablespoons of olive oil and a pinch of salt.

  3. Roast for 30-35 minutes, until the squash is soft and beginning to caramelize. Set aside.

  4. Heat 1 tablespoon olive oil in saucepot or dutch oven over medium heat. Add diced onion, a pinch of salt and cook until onions are soft and translucent, about 8 minutes.

  5. Add ginger, coriander, cumin, turmeric, cinnamon and chili flakes, and cook for another 2 minutes, stirring frequently.

  6. Add the cooked butternut squash, along with the vegetable stock or water, salt and pepper.

  7. Bring to a boil, then reduce heat to simmer and cook for 10 minutes.

  8. Stir in the lime juice and coconut milk, and simmer for another 2 minutes. Take the soup off the heat and add the fresh basil.

  9. Use blender to carefully puree soup in 2 or more batches, until smooth.

  10. Return soup to pot over low heat. Taste and adjust seasoning to balance the salty, pungent and citrus notes. Ladle into bowls and garnish with creme fraiche, toasted squash seeds, fresh herbs or anything else that inspires you. Enjoy!

Chicken & Cauliflower Curry

Curry dishes may seem complicated, as they tend to have a longer list of ingredients, but you most likely already have everything in your pantry/fridge, and curries really do come together quickly once you get going. Feel free to use different spices or veggies based on what you have on-hand, and you can absolutely omit the chicken if you’d prefer a vegetarian curry.

CHICKEN & CAULIFLOWER CURRY

INGREDIENTS

  • 2 tablespoons olive oil

  • 2 teaspoons curry powder

  • 2 teaspoons minced ginger root

  • 1 teaspoon turmeric

  • 3 cloves garlic, minced

  • 1 pound boneless skinless chicken thighs, cut into 1” cubes

  • 1 medium yellow onion, diced

  • 1 teaspoon kosher salt, plus more to taste

  • 1/2 teaspoon black pepper

  • 1 medium sweet potato, peeled and diced into 1/2 inch cubes

  • 2 cups cauliflower cut into florets (1 small head)

  • 1 tablespoon tomato paste

  • 2 cans (13.5 ounces) unsweetened coconut milk

  • Splash of fresh squeezed lime juice

  • Handful chopped cilantro leaves (optional garnish)

INSTRUCTIONS

  • Heat the olive oil in a pan over medium heat. Add the curry powder, turmeric, minced garlic and ginger root, and toast, stirring, until fragrant well combined, 1 to 2 minutes.

  • Add the chicken, onion, salt and pepper and toss until evenly coated in the spices. Cook, stirring occasionally, until chicken is cooked through, about 5 minutes.

  • Add the sweet potato, cauliflower, and tomato paste and toss into the mixture until evenly combined. Add the coconut milk and stir until well combined.

  • Bring the curry to a gentle simmer and cook, uncovered until sweet potatoes are fork tender, about 15-20 minutes. Add a splash of fresh lime juice, and taste and adjust seasoning as needed. Serve over rice and garnish with cilantro, if desired. Enjoy!

Rainbow Spring Rolls with Peanut Miso Dipping Sauce

Whenever I have a mis-mash of various veggies hanging around, I love making these rainbow spring rolls. They come together in just a few minutes, and they are super flexible so you can just use whatever you have on hand – and if you have kids / grandkids, this is an awesome dish to make with them! And promise me you won’t skip the peanut miso dipping sauce… y’all, this dip is so freakin good, you’ll be licking your plate when you’re done!

RAINBOW SPRING ROLLS 

WITH PEANUT MISO DIPPING SAUCE

INGREDIENTS

  • 12” rice paper sheets

  • Fresh herbs – basil or mint leaves, or arugula works too!

  • Red cabbage, shredded

  • Carrots, julienned

  • Cucumber, julienned

  • Red, orange or yellow bell pepper, cut into thin slices

  • Avocado, sliced

Peanut Miso Dipping Sauce

  • 2 cloves garlic

  • 1/4 cup tahini

  • 1/4 cup peanut butter

  • 1/4 cup rice vinegar

  • 2 tablespoons white miso

  • 2 tablespoons maple syrup

  • 1 tablespoon liquid aminos (or soy sauce)

  • 1/2 teaspoon grated fresh ginger 

  • 1/4 teaspoon red pepper flakes

  • 1/4 cup water + additional to thin if necessary

PREPARATION

  • First make sure all over your veggie fillings are prepped and ready to go.

  • Dip your rice paper sheet into a bowl of lukewarm water and rotate for 5 seconds. 

  • Remove rice paper from water, shake off excess, and lay flat on a plate or cutting board. 

  • Make a thin bottom layer of basil, mint and/or arugula on top of the rice paper, leaving a 1-inch border empty along the edges. 

  • Fill the bottom third of the rice paper with your veggie fillings, making sure to leave a 1-inch border empty along the edges, and being careful not to overfill. 

  • When ready to roll, first fold in the sides (like a burrito). Then roll the rice paper around the filling, keeping everything together tightly. The rice paper should adhere to itself and keep everything contained. Have fun, get creative, get messy, and enjoy with a yummy dipping sauce!

  • To make the dipping sauce: Simply place all the ingredients for the dressing to a small food processor and blend until smooth and creamy. Taste and adjust seasoning as needed. If the sauce is too thick, add a bit more water.

Shaved Carrot Salad with Tahini, Crispy Chickpeas & Fresh Herbs

Because I love any excuse for carrots and crispy chickpeas and herbs and a yummy tahini vinaigrette… here’s a delish salad/side recipe that is chock-full of awesome autumnal vibes. It may look like a lot of ingredients, but I promise they are all ones you (most likely) already have in your pantry/fridge, and this dish comes together super easily + keeps super well in the fridge (though the chickpeas get a little less crispy). This recipe is adapted from the always wonderful Deb Perelman, of Smitten Kitchen.

SHAVED CARROT SALAD WITH TAHINI, CRISPY CHICKPEAS AND FRESH HERBS

Photo Credit: Deb Perelman, Smitten Kitchen

INGREDIENTS

Roasted Chickpeas

  • 1 15-ounce can chickpeas, drained and patted dry on paper towels

  • 1 tablespoon olive oil

  • 1/2 teaspoon coarse sea salt

  • 1/2 teaspoon ground cumin

  • 1/2 teaspoon paprika

Salad

  • 2 pounds carrots, peeled and coarsely grated

  • 1/2 cup roughly chopped fresh parsley

  • 1/2 cup shelled, salted pistachios, coarsely chopped

Tahini Dressing

  • 1 large garlic clove, minced

  • 1/3 cup lemon juice

  • 1/3 cup well-stirred tahini

  • 3 tablespoons olive oil

  • 2-4 tablespoons water, plus more if needed

  • Salt and red pepper flakes to taste

PREPARATION

  1. Roast chickpeas: Heat oven to 425 degrees F. Toss chickpeas with one tablespoon olive oil, salt, cumin and paprika until they’re all coated. Spread them on a baking sheet or pan and roast them in the oven until they’re browned and crisp. This can take anywhere from 15 to 20 minutes, depending on the size and firmness of your chickpeas. Toss them occasionally to make sure they’re toasting evenly. Set aside until needed.

  2. Prep the salad: Grate the carrots, chop the parsley and pistachios, and combine in a bowl.

  3. Make the dressing: Combine ingredients together in a jar and shake until well combined, adding more water if needed to thin the dressing slightly. Taste and adjust seasoning – don’t worry if it tastes a little sharp on the lemon, it will marry perfectly with the sweet grated carrots.

  4. Assemble salad: Add the roasted chickpeas to the bowl of grated carrots, parsley, and pistachios. Mix in the dressing and stir gently to combine. Taste and adjust seasoning (adding more salt, lemon juice, etc) as needed. To serve, sprinkle with additional pistachios and parsley.

Root Veggie Slaw with Sesame Ginger Vinaigrette

This recipe is a perfect way to use up fall root veggies like beets, carrots, radishes, or turnips – turning them into something unexpectedly delicious. The sesame ginger vinaigrette is super simple to make, and gives the slaw a unique, asian-inspired flavor that pairs beautifully with the earthy fall veggies.

ROOT VEGGIE SLAW WITH SESAME GINGER VINAIGRETTE

Photo Credit: Lavender and Macarons

INGREDIENTS

For the slaw

  • 2-3lbs assorted winter veggies (carrots, kohlrabi, beets, turnips, radishes, etc)

  • 1 bunch cilantro, roughly chopped

  • Sesame seeds, to taste

For the vinaigrette

  • 1 garlic clove

  • 1/4 cup rice vinegar

  • 2 teaspoons finely minced ginger

  • 2 teaspoons soy sauce 

  • 2 teaspoons yellow miso paste

  • 2 teaspoons honey

  • 5 tablespoons canola oil 

  • 2 tablespoons toasted sesame oil

  • 2 tablespoons toasted sesame seeds

PREPARATION

  1. To prepare the slaw, carefully shred the vegetables with a box grater into a large bowl (or use the shredding attachment on your food processor).

  2. One handful at a time, squeeze any moisture out of the shredded vegetables and place them in a separate bowl (this prevents the salad from getting watery).

  3. Add the chopped cilantro to the bowl with the shredded veggies. 

  4. To make the sesame ginger vinaigrette, combine ingredients together in a small processor and blend until smooth. Taste and adjust seasoning as needed. 

  5. Pour the vinaigrette into the salad bowl and toss together to combine. Taste and adjust seasoning as needed. Top with toasted sesame seeds and a bit more fresh cilantro and enjoy!

Autumn Quinoa Salad with Roasted Butternut Squash, Tuscan Kale, Green Apples, Avocado, Pepitas & Goat Cheese with Apple Cider Vinaigrette

This is a super flexible fall recipe – just use quinoa as the base (or rice, lentils, farro, etc) and whatever veggies, fruits, nuts/seeds you have on hand. The dressing is just a simple apple cider vinaigrette, which has a nice tang that pairs beautifully with the roasted butternut squash, tuscan kale, green apples, avocado, pepitas (pumpkin seeds) and goat cheese.

AUTUMN QUINOA SALAD WITH ROASTED BUTTERNUT SQUASH, TUSCAN KALE, GREEN APPLES, AVOCADO, PEPITAS & GOAT CHEESE WITH APPLE CIDER VINAIGRETTE

INGREDIENTS

  • 2 bunches of lacinato kale, de-stemmed and chopped

  • 4 cups cooked quinoa

  • 2 cups diced and roasted butternut squash

  • 2 green apples, diced

  • 2 avocados, diced

  • 1 bunch of parsley, finely chopped

  • 1 cup toasted pumpkin seeds/pepitas

  • 1/2 cup goat cheese, crumbled

Apple Cider Vinaigrette

  • 1/2 cup olive oil

  • 1/4 cup apple cider vinegar

  • 2 tablespoons Dijon mustard

  • 2 tablespoons maple syrup (or honey)

  • 1 clove minced garlic

  • Kosher salt and freshly ground pepper to taste

PREPARATION

  1. To cook the quinoa: Put 3 cups of water into a medium saucepan and bring to a boil. Add 2 cups uncooked quinoa, reduce heat to a simmer and put a lid on the pot and cook for 15 minutes. Turn off the heat and let sit for 5 minutes, then fluff with a fork and set aside until needed. 

  2. De-stem the kale, roughly chop, and set aside in a bowl. 

  3. Combine the ingredients for the vinaigrette in a jar and shake until well emulsified – taste and adjust seasoning as needed. Pour a few tablespoons of the vinaigrette into the bowl with the chopped kale. Using your hands, massage the kale for 1-2 minutes until the leaves are dark green and broken down. 

  4. In a separate large salad bowl, add the cooked quinoa and other ingredients – massaged kale, roasted butternut squash, diced green apples, avocado, parsley, pepitas, and goat cheese. 

  5. Pour remaining dressing over the salad and toss well to combine. Taste and adjust seasoning as needed.

Basil Salt

Right now our basil is still growing like crazy, and while I may be feeling sick of basil now.. I know that in a month or two, I’ll be missing all these fragrant summer herbs, so NOW is the time to preserve them while we can! Making herb salt is one of the easiest ways to preserve fresh herbs, and they are seriously amazing for seasoning meat, veggies, eggs, etc. In this recipe I’m making basil salt, but feel free to use whatever herbs you have on hand – I like to use a 1:1 ratio of fresh herbs to kosher salt. When it comes to the salt, my favorite brand of kosher salt is Diamond. Pro tip: Cute little jars of herb salt also making great gifts from your garden!

HOMEMADE BASIL SALT

INGREDIENTS

  • 1 cup loosely packed mixed fresh basil leaves (or any herb of choice)

  • 1 cup kosher salt

  • Optional additions: a teaspoon lemon zest and/or minced garlic


PREPARATION

  1. Preheat your oven to the lowest temperature (usually around 180F).

  2. Combine fresh basil leaves and salt together in a food processor and blend until the herbs are fully incorporated into the salt (this usually takes a minute or two).

  3. Spread the herb salt onto a rimmed baking tray, and put into your preheated oven for 45-60 minutes. Stir the salt mixture (or if it’s easier, use your hands to break/mix everything up) every 20 minutes until the salt is fully dry, making sure it doesn’t burn.

  4. Let the herb salt cool fully, then store in a jar with a lid in a cool, dry spot in your pantry, where it will keep for several months.

Dilly Beans (Pickled Green Beans)

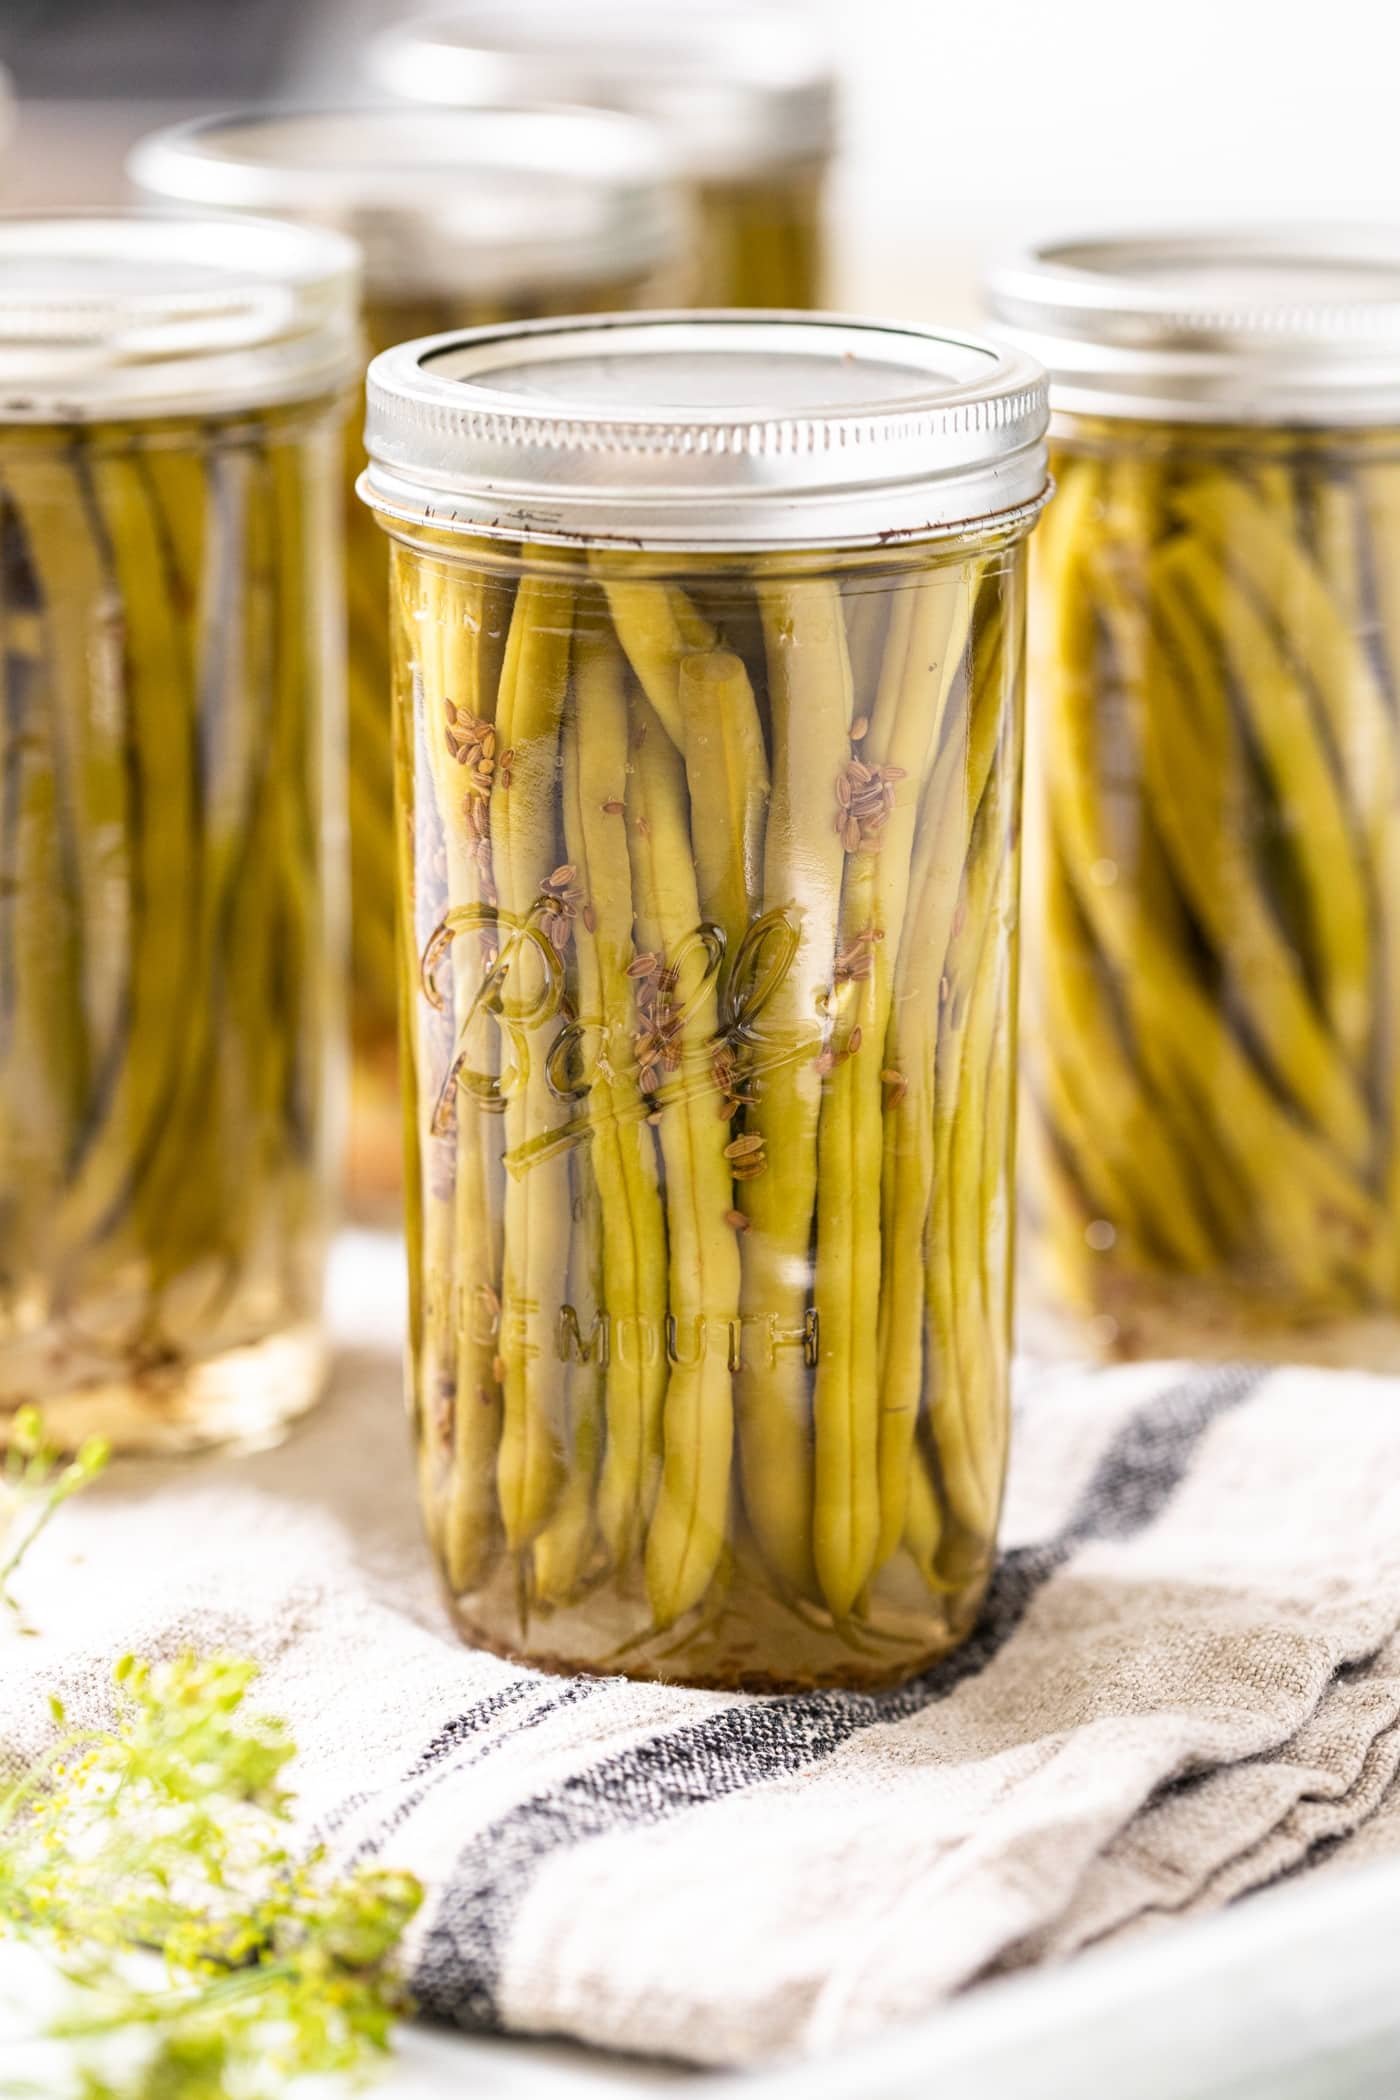
I’ll be honest that until I met my husband Matthew and his family, I had never even heard of dilly beans… but now I’m making up for lost time, especially since these days we are swimming in green beans! Even if you are new to canning, this recipe is very straightforward... though the process is even more fun when you have some helping hands! | MAKES 8 16-oz jars

DILLY BEANS (PICKLED GREEN BEANS)

Photo Credit: Wyse Guide

INGREDIENTS

  • 6 cups water

  • 6 cups white vinegar

  • 1/4 cup kosher salt

  • 4-5 pounds fresh green beans | ends trimmed

  • 1 teaspoon chopped fresh dill

  • 1/4 teaspoon dill seed

  • 1/4 teaspoon celery seed

  • 1/8 teaspoon alum (keeps the beans crisp)

  • 1/2 teaspoon dry red pepper flakes

  • 2 cloves garlic

INSTRUCTIONS

  1. Start by sterilizing 8 pint-size mason jars by boiling them for 10 minutes in a large stockpot. Boil the lids for 10 minutes in a separate smaller saucepan. Remove with rubber tongs, set aside and allow to dry until needed. Keep the stockpot filled with water on the stove, as you will need it again to seal the jars once they are packed with beans and brine.

  2. Quickly blanch the green beans by bringing salted water to boil in a medium saucepan. Add green beans, cook at a medium boil uncovered for two minutes, then immediately refresh the beans in an ice bath.

  3. Next, make the brine by combining the water, vinegar, and salt in a saucepan and bringing to a gentle boil. Lower the heat to keep a very low simmer. 

  4. Meanwhile, pack the fresh dill, dill seed, celery seed, alum, red pepper flakes, and garlic into your sterilized jars. Next, pack the beans tightly in the mason jars and ladle in the hot brine to just cover the beans (leave 1/2” head space). Fasten the lids to each jar and carefully place the jars back into the stock pot with boiling water to seal the jars. After 10 minutes in the hot water bath, remove jars with rubber tongs and gently place on your countertop, as they cool you should hear each jar “pop” as the lid seals. Store for at least two weeks before eating.

Roasted Ratatouille

Ratatouille is my go-to recipe to clean out my fridge (and my garden) in this season of deep-summer abundance. A good long roast in the oven transforms a motley medley of eggplant, peppers, zucchini, tomatoes, and fresh herbs into a hearty stew, which I love serving over creamy polenta. Traditional ratatouille calls for cooking each ingredient one at a time… but ain’t nobody have time for that! This roasting method is super simple and just requires a bit of chopping at the beginning. Don’t forget to add the splash of balsamic vinegar before serving, as the sweet + tangy balsamic kicks up the dish to a whole new level of deliciousness.

ROASTED RATATOUILLE

INGREDIENTS

  • 2 red onions, cut into 1/4-inch-thick half-moons

  • 2 sweet bell peppers (any color is fine), cored, seeded, and cut into 1-inch dice

  • 1 pound eggplant, unpeeled and cut to 1-inch dice

  • 2 medium zucchini (1 pound), cut into 1/2-inch rounds

  • 6-8 whole cloves garlic, peeled and smashed

  • 1 tablespoon chopped fresh rosemary and/or thyme

  • 1 teaspoon dried oregano

  • 1/3 cup extra-virgin olive oil

  • Kosher salt and pepper

  • 4 medium ripe tomatoes, any kind is fine (1 pound total) cut into 1/2-inch chunks (or use 2 cups halved cherry tomatoes)

  • Splash balsamic vinegar

  • Handful thinly sliced fresh basil

INSTRUCTIONS

  1. Preheat the oven to 425 degrees.

  2. Place the chopped onions, bell peppers, eggplant, zucchini, garlic, rosemary.thyme, oregano, olive oil, 2 teaspoons kosher salt, and 1 teaspoon freshly ground black pepper in a large bowl and toss to combine. Pour the vegetables onto two rimmed baking trays. Roast for 30-35 minutes, tossing occasionally, until the vegetables are tender and beginning to brown.

  3. Lower the oven to 400 degrees, divide up the tomatoes equally onto the two pans and roast for another 20 minutes. Scrape all the vegetables and any juices into a serving bowl and toss with a splash (start with 1 tablespoon) of the balsamic vinegar and the fresh basil. Taste and adjust seasoning as needed, and serve warm.

Roasted Tomato & Basil Soup

I’m not sure the world needed another recipe for tomato and basil soup… but I’ve just got to say, this might be the best thing I’ve cooked all summer! We’re spoiled by an abundance of tomatoes AND basil right now, and earlier this week I had a craving for a classic bowl of tomato soup with some gourmet grilled cheese on the side. I’m already planning to make it again this weekend… except I plan to quadruple the recipe and freeze several big jars, so when it’s December and I need some summer goodness in my belly, we can just grab a jar from the freezer and we’ll be instantly transported back to the wild and wonderful summertime deliciousness.

ROASTED TOMATO & BASIL SOUP

Photo credit: With Sweet Honey

INGREDIENTS

  • 3 pounds roma tomatoes, halved

  • Salt and freshly ground black pepper

  • ¼ cup extra-virgin olive oil

  • 2 tablespoons butter

  • 2 medium yellow onions, diced

  • 1/2 cup chopped carrots

  • 2 tablespoons tomato paste

  • 4 garlic cloves, minced

  • 3 cups vegetable broth (or water)

  • 1 tablespoon balsamic vinegar

  • 1/2 teaspoon thyme or dried oregano leaves

  • 1 loose-packed cup basil leaves (plus more for garnish)

INSTRUCTIONS

  1. Preheat the oven to 375°F and place the halved tomatoes cut-side up on a rimmed baking sheet, drizzle with 1/4 cup olive oil, 1 tablespoon kosher salt, and freshly ground pepper. Roast for 1 hour or until the edges begin to shrivel and the insides are still juicy.

  2. Heat 2 tablespoons butter in a large pot over medium heat. Add the onions, carrots, and ½ teaspoon salt and cook until soft, about 8 minutes. Stir in the tomato paste and minced garlic and cook for 1-2 minutes.

  3. Stir in the tomatoes (and any remaining liquid from the baking sheet), vegetable broth (or water), balsamic vinegar, and thyme (or oregano) leaves and simmer for 20 minutes.

  4. Let cool slightly and puree the soup using an immersion/stick blender, or a standing blender, working in batches if necessary. Blend until smooth. Add the basil and pulse until combined. Taste and adjust seasoning as needed.

  5. Garnish the soup with basil leaves and serve with crusty bread.

Summer Tomato & Corn Galette

I’m pretty sure that galettes are my spirit dish… a little rough around the edges, but there’s goodness on the inside! Galettes are great because they are meant to look rustic, so there’s no need to strive for perfection… the more imperfect, the better. I also love that galettes can evolve with the season –all you need is a good basic pie dough recipe on hand, and you can fill it with whatever veggie (or fruit!) combination that strikes your fancy. There are a million different pie dough recipes out there, so feel free to use whatever recipe you like best (I like this one from Fine Cooking). Recipe adapted from David Lebovitz in Fine Cooking.

SUMMER TOMATO & CORN GALETTE

INGREDIENTS

  • 2 tablespoons olive oil

  • 1 large yellow onion, diced

  • Salt and freshly ground black pepper

  • 2 cloves garlic, minced

  • Kernels removed from 2 ears of corn (about 2 cups)

  • 1 recipe pie dough (I like this one, but use whatever recipe you like!)

  • 1/2 cup gruyère or aged gouda cheese, shredded (plus more for garnish)

  • 1 large or 2 medium ripe tomatoes (about 1 lb total) cut into 1/3-inch slices, drained on paper towels

  • 1 large egg yolk mixed with a splash of milk or cream

  • Handful fresh basil, finely chopped (for garnish)

PREPARATION

  1. Heat the olive oil in a large nonstick sauté pan over medium heat. Add the diced onion and cook, stirring frequently, until lightly browned, about 8 minutes. Season with salt and pepper. Lower the heat a bit and add the garlic and corn and cook for a minute or two (just make sure the garlic doesn’t burn). Transfer the mixture to a bowl and set aside to cool.

  2. Adjust an oven rack to the center position and heat the oven to 375°F. Line a baking sheet, preferably one without sides, with kitchen parchment. (If your baking sheet has sides, flip it over and use the back.)

  3. Roll the dough on a floured surface into a 15-inch round, lifting the dough with a metal spatula as you roll to make sure it’s not sticking. If it is, dust the surface with more flour. Transfer it by rolling it around the rolling pin and unrolling it on the lined baking sheet.

  4. Spread the onion and corn mixture over the dough, leaving a 2-inch border without filling (I also reserve a little of the corn mixture to sprinkle on top of the tomatoes, but that is optional). Sprinkle the cheese over the onion and corn mixture. Arrange the tomatoes in a single layer over the onions and corn and season them with salt and pepper. If desired, top the tomatoes with some of your reserved corn mixture.

  5. Lift the edges of the dough and fold them inward over the filling, pleating as you go, to form a folded-over border. Pinch together any tears in the dough. Brush the egg yolk and milk mixture over the exposed crust.

  6. Bake until the crust has browned, 35 to 45 min. Slide the galette off the parchment and onto a cooling rack. Let cool for 10 minutes. Cut the galette into wedges, garnish with a bit more cheese and the chopped fresh basil, and serve.

Blueberry-Ginger Galette with Pecan Crust

A galette, aka a rustic pie, is the ideal vehicle for containing ripe, juicy, sweet summer fruits for a perfectly imperfect dessert. Use this recipe as a guide for whatever fruits you have on hand – raspberries, blackberries, cherries, peaches, pluots, etc – don’t overthink this folks. Galettes are best after sitting for several hours or overnight (allowing all those juices to settle and firm up a bit), so they’re a great make-ahead dessert for summer dinner parties. All you need is a scoop of vanilla ice cream (or whipped cream or creme fraiche) to top it all off!

BLUEBERRY-GINGER GALETTE WITH PECAN CRUST

INGREDIENTS:

Pecan Galette Dough

  • ½ cup pecans

  • 1 cup plus 2 tablespoons all-purpose flour

  • 2 teaspoons sugar

  • ½ teaspoon kosher salt

  • ¼ teaspoon ground cinnamon

  • ½ cup (1 stick) chilled unsalted butter, cut into pieces

Blueberry Filling

  • 12 ounces blueberries (about 2 cups)

  • 1 tablespoon tapioca flour (or cornstarch)

  • 2 teaspoons fresh lemon juice

  • 1/2 teaspoon grated fresh ginger (or more, if you really like ginger)

  • 1/3 cup sugar, plus more for sprinkling

  • All-purpose flour (for surface)

  • 2 tablespoons half-and-half or heavy cream

INSTRUCTIONS:

Make the dough

  1. Preheat oven to 350°. Toast pecans on a rimmed baking sheet, tossing once, until fragrant and slightly darkened, 10–15 minutes; let cool. Pulse pecans in a food processor until the consistency of coarse meal.

  2. In the same food processor as the ground pecans, add flour, sugar, salt, and cinnamon and pulse just to combine. Add cold, chopped butter and pulse until mixture resembles coarse meal with a few pea-size pieces remaining. Drizzle with 4 tablespoons ice water and pulse a few more times to mix.

  3. Transfer the dough to a large bowl and mix quickly with your hands, adding another tablespoonful of water if needed, just until the dough comes together in a ball. Pat dough into a 6"-diameter disk, wrap in plastic wrap, and chill for at least 30 minutes.

Filling and Assembly

  1. Preheat oven to 375°. Toss blueberries, tapioca flour (or cornstarch), lemon juice, grated ginger (I use a microplane to grate ginger) and 1/3 cup sugar in a large bowl.

  2. While the berries macerate in their juices, roll out the chilled dough on a lightly floured piece of parchment paper to a 12" round, 1/8" thick. Carefully transfer the parchment paper with the rolled-out dough onto a baking sheet. Mound the blueberries in center of the dough, leaving a 2" border. Carefully lift and fold the edges up and over the filling, allowing the dough to naturally pleat at 1-2 inch intervals as you fold. Brush dough with cream and sprinkle with sugar.

  3. Bake galette until crust is dark golden brown and filling is bubbling, 45–55 minutes total, rotating the pan halfway through baking. Allow to cool before enjoying. Just before serving, top with scoops of your favorite vanilla ice cream, whipped cream, or creme fraiche for the ultimate galette experience.

Chilled Cucumber & Avocado Soup with Fresh Herbs

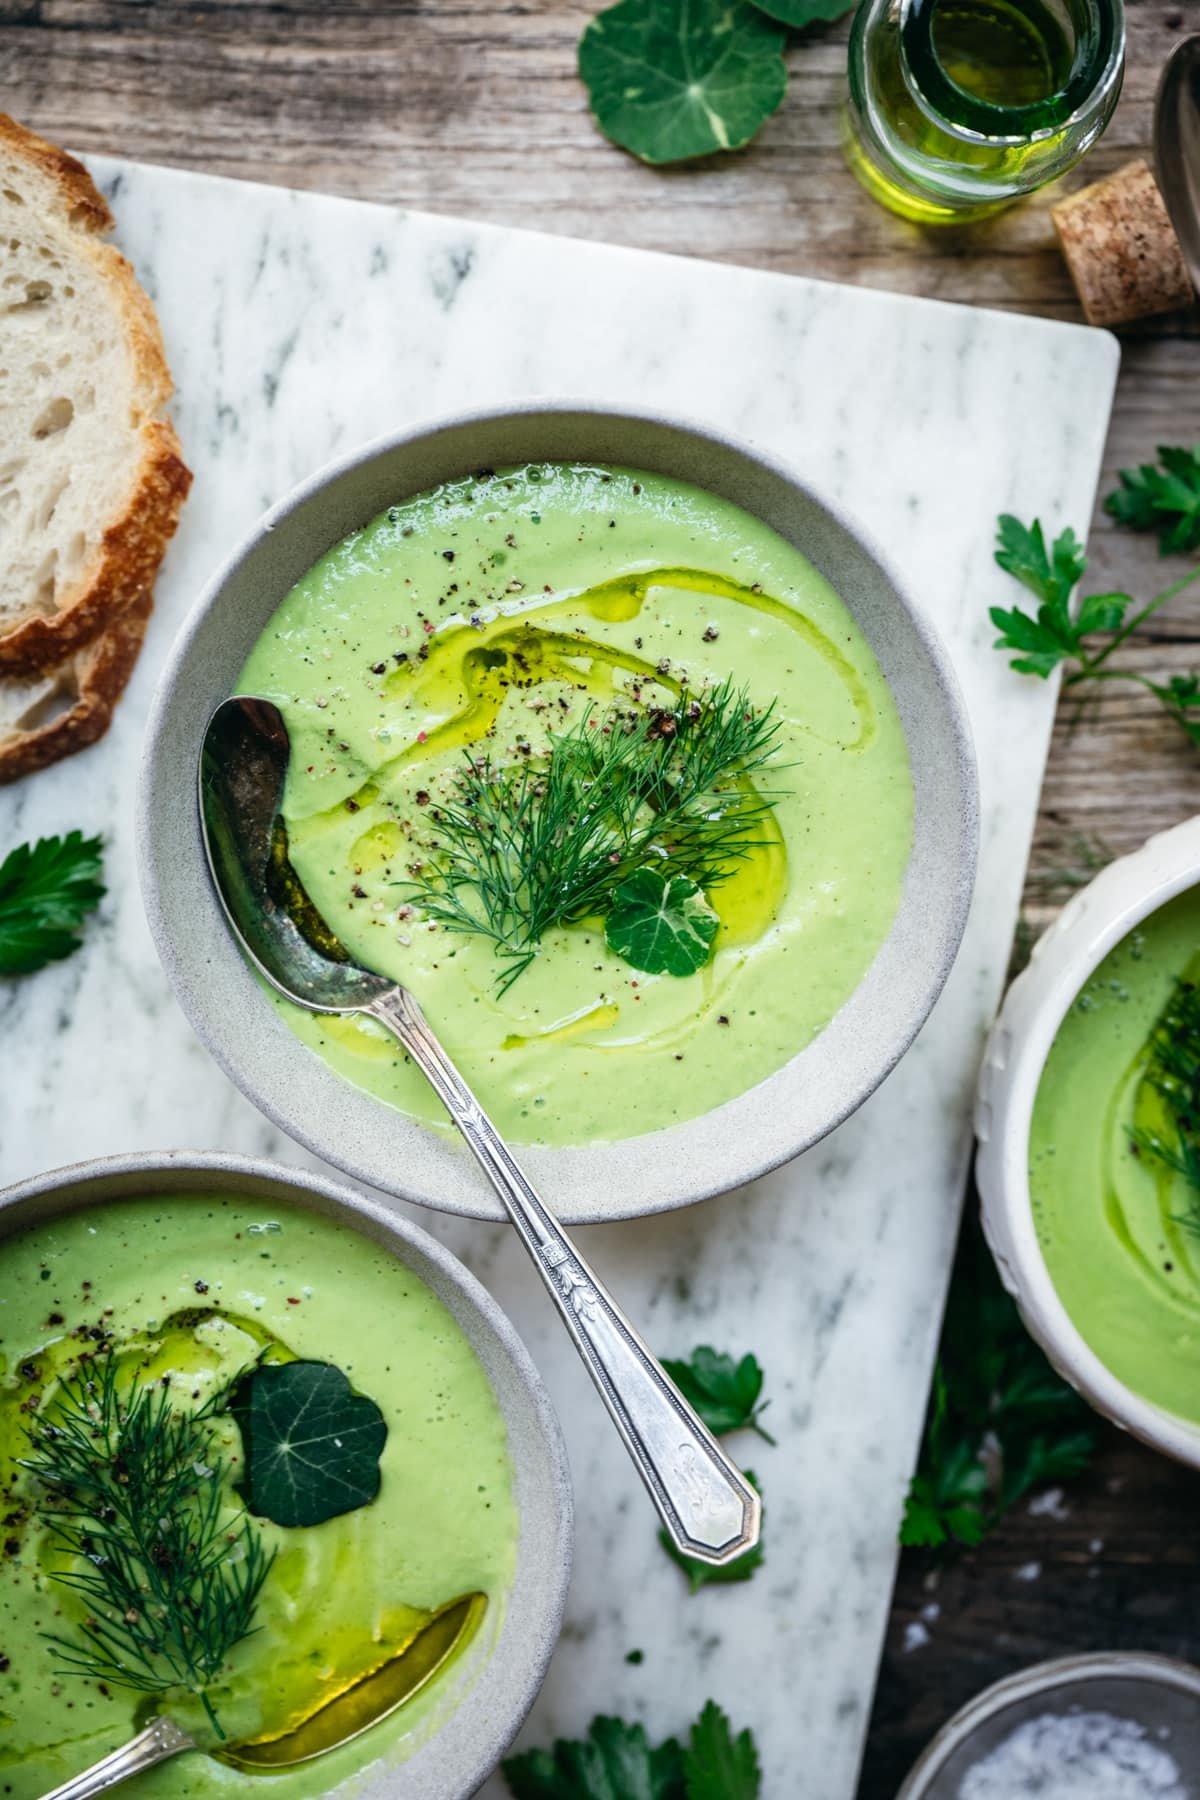
When it’s hot and the last thing you want to do is turn on your stove/oven, chilled soups are your best friend! I absolutely love this super simple, but still flavor-packed recipe for a chilled cucumber and avocado soup. It’s as easy as throwing a few ingredients together in a blender, and it has surprisingly complex flavors for such a straightforward recipe. Happy cooking!

CHILLED CUCUMBER & AVOCADO SOUP

WITH FRESH SUMMER HERBS

Serves 4

Photo Credit: Crowded Kitchen

INGREDIENTS

  • 2 slicing cucumbers | peeled and diced  (1/4 cup reserved for garnish)

  • 2 avocados | pitted, peeled, and diced  (1/4 cup reserved for garnish)

  • 1 tablespoon fresh lemon juice

  • 1/2 teaspoon finely grated lemon zest

  • 1/4 cup coarsely chopped fresh cilantro

  • 2 tablespoons chopped fresh basil

  • 1 scallion/green onion | coarsely chopped

  • 1/2 jalapeno | seeded and coarsely chopped

  • 1 cup nonfat plain yogurt

  • 1 cup cold water

  • 1 teaspoon kosher salt

  • 1/4 teaspoon freshly ground pepper

PREPARATION

  • Puree ingredients in a blender until very smooth. Taste and adjust seasoning as needed.

  • Chill in the fridge for at least 30 minutes, then divide among 4 bowls and top with reserved cucumber, avocado, and a few sprigs of cilantro.

Herby, Lemony, Garlicy & Good on Everything Yogurt Sauce

These days, I pretty much always have some kind of herby, lemony, garlicy yogurt sauce on hand, and I put it on EVERYTHING… roasted veggies! raw veggies! chicken! fish! toasted bread! This is a no-recipe kind of recipe (and as an added bonus, it comes together in about 5 minutes), so just use whatever herbs you have on hand, and in whatever quantity feels good to you!

HERBY, LEMONY, GARLICY & GOOD ON EVERYTHING YOGURT SAUCE

Photo Credit: Super Safeway

INGREDIENTS

  • 2 cups plain greek yogurt

  • 1/2 to 1 cup chopped fresh herbs (I like a combination of parsley, basil, dill, mint, chives, etc)

  • Juice + zest of 1 lemon

  • 1 clove garlic, minced

  • 3 tablespoons olive oil

  • Salt & pepper, to taste

PREPARATION

  1. Scoop the yogurt into a medium sized bowl, and simply stir in all the remaining ingredients.

  2. Taste and make adjustments as needed! Want more herbs? Throw a few more in! Needs more acid? Add more lemon! You get the idea. :)

Shaved Summer Squash with Herbs, Lemon & Parmesan

This week we harvested the very first of our zucchini/summer squash, which was a major win for me! Earlier this spring I had pretty much given up on our zucchini crop (as the young plants just looked terrible) – but low and behold, they have bounced back and the zucchini is pumping!

This is a quick, colorful salad made for hot summer days and you don’t feel like turning on your oven or stove! For this recipe, it’s best to use small to medium sized squash, as larger squash will have tougher skin and larger seeds. This recipe is lightly adapted from the cookbook 'Ruffage' by Abra Berens.

SHAVED SUMMER SQUASH WITH HERBS, LEMON & PARMESAN

INGREDIENTS

  • 2-3 summer squash, shaved thinly into 1/8" slices (I like to use a mandolin)

  • 1 cup assorted coarsely chopped herbs

  • 4 oz Parmesan cheese, peeled into ribbons

  • 1 teaspoon kosher salt

  • 1/2 teaspoon freshly ground black pepper

  • Between 1/4 - 1/2 cup olive oil

  • 2 tablespoons lemon juice

PREPARATION

  1. Toss together the shaved squash, chopped herbs, Parmesan ribbons, salt + pepper, 1/4 cup of the olive oil, and the lemon juice.

  2. Taste and adjust the seasoning, adding more olive oil and/or lemon juice as needed to make it well dressed and flavorful.

  3. Serve within the next 30 minutes. If serving later, shave the zucchini in advance but dress just before serving (as the salt will cause the zucchini to release a lot of moisture).

Roasted Carrot Hummus

Speaking of carrots… today I’m sharing one of my absolutely favorite recipes of all time. Seriously! It is that good. Whenever I have people over and want an extra yummy dip that is delicious with crackers or veggies or bread, I make this Roasted Carrot Hummus and it is always a hit. The roasted carrots take the place of the chickpeas that traditionally are found in hummus, and roasting them with whole spices gives this dip an irresistibly nutty and fragrant flavor.

ROASTED CARROT HUMMUS

INGREDIENTS

  • 3 cups peeled carrots, sliced into 1/2" rounds

  • 4 whole cloves of garlic

  • 1/2 teaspoon whole coriander seeds

  • 1/2 teaspoon whole cumin

  • 6 tablespoons olive oil, divided

  • 1/4 cup tahini

  • 1 tablespoon apple cider vinegar (or lemon juice)

  • Kosher salt, to taste

  • Freshly ground pepper, to taste

PREPARATION

  • Preheat oven to 400F.

  • Combine the sliced carrots, whole garlic cloves, whole coriander and cumin seeds, a pinch of salt, and 4 tablespoons olive oil together on a rimmed baking tray, and toss with your hands to coat the carrots with the spices.

  • Bake in the oven until the carrots are tender, around 30 minutes, tossing once halfway through cooking. Watch the garlic to make sure it doesn't burn.

  • Place the cooked carrots + garlic in the bowl of your food processor. Add the tahini, 2 tablespoons olive oil, apple cider vinegar (or lemon juice), and 1/4 teaspoon salt and a few grinds of pepper. Process until smooth – I usually add another tablespoon or two of olive oil to get the right consistency. Taste and adjust seasoning as needed – I usually add another 1/4 teaspoon salt. Enjoy!

Spring Greens Soup with Roasted Fennel & Cauliflower

Here is a colorful and comforting spring soup featuring vibrant greens and sweet roasted fennel + cauliflower. Adapted from the blog Kale & Caramel.

SPRING GREENS SOUP WITH ROASTED FENNEL & CAULIFLOWER

INGREDIENTS

Roasted Fennel & Cauliflower

  • 4 cups sliced fennel bulb, green fronds reserved

  • 4 cups coarsely chopped cauliflower

  • 4 tablespoons olive oil

  • 1/4 teaspoon sea salt

  • 1/4 teaspoon fennel seeds (optional)

  • fresh ground pepper, to taste

For the Soup

  • Roasted fennel and cauliflower, from above

  • 2 cups diced yellow onion

  • 2 tablespoons olive oil

  • 1/4 teaspoon sea salt

  • Freshly ground pepper, to taste

  • 2 teaspoons minced garlic

  • 6 cups vegetable broth

  • 1 lemon, zested and juiced

  • 6 cups spinach

  • 1 cup arugula

  • 1 cup fennel fronds

  • 1/2 cup roughly chopped chives

  • 1/4 cup roughly chopped mint

  • 1/4 teaspoon sea salt, plus more to taste

Toppings (optional)

  • Thinly sliced radishes

  • Carrot top gremolata (see recipe here)

  • Fennel fronds

  • Drizzle of olive oil

INSTRUCTIONS

Roasted Fennel & Cauliflower

  1. Preheat the oven to 400ºF. Line a rimmed baking sheet with parchment paper or foil.

  2. Lay the sliced fennel and chopped cauliflower on the baking sheet in an even layer, and drizzle with olive oil and sprinkle with salt, pepper, and fennel seeds (if using). Toss gently to coat the mixture evenly. Roast for 30-35 minutes until tender and beginning to brown. Flip the vegetables halfway through roasting to ensure even browning.

For the Soup

  1. Heat the olive oil in a large pot or dutch oven over medium heat. Add the diced onion, salt and pepper and sauté until golden brown, stirring occasionally.

  2. Add the garlic and stir another minute. Add the vegetable broth, lemon zest + lemon juice, as well as the roasted fennel + cauliflower and bring the mixture to a simmer. Simmer gently for 10 minutes.

  3. Remove the pot from heat, add the spinach, arugula, fennel fronds, chives and mint. Stir to submerge in the soup, cover, and let the greens to wilt in the heat of the broth for a few minutes.

  4. Transfer the whole pot of ingredients to a high speed blender and blend until completely smooth (you'll likely need to do this in batches). Return to the pot, taste, and add more salt and pepper as needed.

  5. Garnish with an assortment of sliced radishes, a drizzle of olive oil, fennel fronds, etc. A topping of crunchy pistachio + carrot top gremolata is especially lovely.

Glazed Miso Honey Butter Radishes

Even if you think you don’t like radishes, I hope you’ll give this recipe a try and see if I can change your mint! This dish has only 5 ingredients, comes together in under 10 minutes, and hits all the notes you want – sweet, salty, and savory. Any kind of radishes will work, and this recipe can also be made with hakurei turnips instead of radishes.

GLAZED MISO HONEY BUTTER RADISHES

INGREDIENTS

  • 2 tablespoons yellow miso paste

  • 2 tablespoons room temperature butter

  • 1 tablespoon honey

  • 1 bunch radishes

  • Salt and pepper, to taste

INSTRUCTIONS

  1. Stir together the miso paste, butter, and honey in a small bowl and set aside.

  2. Remove any tops from the radishes and slice them in half lengthwise.

  3. Heat up a large skillet over medium-high heat and add the radishes to the skillet along with the miso honey butter mixture. Cook, stirring often, until the radishes are tender and most of the liquid has evaporated and turns into a nice glaze, 5-8 minutes. You want to be careful not to overcook the radishes to the point where they are mushy… you still want a little bite/firmness to them! Serve warm and enjoy.

Quick Pickles

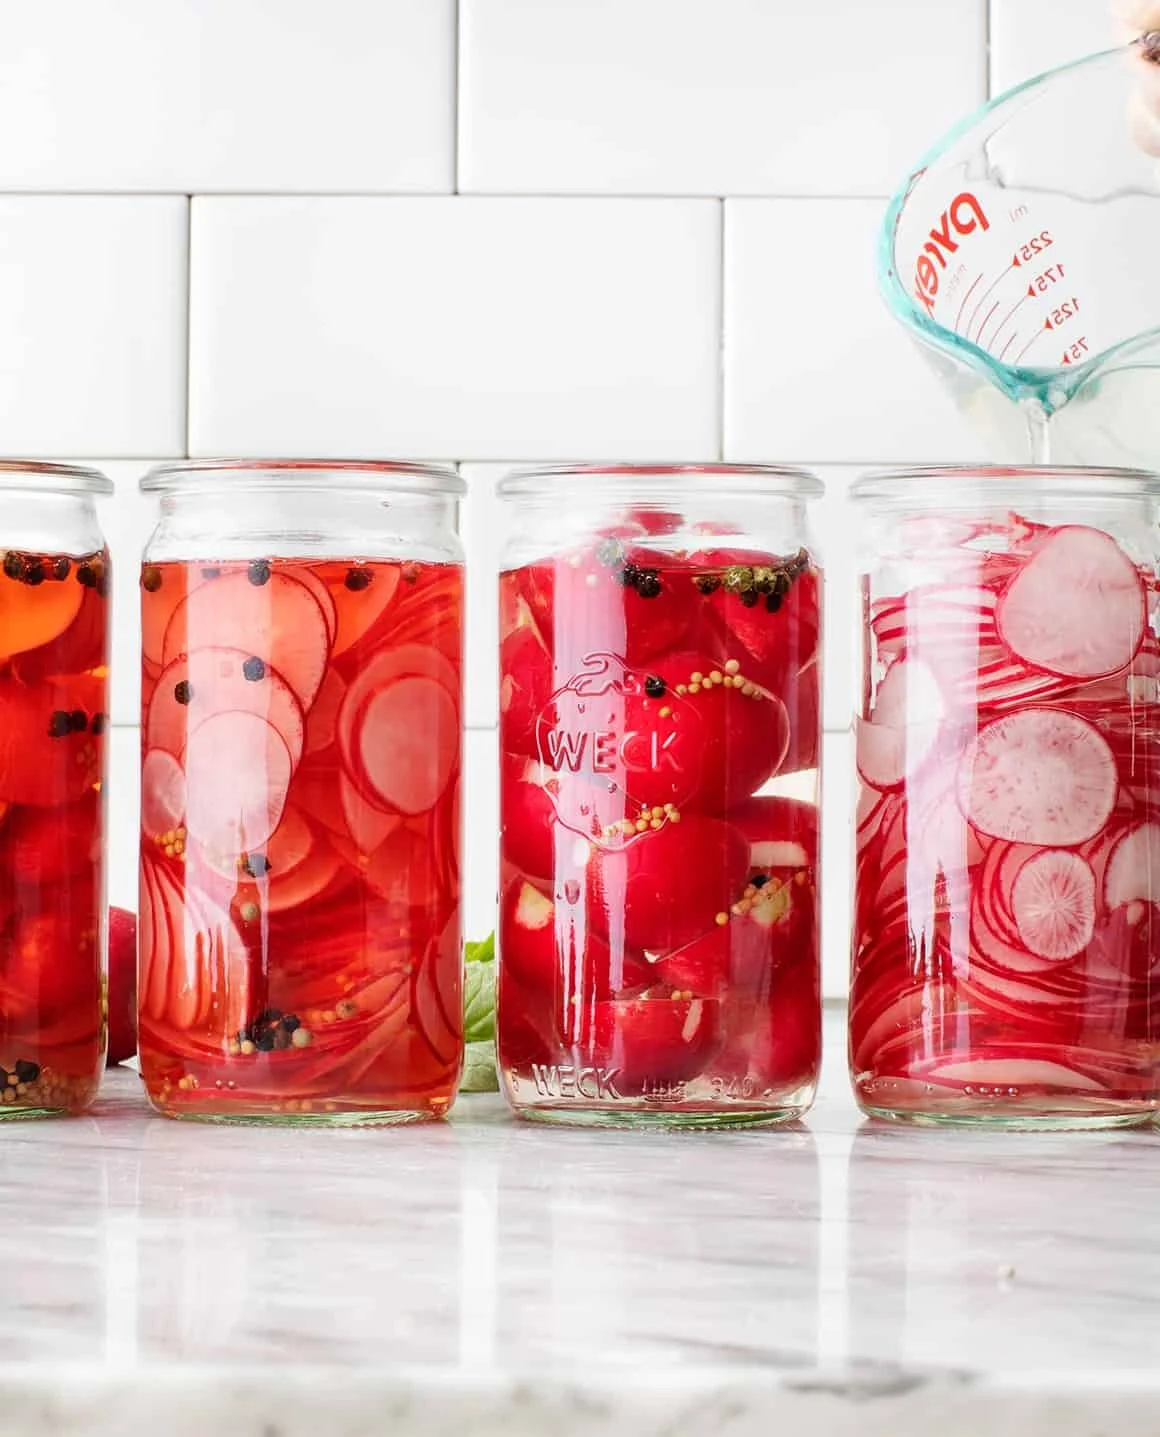
I know that when most people hear the world pickle, you automatically think of cucumbers… but actually, you can pickle just about anything! The process of pickling is just preserving food by immersing it in vinegar, as the highly acidic environment inhibits the growth of harmful bacteria and extends the life of fresh produce. Here’s my *very simple* recipe for making quick pickles… if you’re more of a visual learner, tune into my YouTube video!

HOMEMADE QUICK PICKLES

INGREDIENTS + EQUIPMENT

  • 1 pound of fresh seasonal vegetables (such as cucumbers, carrots, cauliflower, green beans, summer squash, radishes, asparagus)

  • Optional seasonings: fresh herbs, whole spices, garlic, lemon zest, ginger, etc.

  • 2 pint-sized (or 1 quart-sized) wide mouth jars with lid

Basic Brine

  • 1 cup vinegar (I usually use distilled white vinegar)

  • 1 cup water

  • ¼ cup sugar

  • 1 tablespoon kosher salt 

INSTRUCTIONS

  • Prepare the jar: Wash your mason jar and lid in hot soapy water, rinse and let air dry.

  • Make the pickling liquid: Combine the vinegar, water, salt, and sugar in a small saucepan over high heat. Bring to a boil, stirring to dissolve the salt and sugar. 

  • Prep the vegetables: Wash + dry the vegetables, peel (if necessary) and cut vegetables into desired shapes/sizes.

  • Pack the vegetables and flavorings: Pack the vegetables, herbs/spices/aromatics into the jars in layers, making sure there is a 1/2 inch of space from rim of the jar to the tops of the vegetables. Pack as tightly as you can without smashing.

  • Pour brine over the vegetables: Carefully fill each jar to within 1/2 inch of the top with the brine. Note: this recipe makes enough brine for 2 pint-sized jars, or 1 quart of pickles. 

  • Remove air bubbles and seal jars: Gently tap the jars against the counter to remove air bubbles. Top off with more brine if needed. Screw on lids until the rings are tight.

  • Cool and refrigerate: Let the jars cool to room temperature. Store the pickles in the refrigerator. These will taste good after 48 hours, but are much better after a couple days to a week. Keeps for months – the cleaner you keep the jar, the better!