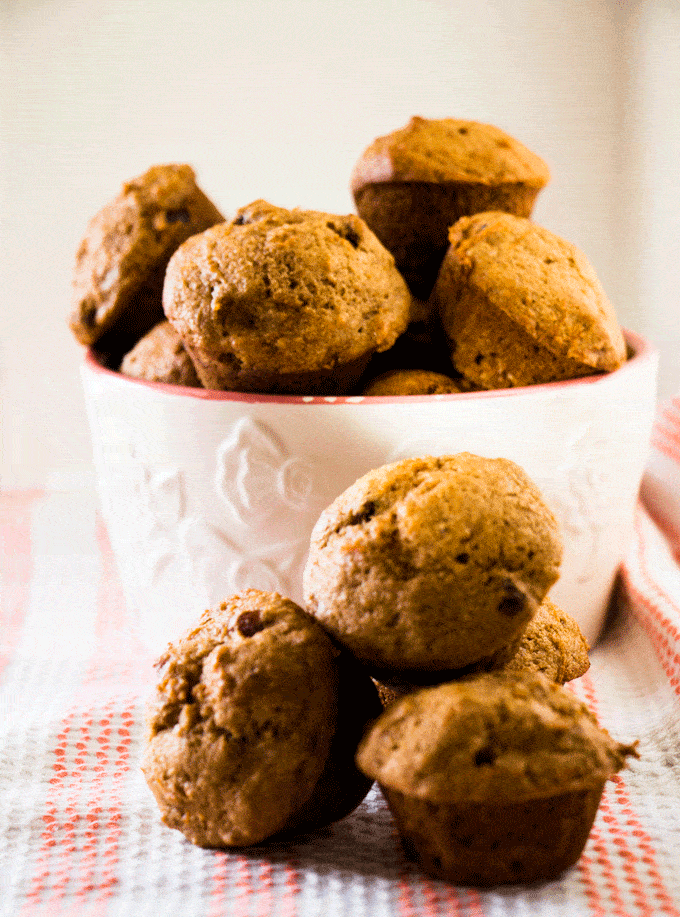
Healthyish Carrot Muffins

I’m going to be honest y’all… these days my culinary attention has been laser-focused on trying to come up with new, healthy meals that Sawyer wants to eat. Overall he’s a pretty good eater (there’s a reason he’s in the 80th percentile for his weight..), but he can definitely be a bit picky, especially whenever we introduce something new. One thing that I know he’ll always chow down? Muffins. Or literally any kind of baked good for that matter. So of course, I’ve made it my mission to find a muffin recipe he’ll be excited to eat, that are still healthy and chock-full of veggies. Thankfully, I found a great recipe over at the blog Yummy Toddler Food, making just a few tweaks of my own. I promise they are yummy enough that even if you don’t have a picky toddler to appease, you’ll enjoy them!

HEALTHYISH CARROT MUFFINS

INGREDIENTS

  • ¾ cup all purpose or whole-wheat flour

  • ½ cup rolled oats

  • ¼ cup brown sugar (for sugar-free, omit and sub 2-3 tablespoons maple syrup)

  • 1 teaspoon cinnamon

  • 1 teaspoon baking powder

  • ¼ teaspoon baking soda

  • 1 cup applesauce (or any kind of veggie puree – sweet potato, winter squash, etc)

  • 1 cup grated carrots

  • 2 large eggs

  • 3 tablespoons canola oil (or melted coconut oil)

  • ¼ cup raisins

  • ¼ teaspoon salt

PREPARATION

  • Preheat the oven to 350 degrees F and coat a 24-cup mini muffin tin with nonstick spray. Don’t be shy with the non-stick spray, or else the muffins will definitely stick!

  • Add all ingredients to a medium bowl and stir together to combine thoroughly but gently.

  • Add a heaping 1 tablespoon of the batter to each prepared muffin cup and bake 18-22 minutes or until lightly golden brown around the edges and a cake tester inserted into the middle comes out cleanly.

  • Remove from oven, cool in the pan for 2 minutes, and use a paring knife to loosen the edges as needed. Tilt in the pan to allow air to circulate underneath or transfer to a wire rack to cool.

  • Serve warm, at room temp, or chilled.
Overnight Oats

I’m usually not very hungry in the morning, and I’m often rushing out the door to do chores outside, which means that many days I realize it’s 11am, I haven’t eaten anything, and I am HANGRY. Which is 0% enjoyable for anyone. So to combat my hangry-ness, I’ve starting making jars of overnight oats, and I’m loving it.

If you’re new to overnight oats, it’s pretty straightforward – literally just soak rolled oats in liquid along with chia seeds and whatever other fruit/nuts/sweeteners you’d like, let sit overnight, and enjoy the next morning! It makes a great on-the-go breakfast/snack, since it’s already in a jar and you can just pop it in your bag to wherever you’re headed. This is definitely a “no recipe” kind of recipe – and while I give specific measurements here, when I make these I never measure anything, so feel free to just “eyeball” the ingredients, use what you have on hand, and taste as you go!

OVERNIGHT OATS

Photo: One Lovely Life

Photo: One Lovely Life

INGREDIENTS

  • 1 cup rolled oats

  • 1.5 cups almond milk (or whatever milk you prefer), plus more to taste

  • 2 tablespoons chia seeds

  • 3 tablespoons peanut butter or almond butter (or other nut or seed butter)

  • 3 tablespoons maple syrup

  • 1/2 cup blueberries (or other fruit of your choice like bananas, peaches, apples, etc)

  • 1/4 cup chopped almonds (or other chopped nuts/seeds)

  • 1 teaspoon cinnamon

  • 1/4 teaspoon kosher salt

INSTRUCTIONS

  • In large (quart sized) mason jar or in bowl with a lid, add all ingredients and stir well to combine. If the mixture seems dry, add a bit more milk. Taste and adjust seasoning (ie sweetness, saltiness, other spices) to taste.

  • Cover securely with a lid/seal and set in the refrigerator overnight (or for at least 6 hours) to set and soak.

  • The next day, open and enjoy as is or garnish with other toppings (like additional fruit, nuts, yogurt, maple syrup, etc). Overnight oats will keep in the refrigerator for 3-4 days (if it lasts that long)!