Roasted Asparagus with Pistachio Gremolata

A gremolata is a fancy-ish work for a super simple herby sauce/condiment that is traditionally made from chopped parsley, lemon zest, and garlic. In this spring-centric recipe, we mix things up a bit by adding some crunchy pistachios to the mix – though you can certainly omit the pistachios or use another nut/seed of choice instead. Enjoy!

ROASTED ASPARAGUS WITH PISTACHIO GREMOLATA

INGREDIENTS

Asparagus

  • 1 bunch fresh asparagus, woody ends trimmed off

  • 2 tablespoon olive oil

  • Salt and pepper, to taste

  • 1 tablespoon fresh squeezed lemon juice

For The Gremolata

  • 1/2 bunch fresh Italian parsley (will make about 1/2 cup chopped)

  • 1 medium clove garlic, minced

  • 2 tablespoons lemon zest

  • 1/4 cup roasted and salted pistachios, chopped

INSTRUCTIONS

  1. Preheat your oven to 400 F. 

  2. Prepare the asparagus: First snap or trim off the woody end of each asparagus stalk. Spread the asparagus in a single layer on a foil-lined baking sheet and drizzle lightly with olive oil, tossing gently to coat evenly. Sprinkle generously with salt and pepper. Roast for 15-20 minutes, until asparagus begins to brown and gets a little crispy on the ends. 

  3. Make the gremolata: Chop the parsley with a chef's knife until it is finely chopped. Using a microplane or fine-toothed grater, grate the garlic clove over the parsley. Using the same grater, grate the lemon zest on top of the garlic (doing the garlic and lemon in this order will help to rid the microplane of garlic odors). Add your chopped pistachios to the parsley mixture and continue to chop, mixing in all the ingredients as you go. Use your knife to scoop the gremolata mixture into a bowl and set aside. 

  4. To serve: When the asparagus comes out of the oven, toss gently with the lemon juice and top with the gremolata, season with additional salt and pepper as needed.

Spring Greens Soup with Roasted Fennel & Cauliflower

Every spring without fail, I start craving anything + everything GREEN. Which is why I love this recipe for a Spring Greens Soup, lightly adapted from the blog Kale & Caramel. The original version of this soup features roasted fennel, which I love, so I’ve gone a step further and added roasted cauliflower for extra body and sweet, caramelized goodness.

So while this 100% plant-based soup definitely falls into the “healthy” category – it’s full of flavor thanks to all the sweet roasted veggies, bright acidity from lemon juice + zest, zippy greens and vibrant herbs. It may seem like a lot of ingredients, but I’ll bet they are things you already have on hand – and if not, everything can be easily sourced.

SPRING GREENS SOUP WITH ROASTED FENNEL & CAULIFLOWER

Roasted Fennel & Cauliflower

  • 4 cups sliced fennel bulb, green fronds reserved

  • 4 cups coarsely chopped cauliflower

  • 4 tablespoons olive oil

  • 1/4 teaspoon sea salt

  • 1/4 teaspoon fennel seeds (optional)

  • fresh ground pepper, to taste

For the Soup

  • Roasted fennel and cauliflower, from above

  • 2 cups diced yellow onion

  • 2 tablespoons olive oil

  • 1/4 teaspoon sea salt

  • Freshly ground pepper, to taste

  • 2 teaspoons minced garlic

  • 6 cups vegetable broth

  • 1 lemon, zested and juiced

  • 6 cups spinach

  • 1 cup arugula

  • 1 cup fennel fronds

  • 1/2 cup roughly chopped chives

  • 1/4 cup roughly chopped mint

  • 1/4 teaspoon sea salt, plus more to taste

Toppings (optional)

  • Thinly sliced radishes

  • Carrot top gremolata (see recipe here)

  • Fennel fronds

  • Drizzle of olive oil

INSTRUCTIONS

Roasted Fennel & Cauliflower

  1. Preheat the oven to 400ºF. Line a rimmed baking sheet with parchment paper or foil.

  2. Lay the sliced fennel and chopped cauliflower on the baking sheet in an even layer, and drizzle with olive oil and sprinkle with salt, pepper, and fennel seeds (if using). Toss gently to coat the mixture evenly. Roast for 30-35 minutes until tender and beginning to brown. Flip the vegetables halfway through roasting to ensure even browning.

For the Soup

  1. Heat the olive oil in a large pot or dutch oven over medium heat. Add the diced onion, salt and pepper and sauté until golden brown, stirring occasionally.

  2. Add the garlic and stir another minute. Add the vegetable broth, lemon zest + lemon juice, as well as the roasted fennel + cauliflower and bring the mixture to a simmer. Simmer gently for 10 minutes.

  3. Remove the pot from heat, add the spinach, arugula, fennel fronds, chives and mint. Stir to submerge in the soup, cover, and let the greens to wilt in the heat of the broth for a few minutes.

  4. Transfer the whole pot of ingredients to a high speed blender and blend until completely smooth (you'll likely need to do this in batches). Return to the pot, taste, and add more salt and pepper as needed.

  5. Garnish with an assortment of sliced radishes, a drizzle of olive oil, fennel fronds, etc. A topping of crunchy pistachio + carrot top gremolata is especially lovely.


Roasted Sweet Potatoes with Peanut-Chili Sauce & Feta

If you, like me, are constantly looking for recipes that feel and taste *special* but don’t require crazy ingredients or equipment or copious amounts of time to make – then THIS is going to be your new favorite recipe (adapted from Molly Baz’s cookbook, Cook this Book). All you do is roast a few sweet potato halves, then top it with a suuuuper simple + flavor-packed peanut-chile sauce and a little feta cheese and you’re golden. I could eat this dish as meal in itself over a bed of greens, but it also makes a great side to bring to a dinner party. Happy cooking!

ROASTED SWEET POTATOES WITH PEANUT-CHILI SAUCE & FETA

INGREDIENTS

  • 4 small sweet potatoes (about 2lbs total)

  • 1/2 cup plus 2 tablespoons olive oil

  • Kosher salt

  • 1/2 cup roasted, unsalted peanuts

  • 1 tablespoon honey

  • 1 teaspoon red pepper flakes

  • 1 teaspoon sweet paprika

  • 2 garlic cloves, minced

  • 2 limes

  • 4 ounces feta cheese, cut/crumbled into bite sized pieces (optional)

PREPARATION

  1. Preheat your oven to 425F.

  2. Roast the sweet potatoes: Cut the sweet potatoes in half lengthwise. Place on a rimmed baking sheet and drizzle with 2 tablespoons olive oil and season with 1.5 teaspoons salt, tossing with your hands to evenly coat. Arrange cut-sides down on your baking sheet. Transfer to the oven and roast until tender when pierced with a knife and charred on the undersides, 25-35 minutes. Transfer the roasted sweet potatoes to a platter.

  3. While the sweet potatoes roast, make the peanut-chile sauce: Roughly chop the 1/2 cup peanuts and place in a small pot and cover with 1/2 cup olive oil. Cook over medium heat, stirring often, until the peanuts are golden brown, 4-5 minutes. (A note that even after you turn off the heat, the oil will still be very hot, so if the peanuts are getting too brown, use a slotted spoon to scoop them out into a separate bowl until the oil cools a bit.)

  4. Add the honey, red pepper flakes, and paprika to the hot oil + peanut mixture and stir to combine. Allow the oil to cool for a few minutes then add the minced garlic (it will sizzle a bit, which is good.. the oil is gently cooking the garlic).

  5. Spoon the yummy peanut-chile sauce over your sweet potatoes, top with feta (if using), and a squeeze of lime. Enjoy!

Sautéed Swiss Chard with Garlic, Raisins & Pine Nuts

Swiss chard is one of the first veggies we harvest in early spring, and our spring crop of swiss chard (sitting cozy in our warm tunnels) is soooo close to being ready! I’ve been looking forward to the return of swiss chard all winter long, and this super simple + flavorful recipe is one of the first dishes I plan to make. A note that you can absolutely use this same recipe with whatever greens you have on hand… kale, spinach, collards, etc will also work! Recipe adapted from Cooking Light.

SAUTÉED SWISS CHARD WITH GARLIC, RAISINS & PINE NUTS

Photo Credit: We Heart Food

INGREDIENTS

  • 2 tablespoons olive oil

  • 1 yellow onion, diced

  • 2 bunches Swiss chard, stemmed and washed, stems diced and leaves coarsely chopped

  • 2 garlic cloves, minced

  • 1/4 cup raisins, rehydrated in some warm water

  • 1/4 cup pine nuts, toasted

  • 2 tablespoons white wine vinegar, plus more to taste

  • Salt and freshly ground pepper, to taste

PREPARATION

  1. Heat the olive oil over medium heat in a large, heavy nonstick skillet. Add the diced yellow onion and chard stems, a pinch of kosher salt, and cook for 3-5 minutes, until tender. 

  2. Add garlic and cook, stirring, for about 1 minute or until the garlic begins to smell fragrant (careful not to let it burn).

  3. Add the chopped greens and raisins, tossing with tongs until they are well coated with oil and beginning to wilt, 3-4 minutes. Stir in vinegar and pine nuts, tossing until well combined. Taste and season as needed with salt and pepper (and additional vinegar if desired).

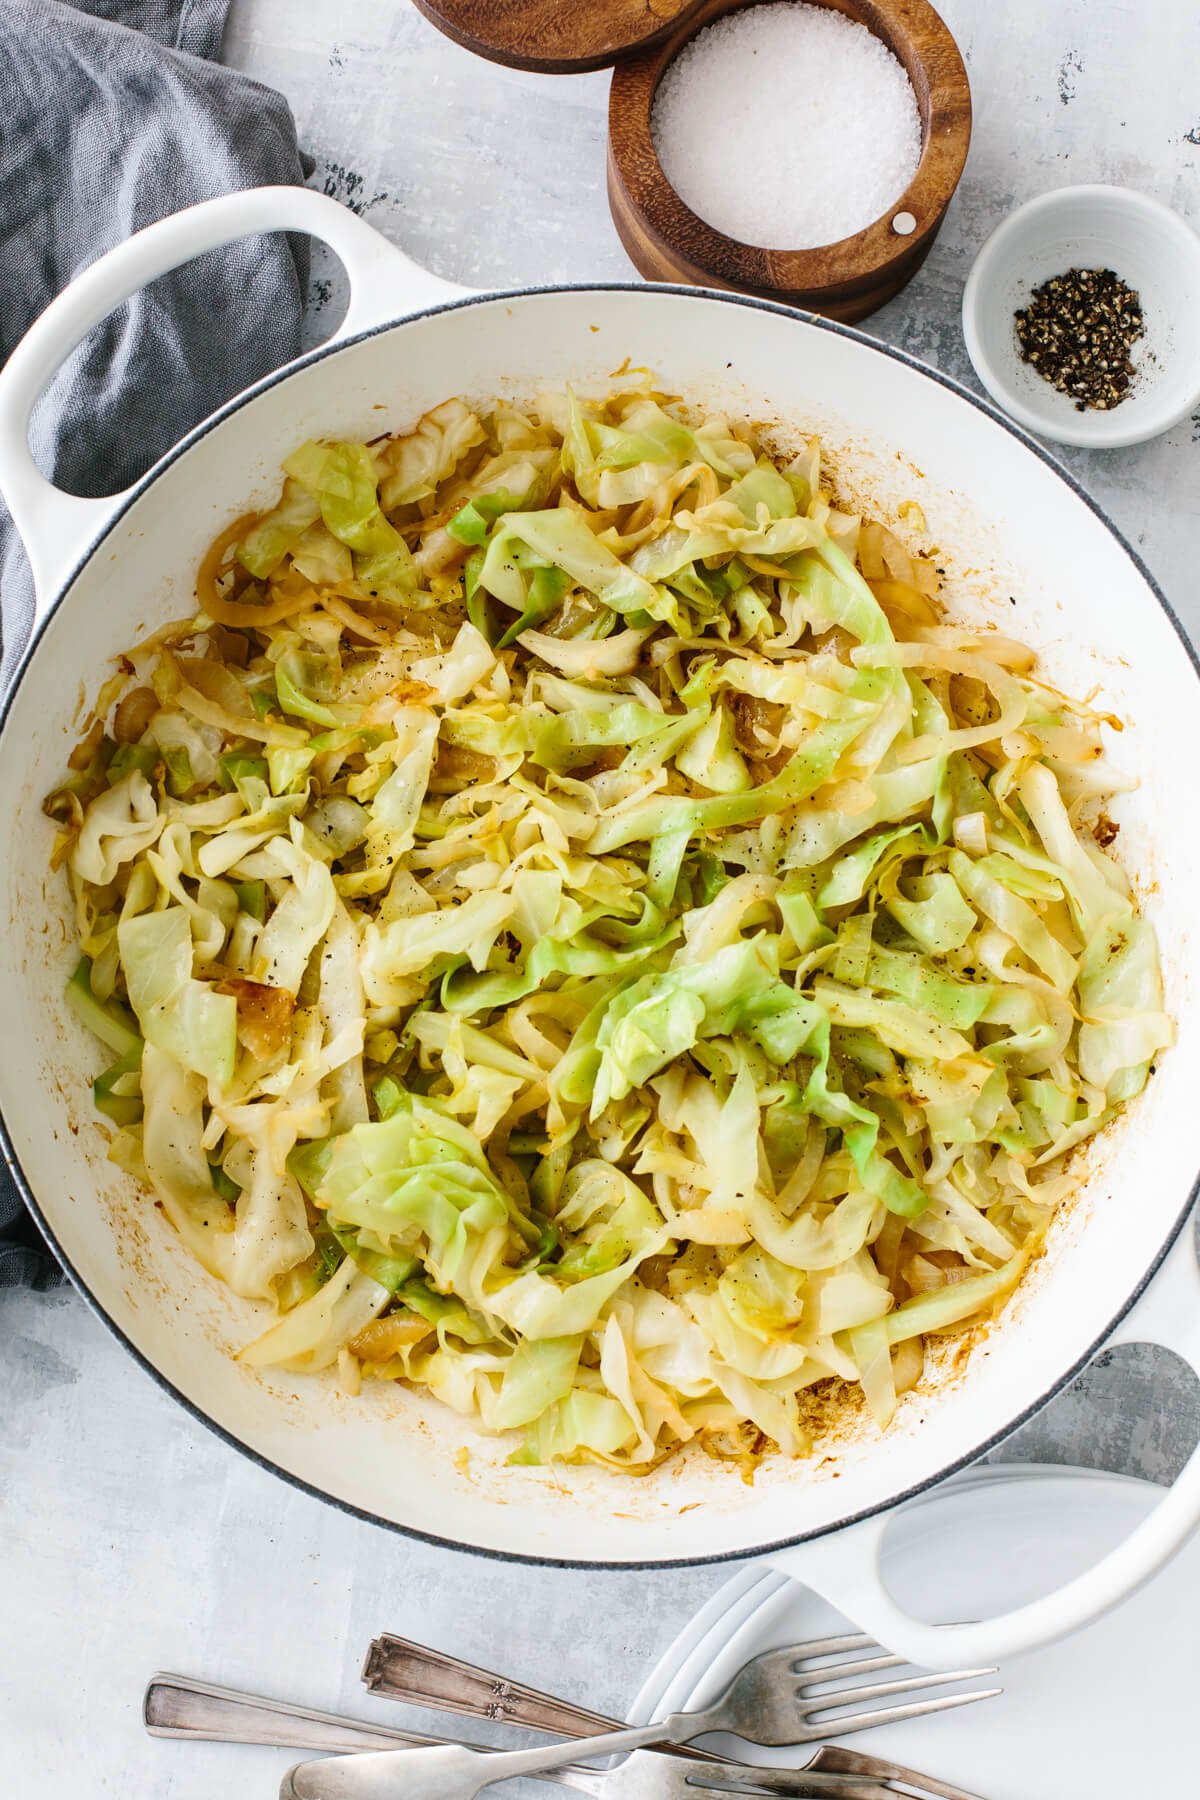
Butter Braised Cabbage

If I have several hours to spare, my go-to cabbage dish is this recipe for Braised Cabbage… but when I’m in a hurry THIS is the recipe I use for equally delicious cabbage that is ready in less than 30 minutes. I know this is one of the least sexy dishes imaginable, but I promise you’ll be shocked by how dang good a humble head of cabbage can taste.

BUTTER BRAISED CABBAGE

Photo credit: Downshiftology

INGREDIENTS

  • 3 tablespoons butter

  • 1 head green cabbage (around 3lbs)

  • Kosher salt

  • Freshly ground black pepper

  • Splash of apple cider vinegar

PREPARATION

  • Cut the cabbage in half from its top down through its core. Place the cut-side down on your cutting board, then shred it as thinly as possible around the core, then discard the core.

  • Heat a large saute pan or dutch oven over medium-high heat. Add the butter and once it has melted, add the cabbage, 1.5 teaspoons kosher salt, and 1/2 teaspoon freshly ground pepper. Saute for 15-20 minutes, stirring occasionally, until the cabbage is tender and begins to brown. You don’t have to constantly stir – leaving it undisturbed for a few minutes at a time allows the cabbage to caramelize and get extra yummy.

  • When the cabbage has reduced by quite a bit and has begun to brown, remove from heat and stir in the apple cider vinegar. Taste and add a bit of additional salt and pepper to taste. Serve warm.

Recipe adapted from Well Plated.

Shakshuka

Shakshuka is a traditional dish from North Africa with lots of variations – but essentially it’s a skillet filled with a hearty tomato sauce with onions, peppers, spices, and some poached eggs on top. I like to serve shakshuka over a bed of basmati rice, topped with some fresh parsley or cilantro, avocado, and some salty feta cheese. It takes less than 30 minutes to pull everything together, and makes a perfect weeknight meal. Happy cooking!

SHAKSHUKA

INGREDIENTS

  • 2 tablespoons extra-virgin olive oil

  • 1 yellow onion, chopped

  • 1 red bell pepper, seeded and diced into 1/2” pieces

  • Kosher salt

  • Freshly ground black pepper

  • 3 medium garlic cloves, minced

  • 1 teaspoon smoked paprika

  • 1 teaspoon ground cumin

  • 1/4 teaspoon red pepper flakes

  • 1 28-ounce can crushed tomatoes (diced tomatoes will work too)

  • 2 tablespoons harissa paste (mild or hot, your preference)

  • 1 tablespoon tomato paste

  • A few handfuls of fresh spinach, roughly chopped

  • 3 to 5 eggs

  • ⅓ cup crumbled feta cheese

  • ¼ cup fresh parsley leaves

  • 1 avocado, diced (optional)

  • Toasted bread (optional)

PREPARATION

  1. Heat the oil over medium heat in a large lidded skillet. Add the onion, red pepper, 1/2 teaspoon salt, and several grinds of fresh pepper and cook until the onion is soft and translucent, 6 to 8 minutes.

  2. Reduce the heat to medium-low and add the garlic, paprika, cumin, and red pepper flakes. Stir and let cook for about 30 seconds, then add the canned tomatoes, harissa paste, and tomato paste. Simmer and stir occasionally for 15 minutes until the sauce is thickened.

  3. Add the spinach and stir until wilted. Use a large spoon to make wells in the sauce and crack an egg into each well. Cover and cook over medium heat until the eggs are set, about 5 minutes – though the timing will also depend on how runny you like your egg yolks.

  4. Season with salt and pepper to taste and sprinkle with the feta, parsley and avocado, if using. Serve over basmati rice and with toasted bread for scooping.

White Bean Chicken Chili

Here’s a recipe for one of my favorite hearty winter soups, which always brings me back to cozy snow days growing up in the midwest. It’s one of my go-to recipes to make and bring over to family/friends who may need some extra love and a hot meal, and the leftovers taste even better the next day!

WHITE BEAN CHICKEN CHILI

INGREDIENTS

  • 2 tablespoons olive oil

  • 2 yellow onions, diced

  • 1 can (4-oz) diced mild green chiles

  • 2 tablespoons ground cumin

  • 1 tablespoon dried oregano

  • 1/4 teaspoon crushed red pepper flakes

  • 4 cloves garlic, minced

  • Kosher salt

  • 6 carrots, chopped in 1/2-inch rounds

  • 1 lb small red or yukon gold potatoes, washed and quartered

  • 3-4 lb cooked rotisserie chicken, meat removed and shredded

  • 4-6 cups chicken broth

  • 3 15-oz cans white beans, drained and rinsed

  • Handful freshly chopped parsley (optional)

  • Shredded parmesan cheese (optional)

  • Plain greek yogurt (optional)

INSTRUCTIONS

  1. Heat olive oil over medium-high heat in a dutch oven or large saucepan. This recipe makes a lot of soup, so be sure to use a big pot/saucepan! Add the diced onions and a pinch of kosher salt and cook until translucent and beginning to brown, stirring occasionally, 4-5 minutes.

  2. Stir in the can of diced green chiles and cook for 2 minutes, stirring occasionally. Add the cumin, oregano, red pepper flakes, garlic and 1 teaspoon kosher salt and cook for 1-2 minutes, until fragrant. Stir in the carrots and potatoes, coating them in the spices.

  3. Pour in the chicken broth, bring to a boil, then lower the heat and gently simmer - partially covered and stirring occasionally - until the potatoes and carrots are tender, 15-20 minutes. Next, add the shredded chicken and white beans, heat on until warmed through, about 10 minutes. Taste and adjust seasoning as needed.

  4. Turn off the heat and let the soup sit for 15-20 minutes to let the flavors meld together. Reheat if needed and serve topped with chopped parsley and shredded parmesan. This may sound weird, but I also love eating this soup with a dollop of tangy plain greek yogurt!

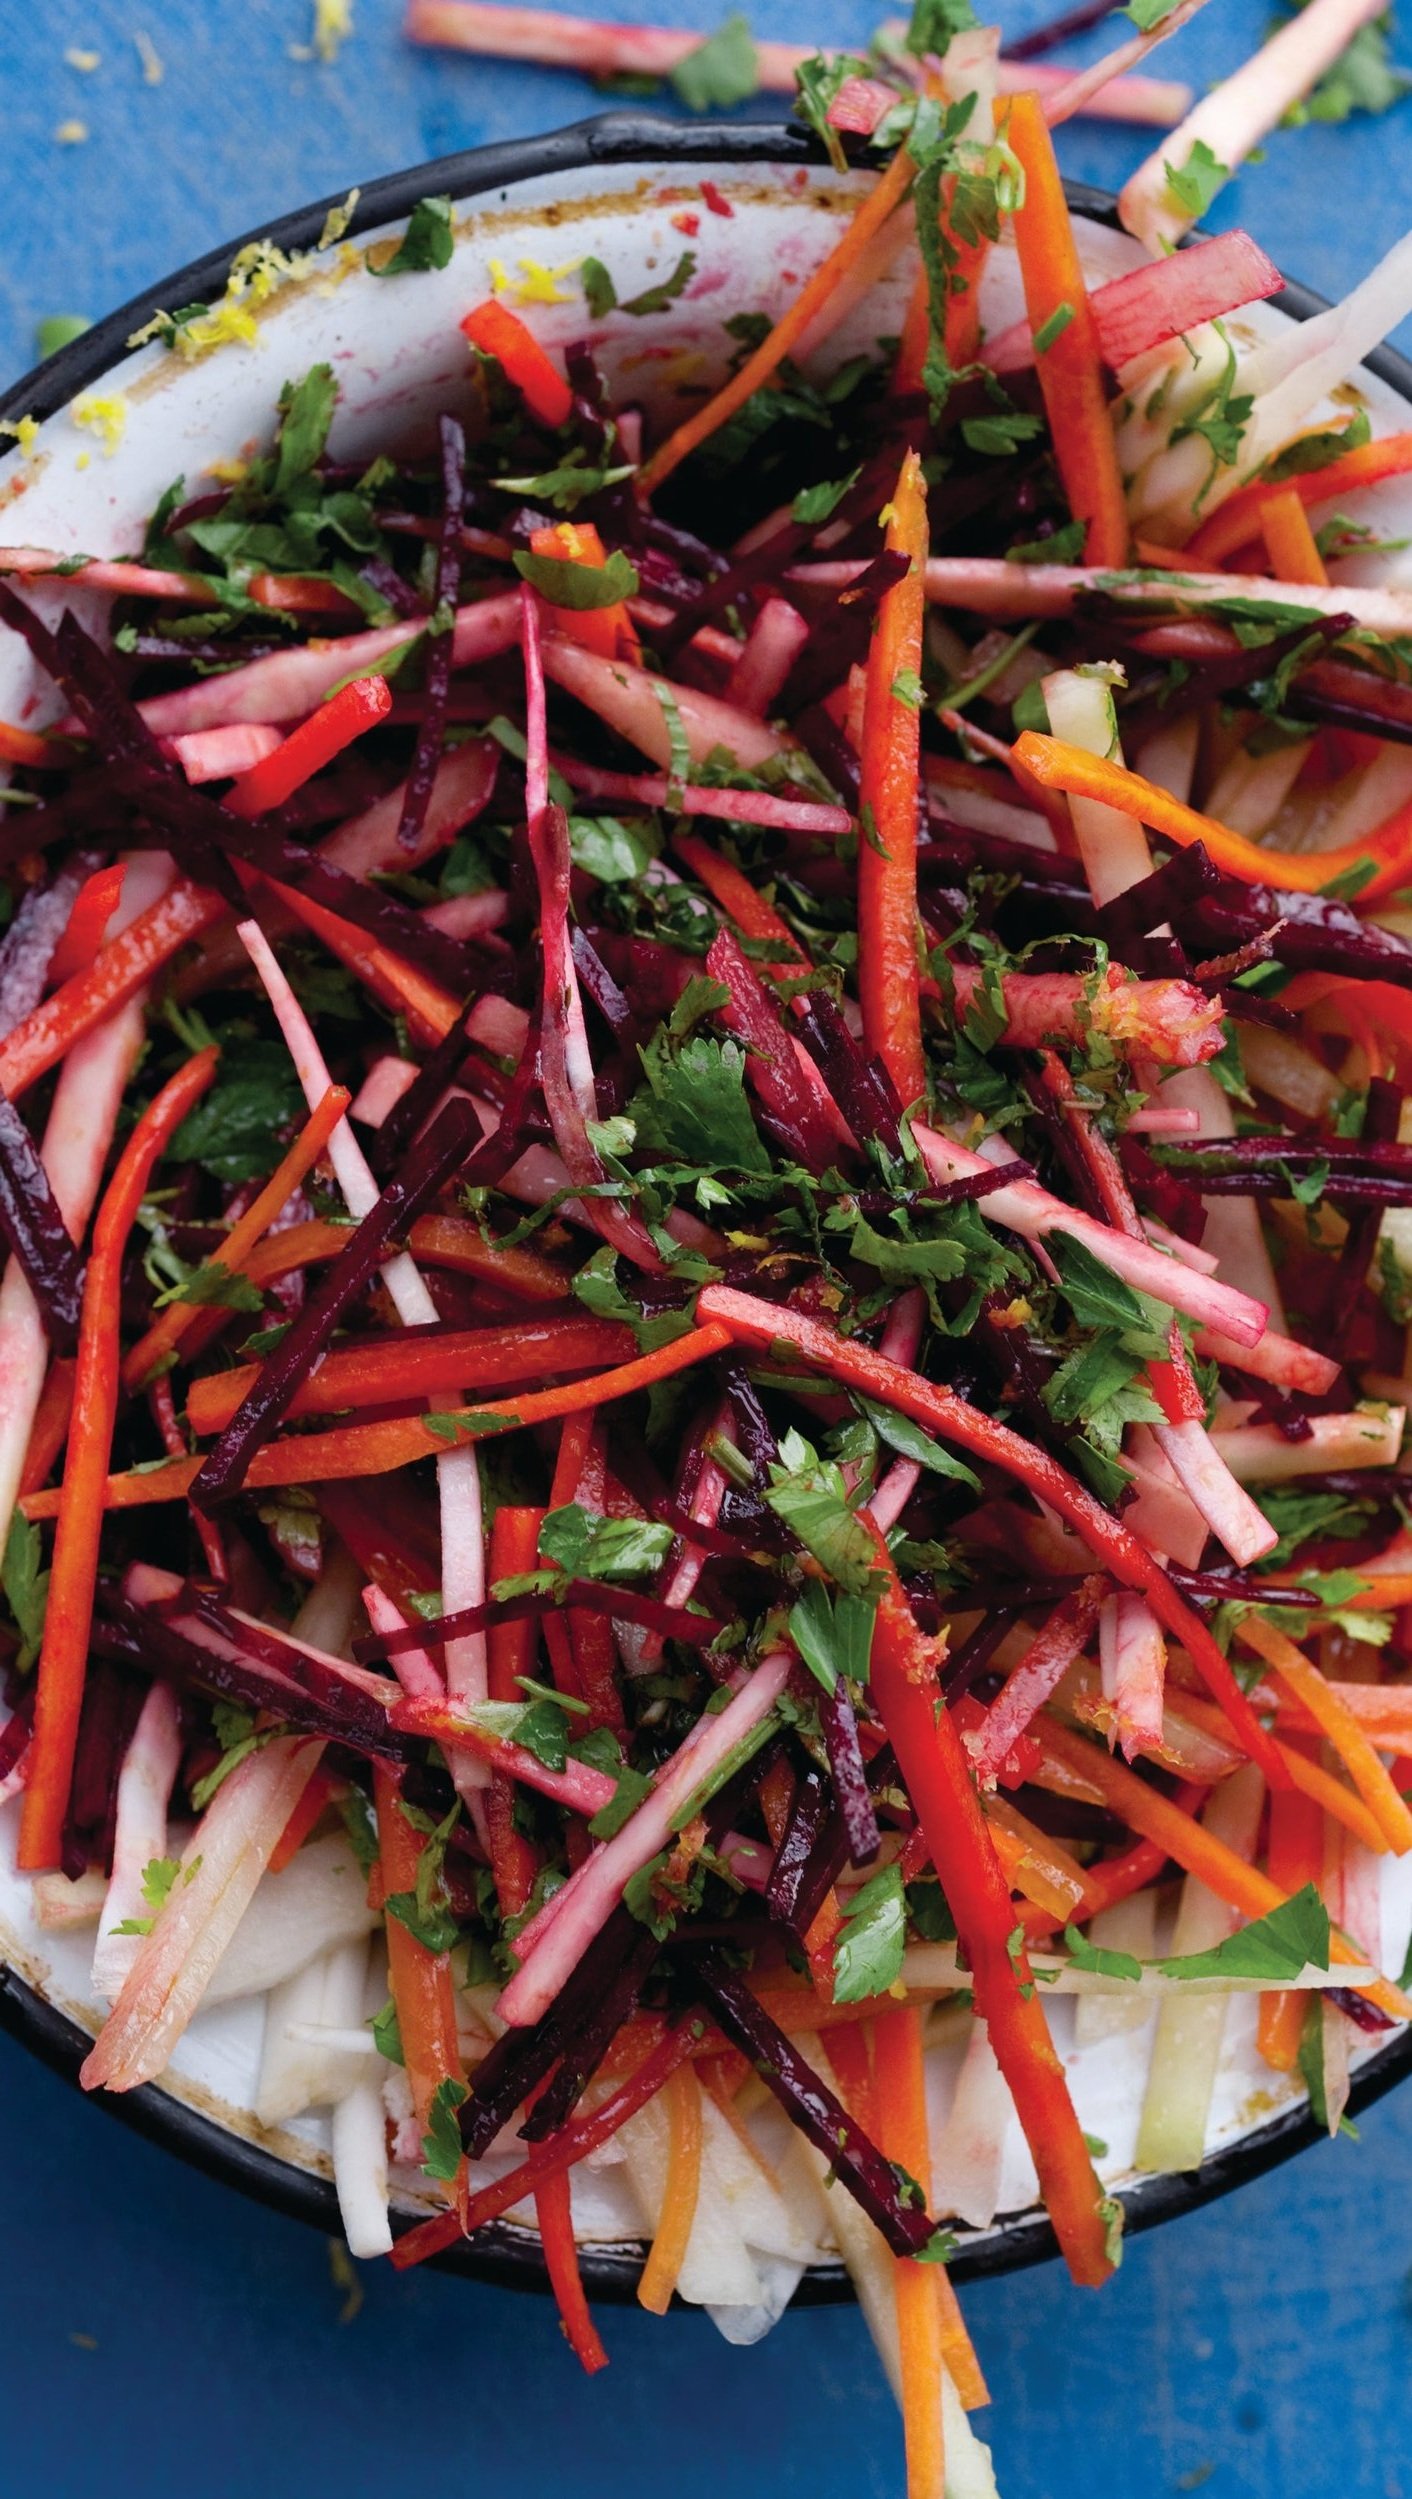
Winter Veggie Slaw with Sesame Ginger Vinaigrette

It’s easy to get stuck in a cooking rut as we head into doldrums of February – so this colorful, hearty winter slaw with a zippy sesame ginger vinaigrette is a fresh take on the same old veggies you’ve been cooking with all winter! It’s a very simple and flexible recipe, just use whatever winter veg – like carrots, beets, cabbage, turnips, kohlrabi, et – that you have on hand.

WINTER VEGGIE SLAW WITH SESAME GINGER VINAIGRETTE

INGREDIENTS

For the slaw

  • 2-3lbs assorted winter veggies (carrots, beets, kohlrabi, turnips, and cabbage are all great), shredded

  • 1 bunch cilantro OR parsley, roughly chopped

For the vinaigrette

  • 1 garlic clove

  • 1 teaspoon finely minced ginger

  • 3 tablespoons rice vinegar

  • 1 teaspoon soy sauce

  • 1 teaspoon yellow miso paste

  • 1 teaspoon honey

  • 5 tablespoons canola oil 

  • 2 tablespoons toasted sesame oil

  • 2 tablespoons toasted sesame seeds

PREPARATION

  1. To prepare the slaw, carefully shred the vegetables with a box grater into a large bowl.

  2. One handful at a time, squeeze any moisture out of the shredded vegetables and place them in a separate bowl (this prevents the slaw from getting watery).

  3. Add the chopped herbs (cilantro or parsley) to the bowl with the shredded veggies. 

  4. To make the sesame ginger vinaigrette, simply combine ingredients together in a small processor and blend until smooth. Taste and adjust seasoning as needed. 

  5. Pour the vinaigrette into the salad bowl and toss together to combine. Allow to sit for 20-30 minutes before enjoying, if possible. Taste and adjust seasoning as needed.

Blood Orange, Almond & Ricotta Cake

When the days are long and cold and you’re stuck inside, why not make some cake? I’m not a big baker by any means, but I was recently inspired to make this Blood Orange, Almond & Ricotta cake – recipe 100% from Smitten Kitchen! It’s peak blood orange season over in California, so now’s a great time to snag some blood oranges if you have access to them, and then I highly encourage you to make this cake. It’s the kind of cake that doesn’t feel TOO decadent, and you can (and perhaps should) absolutely enjoy it for a luxurious breakfast alongside some tangy greek yogurt.

BLOOD ORANGE, ALMOND & RICOTTA CAKE

Recipe by Smitten Kitchen

INGREDIENTS

  • 1/2 cup brown sugar

  • 1 tablespoon water

  • 3 large eggs, separated

  • 2/3 cup (135 grams) granulated sugar

  • 2 blood oranges

  • 1/2 cup (4 ounces or 115 grams) unsalted butter, softened

  • 2/3 cup (165 grams) ricotta

  • 1/3 cup (45 grams) cornmeal

  • 1 cup (135 grams) firm-packed almond flour or meal

  • 1/2 teaspoon fine sea salt

  • 1/4 cup apple or apricot jam (optional, for glossy finish)

INSTRUCTION

Heat oven to 300 degrees F. Butter a 9-inch round cake pan and line the bottom with a round of parchment paper.

Stir brown sugar and water together so they form a thick slurry. Pour into prepared cake pan and spread thin. Set aside.

Whip egg whites in a medium bowl with an electric mixer until they hold thick peaks. Set aside.

Place granulated sugar in a large mixing bowl. Finely zest both oranges over it.

Cut both oranges in half. Cut one of the halves into paper-thin slices and arrange slices over brown sugar base in cake pan. Juice other three halves (I had about 1/3 cup juice) and set juice aside.

Add butter to zest and granulated sugar in large mixing bowl and beat with an electric mixer (you can use same beaters you just did for egg whites) until light and fluffy. Add egg yolks, one at a time, and beat to combine. Add juice and ricotta; mix until smooth. Sprinkle salt over batter, then add almond flour and cornmeal and mix until just combined. Gently fold in egg whites.

Scoop batter in large dollops over prepared cake pan base. Gently spread batter flat, trying not to disturb orange slices underneath. Bake in heated oven for 35 to 40 minutes [updated to warn that this took longer for many people, but remains accurate for my oven– better to check early than late], or until a toothpick inserted into the center comes out clean and then (my preference) for 5 more minutes. The final cake is so moist, almost damp, I found the extra baking time beneficial.

Cool cake in pan on rack for 5 minutes, and then run a knife around the side and invert onto a cake plate. If any orange slices don’t come out easily, just gently arrange them on the top of the cake. If desired, heat jam until loose and brush over cake top for a glossier finish. Let cool and cut into slices. Delicious served with an extra dollop of ricotta, creme fraiche or barely sweetened whipped cream.

HELPFUL NOTES from Deb Perelman of Smitten Kitchen: always zest before juicing, to avoid bad moods. Zest should always go straight into sugar, for maximum flavor release against the grit. Always whip egg whites before egg yolks, so you don’t have to wash your beaters in the middle of prep.

Beef & Bean Enchiladas

Homemade enchiladas may look like a lot of ingredients and steps, but I promise that the whole process goes WAY quicker than you expect. But pretty please don’t skip the step of making your own enchilada sauce! It will be well worth the tiny bit of extra effort, and will be way tastier + healthier than the store-bought stuff. For this recipe, the enchilada filling has ground beef + beans, but you can totally substitute with other proteins like shredded pork or chicken, or make them vegetarian by subbing with sautéed veggies like mushrooms, peppers, zucchini, etc.

BEEF & BEAN ENCHILADAS

Photo Credit: The Beach House Kitchen

INGREDIENTS

For the Enchilada Sauce

  • 3 tablespoons olive oil

  • 3 tablespoons flour (GF flour works too)

  • 1 tablespoon brown sugar

  • 1-2 teaspoons chipotle chili powder (use more or less based on your spice tolerance!)

  • 1 teaspoon ground cumin

  • ½ teaspoon garlic powder

  • ¼ teaspoon dried oregano

  • ¼ teaspoon cinnamon

  • ¼ teaspoon salt, to taste

  • 2 tablespoons tomato paste

  • 2 cups broth (vegetable, chicken, or beef)

  • 1 tablespoon apple cider vinegar

  • Freshly ground black pepper, to taste

For the Enchiladas

  • 1 tablespoon olive oil

  • 1 yellow onion, finely chopped

  • 2 garlic cloves, minced

  • ¼ teaspoon salt, to taste

  • 1 lb ground beef

  • 1 can (14-oz) black beans, rinsed and drained

  • 1 can (14-oz) can pinto beans, rinsed and drained

  • 8 tortillas (or burrito wraps)

  • 1.5-2 cups shredded cheese

  • Handful fresh cilantro, roughly chopped (optional garnish)

INSTRUCTIONS

  1. First make the enchilada sauce – Measure out the dry ingredients (the flour, brown sugar, chili powder, cumin, garlic powder, oregano, cinnamon and salt) into a small bowl. In a medium-sized pot over medium heat, warm the oil until it’s sizzling, then pour in the flour + spice mixture. While whisking constantly, cook until fragrant and slightly deepened in color, about 1 minute. Whisk the tomato paste into the mixture, then slowly pour in the broth while whisking constantly to remove any lumps. Raise heat to medium-high and bring the mixture to a simmer, then reduce heat as necessary to maintain a gentle simmer. Cook, whisking often, for about 5 to 7 minutes, until the sauce has thickened a bit and a spoon encounters some resistance as you stir it. Remove from heat, then whisk in the vinegar and season to taste with additional salt and/or pepper.

  2. Make the beef and bean enchilada filling – Preheat your oven 350F. Heat olive oil in a skillet over high heat. Add onion, garlic, and salt and cook for 2 minutes. Add ground beef and cook for 4-5 minutes, breaking it up as you go, until most of the meat has browned. Next add the rinsed and drained black + pinto beans to the skillet, as well as 1/4 cup of your enchilada sauce. Stir to combine and continue cooking until the ground beef is fully cooked. Taste and add additional salt if needed.

  3. Assemble and bake the enchiladas – Smear a bit of the enchilada sauce on the bottom of a 9x13 pyrex baking dish. Assemble the enchiladas by scooping the enchilada filling on the lower third of a tortilla. Roll up the tortilla and then place in the baking dish, seam side down. Repeat with remaining filling and tortillas. Pour enchilada sauce over the enchiladas and top with the shredded cheese. Bake for 10 minutes covered, then 10 minutes uncovered. Serve hot and enjoy!

Slow Cooked Beef Short Ribs

Balancing cooking with taking care of a newborn means that there are a lot more crock pot/slow cooker meals happening around here! But even if you don’t have a new baby around, I have a feeling we all can use some go-to recipes that only require a little prep, and then can be totally forgotten about until dinner time. We were craving something hearty and comforting, so I tried out this slow cooked beef short ribs recipe, which I’ve adapted a bit from Taste of Home, and we are BIG fans.

This dish does have a bit of prep to sear the short ribs and then saute + simmer some onions, garlic, tomato paste, red wine etc in the beef fat – but once you combine everything in the slow cooker, it will just do its thing for 6-8 hours on low. There is a final step of turning the remaining liquid in the slow cooker into a luxurious sauce, but I promise that part is SUPER easy and just takes a few extra minutes…. don’t skip that part, because it is divine! We enjoyed these short ribs with some mashed potatoes, which I highly recommend.

SLOW COOKED BEEF SHORT RIBS

Photo Credit: Chelsea’s Messy Apron

INGREDIENTS

  • 3 pounds bone-in beef short ribs

  • Salt and pepper

  • 1 tablespoon canola oil

  • 2 cups carrots (4-6 medium carrots), cut into 1-inch pieces

  • 1 cup celery (~2 stalks celery), sliced

  • 1 cup beef broth

  • 2 tablespoons dried thyme or rosemary

  • 1 bay leaf

  • 2 large yellow onions, cut into 1/2-inch wedges

  • 6 garlic cloves, minced

  • 1 tablespoon tomato paste

  • 2 cups dry red wine (or beef broth)

  • 1 heaping tablespoon cornstarch

  • 3 tablespoons cold water

PREPARATION

  1. Sprinkle ribs generously with salt and pepper. In a large skillet, heat oil over medium-high heat. In batches, brown ribs on all sides; transfer to a 4 or 5 qt. slow cooker. Add carrots, celery, beef broth, dried thyme (or rosemary) and bay leaf to the ribs.

  2. Add onions to the same skillet, cook and stir over medium heat 5-6 minutes or until tender. Add minced garlic and tomato paste, cook and stir 1 minute longer. Stir in 2 cups wine (or beef broth). Bring to a boil, cook 8-10 minutes or until liquid is reduced by half. Add everything in the pan into the slow cooker. Cook, covered, on low 6-8 hours or until meat is tender and falling off the bone. Remove ribs and vegetables from the slow cooker and keep warm.

  3. To make the sauce, transfer cooking juices to a small saucepan; skim off fat and discard the bay leaf. Bring the juices to a boil. In a small bowl, mix cornstarch and water until smooth, then stir into cooking juices. Return to a boil, cook and stir 1-2 minutes or until thickened. Taste and add additional salt or pepper if needed. Serve sauce with ribs and vegetables.

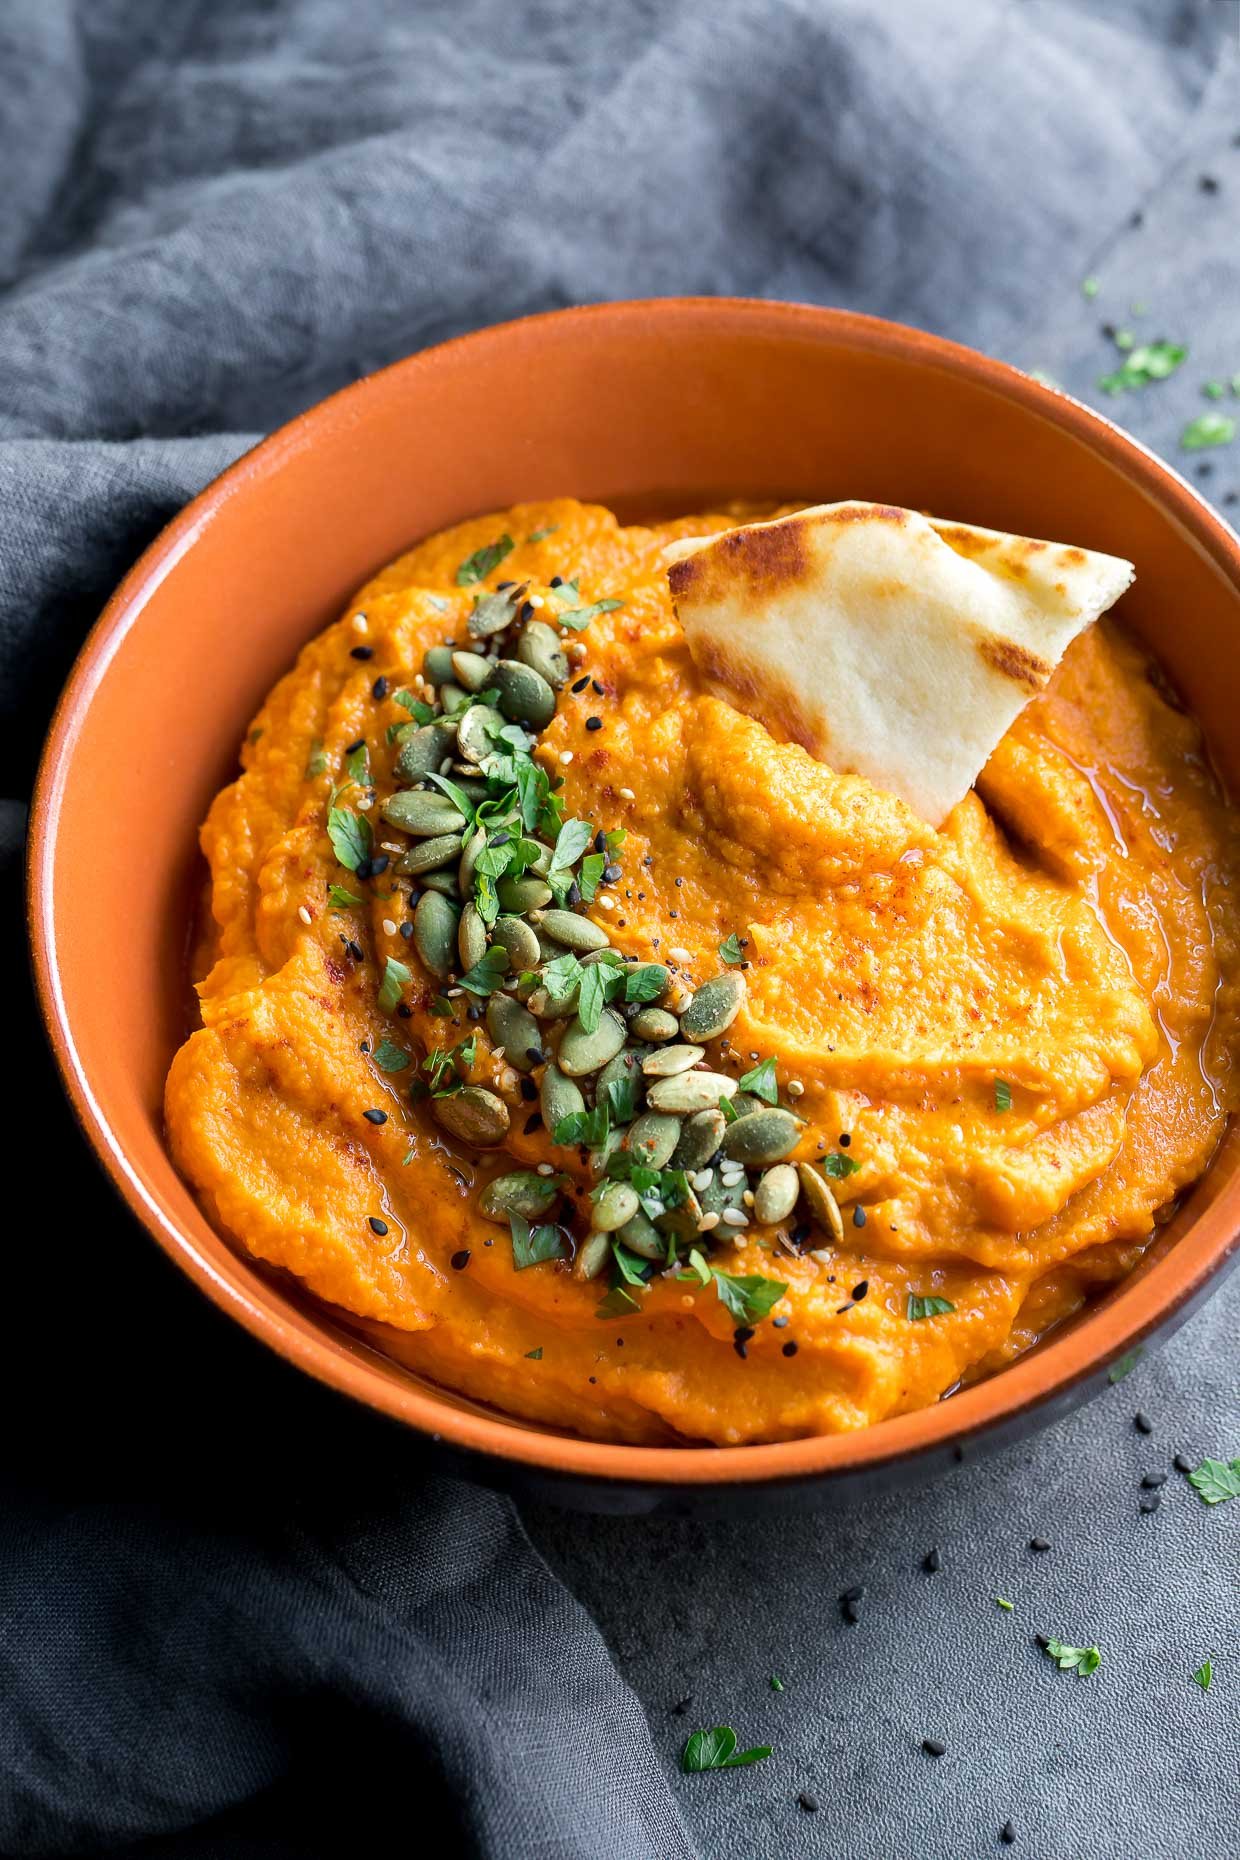
Sweet Potato, Carrot & Parsnip Puree

If you’re looking for a simple, comforting, and nourishing side dish for the holidays – look no further. This sweet potato, carrot, and parsnip puree is super easy to make and it hits all the flavor notes you could want… sweet, bright, herbaceous, and with a hint of acid thanks to a splash of apple cider vinegar. Enjoy as is, but I like to top it with a vibrant pesto or spiced seeds/nuts for a bit of crunch. A note that if you don’t have parsnips on hand, feel free to sub another vegetable or just use a bit more sweet potato and carrot (about 3lbs total root veggies).

SWEET POTATO, CARROT & PARSNIP PUREE

Serves 4-6

Photo Credit: Peas and Carrots

INGREDIENTS

1 lb carrots, peeled and chopped into 1/2” pieces

1 lb parsnips, peeled and chopped into 1/2” pieces

1 lb sweet potatoes, peeled and chopped into 1/2” pieces

1/4 cup olive oil

½ cup coconut milk

2 cloves garlic, minced

1 tablespoon apple cider vinegar

1 teaspoon chopped fresh thyme leaves

1 teaspoon orange zest

1 teaspoon kosher salt

Freshly ground pepper to taste

PREPARATION

  • Simmer carrots, parsnips, and sweet potatoes in salted water until tender, 15-20 mins. 

  • Drain the vegetables and puree with an immersion blender or food processor with olive oil, coconut milk, garlic, thyme, apple cider vinegar, orange zest, salt and pepper.

  • Pulse or puree until the texture is smooth. Add water or more coconut milk if necessary to blend the mixture more easily. Taste and adjust seasoning as needed.

Shredded Brussels Sprout Salad with Apples, Toasted Hazelnuts & Apple Cider Vinaigrette

I’m not exaggerating when I say I look forward to making this salad every winter. This shredded brussels sprout salad is colorful, crunchy, a little salty, full of flavor, and it will hold several days in your fridge (so take my advice and double this recipe and enjoy the leftovers)! It does require a bit of patience as you thinly shred all the brussels by hand… but look at it as an opportunity to sharpen up your knife skills. And I know that toasting / removing the skins of the hazelnuts is a bit of extra effort too… but I promise it is absolutely worth it!

SHREDDED BRUSSELS SPROUT SALAD WITH APPLES, TOASTED HAZELNUTS & APPLE CIDER VINAIGRETTE

Serves 4-6

Photo Credit: Elle Republic

INGREDIENTS

  • 2 pounds Brussels sprouts, thinly shredded

  • 2 Honey Crisp or Pink Lady apples, cut into thin slices

  • 1 tablespoon lemon juice

  • 3/4 cup hazelnuts

  • Shaved Pecorino (or Parmesan) cheese for topping

Apple Cider Vinaigrette

  • 1 tablespoon dijon mustard

  • 1 tablespoon whole grain mustard

  • 1 tablespoon maple syrup

  • 1/4 cup apple cider vinegar

  • 1/2 cup olive oil

  • 1 teaspoon kosher salt

PREPARATION

  • For the vinaigrette: put all ingredients in a jar with a lid and shake to mix. Season to taste.

  • Arrange a rack in the middle of the oven and heat to 350°F. Spread the hazelnuts on a rimmed baking sheet. Toast until lightly golden-brown and the skins are peeling away, 10 to 15 minutes (make sure to watch closely so they don’t burn). Transfer the nuts to a clean dish towel, wrap up the nuts, and let steam for a minute. Rub the nuts with the towel to remove as many skins as possible. (Not all of the skins will be removed, which is fine.) Coarsely chop the nuts and set aside.

  • Shave the brussels sprouts as thinly as possible, either by hand with a sharp knife, or carefully using a mandoline to slice as thinly as possible down to the stem, or until the sprout is too short to safely slice. Place the shaved sprouts in a large bowl.

  • Halve and core the apples, then use your knife or mandoline to slice into 1/4-inch thick slices. Place the apple slices in a small bowl and toss with 1 tablespoon lemon juice to prevent browning. Pour the dressing over the Brussels sprouts and use your hands to gently massage the dressing into the shaved sprouts, softening them a bit. Add the apples and nuts and toss to combine. Top with shaved Pecorino or Parmesan cheese and enjoy!

Winter Slaw with Citrus Vinaigrette

Don’t get me wrong, I love a good mayo-heavy slaw with a big plate of BBQ, but I’m digging this bright and refreshing version of a winter slaw. The recipe is very forgiving… feel free to substitute other winter veggies you have on hand for the slaw, and if you don’t have lime or orange juice you can certainly use lemon juice instead.

WINTER SLAW WITH CITRUS VINAIGRETTE

INGREDIENTS

  • 1 medium green or red cabbage, shredded

  • 4-6 carrots, shredded or thinly sliced

  • 4-6 radishes, thinly sliced

  • 1/4 cup finely chopped scallions/green onions

  • 1/4 cup finely chopped parsley

  • 1/4 cup pepitas/pumpkin seeds (optional)

  • Zest and juice from 1 orange (about 1 teaspoon zest and 1/4 cup juice)

  • 1/4 cup fresh lime juice, from 2 limes

  • 2 tablespoons fresh orange juice

  • 1/3 cup olive oil

  • 1 clove garlic, minced

  • 1-2 tablespoons honey or maple syrup

  • 1-2 tablespoons dijon mustard

  • 1 teaspoon salt

  • 1/2 teaspoon freshly ground black pepper

INSTRUCTIONS

  1. Combine all of the veggies, fresh herbs, and pumpkin seeds (if using) in a large bowl.

  2. In a mason jar, combine the lime and orange juice, olive oil, minced garlic, honey or maple syrup, mustard, salt, and pepper and shake well to make the vinaigrette.

  3. Pour the vinaigrette over the veggies and use your hands to toss until well combined. If possible, dress the slaw at least 30 minutes before eating. Taste and adjust seasoning as needed – I often add a bit more lime juice and salt to give the slaw a bit more punchiness.

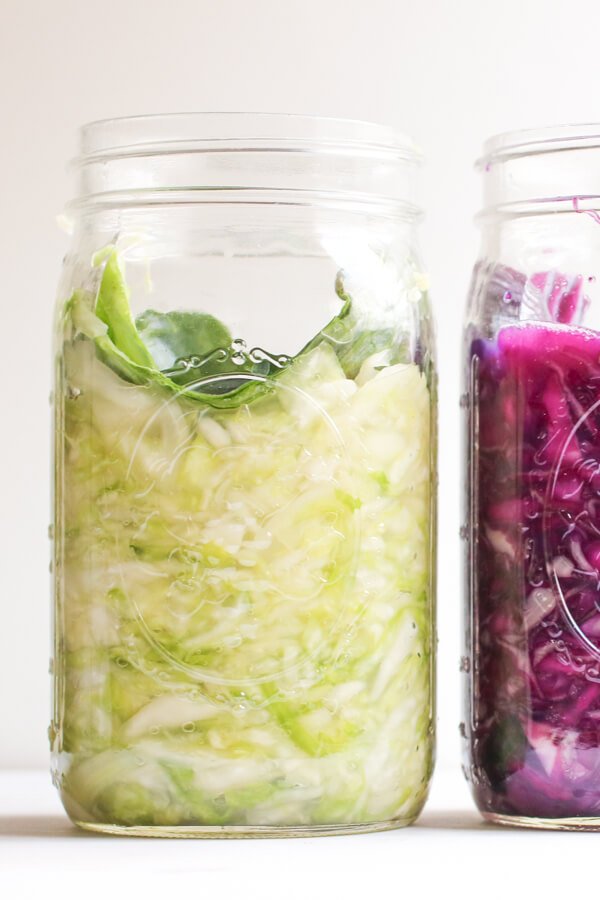
Homemade Sauerkraut

Every winter, the humble cabbage starts to make more frequent appearances in my cooking rotation. One of my favorite cabbage recipes has gotta be braised cabbage, but I also love whipping up some sauerkraut! Making your own sauerkraut may seem daunting, but I like to think of sauerkraut as the gateway into fermentation… it’s quick to make, requires no special tools, and it is so gosh darn good for you + your gut. All you do is combine some freshly shredded cabbage with salt, pack it all into a jar, and then wait a few weeks! You can also certainly substitute other vegetables in place of cabbage… shredded carrots, beets, turnips, kohlrabi, etc would all work great too. Here’s my full recipe + method:

HOMEMADE SAUERKRAUT

INGREDIENTS + EQUIPMENT

  • 1 medium head green or red cabbage (about 3 pounds)

  • 1 1/2 tablespoons kosher salt

  • 1 tablespoon caraway or fennel seeds (optional)

  • 1 quart-sized wide mouth jar with lid

INSTRUCTIONS

  • Prepare jar: Wash your mason jar and lid in hot soapy water, rinse and let air dry.

  • Slice the cabbage: Discard any wilted, limp outer leaves of the cabbage. Cut the cabbage into quarters and trim out the core. Slice each quarter down its length, making 8 wedges. Slice each wedge crosswise into very thin ribbons.

  • Combine the cabbage and salt: Transfer the cabbage to a big mixing bowl and sprinkle the salt and caraway seeds over top. Work the salt and caraway or fennel seeds (if using) into the cabbage by massaging and squeezing the cabbage with your hands until it softens and releases liquid, 5-10 minutes. 

  • Pack the cabbage: Grab handfuls of the cabbage and pack them into the canning jar. Pour any liquid released by the cabbage into the jar. Place one of the larger outer leaves of the cabbage over the surface of the sliced cabbage to keep the cabbage submerged in its liquid.

  • Cover the jar: Cover the mouth of the jar loosely with the lid, or with a cloth secured by a rubber band or twine. 

  • Press the cabbage every few hours: Over the next 24 hours, press down on the cabbage every so often with a clean utensil. As the cabbage releases its liquid, it will become more limp and compact and the liquid will rise over the top of the cabbage.

  • Ferment the cabbage for 1-2 weeks: As it's fermenting, keep out at room temperature and make sure the brine always covers the cabbage. When the sauerkraut tastes great, refrigerate!

  • Storage: Sauerkraut is a fermented product, so it will keep for up to six months refrigerated.

ADDITIONAL NOTES:

  • Add extra liquid, if needed: It’s very important for the brine to cover the cabbage at all times. If extra brine is needed, dissolve 1 teaspoon of salt in 1 cup of water and add enough to submerge the cabbage.

  • Canning sauerkraut: You can process sauerkraut for longer storage outside of refrigeration, but the canning process will kill the good bacteria produced by the fermentation process.

  • Skimming: While the sauerkraut is fermenting, you may see bubbles, foam, or white scum. These are all signs of a healthy, happy fermentation process. The scum can be skimmed off the top either during fermentation or before refrigerating.

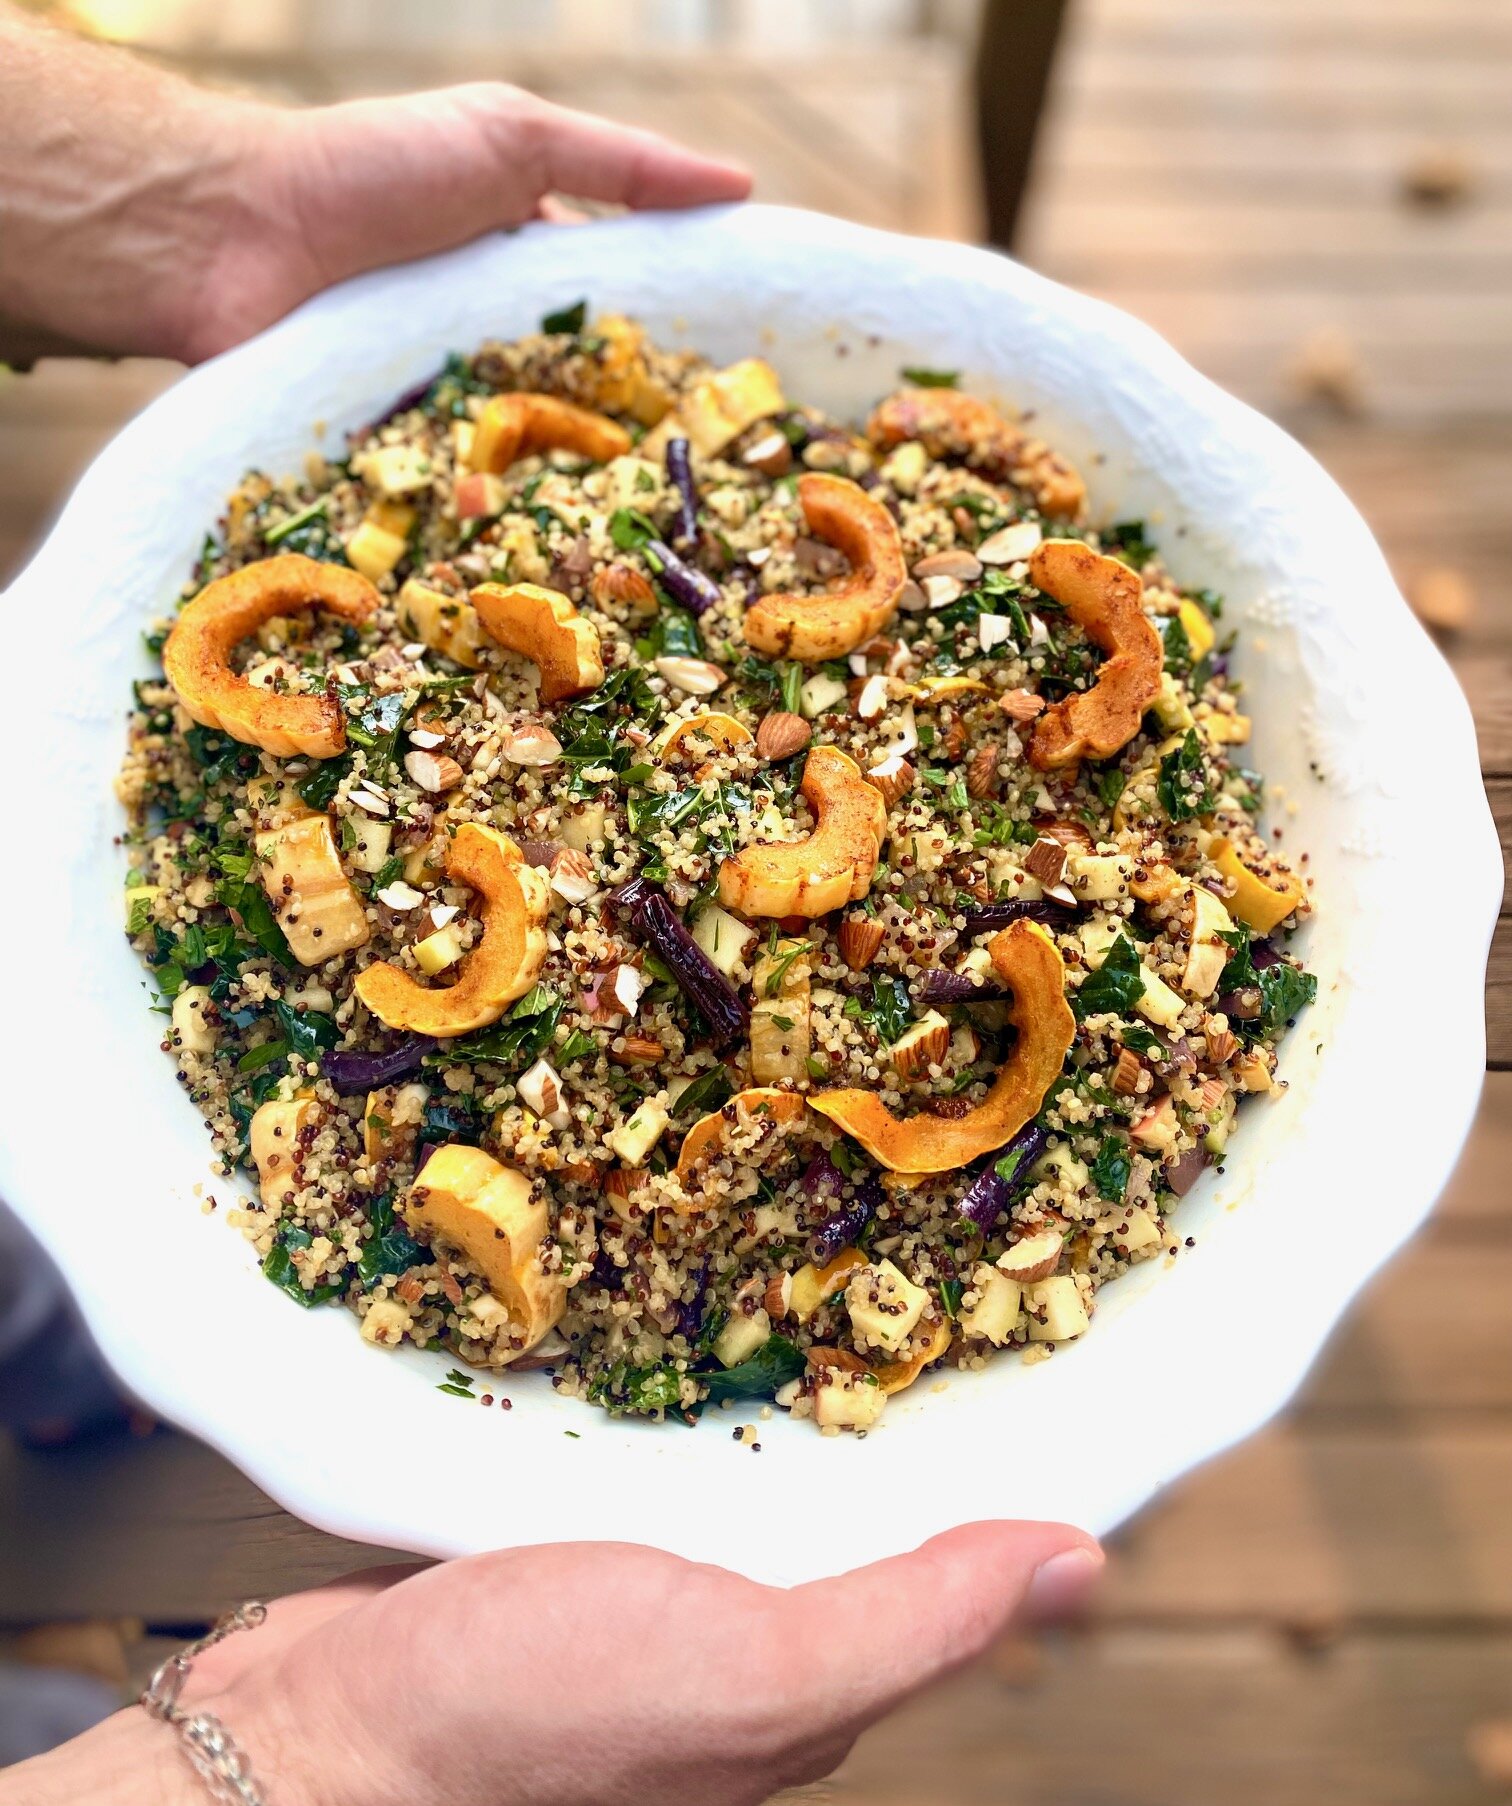
Quinoa & Kale Salad with Delicata Squash, Apples & Apple Cider Vinegar Vinaigrette

This salad is a great dish for fall, which has a hearty grain base (feel free to use rice or lentils instead) which are packed with protein, and they store well in your fridge so you can enjoy leftovers for days. A note that if you don’t have delicata squash, you can substitute with any other kind of winter squash or sweet potatoes.

IMG_6489.jpg

QUINOA & KALE SALAD WITH DELICATA SQUASH, APPLES & APPLE CIDER-MAPLE VINAIGRETTE

INGREDIENTS

For the Salad

  • 3-4 cups cooked quinoa (or other grain like brown rice, lentils, etc)

  • 2 delicata squash (or any other winter squash or sweet potatoes), halved, seeded, and cut into 1/2" thick half moons

  • Olive oil

  • 1 bunch kale, de-stemmed and roughly chopped

  • 1-2 apples, diced

  • 1/2 cup toasted almonds, roughly chopped

  • 1/4 cup chopped fresh mint

  • 1/4 cup chopped fresh parsley

For the Vinaigrette

  • 3/4 cup extra virgin olive oil

  • 1/4 cup apple cider vinegar

  • 2-3 tablespoons dijon mustard

  • 2-3 tablespoons maple syrup

  • 1 clove garlic, minced

  • Salt and pepper to taste

PREPARATION

  1. Preheat oven to 400F.

  2. Slice the delicata squash (or whatever winter squash you’re using) in half lengthwise and scoop out the seeds with a spoon. Slice the squash in 1/2” thick half moons and toss together on a rimmed baking sheet with a few tablespoons of olive oil and some salt + pepper. Roast until tender and beginning to brown, about 20-30 minutes, tossing the squash at least once halfway through baking. When the squash is fully cooked and delicious, remove from oven and set aside.

  3. While the squash is roasting, cook your quinoa (basic quinoa cooking tips here) and add 3-4 cups of your cooked quinoa to a large salad bowl (note that I usually start with 2 cups of uncooked quinoa for this dish).

  4. Make the vinaigrette by adding all your ingredients into a jar and shake vigorously until emulsified. TASTE the vinaigrette and make adjustments as needed (you want to have a good balance between salt, sour, and sweet).

  5. Next add your de-stemmed and chopped kale to the salad bowl with your cooked quinoa, and add a few tablespoons of the vinaigrette on top of the kale and use your hands to gently massage the kale with the vinaigrette (this helps break down the kale a bit). Now add the roasted delicata squash, chopped apples, almonds, mint, and parsley to the salad bowl, pour in more of your vinaigrette and toss everything together. NOTE that you may not need to use all of the vinaigrette that you made - it’s up to you how much you want to use!

  6. TASTE and adjust seasoning to the salad as needed – you may want to add more salt or apple cider vinegar to give the salad a bit more punch.

Elote Salad

Today I’m sharing fresh take on Elote, which is a traditional Mexican street food of charred corn on the cob, topped with a creamy mayo sauce, chilis, cotija cheese, lime, and fresh herbs. Don’t get me wrong, I’m all about digging into sweet corn straight from the cob, but sometimes, you don’t want to deal with all the corn bits stuck in your teeth.. ya know? Enter this recipe for Elote Salad, which features all the classic Elote ingredients, but is made by first removing the corn kernels from the cob and charring them in butter (or oil) before combining with the other ingredients. I’ve also taken the liberty of adding some shredded purple cabbage to the dish, for a little added color + crunch. This recipe is pretty loose, so use what you’ve got / feel free to mix it up! Recipe adapted from Serious Eats.

Elote Salad

INGREDIENTS

  • 2 tablespoons butter (or vegetable or olive oil)

  • 5 ears fresh corn, shucked, kernels removed (about 3 cups fresh corn kernels)

  • Kosher salt

  • 1 cup finely shredded purple cabbage

  • 1/4 cup feta or Cotija cheese, finely crumbled

  • 1/2 cup finely sliced scallions, green parts only

  • 1/2 cup fresh cilantro leaves, finely chopped

  • 1/2 of a jalapeño pepper, seeded and stemmed, finely chopped

  • 1-2 cloves garlic, pressed or minced on a Microplane grater

  • 3 tablespoons mayonnaise

  • 2 tablespoons freshly squeeze lime juice, plus more to taste

  • Chili powder or hot chili flakes, to taste

PREPARATION

  1. Heat butter or oil in a large nonstick skillet over high heat until shimmering. Add corn kernels, season to taste with salt, toss once or twice, and cook without moving until charred on one side, about 2 minutes.

  2. Toss corn, stir, and repeat until charred on second side, about 2 minutes longer. Continue tossing and charring until corn is well charred all over, about 10 minutes total. Transfer to a large bowl.

  3. Add shredded cabbage, cheese, scallions, cilantro, jalapeño, garlic, mayonnaise, lime juice, and chili powder and toss to combine. Taste and adjust seasoning (possibly adding more salt, mayo, lime juice, chili flakes, etc) to taste. Serve immediately.

Homemade Ground Pepper Powder

IMG_6058.jpg

Making your own ground pepper powder is ridiculously easy – all you need are some peppers, an oven, a few hours of patience, and a spice grinder or food processor. If you have a dehydrator, you can totally use it to dry out the peppers – I’m using the oven here because I know not everyone has a dehydrator, and I can dry bigger batches of peppers using an oven.

For this recipe, I used cayenne peppers, but you can absolutely use whatever peppers you have on hand. Not only will these be the freshest spices you’ve ever cooked with, but they make wonderful gifts!

DIY GROUND PEPPER POWDER

INGREDIENTS & MATERIALS

PREPARATION

  1. Preheat your oven to 180F.

  2. Cut off the stems and any bad spots off each pepper. If you would like to have less heat in your powder, slice each pepper in half lengthwise and use a spoon to remove the pith/membrane and seeds (I usually skip this step). Place your prepped peppers on a baking sheet(s) in a single layer.

  3. Place the peppers in the warm oven and bake until they are fully dried, checking them every so often to ensure they aren’t burning. The amount of time will vary based on the peppers you’re using – it usually takes about 3-4 hours for cayenne peppers to dry.

  4. Once the peppers have cooled, place them in batches in your spice grinder and pulse until at the desired powder consistency. Voila! You now have homemade pepper powder. Store in an air tight container for up to 6 months for maximum freshness – or you can freeze to keep even longer!

Simple Summer Gazpacho

Let’s talk gazpacho! There are so many different variations on this chilled summer soup, but it’s culinary roots can be traced back to Spain and Portugal.

At its most basic, a gazpacho is a chilled soup made of ripe summer tomatoes blended with peppers, cucumber, shallots/onion, and garlic, and seasoned with vinegar and good olive oil. Many traditional recipes also call for some day-old bread blended in with the veggies for some extra body, though it’s totally up to you (I omit the bread as I like to keep everything veggie-centric). Some gazpachos are blended to be completely smooth, while others are part blended / part diced veggies for some extra texture and crunch.

Here is my basic recipe for gazpacho, but you totally can (and should!) get creative and make this soup your own, using whatever summer veggies/herbs/fruits you have on hand.

Simple Summer Gazpacho

INGREDIENTS

  • 3-4 lbs ripe heirloom, slicer, and/or cherry tomatoes (4-5 cups chopped)

  • 1-2 cucumbers (1-2 cups chopped)

  • 1-2 bell peppers, any color (about 1 cup chopped)

  • 1 shallot or 1/2 red onion (about 1/2 cup chopped)

  • 1 clove garlic

  • 1/4 cup fresh basil leaves

  • 2 tablespoons red wine or sherry vinegar

  • 1/4 cup olive oil

  • Kosher salt and freshly ground pepper

PREPARATION

  1. Prepare your ingredients by roughly chopping all of the tomatoes, cucumber, bell peppers, shallot/onion, garlic, and basil and combine in a blender or food processor and blend until smooth. NOTE: If you’d like some extra texture/crunch for your gazpacho, set aside some of the tomato, cucumber, bell pepper and shallot/onion and chop in a small dice, which you can add to the blended portion of the soup later.

  2. Add the vinegar, olive oil, kosher salt (start with 3/4 teaspoon), freshly ground pepper, 1/4 cup fresh basil leaves and blend all of the ingredients until smooth. Taste and adjust seasoning as needed – you may want to add more salt or vinegar to really make all the flavors pop.

  3. Stir in your diced veggies (if using) into the blended portion of the soup and chill in your fridge for 1-2 hours before enjoying (if time allows).

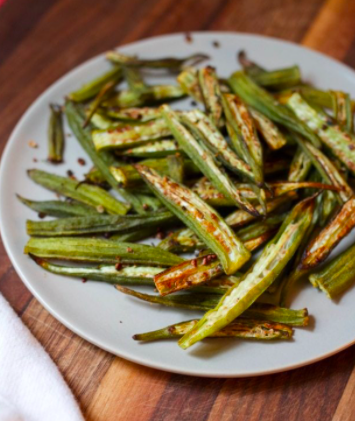
Crispy Roasted Okra

Okra is a summer veggie that keeps you on your toes… the pods start coming in at a trickle, and with each passing week the harvests begin to slowly (but exponentially) increase… and by the time late July rolls around, the okra goes GANGBUSTERS.

Okra has a reputation for being “slimy” – which isn’t inaccurate! My general philosophy for getting the most enjoyment out of okra is to either A) embrace the sliminess and make a stew/sauce (like this stew), or B) get rid of any hint of slime by roasting/grilling/broiling the pods at a high heat.

Today I’m going to share a recipe for the latter strategy, for simple roasted okra – which I LOVE to pair with some romesco sauce. This is a “no recipe” kind of recipe… just 4-5 ingredients and 15ish minutes in a hot oven, and you’re ready to dig in.

CRISPY ROASTED OKRA

Screen Shot 2021-07-20 at 6.49.39 PM.png

INGREDIENTS

  • 1 pound okra

  • 1-2 tablespoons olive oil

  • Kosher salt, to taste

  • 1 teaspoon paprika

  • Dash of wine wine vinegar or a squeeze of lemon juice

PREPARATION

  1. Preheat oven to 450°F.

  2. Cut the thicker stem end off each okra pod, then cut the okra in half lengthwise and place on a rimmed baking sheet.

  3. Add the olive oil, salt (I usually start with 1/2 teaspoon), and paprika, and use your hands to toss and coat the okra halves. Roast in your oven for 15-20 minutes, stirring the okra twice while cooking for even browning. The okra is ready when it is tender and lightly browned/crispy.

  4. Right when the okra comes out of the oven, add a splash of white wine vinegar or a squeeze of lemon juice for a little extra zip. Taste and add more salt and pepper if needed. Enjoy right away while hot for maximum crispiness!