June 10

Farm Notes

Goodness gracious, it’s been an eventful week around here! Last weekend we snuck away to the beach for a friend’s wedding, and it was so nice to get off the farm and dip our toes in the cold ocean for a bit. Though of course, we had some excitement waiting for us when we got home… we came to find that we had NO water to our house or to the farm, and it took a while to figure out the problem. Long story short, we had to call in an emergency electrician, and after quite a bit of stress the problem was fixed, and hallelujah we have water back! Never again will I take for granted how easily we are (usually) able to access water… it really is one of our most precious resources.

Oh! And did I mention that when we got home on Sunday, I also found that we had caught a groundhog (that had been munching on all our okra..)? THAT was fun. We also have a sweet baby who is so darn wonderful, but who happens to also be teething terribly and has decided that he absolutely does not want to nap during the day, so that has also been an adventure to navigate!

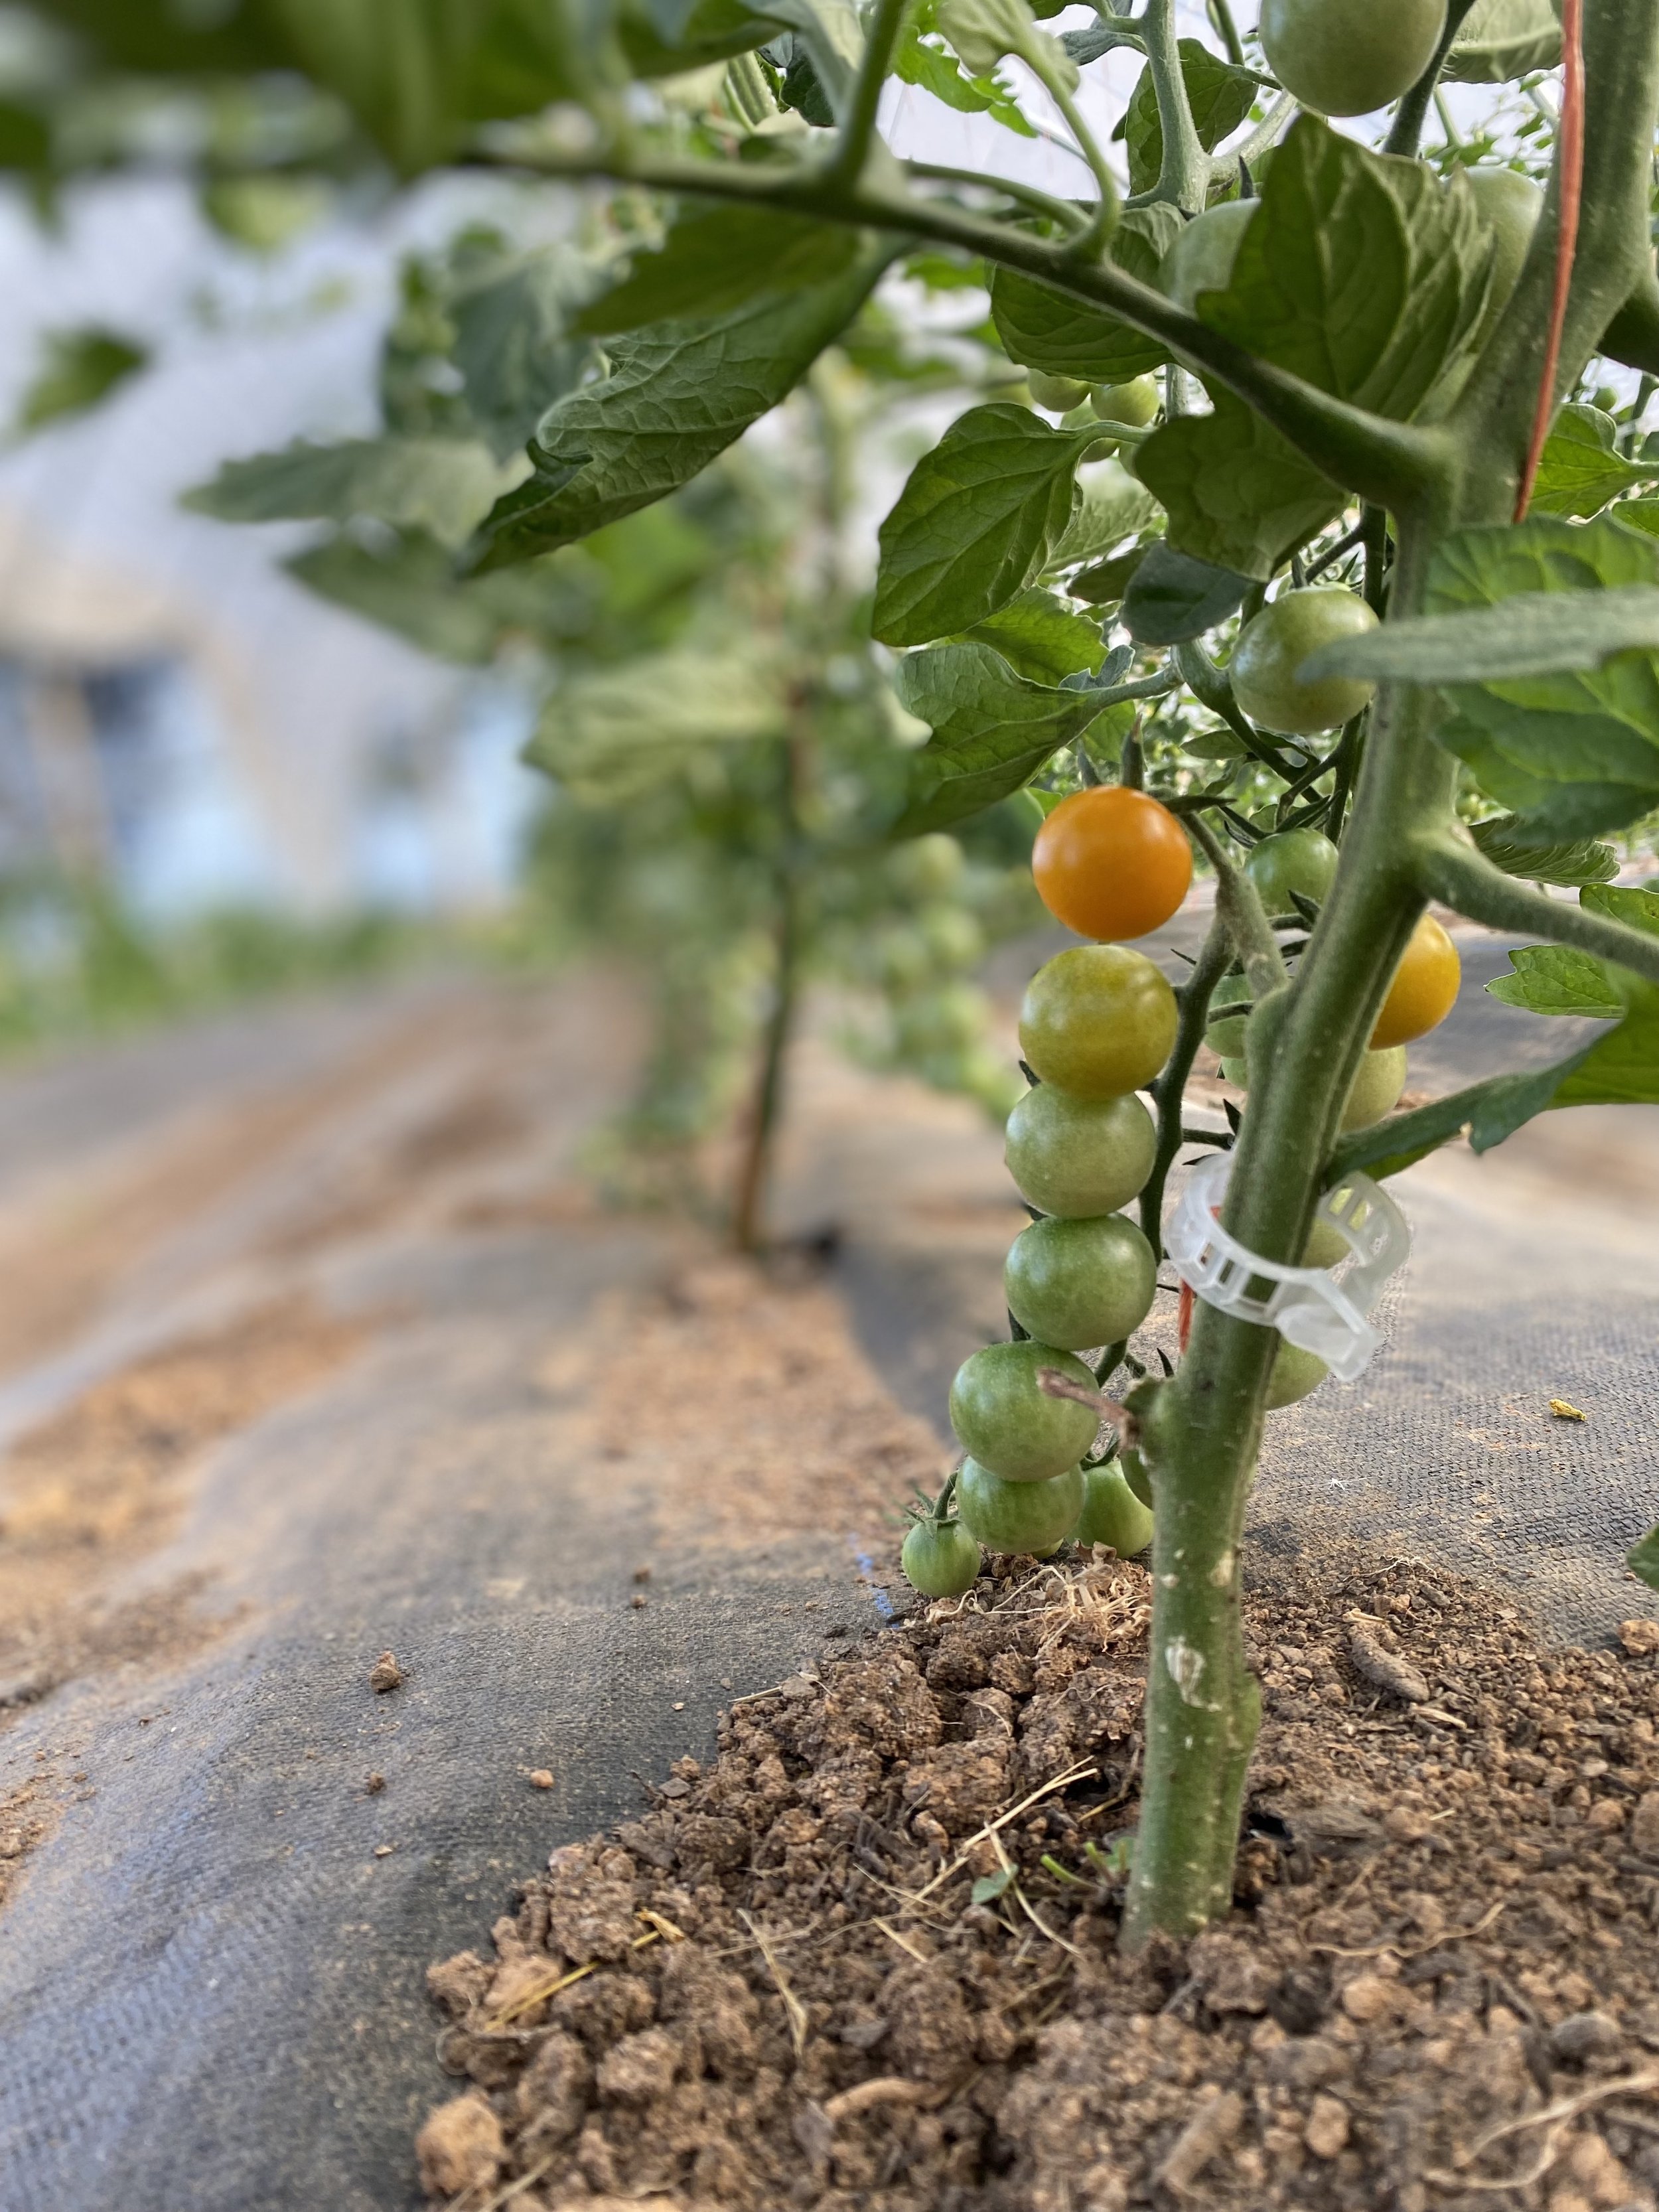
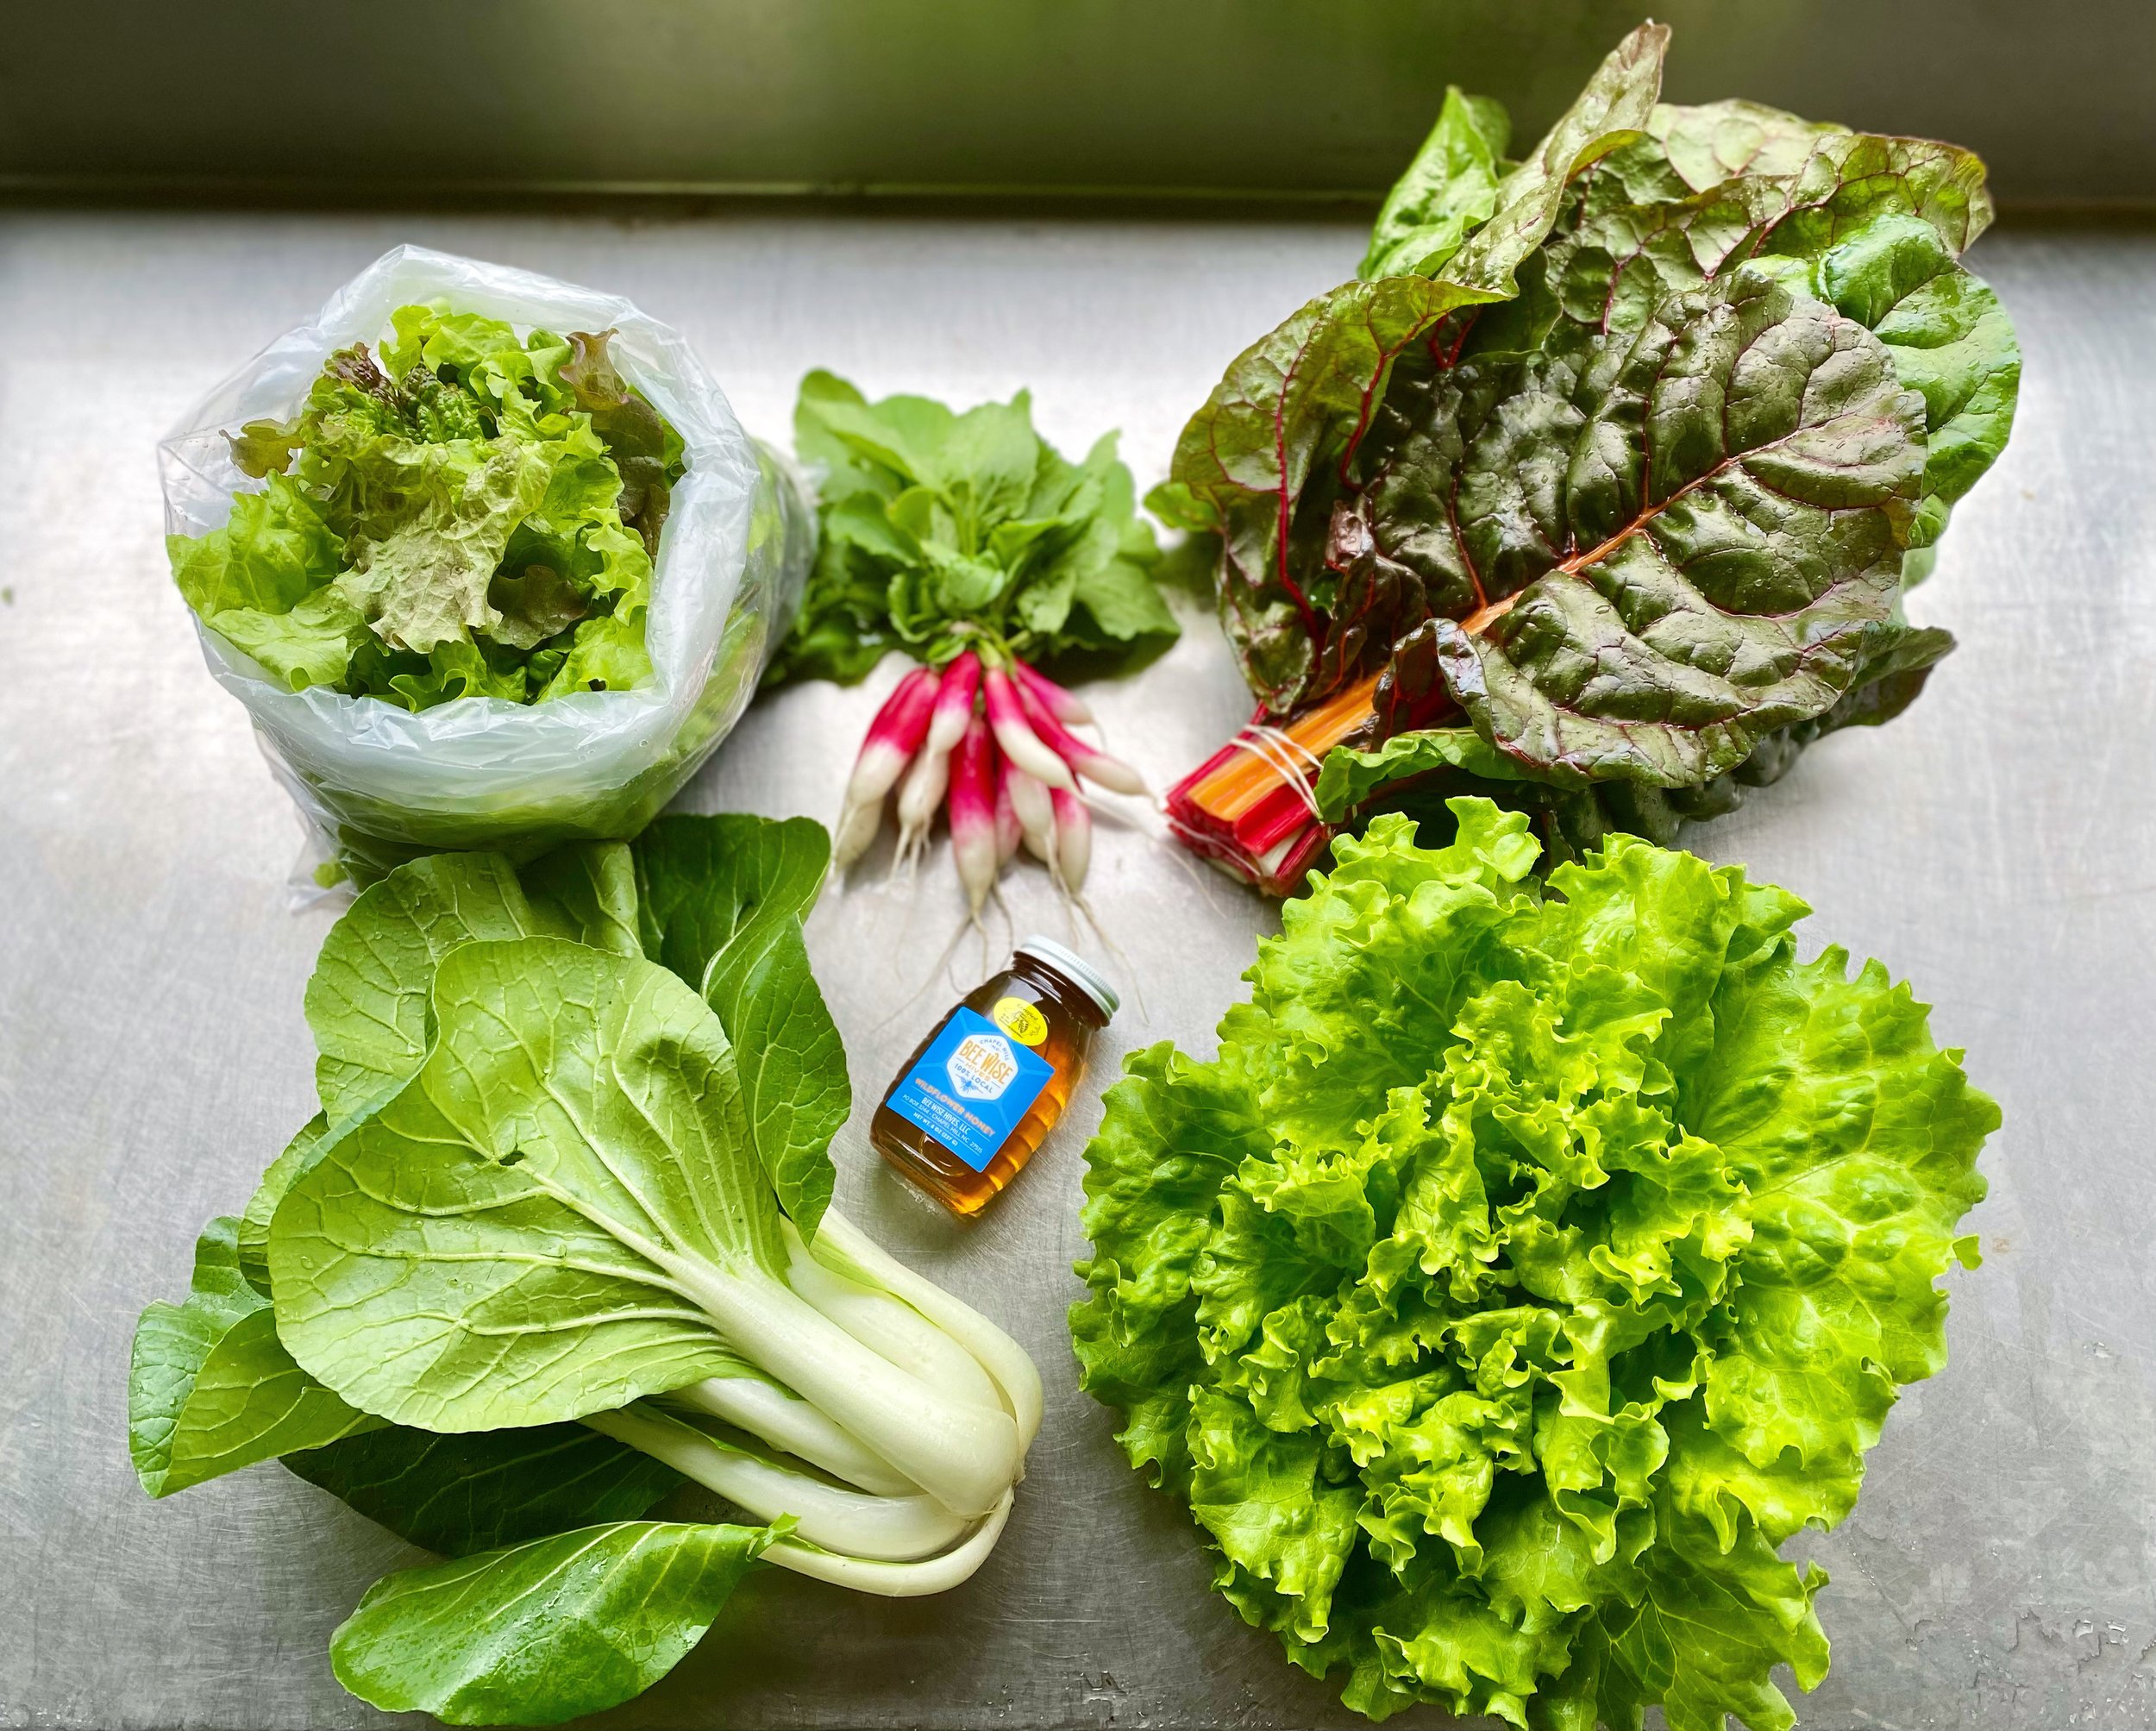
On the bright side, all of our summer veggies have taken off, and a large chunk of my farm work these days is just spent harvesting… tomatoes, potatoes, zucchini, peppers, eggplant, etc. This week we kicked off our 10-week Summer CSA, and it was a bountiful and delicious start to the summer season.
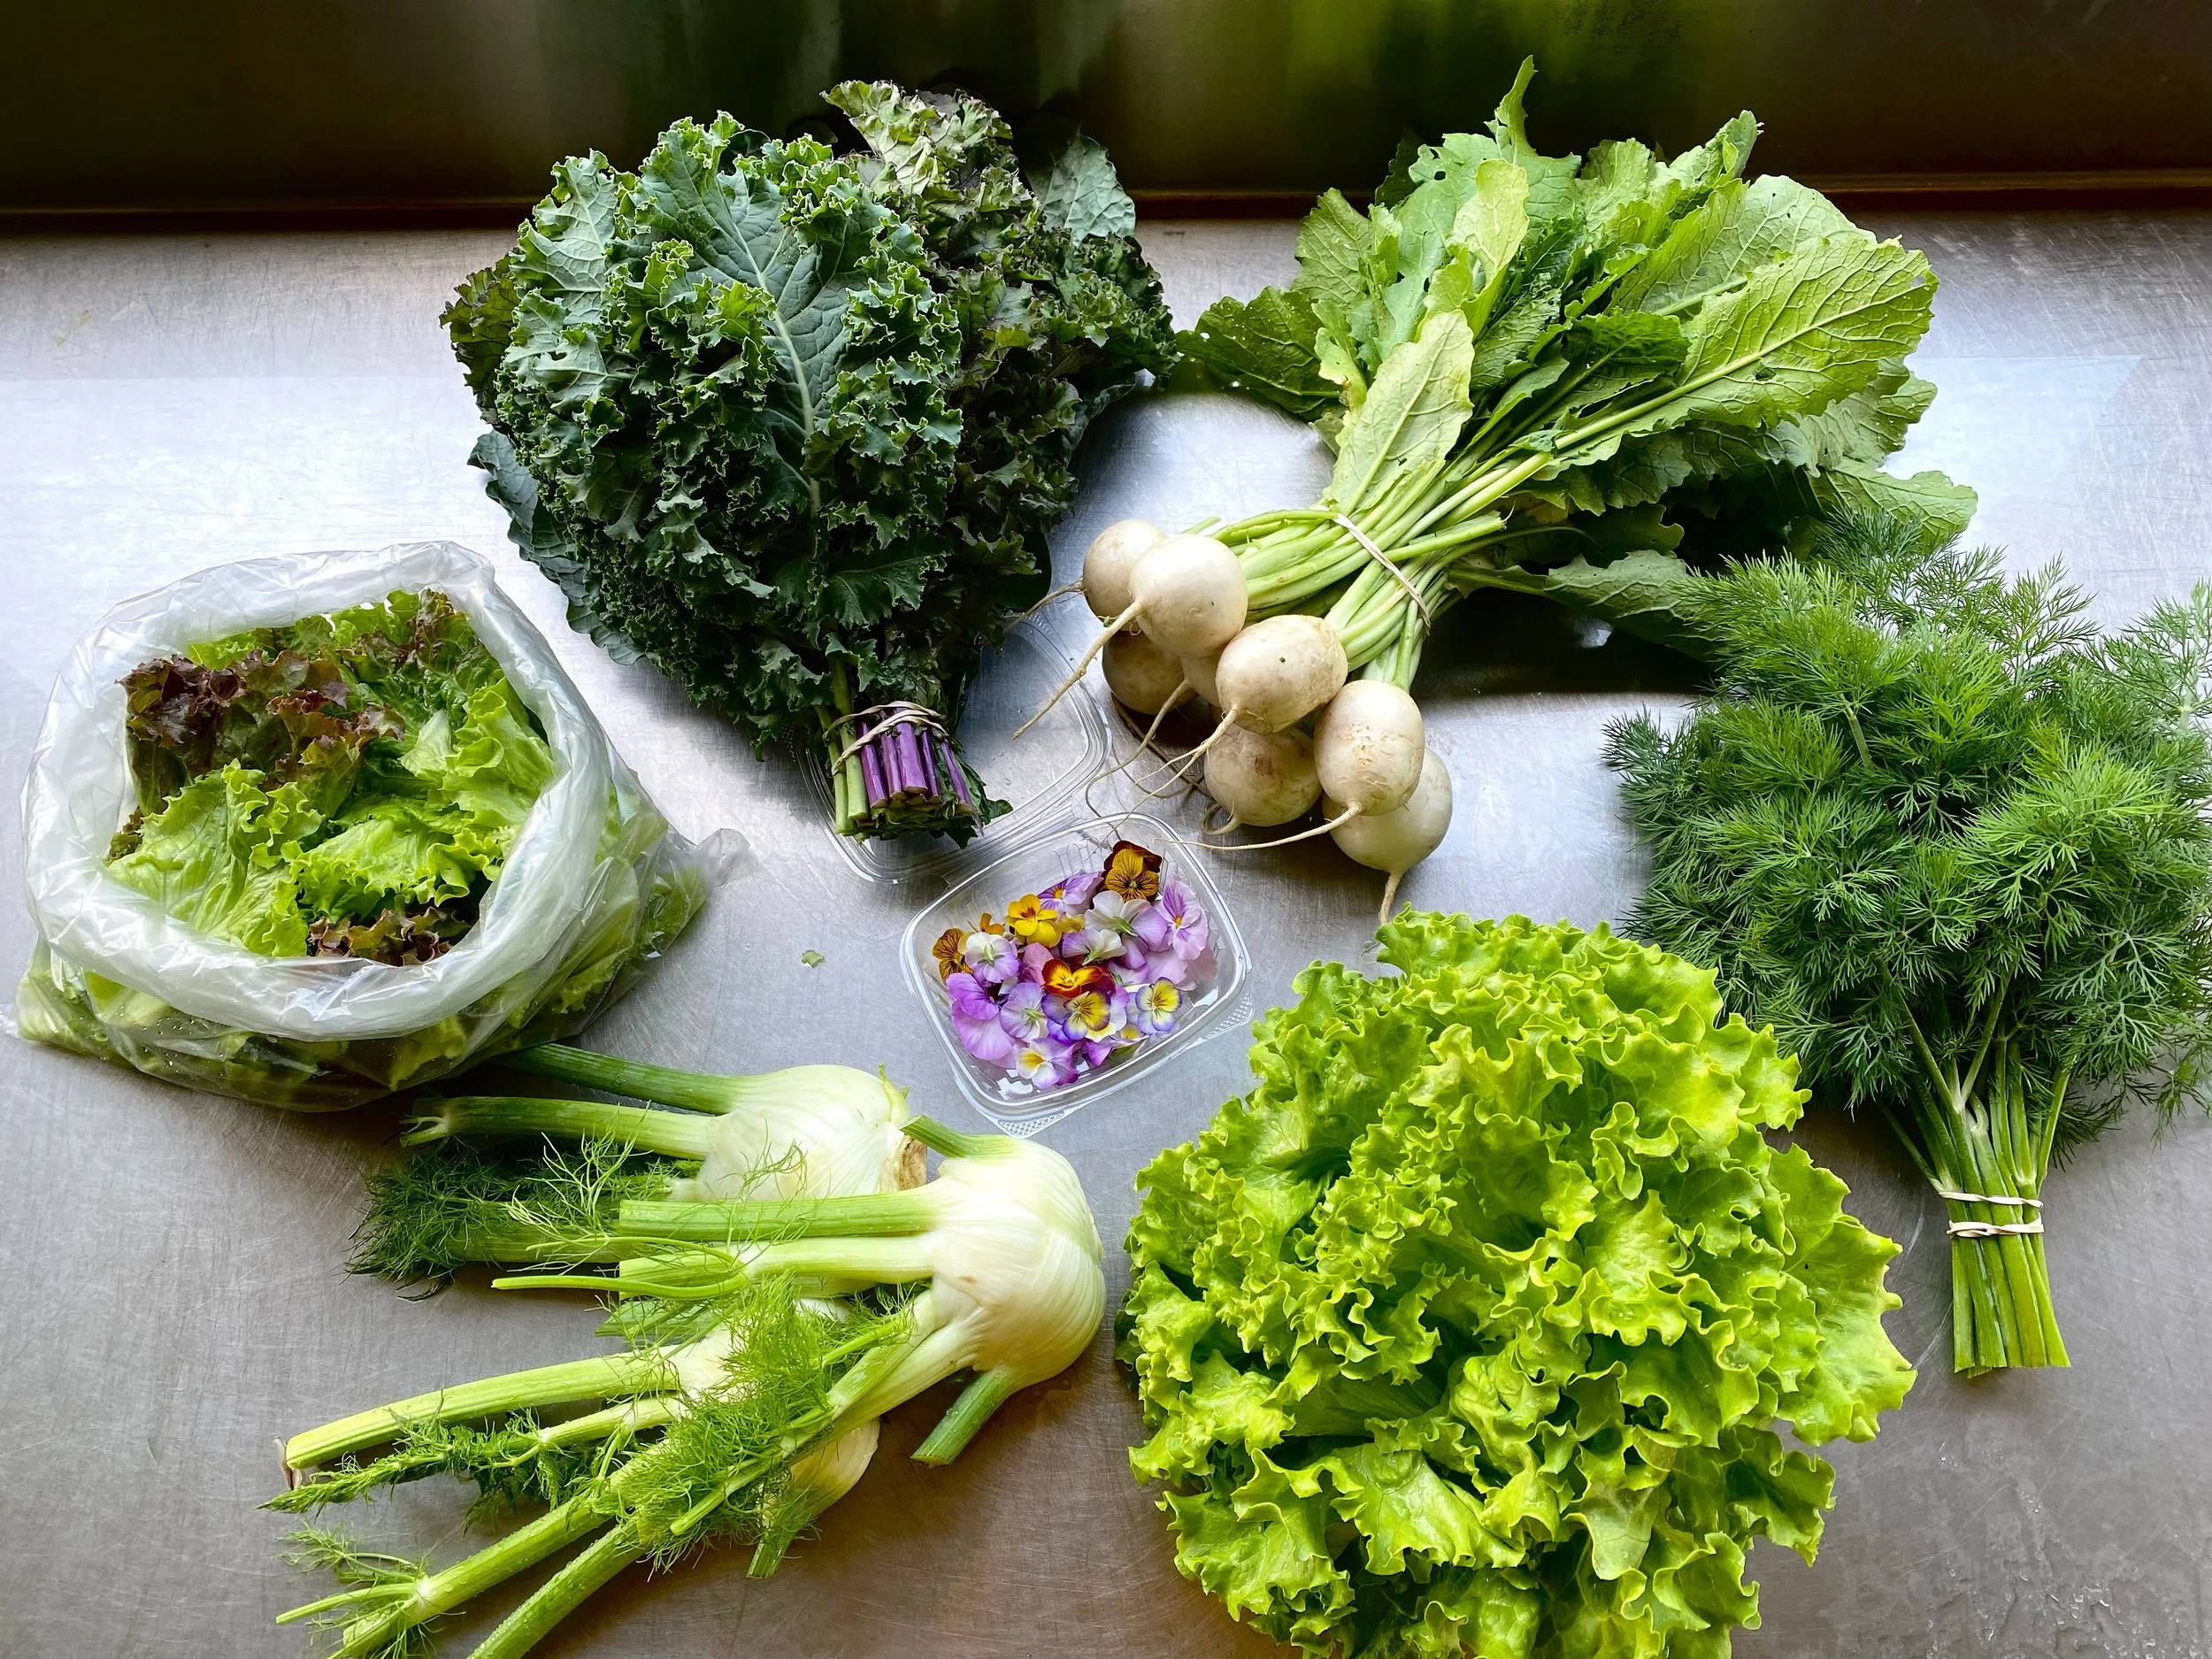
Summer CSA Week 1

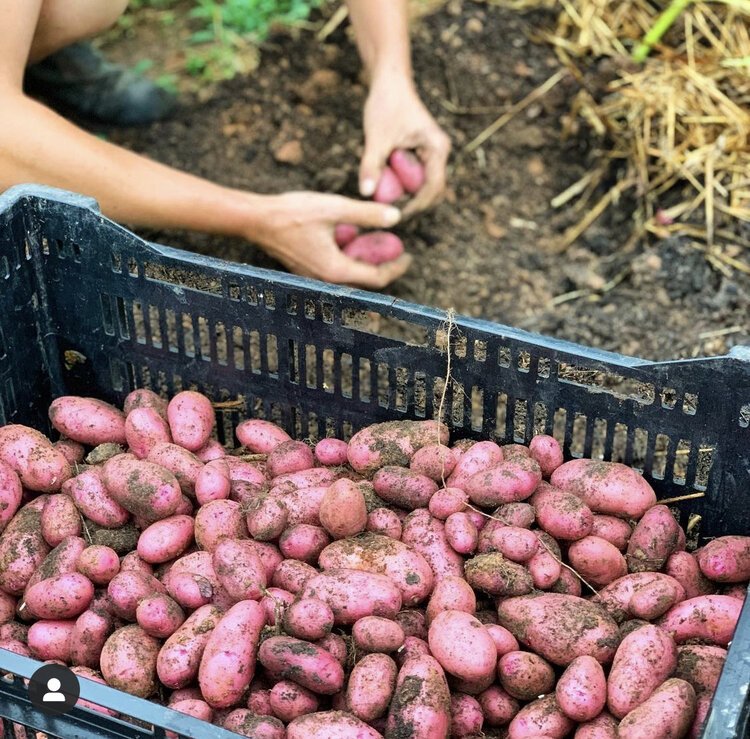
Over the past week or two, we’ve been digging up our potatoes, and goodness gracious they are beautiful. We grew 6 or 7 different varieties this year, and so far my favorite is Gold Nugget (pictured below). They are SO prolific, have beautiful color and shape, and most important of all – they are so dang delicious. Definitely going to grow a lot more of this variety in years to come!

Freshly dug Gold Nugget potatoes

A few notes about harvesting potatoes… the time to harvest is typically after the potato plant has flowered and the foliage begins to turn brown and die off. I like to carefully pull up the plant, and then use my hands to dig around a few feet deep (and across the bed) to dig up any tubers that may be hiding.

After harvesting, you’ll also want to cure your potatoes for 10-14 days. Potatoes like to cure in a dark, humid, and cool environment (around 45-60F)... your fridge may be a little colder than is ideal, but it will work in a pinch! I usually keep the dirt on while the potatoes are curing, and don’t wash until I’m ready to eat them.

Why go the extra step of curing? Curing helps to thicken the skin of the potatoes, and it slows the respiratory rate – which will allow the spuds to store longer.

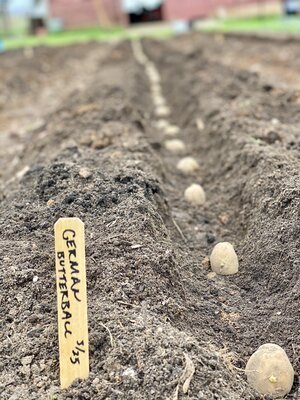
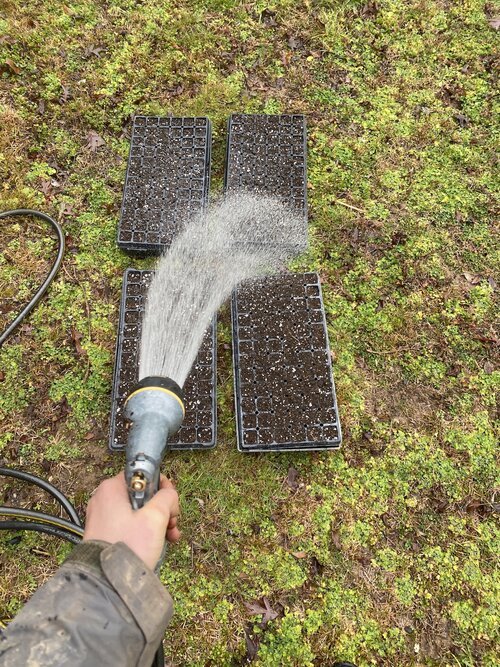
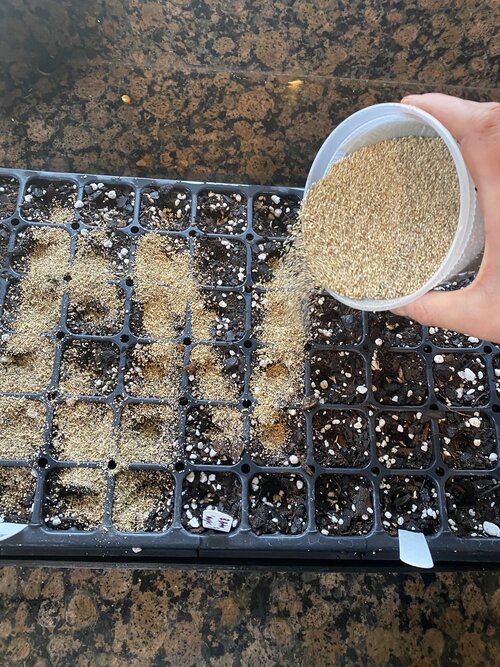
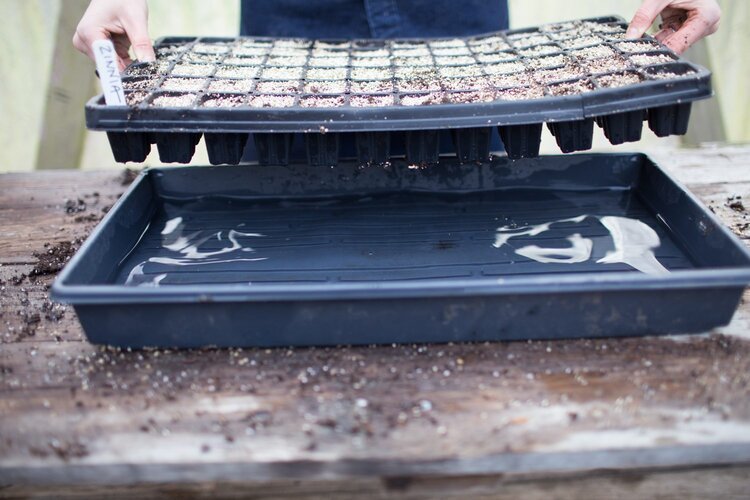
As for the many other tasks that have been keeping us busy around the farm... we've been working to keep up with the weeds, pull out our spring brassica plants, and to stay on top of pruning + trellising all the tomatoes, peppers, eggplant, and cucumbers! For a full farm update and some trellising tips, be sure to watch my virtual farm walk from today – you can watch via our Facebook Group HERE or at our Google Drive folder HERE.

In other news, it’s time to announce the winner of our most recent giveaway! CONGRATS Wendy Royce! I’ll be in touch with you directly to send you your new Victorinox chef knife. :)

Kitchen Notes

These days, I pretty much always have some kind of herby, lemony, garlicy yogurt sauce on hand, and I put it on EVERYTHING… roasted veggies! raw veggies! chicken! fish! toasted bread! This is a no-recipe kind of recipe (and as an added bonus, it comes together in about 5 minutes), so just use whatever herbs you have on hand, and in whatever quantity feels good to you.

Herby, Lemony, Garlicy & Good On Everything Yogurt Sauce

Photo credit: Super Safeway

INGREDIENTS

  • 2 cups plain greek yogurt

  • 1/2 to 1 cup chopped fresh herbs (I like a combination of parsley, basil, dill, mint, chives, etc)

  • Juice + zest of 1 lemon

  • 1 clove garlic, minced

  • 3 tablespoons olive oil

  • Salt & pepper, to taste

PREPARATION

  1. Scoop the yogurt into a medium sized bowl, and simply stir in all the remaining ingredients.

  2. Taste and make adjustments as needed! Want more herbs? Throw a few more in! Needs more acid? Add more lemon! You get the idea. :)

Today’s Stats

  • Low temp: 63F

  • High temp: 85F

  • Sunrise: 6:00am

  • Sunset: 8:34pm

  • Moon phase: Waxing Gibbous

  • Additional notes: Sunny & warm

May 27

Farm Notes

Well friends, it's been quite a roller coaster of a few days over here! Over the past week, our family weathered COVID just fine and we are officially negative again… but as soon as we all got over that, I got really sick with an infection that completely knocked me out. Thankfully we’ve addressed the infection and I’m taking all the necessary steps + medicine to get back on my feet soon… and once again, our village has stepped up this week to pull off our CSA with me on the sidelines! I’ll be honest that May is usually my favorite month of the year, but this time around everything has just felt… hard. I'm hopeful that as we head into a new month, things will start looking up, get a little easier, and everyone will stay healthy!

Despite the tough few days around here, this week’s CSA (our last week of the 8-week Spring session) is one of our most beautiful + bountiful yet. While the early weeks of our Spring CSA are dominated by greens, greens, and more greens – this time of year, we’re harvesting a way wider variety of veggies like carrots, cabbage, broccoli, sugar snap peas, beets, and the first itty bitty zucchini!

CSA Week 8 Full Shares

Next week we will take “off” the CSA, and then our Summer CSA starts the week of June 6th. Our cherry tomatoes are already ripening, so I have a good feeling tomatoes will find their way into the first Summer shares! Local friends – if you are signed up for our Summer CSA, I will be in touch next week to confirm your pick up day and location. All of our small shares are sold out, but if you know anyone who might be interested in a Full Share this summer, please point them to my website!

In another exciting piece of news for our local friends, you get first dibs on our next workshop hosted here at the farm – Eat Like a Farmer Workshop on Saturday, June 25th! This is one of our most popular Farmbelly classes, and it’s perfect for anyone looking to sharpen up their knife skills and learn more about growing, sourcing, preparing, and cooking with seasonal and local produce. This workshop is part demonstration and part hands-on, and everyone will help harvest veggies from the farm and make two vibrant seasonal salads that we will enjoy together. More details and tickets HERE.

Okay, last but not least… it’s time for our May giveaway! This month is a GOOD one… I’m giving away my favorite chef knife from Victorinox. This is an awesome everyday chef knife that is light, easy to use, lasts forever, and is hands down my most used kitchen tool.

TO ENTER THE GIVEAWAY – There are two ways that you can enter this giveaway (just choose 1):

  1. Comment on this post in our private Facebook Group and share what kitchen tool you couldn’t live without! If you aren’t already a member of our private Facebook Group, just request access here.

  2. OR Click the “Comment” button at the bottom of this journal entry and share what kitchen tool you couldn’t live without.

You have until Thursday, June 2nd @ midnight to enter, and I’ll announce one randomly selected winner on Friday, June 3rd.

Kitchen Notes

This week we harvested the very first of our zucchini/summer squash, which was a major relief for me! Earlier this spring I had pretty much given up on our zucchini crop (as the young plants just looked terrible) – but low and behold, they have bounced back and now the zucchini is pumping out heaps of gorgeous fruit.

This is a quick, colorful salad made for hot summer days and you don’t feel like turning on your oven or stove! For this recipe, it’s best to use small to medium sized squash, as larger squash will have tougher skin and larger seeds. This recipe is lightly adapted from the cookbook 'Ruffage' by Abra Berens.

Shaved Summer Squash With Herbs, Lemon & Parmesan

INGREDIENTS

  • 2-3 summer squash, shaved thinly into 1/8" slices (I like to use a mandolin)

  • 1 cup assorted coarsely chopped herbs

  • 4 oz Parmesan cheese, peeled into ribbons

  • 1 teaspoon kosher salt

  • 1/2 teaspoon freshly ground black pepper

  • Between 1/4 - 1/2 cup olive oil

  • 2 tablespoons lemon juice

PREPARATION

  1. Toss together the shaved squash, chopped herbs, Parmesan ribbons, salt + pepper, 1/4 cup of the olive oil, and the lemon juice.

  2. Taste and adjust the seasoning, adding more olive oil and/or lemon juice as needed to make it well dressed and flavorful.

  3. Serve within the next 30 minutes. If serving later, shave the zucchini in advance but dress just before serving (as the salt will cause the zucchini to release a lot of moisture).

Today’s Stats

  • Low temp: 60F

  • High temp: 76F

  • Sunrise: 6:03am

  • Sunset: 8:25pm

  • Moon phase: Waning Crescent

  • Additional notes: Cool and rainy

May 20

Farm Notes

I often say that running a farm (and raising a baby) takes a village, but let me tell you… this week, it REALLY took a village! Our CSA this week was brought to our members *entirely* thanks to a crew of Farmbelly team members, neighbors, and friends old + new – as baby Sawyer, Matthew, and I all tested positive for COVID on Monday evening, and since then we’ve been hunkered down and feeing downright crummy. We aren’t sure how/where we were exposed, and even after 2.5 years of being very careful and cautious, I guess at some point it was bound to happen!

Needless to say, I’m incredibly grateful for our village who have stepped up and helped us get through a really tough week. It was humbling to see that even with me on the sidelines, this little farm keeps humming along and keeps cranking out some beautiful veggies for our community.

CSA Week 7

While I wasn’t involved with the CSA this week out of an abundance of caution for our members, there are still plenty of other farm chores that I have been tackling solo. From trellising tomatoes to weeding to planting our first succession of green beans… let’s just say even when I’m not feeling my best, it’s tough to force me to sit still.

One of the tasks I was able to accomplish was getting most of our winter squash went in the ground. Last year we really struggled with all our cucurbits (pests, fungus, bad luck, stupid mistakes on my part, etc) and this year I am bound and determined to get a better winter squash harvest.

For one, I did more research on varieties that tend to do well in our hot, humid, pest-ridden climate - and I learned about a variety called South Anna Butternut (pictured here) that I’m excited to try. In addition to South Anna butternut variety, we are growing 3 kinds of delicata squash, 2 kinds of acorn squash, 3 varieties of baby butternuts, and a few standard butternuts. Fingers crossed that this season will be a bumper crop!

That’s all for this week friends… time for some rest (which we already know I’m not very good at…) and cuddles with baby Sawyer. Stay safe and stay healthy out there, and take care of your village!

Kitchen Notes

I’ll be real honest, there hasn’t been much cooking going on around here this week! The one thing that I’ve had the energy/inspiration to make this week has been my Spring Quinoa Tabbouleh Salad. This salad absolutely never disappoints, lasts for days in the fridge, and I just use whatever veggies + herbs I have on hand… it’s a super flexible recipe, so go wild and make it your own! I’ll be back next week with a new recipe, I promise. ;)

Today’s Stats

  • Low temp: 69F

  • High temp: 95F

  • Sunrise: 6:07am

  • Sunset: 8:20pm

  • Moon phase: Waning Gibbous

  • Additional notes: HOT and sunny

May 13

Farm Notes

It’s finally that time of year when the fruits of the farm get a lot more colorful! This week’s CSA was a bounty of rainbow-colored veggies.. from beets to carrots, turnips, broccoli, fennel, cabbage, etc. And before we know it, summer tomatoes, peppers, and eggplant will be rolling in! But for now, I’m loving this window of spring when greens are still plentiful, but we also have an abundance of heavier root crops and robust brassicas like cabbage and broccoli. It’s a good thing that my arms are getting strong from carrying around a 20lb baby all the time… cause these boxes are getting heavy!

Week 6 Full CSA Share

I’ve gotta say that veggie I’m most proud of this week is our carrots. Honestly, I’d kind of forgotten about them till last week, when I decided to dig a few up to see how they were doing… and what would you know, we had some gorgeous and fully grown carrots in there! Carrots can be especially tough to grow in NC’s clay-heavy soils, but every year we add more compost and organic matter to our beds, and every year our carrots look (and taste!) better and better.

PS – A pro tip when it comes to cooking with carrots… if your carrots come with greens still attached, make sure you cut those tops off ASAP when you get home! The tops will draw precious moisture out of the roots an leave you with sad, floppy carrots. This goes for pretty much any kind of root veggie…. take those tops off to ensure your roots stay nice and crisp. Carrot tops are also edible, though they can be a bit bitter… my favorite uses for them are incorporating them into a pesto, or making carrot top gremolata.

In other news, this week we finally started planting in our new perennial garden space! After living in my head for the past 6+ months, it felt so good to get some plants in the ground and to see this garden start taking shape (see photos below). I’ll give a full tour + description of everything we’re planting in this garden in another week or two once we get it fully planted, but so far we’ve planted a bunch of culinary herbs (rosemary, thyme, oregano, marjoram, sage, lemon balm, lemon verbena), some edible flowers (calendula and nasturtiums) and some fun zinnias – and LOTS more to come.

Last but not least… tomorrow I’m SO excited to host our first workshop here at the farm in over two years! Back in the day, I used to teach cooking classes almost every week, and I’ve definitely missed the amazing energy and connections that come with gathering people together around good food. Tomorrow’s class is all about herbs, aka one of my very favorite things to grow + cook with, so I have a feeling it’s gonna be a good one. :)

For a full tour of the farm this week, check out my virtual farm tour from today HERE on Facebook or in our google drive folder HERE.

Kitchen Notes

While we have carrots on the brain… today I’m sharing one of my absolutely favorite recipes of all time. Seriously! It is that good. Whenever I have people over and want an extra yummy dip that is delishhhh with crackers or veggies or bread, I make this Roasted Carrot Hummus and it’s always a hit. The roasted carrots take the place of the chickpeas (traditionally found in hummus), and roasting them first with whole spices gives this dip an irresistibly nutty and fragrant flavor.

Roasted Carrot Hummus

Photo Credit: Savory Online

INGREDIENTS

  • 3 cups peeled carrots, sliced into 1/2" rounds

  • 4 whole cloves of garlic

  • 1/2 teaspoon whole coriander seeds

  • 1/2 teaspoon whole cumin

  • 6 tablespoons olive oil, divided

  • 1/4 cup tahini

  • 1 tablespoon apple cider vinegar (or lemon juice)

  • Kosher salt, to taste

  • Freshly ground pepper, to taste

PREPARATION

  • Preheat oven to 400F.

  • Combine the sliced carrots, whole garlic cloves, whole coriander and cumin seeds, a pinch of salt, and 4 tablespoons olive oil together on a rimmed baking tray, and toss with your hands to coat the carrots with the spices.

  • Bake in the oven until the carrots are tender, around 30 minutes, tossing once halfway through cooking. Watch the garlic to make sure it doesn't burn.

  • Place the cooked carrots + garlic in the bowl of your food processor. Add the tahini, 2 tablespoons olive oil, apple cider vinegar (or lemon juice), and 1/4 teaspoon salt and a few grinds of pepper. Process until smooth – I usually add another tablespoon or two of olive oil to get the right consistency. Taste and adjust seasoning as needed – I usually add another 1/4 teaspoon salt. Enjoy!

May 6

Farm Notes

Holy guacamole, how is it already MAY?! Last week, we were away visiting my family in the midwest for a few days, and I swear everything (including the weeds…) grew a foot while we where gone. It’s always a herculean effort to leave the farm (especially in peak growing season), but it’s always worth it to get away for a few days, and to come back to the farm with fresh eyes and a refreshed spirit.

Yesterday marked Week 5 of our 8-week Spring CSA, and it’s wild to think we are more than halfway through this spring season already! This week I was excited to bring some new veggies into our member’s boxes.. like hakurei turnips, fennel, and some extra gorgeous edible flowers. And coming up next week, it looks like we will have beets, carrots, cabbage, and scallions to the mix – wohoo!

Full size share for Week 5 of our CSA

And while we’re harvesting all these glorious spring greens, we are simultaneously planting furiously for summer. Almost all of our tomatoes, peppers, and eggplant are in the ground, and next week we will (hopefully!) get our okra and first succession of green beans planted. Unfortunately, I’m battling some fungal issues that are wrecking havoc on our zucchini and cucumbers… so fingers crossed they make a come back, or else I’ll need to try another succession elsewhere in the garden (which isn’t easy when every single bed is already called for)!

I’ll be honest – right now, I’m still trying to find the right balance between running the farm and having space for family, friends, doing laundry (lol), etc! Sawyer is just 7 months old, and every day he is growing and changing, and I don’t want to look back and only remember being stressed out and over-worked, especially while he’s in these precious early months. So at the moment I’m working on scaling a few things back, while also seeking a bit more help on the farm during the week (speaking of which, if you’re local and interested in getting paid to work a few hours a week and learn in the dirt with me + get as many veggies as you can eat… please send me a message)!

One of the projects that is looming over my head that I am so excited to work on, but also not sure where I’ll find the time to tackle, is our perennial garden space. There is SO much potential for this new area, but I’m finding it’s a lot to manage in addition to the rest of the farm tasks on my growing list…

Perennial garden in progress

Perennial garden in progress

Alas! These days it feels like everything happens so very slowly but surely… and also all at once. Each week we make a little more progress, and every season will get a bit easier. And so, especially on this Mother’s Day weekend I’m sending extra love to all the caregivers and mothers and mother-figures out there… I see you and I feel your love and your compassion and your exhaustion and I’m cheering you on.

For a full tour of the garden this week, be sure to check out my virtual farm walk from today, either on Facebook Group HERE or our google drive folder HERE.

Kitchen Notes

This week, I’m excited to share a colorful and comforting spring soup featuring vibrant greens and sweet roasted fennel + cauliflower. Adapted from the blog Kale & Caramel.

SPRING GREENS SOUP WITH ROASTED FENNEL & CAULIFLOWER

INGREDIENTS

Roasted Fennel & Cauliflower

  • 4 cups sliced fennel bulb, green fronds reserved

  • 4 cups coarsely chopped cauliflower

  • 4 tablespoons olive oil

  • 1/4 teaspoon sea salt

  • 1/4 teaspoon fennel seeds (optional)

  • fresh ground pepper, to taste

For the Soup

  • Roasted fennel and cauliflower, from above

  • 2 cups diced yellow onion

  • 2 tablespoons olive oil

  • 1/4 teaspoon sea salt

  • Freshly ground pepper, to taste

  • 2 teaspoons minced garlic

  • 6 cups vegetable broth

  • 1 lemon, zested and juiced

  • 6 cups spinach

  • 1 cup arugula

  • 1 cup fennel fronds

  • 1/2 cup roughly chopped chives

  • 1/4 cup roughly chopped mint

  • 1/4 teaspoon sea salt, plus more to taste

Toppings (optional)

  • Thinly sliced radishes

  • Carrot top gremolata (see recipe here)

  • Fennel fronds

  • Drizzle of olive oil

INSTRUCTIONS

Roasted Fennel & Cauliflower

  1. Preheat the oven to 400ºF. Line a rimmed baking sheet with parchment paper or foil.

  2. Lay the sliced fennel and chopped cauliflower on the baking sheet in an even layer, and drizzle with olive oil and sprinkle with salt, pepper, and fennel seeds (if using). Toss gently to coat the mixture evenly. Roast for 30-35 minutes until tender and beginning to brown. Flip the vegetables halfway through roasting to ensure even browning.

For the Soup

  1. Heat the olive oil in a large pot or dutch oven over medium heat. Add the diced onion, salt and pepper and sauté until golden brown, stirring occasionally.

  2. Add the garlic and stir another minute. Add the vegetable broth, lemon zest + lemon juice, as well as the roasted fennel + cauliflower and bring the mixture to a simmer. Simmer gently for 10 minutes.

  3. Remove the pot from heat, add the spinach, arugula, fennel fronds, chives and mint. Stir to submerge in the soup, cover, and let the greens to wilt in the heat of the broth for a few minutes.

  4. Transfer the whole pot of ingredients to a high speed blender and blend until completely smooth (you'll likely need to do this in batches). Return to the pot, taste, and add more salt and pepper as needed.

  5. Garnish with an assortment of sliced radishes, a drizzle of olive oil, fennel fronds, etc. A topping of crunchy pistachio + carrot top gremolata is especially lovely.

Today’s Stats

  • Low temp: 65F

  • High temp: 81F

  • Sunrise: 6:19am

  • Sunset: 8:09pm

  • Moon phase: Waxing Crescent

  • Additional notes: Warm and chance of thunderstorms

April 29

Farm Notes

It may be peak spring at the moment, but believe it or not, I’m already planning (and planting) for winter. Yesterday I started all of our winter squash seeds – several types of butternut, acorn, delicata, and kabocha squash. Even though they are called “winter squash,” in our climate most growers plant their butternuts in May/June, and they are typically ready for harvest by August. This year I'm trying a new variety that I'm especially excited about called South Anna Butternut, which is supposed to be more resistant to the dreaded squash bugs and vine borers!

I’ve found that the earlier we plant winter squash (and honestly, anything in the cucurbit family) around here the better… because the longer you wait, the worse the pest/fungal pressure will be. I started the seeds in these 2.5” pots, and they will grow in our mini greenhouse for about 3 weeks before we plant them in the ground outside. We space our winter squash 2 feet apart between each plant… most winter squash generate a LOT of sprawling plant matter, so make sure to give them plenty of room!

Seed organizer!

While we are talking about seed starting… have I shared with y’all my secret for keeping seeds organized?! I recently got this plastic organizer (via Amazon here) and it has been a GAME CHANGER and makes me happy every time I open it up. It ensures our seeds stay clean, dry, and out of reach of any pesky mice or critters (who always seem to love eating your precious garden seeds).

As a general rule, you should plant seeds within 2 (and max 3) years from when they are packed, so if you have a glut of seed packets stashed around, it’s a good practice to go through them and double check their age and viability.

In other news on the farm, this week marked the halfway point of our Spring CSA! It was another week filled with spring greens galore, and I’m really proud of the veggies we sent out into the world (and also feeling veryyy tired just looking at at the photo below and all the work that went into making it happen). In the coming weeks, our CSA shares will shift away from greens and towards other spring veggies –like fennel, beets, turnips, carrots, cabbage, broccoli, etc. I love this time of year and I’m just trying to soak up all this green goodness, because before we know it, we will be deep into summer and our plates will be filled with tomatoes, peppers, eggplant, and zucchini!

Last but not least, it’s time to announce the winner of our April giveaway: CONGRATS Jennifer Johnson! I’ll be in touch directly and send along your new cookbook, Dishing Up the Dirt. Thanks to everyone who entered, I loved hearing about all the destinations where you’d like to eat your way through… stay tuned for another giveaway coming up in May. :)

Kitchen Notes

Even if you think you don’t like radishes, I hope you’ll give this recipe a try and see if I can change your mint! This dish has only 5 ingredients, comes together in under 10 minutes, and hits all the notes you want – sweet, salty, and savory. Any kind of radishes will work, and this recipe can also be made with hakurei turnips instead of radishes.

GLAZED MISO HONEY BUTTER RADISHES

INGREDIENTS

  • 2 tablespoons yellow miso paste

  • 2 tablespoons room temperature butter

  • 1 tablespoon honey

  • 1 bunch radishes

  • Salt and pepper, to taste

INSTRUCTIONS

  1. Stir together the miso paste, butter, and honey in a small bowl and set aside.

  2. Remove any tops from the radishes and slice them in half lengthwise.

  3. Heat up a large skillet over medium-high heat and add the radishes to the skillet along with the miso honey butter mixture. Cook, stirring often, until the radishes are tender and most of the liquid has evaporated and turns into a nice glaze, 5-8 minutes. You want to be careful not to overcook the radishes to the point where they are mushy… you still want a little bite/firmness to them! Serve warm and enjoy.

Today’s Stats

  • Low temp: 52F

  • High temp: 71F

  • Sunrise: 6:27am

  • Sunset: 8:03pm

  • Moon phase: Waning Crescent

  • Additional notes: Mostly sunny and lovely

April 22

Farm Notes

Yesterday I was looking back at photos from one month ago, and I was shocked to see just how much the farm has grown! The month of March around here still feels very cold and dreary and hectic, and I always find myself stressing out and questioning if anything is even going to grow… and then just a month later, all of the plants seem to have grown feet overnight (see below for some before and after photos). This time of year is one of my very favorites, as the hours of daylight keep stretching longer, temperatures are pleasantly warm, and there’s no humidity or mosquitos in sight… if only it could stay like this all year long!

March 2022

April 2022

Yesterday marked the third week of our Spring CSA, and it was another week with boxes filled with beautiful spring greens. One fun addition to our full shares this week was green garlic, which is basically immature garlic that looks (and taste) very similar to a leek… if you’re interested in learning more, here’s a helpful article all about green garlic!

CSA Week 3 Full Share

Tunnel tomatoes!

I’m also happy to report that all of the tomatoes inside our tunnels are in the ground! We grow a mix of cherry tomatoes, red slicers, funky heirlooms, as well as paste/roma tomatoes – 14 different varieties in all this year. We will still be planting a few rows of tomatoes outside, but I’m waiting until early May once everything has warmed up a bit more, and there’s no threat of a sneaky late frost. If you are starting to plant your tomatoes, make sure to give them plenty of room… they get big! I recommend giving at least 2 feet of space around each plant (spacing them any closer will reduce air circulation around the plants and may result in disease/fungal pressure). In the coming weeks I’ll share lots more about tomato care, pruning, etc – so stay tuned.

For a full tour of the garden this week, be sure to check out my virtual farm walk from today, either on Facebook Group HERE or our google drive folder HERE.

Last but not least… it’s time for our April giveaway!

Each month this year, I’m giving away some of my favorite tools for the garden and the kitchen, just as a thank you for being a part of this community. These giveaways aren’t sponsored – it’s just me wanting to share some of the things I find most helpful, in hopes that it will help inspire and empower you to eat like a farmer. :)

This week, I’m excited to giveaway one of my all time favorite farm to table cookbooks… Dishing Up the Dirt by Andrea Bemis! Andrea is a badass farmer, mother, and cookbook author based in Oregon, and I just LOVE this cookbook. The recipes are straightforward and unfussy, but they are still unique and seriously bursting with flavor… it’s the ultimate cookbook for eating like a farmer! She has tons of great recipes on her website, and I love following along with her journey on Instagram.

TO ENTER THE GIVEAWAY – There are two ways that you can enter this giveaway (just choose 1):

  1. Comment on this post in our private Facebook Group and share what destination (anywhere in the world) you’d most like to visit and eat your way through! If you aren’t already a member of our private Facebook Group, just request access here.

  2. OR Click the “Comment” button at the bottom of this journal entry and share what destination (anywhere in the world) you’d most like to visit and eat your way through!

You have until Thursday, April 28th @ midnight to enter, and I’ll announce one randomly selected winner on Friday, April 29th. One entry per person please.

Kitchen Notes

I’m not exactly sure how it happened, but all the sudden we have SO MANY beautiful radishes ready to be harvested, and I’m having to get creative on what to do with all of them! I love slicing radishes raw into salads, dipping them into butter, and/or roasting them until crispy – but my favorite way to preserve radishes to last for weeks and months is to turn them into quick pickles.

I know that when most people hear the world pickle, you automatically think of cucumbers… but actually, you can pickle just about anything! The process of pickling is just preserving food by immersing it in vinegar, as the highly acidic environment inhibits the growth of harmful bacteria and extends the life of fresh produce. Today I’m sharing my (very simple) recipe for making quick pickles, which I’ll be using this weekend to make some yummy pickled radishes! If you’re more of a visual learner, tune into my YouTube video all about making your own quick pickles.

HOMEMADE QUICK PICKLES

Photo Credit: Love & Lemons

INGREDIENTS + EQUIPMENT

  • 1 pound of fresh seasonal vegetables (such as cucumbers, carrots, cauliflower, green beans, summer squash, radishes, asparagus)

  • Optional seasonings: fresh herbs, whole spices, garlic, lemon zest, ginger, etc.

  • 2 pint-sized (or 1 quart-sized) wide mouth jars with lid

Basic Brine

  • 1 cup vinegar (I usually use distilled white vinegar)

  • 1 cup water

  • ¼ cup sugar

  • 1 tablespoon kosher salt 

INSTRUCTIONS

  • Prepare the jar: Wash your mason jar and lid in hot soapy water, rinse and let air dry.

  • Make the pickling liquid: Combine the vinegar, water, salt, and sugar in a small saucepan over high heat. Bring to a boil, stirring to dissolve the salt and sugar. 

  • Prep the vegetables: Wash + dry the vegetables, peel (if necessary) and cut vegetables into desired shapes/sizes.

  • Pack the vegetables and flavorings: Pack the vegetables, herbs/spices/aromatics into the jars in layers, making sure there is a 1/2 inch of space from rim of the jar to the tops of the vegetables. Pack as tightly as you can without smashing.

  • Pour brine over the vegetables: Carefully fill each jar to within 1/2 inch of the top with the brine. Note: this recipe makes enough brine for 2 pint-sized jars, or 1 quart of pickles. 

  • Remove air bubbles and seal jars: Gently tap the jars against the counter to remove air bubbles. Top off with more brine if needed. Screw on lids until the rings are tight.

  • Cool and refrigerate: Let the jars cool to room temperature. Store the pickles in the refrigerator. These will taste good after 48 hours, but are much better after a couple days to a week. Keeps for months – the cleaner you keep the jar, the better!

Today’s Stats

  • Low temp: 52F

  • High temp: 81F

  • Sunrise: 6:35am

  • Sunset: 7:57pm

  • Moon phase: Waning Gibbous

  • Additional notes: Warm, sunny, and beautiful!

April 15

Farm Notes

We’re getting back into the growing + harvesting groove around here, as we wrapped up Week 2 of our Spring CSA yesterday! There’s a pretty amazing abundance of spring greens right now – from swiss chard to lettuces, arugula, baby kale, bok choy, and radishes – with more variety becoming available each week. Below is a snapshot of one of our full shares from this week… once again, it was not easy to fit all these bodacious veggies into their boxes!

Week 2 Spring CSA box!

I’ll admit I’m a little sad to say goodbye to some of these greens, but it’s already time to make room for tomatoes! Starting today, we’re clearing out several rows in our caterpillar tunnels and planting the majority of our tomatoes (a mix of heirlooms, slicers, and cherries). I’ve found there are several benefits to growing tomatoes in a covered tunnel – first, you’re able to plant a bit sooner than usual, because it’s warmer in the tunnels + less chance of frost damage. Growing tomatoes under cover also means that you can control how much water the plants get, and you won’t be dealing with too much rain, which can cause tomatoes to have major fungal issues. All that said, I know most folks don't have tunnels in their backyards, and you can absolutely still grow amazing tomatoes out in the open!

For an extensive look at what’s growing here at the farm right now (plus lots of tips for your own gardens), I just took a virtual tour around our farm, which you can watch here on Facebook or via our private google drive folder here. In this week’s farm walk, I dig into specifics for properly harvesting a wide range of spring greens.

In other news, I’m excited to announce our first in-person workshop here at the farm in over two years! Join me on Saturday, May 14th for a Growing & Cooking with Herbs Workshop from 2pm-4pm.

This outdoor workshop is part demonstration and part hands-on, and everyone will get to pot up their own herb to take home. During this workshop, I will cover the following topics:

  • Culinary & medicinal herb identification

  • Recipes, techniques, and tips for cooking with a wide range of herbs

  • Understanding when to use fresh vs. dried herbs in recipes

  • How to properly store fresh herbs to maximize shelf life

  • How to properly and safely chop fresh herbs

  • How to make homemade herbal tea blends

  • How to grow, maintain, and harvest herbs in your home garden

As Farmbelly Club members, you get first dibs on tickets before I release them to the public on Monday (April 18th)! I’m keeping this class nice and intimate (max 10-12 people) and have a feeling tickets will sell out quickly. And no worries if you’re not able to join for this first class, lots more workshops and tours will be announced soon!

Kitchen Notes

In honor of my upcoming workshop all about herbs, this week I’m sharing a spring-centric recipe that’s heavy on the herbs… Asparagus with Pistachio Gremolata! A gremolata is a fancy-ish work for a super simple herby sauce/condiment that is traditionally made from chopped parsley, lemon zest, and garlic. In this recipe, we mix things up a bit by adding some crunchy pistachios to the mix – though you can certainly omit the pistachios or use another nut/seed of choice instead. Enjoy!

Photo Credit: With Two Spoons

ROASTED Asparagus with Pistachio Gremolata

INGREDIENTS

Asparagus

  • 1 bunch fresh asparagus, woody ends trimmed off

  • 2 tablespoon olive oil

  • Salt and pepper, to taste

  • 1 tablespoon fresh squeezed lemon juice

For The Gremolata

  • 1/2 bunch fresh Italian parsley (will make about 1/2 cup chopped)

  • 1 medium clove garlic, minced

  • 2 tablespoons lemon zest

  • 1/4 cup roasted and salted pistachios, chopped

INSTRUCTIONS

  1. Preheat your oven to 400 F. 

  2. Prepare the asparagus: First snap or trim off the woody end of each asparagus stalk. Spread the asparagus in a single layer on a foil-lined baking sheet and drizzle lightly with olive oil, tossing gently to coat evenly. Sprinkle generously with salt and pepper. Roast for 15-20 minutes, until asparagus begins to brown and gets a little crispy on the ends. 

  3. Make the gremolata: Chop the parsley with a chef's knife until it is finely chopped. Using a microplane or fine-toothed grater, grate the garlic clove over the parsley. Using the same grater, grate the lemon zest on top of the garlic (doing the garlic and lemon in this order will help to rid the microplane of garlic odors). Add your chopped pistachios to the parsley mixture and continue to chop, mixing in all the ingredients as you go. Use your knife to scoop the gremolata mixture into a bowl and set aside. 

  4. To serve: When the asparagus comes out of the oven, toss gently with the lemon juice and top with the gremolata, season with additional salt and pepper as needed.

Today’s Stats

  • Low temp: 49F

  • High temp: 73F

  • Sunrise: 6:44am

  • Sunset: 7:51pm

  • Moon phase: Waxing Gibbous

  • Additional notes: Mostly sunny and lovely

April 8

Farm Notes

And just like that, the first week of our Spring CSA is in the books! Yesterday was an awesome day – the weather was cloudy and cool, which was perfect for harvesting heaps of greens for all our CSA members. These first few weeks will be heavy on the greens… our boxes were filled with lettuces, swiss chard, bok choy, radishes, and even some local honey for our Full Share members.

A peek at a Full share for Week 1 of our Spring CSA!

Between all the wild (and especially chilly) weather we’ve had this spring, along with navigating how to run the farm with a 6 month old baby, I’m feeling especially proud of all the veggies that went out into the world yesterday… and I’m especially grateful for all the families who trust me to be their farmer!

It always brings me so much joy to see folks out here enjoying the farm, and I’m so excited to share that next week I’ll be announcing some upcoming workshops and tours here at Farmbelly HQ! Stay tuned for all the details… and as Farmbelly Club members, y’all get first dibs on all our upcoming events at the farm.

While we are overflowing with gorgeous spring greens at the moment, we’re already in summer mode and over the next few weeks will be flipping beds and planting out our tomatoes, peppers, eggplant, zucchini, cucumbers, etc. All of these summer crops are frost sensitive, so I’m just waiting about 2 more weeks, after which I’m pretty confident that freezing temps will be behind us till the fall. And I’m sending all the positive green thumb vibes to all y’all growing gardens this year… as always, if you have any questions about planning out your summer gardens, don’t hesitate to reach out!

Kitchen Notes

Now that all the greens are BACK for spring, I thought it would be a good time for a refresher on the art of making your own vinaigrettes / salad dressings! I definitely didn’t grow up making my own dressings, but once I learned how simple it was to make, I’ve never looked back. If you’re more of a visual learner, here’s a fun video tutorial I made showing you how to make your own vinaigrettes with just a few ingredients you surely already have in your pantry. Below are a few helpful tips for making your own vinaigrettes, along with a very simple recipe for a homemade lemon vinaigrette!

VINAIGRETTES 101

1) Remember Your Ratio (1:3)

  • The traditional ratio for vinaigrettes is 1 part acid to 3 parts oil – but if you prefer more acidic dressings, use a 1:2 ratio of acid to oil (ie twice as much oil as acid).

  • When making a vinaigrette oil is typically extra-virgin olive oil (ideally cold pressed, in a dark glass container), but you can also use grapeseed oil, sunflower oil, canola oil, etc. 

  • The acid can be either vinegar (white/red wine vinegar, apple cider) or citrus (lemon, lime)

2) Balance Your Vinaigrette

  • Salt is crucial to temper the acid while amplifying flavor. Don’t be shy!

  • Sweeteners like sugar, honey, maple syrup, and agave are optional, but help temper acidity.

  • Aromatics like spices, fresh herbs, shallots, garlic, ginger, and lemon zest add tons of flavor.

3) Emulsify + Stabilize Your Vinaigrette

  • Tahini - made from ground sesame seeds, pairs well with lemon, olive oil, garlic and honey.

  • Miso - Miso is a fermented soybean paste that is widely used in Japanese and Korean cuisines.

  • Mustard - lends a creamy and delightfully tangy flavor to vinaigrettes. 

Simple Lemon Vinaigrette

INGREDIENTS

  • Juice of 2-3 lemons (if you don’t have lemons, use 1/4 cup white wine vinegar)

  • Olive oil

  • Dijon or Whole Grain Mustard

  • Maple syrup or honey

  • Salt and Pepper, to taste (don’t be shy with the salt!)

INSTRUCTIONS

  • Juice your lemons and pour the juice into a mason jar. Add twice as much olive oil as lemon juice to the jar. Add a good squeeze (a tablespoon or so) each of mustard and maple syrup (or honey). If you'd like, add some minced garlic, fresh herbs, and/or lemon zest for added flavor. Add salt and pepper to taste and shake, shake shake! Taste the dressing and adjust seasoning - you're looking for a good balance between sour, sweet, and salty.

Todays Stats

  • Low temp: 38F

  • High temp: 64F

  • Sunrise: 6:53am

  • Sunset: 7:45pm

  • Moon phase: Waxing Crescent

  • Additional notes: Mostly sunny and lovely

April 1

Farm Notes

Thank goodness, we made it to April! I don’t know about y’all, but the past month has just felt HARD – between hustling to get thousands of plants in the ground (and keeping them alive through major frosts), battling with squirrels who seem hell bent on eating all our plants, sick family members, inconsistent childcare, issues with our well water, etc – it’s all felt a bit overwhelming. So while I love spring, I always forget that around here, the month of March is absolutely non-stop. Alas! We’ve made it through one of the busiest times of the growing season, and I feel like we (and the plants!) are finally hitting our stride.

Just this morning, I was walking around the farm and could see signs of new life that had been dormant only a few weeks ago. Suddenly, the freshly planted asparagus has shot up, the new blackberry plants are leafing out, blueberry bushes are blooming, potatoes have emerged above ground, and our lettuces are looking extra-lush. The longer + warmer days have made a world of a difference, and seeing all the new growth has put some much needed pep in this tired farmer’s step.

In other exciting news, our Spring CSA officially starts next week! I can’t believe it’s already here, but I’m happy to report that we have an abundance of gorgeous swiss chard, lettuces, asian greens, radishes, etc that will be heading home with our awesome CSA members next Thursday (if you are a CSA member, I’ll be sending an email to you on Monday to remind you about all the details for our first pick up on Thursday, April 7th).

And while our early spring veggies have been busy growing and are getting ready to be harvested, I’ve been busy seeding more of our summer crops like zucchini, cucumbers, and okra. These are crops that are easily started at home and usually only need about 4 weeks from the time of seeding to when they can be transplanted, so if you’re starting your own seeds, give these plants a try! A reminder that THIS is a great free online tool to figure out when to start seeds for each crop based on your climate/frost dates.

Another thing I wanted to help clarify for any new gardeners is which plants should be planted directly into your garden as a seed, versus which plants are best transplanted as an established seedling. Here is a quick guide on which plants to grow from seed vs. seedlings:

Crops to plant as SEEDS:

  • Carrots, beets, arugula, baby kale, looseleaf lettuces, radishes, turnips, mustard greens, beans and peas, corn

Crops to plant as SEEDLINGS:

  • Tomatoes, eggplant, peppers, onions, most brassicas (kale, cauliflower, broccoli, etc), okra, fennel, most herbs (basil, thyme, rosemary, etc)

A note that cucurbits (ie summer and winter squash, cucumbers, melons) can be planted either directly by seed or as seedlings. If starting from seed, it takes 3-4 weeks from when you start the seed to being ready to transplant in the bed.

Hopefully this info is helpful as your spring gardens get growing! As always, don’t hesitate to reach out if you have any questions or just need someone to bounce ideas off… I’m here for you! :)

Kitchen Notes

Every spring without fail, I start craving anything + everything GREEN. Which is why I love this recipe for a Spring Greens Soup, lightly adapted from the blog Kale & Caramel. The original version of this soup features roasted fennel, which I love, so I’ve gone a step further and added roasted cauliflower for extra body and sweet, caramelized goodness.

So while this 100% plant-based soup definitely falls into the “healthy” category – it’s full of flavor thanks to all the sweet roasted veggies, bright acidity from lemon juice + zest, zippy greens and vibrant herbs. It may seem like a lot of ingredients, but I’ll bet they are things you already have on hand – and if not, everything can be easily sourced.

SPRING GREENS SOUP WITH ROASTED FENNEL & CAULIFLOWER

INGREDIENTS

Roasted Fennel & Cauliflower

  • 4 cups sliced fennel bulb, green fronds reserved

  • 4 cups coarsely chopped cauliflower

  • 4 tablespoons olive oil

  • 1/4 teaspoon sea salt

  • 1/4 teaspoon fennel seeds (optional)

  • fresh ground pepper, to taste

For the Soup

  • Roasted fennel and cauliflower, from above

  • 2 cups diced yellow onion

  • 2 tablespoons olive oil

  • 1/4 teaspoon sea salt

  • Freshly ground pepper, to taste

  • 2 teaspoons minced garlic

  • 6 cups vegetable broth

  • 1 lemon, zested and juiced

  • 6 cups spinach

  • 1 cup arugula

  • 1 cup fennel fronds

  • 1/2 cup roughly chopped chives

  • 1/4 cup roughly chopped mint

  • 1/4 teaspoon sea salt, plus more to taste

Toppings (optional)

  • Thinly sliced radishes

  • Carrot top gremolata (see recipe here)

  • Fennel fronds

  • Drizzle of olive oil

INSTRUCTIONS

Roasted Fennel & Cauliflower

  1. Preheat the oven to 400ºF. Line a rimmed baking sheet with parchment paper or foil.

  2. Lay the sliced fennel and chopped cauliflower on the baking sheet in an even layer, and drizzle with olive oil and sprinkle with salt, pepper, and fennel seeds (if using). Toss gently to coat the mixture evenly. Roast for 30-35 minutes until tender and beginning to brown. Flip the vegetables halfway through roasting to ensure even browning.

For the Soup

  1. Heat the olive oil in a large pot or dutch oven over medium heat. Add the diced onion, salt and pepper and sauté until golden brown, stirring occasionally.

  2. Add the garlic and stir another minute. Add the vegetable broth, lemon zest + lemon juice, as well as the roasted fennel + cauliflower and bring the mixture to a simmer. Simmer gently for 10 minutes.

  3. Remove the pot from heat, add the spinach, arugula, fennel fronds, chives and mint. Stir to submerge in the soup, cover, and let the greens to wilt in the heat of the broth for a few minutes.

  4. Transfer the whole pot of ingredients to a high speed blender and blend until completely smooth (you'll likely need to do this in batches). Return to the pot, taste, and add more salt and pepper as needed.

  5. Garnish with an assortment of sliced radishes, a drizzle of olive oil, fennel fronds, etc. A topping of crunchy pistachio + carrot top gremolata is especially lovely.


Todays Stats

  • Low temp: 36F

  • High temp: 65F

  • Sunrise: 7:03am

  • Sunset: 7:39pm

  • Moon phase: New moon

  • Additional notes: Sunny and breezy

March 18

Farm Notes

Goodness gracious, it has been a WEEK. Last Saturday I spent pretty much all day scurrying around outside in the wind (and some snow flurries) making sure all our veggie babies were covered for the extremely cold (18F!) overnight temperatures. Thankfully, when I peeked under all our row cover on Sunday morning, I found that our veggies made it through with very little damage, which I am incredibly grateful for. I know that a lot of farmers in the area weren’t so lucky, and it’s a testament to how resilient farmers have to be in order to do this work.

With the freezing temps (hopefully) behind us, throughout this week we’ve been planting like crazy! On Tuesday we got many of our brassica plants in the ground – 3 kinds of kale, broccoli and cabbage. Plants in the brassica family prefer the cooler spring weather, so we plant them now so that we’re able to harvest them in May before the summer heat arrives.

Yesterday we planted our alliums (red and yellow onions, leeks, and scallions) and our potatoes. It’s apparently good luck to plant your potatoes on St. Patrick’s Day, so hopefully our taters will be filled with good juju, and in a few months we will be rolling in delicious potatoes for all our CSA members. Potatoes are one of my favorite veggies to grow (and hands down the most fun to harvest) and now is a great time to plant them, so today I’m sharing all my tips for growing potatoes!

BEFORE YOU PLANT

1) Source your seed potatoes from a reputable local farm/garden store (for local friends, we source ours from Country Farm & Home in Pittsboro). While you technically can plant potatoes from the grocery store, your best bet is to buy seed potatoes that are specifically bred to be used to for growing potatoes (as grocery store potatoes are often treated to prevent sprouting).

2) It’s recommended to “green sprout” your seed potatoes a 1-3 weeks before you plant them, which means putting your whole seed potatoes in a box and leaving them in a warm (70-85 F) and dark place to encourage their eyes to begin sprouting. Be careful when handling to avoid breaking off sprouted eyes.

3) If your potatoes are especially large (over 4 ounces) and have lots of eyes, you can cut them into smaller pieces, which allows you to get more out of each potato. Think of the size/weight of a chicken egg as your ideal size, and try to have at least 2 eyes per seed piece. If you are going to cut your potatoes, cut them 2-3 days before you plant, to allow the cut part of the potato to heal over (to avoid the potatoes from rotting in the ground).

PLANTING YOUR POTATOES

1) Prepare the soil by adding compost and any other amendments to you bed. Dig a trench in your bed about 4”-6” deep.

2) Lay seed pieces eyes pointing up in the trench spaced 8”-12” apart for standard potato varieties and 12”-18” apart for fingerling varieties.

3) Cover potatoes with a few inches of soil, leaving a bit of a trench in the bed (because over time, you’ll want to “hill” your potatoes with additional soil from the sides of your trench).

TENDING YOUR POTATOES

1) Generally, potatoes need between 1-2 inches of water per week, which can be provided by rain or you to make up the difference by watering.

2) You should “hill” your potatoes 2-3 times per season by loosening surrounding soil in the bed and pulling it up around the leaves and stems. Try to hill before the stems grow too long and start to flop over. You should pull between 2”-6” new soil up around the plants each time you hill.

HARVESTING YOUR POTATOES

1) When buying your seed potatoes, make sure to check the recommended days to harvest for each variety. Some potato varieties will be ready to harvest in 60-70 days, while others will need 90-100 days to fully mature.

2) In general, potatoes are harvested after they go to flower and once the foliage begins to die back and turn brown. I’ll cover potato harvesting in more detail when that time comes this June!

I hope this is helpful! If you have any other questions about growing potatoes, feel free to send me a message. If you are short on garden space, you can also grow potatoes in grow bags! Here’s a tutorial if you’re interested in the grow bag method.

PS – CONGRATS to Stephanie Campbell, the winner of this month’s giveaway of a Cobra gardening tool!

Kitchen Notes

If you, like me, are constantly looking for recipes that feel and taste *special* but don’t require crazy ingredients or equipment or copious amounts of time to make – then THIS is going to be your new favorite recipe (adapted from Molly Baz’s cookbook, Cook this Book). All you do is roast a few sweet potato halves, then top it with a suuuuper simple + flavor-packed peanut-chile sauce and a little feta cheese and you’re golden. I could eat this dish as meal in itself over a bed of greens, but it also makes a great side to bring to a dinner party. Happy cooking!

Roasted Sweet Potatoes with Peanut-Chili Sauce & Feta

INGREDIENTS

  • 4 small sweet potatoes (about 2lbs total)

  • 1/2 cup plus 2 tablespoons olive oil

  • Kosher salt

  • 1/2 cup roasted, unsalted peanuts

  • 1 tablespoon honey

  • 1 teaspoon red pepper flakes

  • 1 teaspoon sweet paprika

  • 2 garlic cloves, minced

  • 2 limes

  • 4 ounces feta cheese, cut/crumbled into bite sized pieces (optional)

PREPARATION

  1. Preheat your oven to 425F.

  2. Roast the sweet potatoes: Cut the sweet potatoes in half lengthwise. Place on a rimmed baking sheet and drizzle with 2 tablespoons olive oil and season with 1.5 teaspoons salt, tossing with your hands to evenly coat. Arrange cut-sides down on your baking sheet. Transfer to the oven and roast until tender when pierced with a knife and charred on the undersides, 25-35 minutes. Transfer the roasted sweet potatoes to a platter.

  3. While the sweet potatoes roast, make the peanut-chile sauce: Roughly chop the 1/2 cup peanuts and place in a small pot and cover with 1/2 cup olive oil. Cook over medium heat, stirring often, until the peanuts are golden brown, 4-5 minutes. (A note that even after you turn off the heat, the oil will still be very hot, so if the peanuts are getting too brown, use a slotted spoon to scoop them out into a separate bowl until the oil cools a bit.)

  4. Add the honey, red pepper flakes, and paprika to the hot oil + peanut mixture and stir to combine. Allow the oil to cool for a few minutes then add the minced garlic (it will sizzle a bit, which is good.. the oil is gently cooking the garlic).

  5. Spoon the yummy peanut-chile sauce over your sweet potatoes, top with feta (if using), and a squeeze of lime. Enjoy!

Today’s Stats

  • Low temp: 59F

  • High temp: 76F

  • Sunrise: 7:23am

  • Sunset: 7:27pm

  • Moon phase: Full moon

  • Additional notes: Sunny and beautiful!

March 11

Farm Notes

In typical North Carolina fashion, we’ve been spoiled by blue skies and spring-like weather the past week or two, and now this weekend we have heaps of rain and extremelyyy cold temperatures coming our way. Saturday’s low temperature is going to be around 20F, which is COLD for mid-March! It’s especially tough for all the farmers around here, as we’ve been busy planting tender spring babies that will now need protection from the frosty temps. Last weekend I had a great crew helping me out here, and we got all our lettuces, swiss chard, kohlrabi, beets, and fennel in the ground… still to plant are all our brassicas (kale, cabbage, broccoli, etc), alliums (onions, scallions, leeks, etc), and our potatoes!

Before…

…and after!

Thankfully, I have plenty of frost cover and I will have all our veggies tucked in tight throughout the chilly weekend… but the main bummer is that in anticipation of the freezing temperatures, I’ve decided to hold off on planting the many thousands of plants that are still waiting to go in the ground. Alas! Farming is always a bit of a gamble, and I’m constantly being reminded that Mother Nature is still in charge. Speaking of frost cover - if any of you are in the same boat and have planted some veggies outside that are susceptible to freezing temps this weekend, I definitely recommend heading over to your local garden store and picking up some frost cover (something like this)!

Yesterday was cold and rainy and not terribly fun, but we toughed it out and got a big section of beds prepped and ready for planting next week. It’s this time of year that I’m especially grateful for our silage tarps, which have been hanging out on top of our beds since November/December. Today we peeled back a big area that had been tarped, and the beds look amazing (see below for a pic of when we pulled back the tarp). No weeds in sight, not too wet (even after a pretty wet winter), and super easy to prep for spring veggie babies. We source our tarps from a company called Farmers Friend, and I can’t recommend them enough!

Silage tarps working their magic!

Alright friends, let’s not let this dreary weather get us down… it’s time for another giveaway! Each month this year, I’ll be giving away some of my favorite tools for the garden and the kitchen, just as a thank you for being a part of this community. These giveaways aren’t sponsored –it really is just me wanting to share some of the tools that I find most helpful, in hopes that it will help inspire and empower you to eat like a farmer. :)

This week, I’m excited to giveaway one of my favorite garden tools… a “Cobra” weeder/planter/cultivator! I feel like this tool doesn’t get enough attention… it’s an amazing all-purpose hand tool with so many uses! It is great for getting out weeds (both small or large), making small furrows in the soil, and I also use it when transplanting seedlings into the garden.


TO ENTER THE GIVEAWAY – There are two ways that you can enter this giveaway (just choose 1):

  1. Comment on this post in our private Facebook Group and share what vegetable or fruit you are most excited to grow in your garden this year! If you aren’t already a member of our private Facebook Group, just request access here.

  2. OR Click the “Comment” button at the bottom of this journal entry and share what vegetable or fruit you are most excited to grow in your garden this year!

You have until Thursday, March 17th @ midnight to enter, and I’ll announce one randomly selected winner on Friday, March 18th. One entry per person please.

Kitchen Notes

Swiss chard is one of the first veggies we harvest in early spring, and our spring crop of swiss chard (sitting cozy in our warm tunnels) is soooo close to being ready! I’ve been looking forward to the return of swiss chard all winter long, and this super simple + flavorful recipe is one of the first dishes I plan to make. A note that you can absolutely use this same recipe with whatever greens you have on hand… kale, spinach, collards, etc will also work! Recipe adapted from Cooking Light.

SAUTÉED RAINBOW CHARD WITH GARLIC, RAISINS & PINE NUTS

Photo credit: We [Heart] Food

INGREDIENTS

  • 2 tablespoons olive oil

  • 1 yellow onion, diced

  • 2 bunches Swiss chard, stemmed and washed, stems diced and leaves coarsely chopped

  • 2 garlic cloves, minced

  • 1/4 cup raisins, rehydrated in some warm water

  • 1/4 cup pine nuts, toasted

  • 2 tablespoons white wine vinegar, plus more to taste

  • Salt and freshly ground pepper, to taste

PREPARATION

  1. Heat the olive oil over medium heat in a large, heavy nonstick skillet. Add the diced yellow onion and chard stems, a pinch of kosher salt, and cook for 3-5 minutes, until tender. 

  2. Add garlic and cook, stirring, for about 1 minute or until the garlic begins to smell fragrant (careful not to let it burn).

  3. Add the chopped greens and raisins, tossing with tongs until they are well coated with oil and beginning to wilt, 3-4 minutes. Stir in vinegar and pine nuts, tossing until well combined. Taste and season as needed with salt and pepper (and additional vinegar if desired).

Today’s Stats

  • Low temp: 50F

  • High temp: 59F

  • Sunrise: 6:33am

  • Sunset: 6:21pm

  • Moon phase: Waxing Gibbous

  • Additional notes: Partly cloudy, showers in evening

March 4

Farm Notes

This week has brought the first stretch of warm, dry, and glorious spring weather – which means we are now in full-on planting mode! Earlier this week, I learned that the thousands of spring seedlings I had ordered would be arriving a whole week early… which may not sound like a big deal, but I was planning on using these next 7 days to get all our growing beds prepped and ready for these new plant babies, so we are suddenly WAY behind schedule when it comes to bed preparation (see below for some progress made yesterday on getting some beds ready).

Alas! Yesterday we received all our beautiful seedlings for the spring season – lettuces, asian greens, swiss chard, kale, fennel, kohlrabi, onions, beets, broccoli, cabbage, etc etc – and now the next few days are going to be non-stop hustling to get these plants in the ground. I’m grateful that the weather forecast for the next few days is staying warm and dry, so it’s a great time to get these new seedlings established… even if they arrived early to the party. ;)

Prepping beds in progress…

… and beds prepped and ready for planting!

But today, I want to focus on a crop that we planted last week… asparagus! I’m excited to share more about the process of planting and growing asparagus, in case you are interested in giving it a try in your growing space. Asparagus is a perennial that takes 2-3 years to get established before you can get a proper harvest, so it’s definitely a commitment and requires some patience, but I think it is well worth the wait!

ASPARAGUS NUTS & BOLTS

  • We purchased our asparagus crowns from Nourse Farms, and the variety we chose is called ‘Millennium’ (though other common and respected varieties are Jersey Knight and Jersey Giant).

  • The best time to plant asparagus is in the winter, between mid-January and mid-March, while the plants are dormant.

  • When choosing a site for your asparagus, a few things to keep in mind:

    • Choose a sunny, well-drained site with soil that holds moisture well.

    • If possible, prepare your site a few months/weeks ahead to clear out any grass or weeds. It also helps to apply some compost to the bed a few weeks before you plant to plant.

    • Late spring frosts can kill new spears, so pick an area that is not especially low-lying or exposed to frost.

    • If the asparagus bed is to be part of a larger vegetable garden, the best place is at the north end of the space (so the tall ferns that grow in the summer/fall do not shade your other crops).

HOW TO PLANT ASPARAGUS

  • Step 1: Dig a trench – Dig a 12” wide by 8” deep trench wherever you plan to plant your asparagus crowns. Ideally the area where you plant the asparagus will already be free of grass/weeds, as asparagus doesn’t like to compete with other plants for nutrients. As the soil is removed from the trench, set it directly to the side. It will be returned to the trench as the spears grow.

  • Step 2: Apply amendments – Asparagus loves phosphorous, so it’s recommended to add organic bone meal (about 1/2lb per every 10 feet) to the bottom of your trench before planting.

Step 1: Dig trench

Step 2: Apply amendments

  • Step 3: Set your crowns – Lay crowns in the trench with the long roots running parallel with the trench (see photo below for example). Space plants so that the center “buds” of each crown are about 12” apart.

  • Step 4: Partially cover the crowns – Next, cover the crowns with 2-3 inches of the soil that was removed from the trench previously. The rest of the remaining soil will be added to the trench a few weeks later, once the spears begin to emerge above ground. As the spears grow, gradually fill in the trench with a bit more soil – within 6 weeks, the furrow should be completely filled (this method helps to limit weed development).

  • Step 5: Water – Make sure to water in the asparagus crowns well after planting, and as the asparagus grows it should receive around 1” of water per week, either by rain, hand watering, or drip irrigation. Soil moisture is important for good root and fern growth in asparagus, and they need consistent soil moisture in order to stay healthy for the next year.

Step 3: Set your crowns

Step 4: Partially cover crowns

And there you have it! Hopefully this is a helpful visual guide for planting asparagus, and I’ll be sure to keep sharing tips for overall asparagus maintenance and care as the season progresses. The main thing for the first year of growing asparagus is to keep the bed well weeded, watered, and do NOT harvest any spears in this first season so that the plants can focus on developing strong root systems. If you have any questions or need help troubleshooting, don’t hesitate to send me a message. Happy growing everyone!

Today’s Stats

  • Low temp: 40F

  • High temp: 57F

  • Sunrise: 6:41am

  • Sunset: 6:15pm

  • Moon phase: Waxing Crescent

  • Additional notes: Sunshine!

February 25

Farm Notes

I’m a bit at a loss for words today, as I sit comfortably in our cozy farmhouse while knowing the untold amount of suffering, fear, and pain happening in Ukraine right now. I’m certainly not qualified to speak on the politics of the moment, but I am committed to learning more about how I (and we, as a global community) can support the people in Ukraine in the days, weeks, and months to come. There are a few food-focused accounts on social media that I am following that I can recommend to stay informed – @oliahercules, @alissatimoshkina, and the hashtag #cookforukraine to name a few.

And in this moment, the best thing I can think to do is to plant seeds. Because I believe there are few things more hopeful or powerful than planting seeds of new life in the face of darkness.

While we work with a few local farms and nurseries to start the majority of our seeds (since we don’t have a proper greenhouse), every season I still start a few trays of seeds that go in our mini indoor greenhouses… and it’s seeding season my friends! If you haven’t started your own seeds before, I totally understand that the process can feel a bit intimidating. But I assure you that YOU CAN DO IT, and I’m here to help walk you through the process with heaps of info below…. ready, set, seed!

Seed Starting 101

SEEDING MATERIALS

*A note that I’m sharing Amazon links for these materials, but encourage you to purchase these items from your local garden shop if you can!

SEEDING INSTRUCTIONS

  • Fill each seed tray with potting soil, tapping the whole tray firmly against the ground as you go so the soil settles. Gently soak the soil-filled trays with a hose (make sure you have a nozzle so you can water the trays gently). Alternatively, you can get the soil wet before your fill your tray – but I find it’s easier to first fill the trays with dry soil and then to gently soak them.

  • Make holes in each cell using your finger, a pencil, or a dibbler. A general rule is to plant the seed to a depth twice its size. Drop 1 or 2 seeds into each hole (unless seed packet specifically says otherwise).

  • Cover the tray with a light dusting of fine vermiculite or seed starting mix, making sure all seeds are covered.

  • Label the tray with the variety name and date sown.

  • Set freshly sown trays into a large plastic tub with an inch of water in the bottom and let them soak up the water from below. Remove once the soil surface is evenly moist. Seed trays should not be watered from overhead until the plant begins to emerge, as a strong blast from your hose can damage your plants.

Photo credit: Floret Farm

  • Cover trays with a clear plastic dome (OR place in your indoor greenhouse) and set onto a 70°F heat mat (optional) or just in a warm corner of the house, consistently above 65°F. Check your seed packet to see if any of your seeds need light to germinate – most seeds do not need light for germination, but some do – and you’ll obviously want to turn your grow lights on (or place in a sunny window) for seeds that need light! A note that many plants can take a long time to germinate (anywhere from 1-3 weeks) so patience is key!

  • If using plastic dome lids over your trays – Once your seeds have germinated, remove the dome and take off heat mat (if using) once seeds have sprouted. Move trays to your greenhouse space and turn on the grow lights. If you don’t have a space with grow lights, a sunny south-facing window is your next best bet.

  • If not using the dome lids and your trays are already in your indoor greenhouse space – Once your seeds have germinated, turn on your grow lights. If it seems too wet in your greenhouse space at any point, roll up the plastic (if possible) to lower the humidity level.

  • NOTE ABOUT GROW LIGHTS: Make sure your grow lights are suspended a few inches above seedlings, keeping them on for 14 to 16 hours per day. As the plants get taller, keep raising the lights so that they are 2-3 inches above the tallest plant.

  • NOTE ABOUT WATERING: Use your finger to feel the soil moisture levels in the trays – if the plants just seem a little dry, gently spritz with a spray bottle filled with water. If the plants see really dry, water them from below by placing in a tub filled with an inch of water on the bottom (like you did when the seeds were first sown).

I hope these are some helpful tips for starting your own seeds this season! In a few weeks, I’ll talk about what to do when your plants need to be potted up into bigger trays, and how to “harden off” your plants before they go in the ground outside. As always, if you have any questions don’t hesitate to give me a holler!

Kitchen Notes

To make room as we start planting for spring, this week I’m harvesting the very last remaining veggies from our winter fields the winter… and I realized we still had few heads of green cabbage hanging on out there!

Now, if I have several hours to spare, my go-to cabbage dish is this recipe for Braised Cabbage… but when I’m in a hurry THIS is the recipe I use for equally delicious cabbage that is ready in less than 30 minutes. I know this is one of the least sexy dishes imaginable, but I promise you’ll be shocked by how dang good a humble head of cabbage can taste.

Butter Braised Cabbage

Photo credit: Downshiftology

INGREDIENTS

  • 3 tablespoons butter

  • 1 head green cabbage (around 3lbs)

  • Kosher salt

  • Freshly ground black pepper

  • Splash of apple cider vinegar

PREPARATION

  • Cut the cabbage in half from its top down through its core. Place the cut-side down on your cutting board, then shred it as thinly as possible around the core, then discard the core.

  • Heat a large saute pan or dutch oven over medium-high heat. Add the butter and once it has melted, add the cabbage, 1.5 teaspoons kosher salt, and 1/2 teaspoon freshly ground pepper. Saute for 15-20 minutes, stirring occasionally, until the cabbage is tender and begins to brown. You don’t have to constantly stir – leaving it undisturbed for a few minutes at a time allows the cabbage to caramelize and get extra yummy.

  • When the cabbage has reduced by quite a bit and has begun to brown, remove from heat and stir in the apple cider vinegar. Taste and add a bit of additional salt and pepper to taste. Serve warm.

Recipe adapted from Well Plated.

Today’s Stats

  • Low temp: 35F

  • High temp: 47F

  • Sunrise: 6:52am

  • Sunset: 6:08pm

  • Moon phase: Waning Crescent

  • Additional notes: Cool and cloudy, chance of rain

February 18

Farm Notes

Hot dang y’all… the Farmbelly 2022 growing season has officially begun! Yesterday was as good a weather day as we’ll ever get in mid-February (70 degrees, dry and overcast), so you better believe we hustled to get beds prepped and plants + seeds in the soil. There was rain in the forecast overnight and we have lots more rain coming next week, so it was important to work the ground yesterday before the soil got too wet to work in.

It was an exciting moment to finally pull back the tarps – which have been sitting over the beds since November – and see how beautiful the soil looked underneath! The tarps did their job – no weeds in sight, and the soil was light, fluffy, filled with organic matter, and wasn’t too wet. Covering the soil with tarps all winter makes spring bed prep a breeze – our broadforks (the tool we use to loosen the soil when prepping beds… basically a giant pitchfork) practically sank into the soft soil with ease as we prepped the beds (see photo below for our future carrot beds after removing the tarp and going through with a broadfork).

Future carrot beds after removing the tarp and a quick broadfork to loosen the soil.

Another crop we planted yesterday was our sugar snap peas, which will slowly but surely grow up a trellis all spring until they are close to 8 feet tall, and if all goes according to plan they’ll be ready to pick in mid May. Sugar snap peas are pretty easy to grow, though I do have some helpful tips…

Peas getting seeded!

  • Most varieties of sugar snap peas get pretty tall, so you’ll want to use a trellis! We use 10 ft tall t-posts and stake them in the ground every 8-10 feet down the row, and then we tie up this trellis netting and attach it to the t-posts using zip ties. The trellis netting is 4-feet tall, so we just tie up two layers – one below and one above – so that in all the peas have 8 feet of netting to grow up.

  • To prep the seeds for planting and help with better germination, I soak our pea seeds in water for about 4-6 hours before planting. Another step that isn’t required, but certainly helps ensure that your peas will fix nitrogen in your soil is to coat the seeds with an inoculant just before planting. Inoculants are basically a powdered form of a beneficial bacteria, which encourages the formation of high-nitrogen nodules on plant roots for richer soil, bigger plants, and better yields. Here is a source from Johnny’s Seeds.

  • When it’s time to plant, I make two long furrows in the soil spaced about 4-6 inches apart from each other (in the space between each furrow is where your trellis will go), and in each furrow I plant the seeds by hand, about 1-inch apart. Once you’ve placed the seeds, just cover them back up with soil, water in well, and let the magic happen!

Our beloved Jang Seeder, which makes seeding a breeze.

We also seeded our carrots yesterday! Our first season here, we did ALL our direct seeding by hand, which is fine if you’re a home gardener, but was totally crazy considering the amount of seeds we were planting. So now, most all of our direct seeding is made a million times easier/faster thanks to our Jang Seeder. This nifty tool can be calibrated to directly seed a multitude of different sized seeds at whatever spacing you need, and it takes a job that would have taken hours by hand and gets it done in about 15 minutes. It’s been a game changer for sure!

One thing to note if you’re using the Jang Seeder to plant carrots – you need to buy pelleted carrot seeds. Super small seeds (like carrots, onions and lettuce) are often “pelleted” – meaning that each seed is coated with a layer of clay to increase its size for easier handling and for use in seeding tools. Even if you plan to plant carrot seeds by hand, I recommend getting pelleted seeds, as you are able to see and place the seeds MUCH better!

Last but not least, yesterday I also got some sweet pansies in the ground… pansies are one of my favorite edible flowers for spring, because they are so easy to grow and they don’t mind the cold! So if you want to add some color to your dishes right about now, go pick up some pansies from your local garden store and pop them in a pot or garden bed, and you’ll be glad you did.

Kitchen Notes

It’s been a busy, farm-focused week around here – which means there hasn’t been a ton of cooking going on. So when I really needed some inspiration on a Tuesday night this week, I dug into our Farmbelly Club Recipes page and remembered how much I loved this Sheet Pan Harissa Chicken with Potatoes, Leeks & Herby Yogurt. It’s a perfect weeknight meal that all fits on one pan in the oven, and it’s filled with flavor from the harissa, bright lemon, tangy yogurt, and fresh herbs.

So don’t forget there are a ton of recipes on our Farmbelly Club Recipes page, with more getting added every week, so go check them out when you need some inspiration for eating like a farmer!

Today’s Stats

  • Low temp: 26F

  • High temp: 62F

  • Sunrise: 7:01am

  • Sunset: 6:01pm

  • Moon phase: Waxing Gibbous

  • Additional notes: Rainy and warm

February 11

Farm Notes

The days are getting noticeably longer (finally!) and slowly but surely I’m dusting off the cobwebs and getting myself back into “farm shape” after a good long break this winter. This week we’ve been busy checking some big projects off our to-do list… last weekend, we built some proper end walls for our caterpillar tunnels, with an ingenious design that lets you easily roll up/down the plastic on each end!

I’ve been wanting to build proper walls for the ends of our tunnels for years, so I was thrilled to see how well they work and how nice they look. This end wall design was created by a farmer friend of mine, and if you’d like any more info on this design, materials needed, just let me know and I’d be happy to share my notes.

This week we also spent more time getting our perennial garden ready for spring, and yesterday we sheet mulched a large section of the garden – which means we laid down big strips of kraft paper directly over the ground, followed by a thick layer of compost on top of the kraft paper.

Sheet mulching!

Sheet mulching (sometimes called lasagna mulching) is a process of creating a new garden bed over an area of grass by layering on “sheets” of organic matter – it’s a simple, passive way to create a new growing space with minimal effort and zero digging. Cardboard is typically used for sheet mulching, but we have found that using long rolls of kraft paper will also work. If you’re interested in learning more about sheet mulching, here’s a great video tutorial.

Looking ahead to next week, we will continue prepping growing beds for the sugar snap peas, carrots, greens, asparagus, and blackberries that will be going in the ground soon.

If you have any questions about getting your garden ready for spring, don’t hesitate to reach out!


Kitchen Notes

Shakshuka is a traditional dish from North Africa with lots of variations – but essentially it’s a skillet filled with a hearty tomato sauce with onions, peppers, spices, and some poached eggs on top. I like to serve shakshuka over a bed of basmati rice, topped with some fresh parsley or cilantro, avocado, and some salty feta cheese. It takes less than 30 minutes to pull everything together, and makes a pretty darn perfect weeknight meal if you ask me!

Shakshuka

Photo credit: Sandra Valvassori

INGREDIENTS

  • 2 tablespoons extra-virgin olive oil

  • 1 yellow onion, chopped

  • 1 red bell pepper, seeded and diced into 1/2” pieces

  • Kosher salt

  • Freshly ground black pepper

  • 3 medium garlic cloves, minced

  • 1 teaspoon smoked paprika

  • 1 teaspoon ground cumin

  • 1/4 teaspoon red pepper flakes

  • 1 28-ounce can crushed tomatoes (diced tomatoes will work too)

  • 2 tablespoons harissa paste (mild or hot, your preference)

  • 1 tablespoon tomato paste

  • A few handfuls of fresh spinach, roughly chopped

  • 3 to 5 eggs

  • ⅓ cup crumbled feta cheese

  • ¼ cup fresh parsley leaves

  • 1 avocado, diced (optional)

  • Toasted bread (optional)

PREPARATION

  1. Heat the oil over medium heat in a large lidded skillet. Add the onion, red pepper, 1/2 teaspoon salt, and several grinds of fresh pepper and cook until the onion is soft and translucent, 6 to 8 minutes.

  2. Reduce the heat to medium-low and add the garlic, paprika, cumin, and red pepper flakes. Stir and let cook for about 30 seconds, then add the canned tomatoes, harissa paste, and tomato paste. Simmer and stir occasionally for 15 minutes until the sauce is thickened.

  3. Add the spinach and stir until wilted. Use a large spoon to make wells in the sauce and crack an egg into each well. Cover and cook over medium heat until the eggs are set, about 5 minutes – though the timing will also depend on how runny you like your egg yolks.

  4. Season with salt and pepper to taste and sprinkle with the feta, parsley and avocado, if using. Serve over basmati rice and with toasted bread for scooping.

Today’s Stats

  • Low temp: 39F

  • High temp: 61F

  • Sunrise: 7:09am

  • Sunset: 5:54pm

  • Moon phase: Waxing Gibbous

  • Additional notes: Sunny and warm

February 4

Farm Notes

Yesterday while working in the garden, I felt the very first warm breeze since last fall, and it made me so dang excited for spring. I know this first glimpse of warmth was fleeting and we have a lot more winter ahead, but something about feeling those first hints of spring always lifts this farmer’s spirits.

It’s been a busy week here at the farm… I can’t believe it’s already February, as this month is when we start planting lots of veggies for spring! I’ve been putting the finishing touches on our planting calendar, and in a few weeks we will fill our caterpillar tunnels with swiss chard, lettuce, radishes, turnips, arugula, and baby kale. (A reminder that I’ve shared an excerpt of the planting plan that we use HERE in case it’s helpful for you). And while those veggies grow in our cozy tunnels, at the end of February we will also start planting outside… sugar snap peas, carrots, asparagus and blackberries!

Speaking of asparagus and blackberries… they are going in our new perennial garden space, and after lots of research I finally placed the orders for those plants this week. For the asparagus, I’ve chosen a newer variety called Millennium that has been proven to grow well in our region’s clay-heavy soils (purchased from Nourse Farms). There is an art and a specific method to successfully planting + growing asparagus, so I’ll definitely take y’all along for the ride as we prep the growing bed and when we plant our asparagus crowns later this month.

In the berry department, I spent waaay too long digging into the many different varieties of blackberries and finally narrowed it down to two varieties, which I purchased from Isons Nursery. For anyone looking to plant blackberries and wanting to learn about the different varieties, here is a great resource from NC State. I’ve decided to plant two varieties of blackberries – Natchez and Ouachita. Both are known for large fruit, high yields, and have an erect habit, and they both have harvest windows in June/July, which was a big deciding factor for me. Some of the blackberry varieties I was considering turn ripe in August, and the thought of harvesting berries for hours in the brutal heat/humidity of August in NC was a no-go! Growing berries is a whole new experiment for me, and I’ll be honest that I feel like such a beginner… which is humbling AND it’s also part of the fun and is exactly why I love farming so much.

This week we also made big progress on our perennial garden! As you can see in the photo below, we have pretty much finished laying out the space, and now we are beginning to build out the growing beds. One of the main features of this new garden is a large gathering area in the middle, where we will have tables and a nice space for hosting workshops, farm dinners, etc. From each corner of the garden we have walkways that lead into the middle… all the spaces you see covered in the black landscape fabric will be covered with mulch later this spring. On the short ends of the garden, we will have 6-7 curved growing beds for culinary + medicinal herbs, and long sides of the garden will be filled with wildflowers and other perennials. Along the western edge of the garden (closest to our deer fence) is where our asparagus will be planted. Slowly but surely, this space is coming along and I’m excited to continue documenting the process, in hopes that there will be helpful nuggets of information for some of you. A note that I’ll be saving documentation of this project in a highlight on my Instagram, which you can see here.

Kitchen Notes

It’s still soup season y’all! Here’s a recipe for one of my favorite hearty winter soups, which always brings me back to cozy snow days growing up in the midwest. It’s one of my go-to recipes to make and bring over to family/friends who may need some extra love and a hot meal, and the leftovers taste even better the next day!

WHITE BEAN CHICKEN CHILI

INGREDIENTS

  • 2 tablespoons olive oil

  • 2 yellow onions, diced

  • 1 can (4-oz) diced mild green chiles

  • 2 tablespoons ground cumin

  • 1 tablespoon dried oregano

  • 1/4 teaspoon crushed red pepper flakes

  • 4 cloves garlic, minced

  • Kosher salt

  • 6 carrots, chopped in 1/2-inch rounds

  • 1 lb small red or yukon gold potatoes, washed and quartered

  • 3-4 lb cooked rotisserie chicken, meat removed and shredded

  • 4-6 cups chicken broth

  • 3 15-oz cans white beans, drained and rinsed

  • Handful freshly chopped parsley (optional)

  • Shredded parmesan cheese (optional)

  • Plain greek yogurt (optional)

INSTRUCTIONS

  1. Heat olive oil over medium-high heat in a dutch oven or large saucepan. This recipe makes a lot of soup, so be sure to use a big pot/saucepan! Add the diced onions and a pinch of kosher salt and cook until translucent and beginning to brown, stirring occasionally, 4-5 minutes.

  2. Stir in the can of diced green chiles and cook for 2 minutes, stirring occasionally. Add the cumin, oregano, red pepper flakes, garlic and 1 teaspoon kosher salt and cook for 1-2 minutes, until fragrant. Stir in the carrots and potatoes, coating them in the spices.

  3. Pour in the chicken broth, bring to a boil, then lower the heat and gently simmer - partially covered and stirring occasionally - until the potatoes and carrots are tender, 15-20 minutes. Next, add the shredded chicken and white beans, heat on until warmed through, about 10 minutes. Taste and adjust seasoning as needed.

  4. Turn off the heat and let the soup sit for 15-20 minutes to let the flavors meld together. Reheat if needed and serve topped with chopped parsley and shredded parmesan. This may sound weird, but I also love eating this soup with a dollop of tangy plain greek yogurt!

Today’s Stats

  • Low temp: 29F

  • High temp: 66F

  • Sunrise: 7:17am

  • Sunset: 5:47pm

  • Moon phase: Waxing Crescent

  • Additional notes: Rain!

January 28

Farm Notes

Even though it’s not even February yet, I already feel like spring is basically HERE and my to-do list for the farm grows longer by the day… thankfully the amount of sunlight each day is getting longer too! This week we “broke ground” on our new perennial garden, and I am SO excited to watch this space transform. Right now, it is honestly the ugliest spot on the farm (see photo below for proof)… but with a little love (and a lot of muscle), I know that this will soon be one of our favorite places to sit and hang out among the plants.

Our soon-to-be perennial garden!

Rough sketch design of our new perennial garden.

I’ve been calling this our perennial garden because, well, it’s where we plan to plant lots of perennials that will stay in the same place year after year (as opposed to annuals, which only last in the ground for one season)! Some of the perennials that we will be planting include… blackberries, asparagus, ramps (wild onions), artichokes, herbs like rosemary, thyme, sage, and lemongrass; medicinal plants like comfrey, yarrow, and plantain; as well as flowers like milkweed, coneflower, black-eyed susans, etc.

Whether you live on a big farm or have a small home garden, planting perennials is definitely a commitment – because hopefully, that plant will stay in the same spot for many, many years! Which means it’s important to do your homework to source high quality perennial plants, and to choose + prepare your growing site appropriately.

All this winter I’ve been busy doing research for this new garden space, and I want to share some of the resources that I’ve gathered with y’all!

BOOKS ABOUT PERENNIALS

WHERE TO SOURCE PERENNIAL PLANTS

ONLINE PLANTING GUIDES

Kitchen Notes

It’s easy to get stuck in a cooking rut as we head into doldrums of February – so this colorful, hearty winter slaw with a zippy sesame ginger vinaigrette is a fresh take on the same old veggies you’ve been cooking with all winter! It’s a very simple and flexible recipe, just use whatever winter veg – like carrots, beets, cabbage, turnips, kohlrabi, et – that you have on hand.

WINTER VEGGIE SLAW WITH SESAME GINGER VINAIGRETTE

INGREDIENTS

Photo Credit: Jonathan Lovekin

For the slaw

  • 2-3lbs assorted winter veggies (carrots, beets, kohlrabi, turnips, and cabbage are all great), shredded

  • 1 bunch cilantro OR parsley, roughly chopped

For the vinaigrette

  • 1 garlic clove

  • 1 teaspoon finely minced ginger

  • 3 tablespoons rice vinegar

  • 1 teaspoon soy sauce

  • 1 teaspoon yellow miso paste

  • 1 teaspoon honey

  • 5 tablespoons canola oil 

  • 2 tablespoons toasted sesame oil

  • 2 tablespoons toasted sesame seeds

PREPARATION

  1. To prepare the slaw, carefully shred the vegetables with a box grater into a large bowl.

  2. One handful at a time, squeeze any moisture out of the shredded vegetables and place them in a separate bowl (this prevents the slaw from getting watery).

  3. Add the chopped herbs (cilantro or parsley) to the bowl with the shredded veggies. 

  4. To make the sesame ginger vinaigrette, simply combine ingredients together in a small processor and blend until smooth. Taste and adjust seasoning as needed. 

  5. Pour the vinaigrette into the salad bowl and toss together to combine. Allow to sit for 20-30 minutes before enjoying, if possible. Taste and adjust seasoning as needed.

Today’s Stats

  • Low temp: 26F

  • High temp: 47F

  • Sunrise: 7:21am

  • Sunset: 5:40pm

  • Moon phase: Waning Crescent

  • Additional notes: Snow!

January 21

Farm Notes

It’s been a few years since we’ve had a proper winter here in North Carolina, but this year it seems we’re getting the real deal! I have mad respect for all the farmers who live in northern climates where freezing temps and snow are a common occurrence… I’m afraid I’ve gone a bit soft after living in Southern California for several years, so I’m grateful that NC usually stays pretty mild. This weekend is going to be COLD, so you better believe this softie is going to be staying inside!

Yesterday we were able to get a few hours of work in before the freezing rain began… we finished putting protective wire around our newly planted fruit trees, cleared out some lingering plants inside our tunnels, and spent some time measuring out + dreaming up the new perennial garden! Over the next few weeks I’ll share some sketches and plans for this new garden, and I’ll walk you through our whole process for taking a bare piece of ground into a thriving and beautiful space.

A main feature of this garden will be a nice gathering space in the middle, which we will use for outdoor workshops, tours, farm dinners, etc. It’s been two years since we’ve been able to host any classes on the farm due to the pandemic, but I’m cautiously hopefully that 2022 is the year that we can safely gather again. Y’all will be the first to know about upcoming outdoor workshops this year, and I plan to announce some exciting new events in the next few weeks.

Speaking of exciting announcements, today I get to share the winner of last week’s cookbook giveaway… CONGRATS Lauryn Douglas! I hope you love the cookbook Grow, Cook, Nourish as much as I do. :) Thanks to everyone who entered the giveaway… I have lots more planned for this year, so stay tuned!

Kitchen Notes

When the days are long and cold and you’re stuck inside, why not make some cake? I’m not a big baker by any means, but I was recently inspired to make this Blood Orange, Almond & Ricotta cake – recipe is from Smitten Kitchen, who I can always depend on for delicious, tried and true recipes. It’s peak blood orange season over in California, so now’s a great time to snag some blood oranges if you have access to them, and then I highly encourage you to make this cake. It’s the kind of cake that doesn’t feel TOO decadent, and you can (and perhaps should) absolutely enjoy it for a luxurious breakfast alongside some tangy greek yogurt.

Blood Orange, Almond & Ricotta Cake

Recipe by Smitten Kitchen

INGREDIENTS

  • 1/2 cup brown sugar

  • 1 tablespoon water

  • 3 large eggs, separated

  • 2/3 cup (135 grams) granulated sugar

  • 2 blood oranges

  • 1/2 cup (4 ounces or 115 grams) unsalted butter, softened

  • 2/3 cup (165 grams) ricotta

  • 1/3 cup (45 grams) cornmeal

  • 1 cup (135 grams) firm-packed almond flour or meal

  • 1/2 teaspoon fine sea salt

  • 1/4 cup apple or apricot jam (optional, for glossy finish)

INSTRUCTION

Heat oven to 300 degrees F. Butter a 9-inch round cake pan and line the bottom with a round of parchment paper.

Stir brown sugar and water together so they form a thick slurry. Pour into prepared cake pan and spread thin. Set aside.

Whip egg whites in a medium bowl with an electric mixer until they hold thick peaks. Set aside.

Place granulated sugar in a large mixing bowl. Finely zest both oranges over it.

Cut both oranges in half. Cut one of the halves into paper-thin slices and arrange slices over brown sugar base in cake pan. Juice other three halves (I had about 1/3 cup juice) and set juice aside.

Add butter to zest and granulated sugar in large mixing bowl and beat with an electric mixer (you can use same beaters you just did for egg whites) until light and fluffy. Add egg yolks, one at a time, and beat to combine. Add juice and ricotta; mix until smooth. Sprinkle salt over batter, then add almond flour and cornmeal and mix until just combined. Gently fold in egg whites.

Scoop batter in large dollops over prepared cake pan base. Gently spread batter flat, trying not to disturb orange slices underneath. Bake in heated oven for 35 to 40 minutes [updated to warn that this took longer for many people, but remains accurate for my oven– better to check early than late], or until a toothpick inserted into the center comes out clean and then (my preference) for 5 more minutes. The final cake is so moist, almost damp, I found the extra baking time beneficial.

Cool cake in pan on rack for 5 minutes, and then run a knife around the side and invert onto a cake plate. If any orange slices don’t come out easily, just gently arrange them on the top of the cake. If desired, heat jam until loose and brush over cake top for a glossier finish. Let cool and cut into slices. Delicious served with an extra dollop of ricotta, creme fraiche or barely sweetened whipped cream.

HELPFUL NOTES from Deb Perelman of Smitten Kitchen: always zest before juicing, to avoid bad moods. Zest should always go straight into sugar, for maximum flavor release against the grit. Always whip egg whites before egg yolks, so you don’t have to wash your beaters in the middle of prep.

Today’s Stats

  • Low temp: 15F

  • High temp: 27F

  • Sunrise: 7:25am

  • Sunset: 5:32pm

  • Moon phase: Waning Gibbous

  • Additional notes: Snow!

January 14

Farm Notes

It’s been a frosty week here at the farm, and we’ve got some winter weather coming our way this weekend. Looks like Sunday is going to be a blustery mix of freezing rain / sleet / snow… now doesn’t that sound like fun?! The main concern with winter storms on the farm is that the snow and/or ice can be very heavy on our caterpillar tunnels, and if you don’t go out every few hours to knock off the snow/ice, the tunnels can collapse under the weight. I’m not too terribly worried, but I’ll definitely be watching this storm closely!

One project I started tackling this week that I am very excited about was beginning to lay out our new perennial garden area (read more about the inspiration for this new garden in this Farmbelly Journal post). The area for the perennial garden is about 80 x 40 feet long and it’s a total blank slate – which can actually be a bit intimidating! One thing that helps me start to visualize how to best design a new growing space is by putting stakes in each corner, and tying bright orange twine between the stakes (see photo to the right). If you are also planning out a new garden area this season, and not sure where to start, I definitely recommend using this stake + twine method to start laying out your ideas and to help visualize your space.

And now for a fun announcement… it’s time for another cookbook giveaway! I love sharing my favorite books with y’all and will continue to host giveaways throughout the season... this time, I’m excited to give away an amazing farm to table cookbook – Grow, Cook, Nourish – written by Darina Allen, the founder / matriarch of the Ballymaloe Cooking School, which is located on a magical 100-acre organic farm in the Irish countryside. I attended the culinary program at Ballymaloe back in 2013, and it absolutely changed my life (and the way I look at food) forever.

Grow, Cook, Nourish is a vegetable-focused cookbook with 500+ recipes, AND it also digs into tons of tips and information for how to grow each vegetable. This book is a wealth of information, and it epitomizes what it means to “eat like a farmer”!

TO ENTER THE GIVEAWAY – There are two ways that you can enter this giveaway (just choose 1):

  1. Comment on this post in our private Facebook Group and share which spring vegetable you are most looking forward to cooking with! If you aren’t already a member of our private Facebook Group, just request access here.

  2. OR Click the “Comment” button at the bottom of this journal entry and share which spring vegetable you are most looking forward to cooking with!

You have until Thursday, January 20th @ midnight to enter, and I’ll announce one randomly selected winner on Friday, January 21st. One entry per person please.

Kitchen Notes

Last weekend, I cooked up a juicy, crispy-skinned roast chicken, and it was DELICIOUS. As we were cleaning up, I saw my dear husband going to throw away the picked-over chicken carcass, and I screamed “NO!” and quickly snatched it from the clutches of our trash can. You see… I had big plans for that chicken, and I was determined to squeeze every bit of goodness out of it by making some homemade chicken broth this week.

While we should never feel ashamed about buying chicken (or veggie) broth from the store, it so wonderfully easy (and healthier and waaay more economical) to make yourself… so today I’m excited to share a very simple recipe for homemade chicken broth. For vegetarians, just omit the chicken in this recipe and you’ve still got a splendid broth that is ready to incorporate into soups, stews, sauces, risotto, etc.

HOMEMADE CHICKEN BROTH 

INGREDIENTS 

  • 1 chicken carcass

  • 2 onions, cut into quarters (peels can stay on)

  • 4 smashed garlic cloves

  • 4 ribs celery, roughly chopped

  • 4 carrots, roughly chopped

  • 2 bay leaves

  • A few sprigs (or stems) of fresh parsley and/or thyme

  • 1 teaspoon black peppercorns

  • Other optional ingredients to add that will add flavor and depth: leek tops, carrot tops, parmesan rind, seeds from inside a winter squash, etc

PREPARATION

  • Place the chicken carcass, chopped vegetables, herbs and any additional aromatics in a large (at least 5 quarts) pot.

  • Cover the vegetables with an inch or two of water (around 3.5-4 quarts of water) and bring to a boil, uncovered. 

  • Reduce the heat, maintaining a gentle simmer, and cook for 1 hour and 30 minutes. Spoon off and discard any foam that rises to the surface.

  • Strain the stock ingredients through a fine mesh strainer and let it cool to room temperature. Store the stock in quart jars and refrigerate or freeze (I love freezing broth in these Souper Cubes). Fresh homemade stock will last one week in the fridge and several months in the freezer.

Today’s Stats

  • Low temp: 26F

  • High temp: 52F

  • Sunrise: 7:27am

  • Sunset: 5:25pm

  • Moon phase: Waxing Gibbous

  • Additional notes: Sunny & chilly