January 7

Farm Notes

Let’s talk about making your garden/farm planting plans for 2022!

Regardless of how big or small your growing area may be, I highly recommend creating a visual planting plan at the beginning of each season, where you can plan out which crops will go where over the course of a year. To help you visualize what I’m talking about (and to offer you a template to use if this is helpful for you), here is an excerpt of our planting plan for March and April of 2021 (also see photo below):

Example planting plan from March 2021.

In the planting plan, I include information about how a certain crop will be spaced within the row (for example, when we plant tomatoes, I specify that we will plant one row of tomatoes down the middle, and each plant is spaced 18” apart). I also mark on the spreadsheet the expected planting date – which I’ll update after we do the actual planting, as my expected planting dates aren’t always accurate!

I use a template titled Seeding Calendar, where I keep track of when I need to start seeds to have them ready to transplant into the garden at the right time. While I work with other farms/nurseries to start the majority of our seedlings, I enjoy starting my own seeds for things that are a bit funky (like edible flowers), and for seeds that only take a few weeks to start (like anything in the cucurbit family - cucumbers, zucchini, etc). Not sure when to start seeds indoors? Here’s a great guide that is customized by zip code that is an awesome resource!

I find that this process of mapping out the whole season is incredibly helpful, and means that when thousands of seedlings arrive here and are ready to be planted, I know exactly where everything is going. It’s also useful for planning out future growing seasons, because I make sure to rotate different crop families – for example, I’ll make sure that I don’t plant our brassicas (broccoli, cabbage, kale, etc) in the same place two years in a row. The reason we rotate crops is to ensure we don’t deplete the soil of nutrients, and because it really helps with pest/disease management to move the different crop families around each season. For more information about crop rotation and why it’s important, check out this article.

So if you have a home garden, make a planting plan! Just create a layout for your garden space on a spreadsheet (or even with pen on paper) and start filling in details about which plants you’d like to grow, and where they will go. If you have any questions or need some help with this planning process, just give me a holler!

Kitchen Notes

Real talk. My kitchen inspiration this week isn’t exactly the epitome of “farm to table”… but until a few days ago, I’d never made homemade enchiladas before, as I assumed they were complicated and time consuming to make. Alas! The other day while scrounging in the kitchen, I realized we had all the ingredients for enchiladas, and decided to give them a try. It may look like a lot of ingredients and steps, but I promise that the whole process goes WAY quicker than you expect. But pretty please don’t skip the step of making your own enchilada sauce! It will be well worth the tiny bit of extra effort, and will be way tastier + healthier than the store-bought stuff. For this recipe, the enchilada filling has ground beef + beans, but you can totally substitute with other proteins like shredded pork or chicken, or make them vegetarian by subbing with sautéed veggies like mushrooms, peppers, zucchini, etc.

Beef & Bean Enchiladas

Photo Credit: The Beach House Kitchen

INGREDIENTS

For the Enchilada Sauce

  • 3 tablespoons olive oil

  • 3 tablespoons flour (GF flour works too)

  • 1 tablespoon brown sugar

  • 1-2 teaspoons chipotle chili powder (use more or less based on your spice tolerance!)

  • 1 teaspoon ground cumin

  • ½ teaspoon garlic powder

  • ¼ teaspoon dried oregano

  • ¼ teaspoon cinnamon

  • ¼ teaspoon salt, to taste

  • 2 tablespoons tomato paste

  • 2 cups broth (vegetable, chicken, or beef)

  • 1 tablespoon apple cider vinegar

  • Freshly ground black pepper, to taste

For the Enchiladas

  • 1 tablespoon olive oil

  • 1 yellow onion, finely chopped

  • 2 garlic cloves, minced

  • ¼ teaspoon salt, to taste

  • 1 lb ground beef

  • 1 can (14-oz) black beans, rinsed and drained

  • 1 can (14-oz) can pinto beans, rinsed and drained

  • 8 tortillas (or burrito wraps)

  • 1.5-2 cups shredded cheese

  • Handful fresh cilantro, roughly chopped (optional garnish)

INSTRUCTIONS

  1. First make the enchilada sauce – Measure out the dry ingredients (the flour, brown sugar, chili powder, cumin, garlic powder, oregano, cinnamon and salt) into a small bowl. In a medium-sized pot over medium heat, warm the oil until it’s sizzling, then pour in the flour + spice mixture. While whisking constantly, cook until fragrant and slightly deepened in color, about 1 minute. Whisk the tomato paste into the mixture, then slowly pour in the broth while whisking constantly to remove any lumps. Raise heat to medium-high and bring the mixture to a simmer, then reduce heat as necessary to maintain a gentle simmer. Cook, whisking often, for about 5 to 7 minutes, until the sauce has thickened a bit and a spoon encounters some resistance as you stir it. Remove from heat, then whisk in the vinegar and season to taste with additional salt and/or pepper.

  2. Make the beef and bean enchilada filling – Preheat your oven 350F. Heat olive oil in a skillet over high heat. Add onion, garlic, and salt and cook for 2 minutes. Add ground beef and cook for 4-5 minutes, breaking it up as you go, until most of the meat has browned. Next add the rinsed and drained black + pinto beans to the skillet, as well as 1/4 cup of your enchilada sauce. Stir to combine and continue cooking until the ground beef is fully cooked. Taste and add additional salt if needed.

  3. Assemble and bake the enchiladas – Smear a bit of the enchilada sauce on the bottom of a 9x13 pyrex baking dish. Assemble the enchiladas by scooping the enchilada filling on the lower third of a tortilla. Roll up the tortilla and then place in the baking dish, seam side down. Repeat with remaining filling and tortillas. Pour enchilada sauce over the enchiladas and top with the shredded cheese. Bake for 10 minutes covered, then 10 minutes uncovered. Serve hot and enjoy!

Today’s Stats

  • Low temp: 18F

  • High temp: 37F

  • Sunrise: 7:28am

  • Sunset: 5:19pm

  • Moon phase: Waxing Crescent

  • Additional notes: Very cold and clear!

December 31

Farm Notes

Happy New Years Eve friends!

What are you dreaming up for 2022? This quiet(ish) window of time after Christmas and before NYE is one of my favorite times to be still, reflect, and put some big dreams into the universe. It's time to take stock of the previous 12 months – what worked, what didn't, what gave me energy, what was draining, etc – and start to sketch out what the next 12 months can bring.

I’m also using this quiet time to dig into all the books that have been piling up on my bedside table! I’ve always been a book worm, and back when I first got interested in farming 12+ years ago, there were several books that were absolutely foundational to fueling my passion for growing vegetables. While there’s no question that the best way to get experience with farming/gardening is to just get out in the dirt and learn by doing… it definitely helps to read up and establish a baseline of knowledge! So in case any of you are looking to cozy up with some good gardening-focused books this winter, I’m happy to share a few curated lists of titles that I would personally recommend (a note that I’m sharing Amazon links for these books, but if you can shop at your local bookstore, even better!):

FOR THE BEGINNING GARDENER

FOR FLOWER LOVERS

FOR HERB ENTHUSIASTS

FOR THE EXPERIENCED GARDENER / MARKET FARMER

Also! A reminder that as a thank you for being part of the Farmbelly Club community, I’m gifting free 15-minute garden consultations in January for anyone who wants to dig in and make a game plan for a thriving garden in 2022. Whether you have just a few pots on your front porch or a big dedicated garden space (and everything in between) – let’s get you growing like a pro next season!

To sign up for your free garden/farm consult, please fill out this quick survey by January 7th. After submitting this form, you will be contacted within 1 week to schedule your consult, which will take place on the phone or via Zoom in January 2022.

Kitchen Notes

Balancing cooking with taking care of a newborn means that there are a lot more crock pot/slow cooker meals happening around here! But even if you don’t have a new baby around, I have a feeling we all can use some go-to recipes that only require a little prep, and then can be totally forgotten about until dinner time. Earlier this week, we were craving something hearty and comforting, so I tried out this slow cooked beef short ribs recipe, which I’ve adapted a bit from Taste of Home, and we are BIG fans.

This dish does have a bit of prep to sear the short ribs and then saute + simmer some onions, garlic, tomato paste, red wine etc in the beef fat – but once you combine everything in the slow cooker, it will just do its thing for 6-8 hours on low. There is a final step of turning the remaining liquid in the slow cooker into a luxurious sauce, but I promise that part is SUPER easy and just takes a few extra minutes…. don’t skip that part, because it is divine! We enjoyed these short ribs with some mashed potatoes, which I highly recommend.

Slow Cooked Beef Short Ribs

Photo credit: Chelsea’s Messy Apron

INGREDIENTS

  • 3 pounds bone-in beef short ribs

  • Salt and pepper

  • 1 tablespoon canola oil

  • 2 cups carrots (4-6 medium carrots), cut into 1-inch pieces

  • 1 cup celery (~2 stalks celery), sliced

  • 1 cup beef broth

  • 2 tablespoons dried thyme or rosemary

  • 1 bay leaf

  • 2 large yellow onions, cut into 1/2-inch wedges

  • 6 garlic cloves, minced

  • 1 tablespoon tomato paste

  • 2 cups dry red wine (or beef broth)

  • 1 heaping tablespoon cornstarch

  • 3 tablespoons cold water

PREPARATION

  1. Sprinkle ribs generously with salt and pepper. In a large skillet, heat oil over medium-high heat. In batches, brown ribs on all sides; transfer to a 4 or 5 qt. slow cooker. Add carrots, celery, beef broth, dried thyme (or rosemary) and bay leaf to the ribs.

  2. Add onions to the same skillet, cook and stir over medium heat 5-6 minutes or until tender. Add minced garlic and tomato paste, cook and stir 1 minute longer. Stir in 2 cups wine (or beef broth). Bring to a boil, cook 8-10 minutes or until liquid is reduced by half. Add everything in the pan into the slow cooker. Cook, covered, on low 6-8 hours or until meat is tender and falling off the bone. Remove ribs and vegetables from the slow cooker and keep warm.

  3. To make the sauce, transfer cooking juices to a small saucepan; skim off fat and discard the bay leaf. Bring the juices to a boil. In a small bowl, mix cornstarch and water until smooth, then stir into cooking juices. Return to a boil, cook and stir 1-2 minutes or until thickened. Taste and add additional salt or pepper if needed. Serve sauce with ribs and vegetables.

Today’s Stats

  • Low temp: 58F

  • High temp: 70F

  • Sunrise: 7:28am

  • Sunset: 5:13pm

  • Moon phase: Waning Crescent

  • Additional notes: Partly cloudy and unseasonably warm

December 23

Farm Notes

Happy holidays everyone! I hope you are finding joy, rest, and lots of delicious meals in this season, which I know can also be a pretty darn stressful time of year. While I love getting to travel and celebrate with lots of family over the holidays, this year we’re laying low and spending Christmas here on the farm with a few close family members, and honestly, I’m excited for a quiet holiday at home!

As we look ahead to next year, I want to help YOU set goals + plans for your home gardens! As a thank you for being part of the Farmbelly Club community, I’m gifting free 15-minute garden consultations in January for anyone who wants to dig in and make a game plan for a thriving garden in 2022. Whether you have just a few pots on your front porch or a big dedicated garden space (and everything in between) – let’s get you growing like a pro next season!

To sign up for your garden consult, please fill out this quick survey by January 1st. After submitting this form, you will be contacted within 1 week to schedule your consult, which will take place on the phone or via Zoom in January 2022.

And in case it’s helpful, I put together this printable 2022 Garden Goals Worksheet to help you start thinking about your growing goals for next year. Let’s get growing friends!

Kitchen Notes

If you’re looking for a simple, comforting, and nourishing side dish for the holidays – look no further. This sweet potato, carrot, and parsnip puree is super easy to make and it hits all the flavor notes you could want… sweet, bright, herbaceous, and with a hint of acid thanks to a splash of apple cider vinegar. Enjoy as is, but I like to top it with a vibrant pesto or spiced seeds/nuts for a bit of crunch. A note that if you don’t have parsnips on hand, feel free to sub another vegetable or just use a bit more sweet potato and carrot (about 3lbs total root veggies).

SWEET POTATO, CARROT & PARSNIP PUREE

Serves 4-6

Photo Credit: Peas and Carrots

INGREDIENTS

1 lb carrots, peeled and chopped into 1/2” pieces

1 lb parsnips, peeled and chopped into 1/2” pieces

1 lb sweet potatoes, peeled and chopped into 1/2” pieces

1/4 cup olive oil

½ cup coconut milk

2 cloves garlic | minced

1 tablespoon apple cider vinegar

1 teaspoon chopped fresh thyme leaves

1 teaspoon orange zest

1 teaspoon kosher salt

Freshly ground pepper to taste

PREPARATION

  • Simmer carrots, parsnips, and sweet potatoes in salted water until tender, 15-20 mins. 

  • Drain the vegetables and puree with an immersion blender or food processor with olive oil, coconut milk, garlic, thyme, apple cider vinegar, orange zest, salt and pepper.

  • Pulse or puree until the texture is smooth. Add water or more coconut milk if necessary to blend the mixture more easily. Taste and adjust seasoning as needed.

Today’s Stats

  • Low temp: 28F

  • High temp: 49F

  • Sunrise: 7:25am

  • Sunset: 5:08pm

  • Moon phase: Waning Gibbous

  • Additional notes: Cold and clear

December 17

Farm Notes

Let the winter projects commence! In the past week, I was able to place all my seed orders for 2022, order our spring seedlings from Banner Greenhouses, process heaps of excess veggies to fill our freezer, make tons of progress organizing the disaster that is/was our barn, AND we significantly reduced the size of our laying hen flock to make room for a big project that we’re kicking off next year… whew! It’s amazing what you can get done when you aren’t busy outside planting, watering, weeding, trellising, harvesting, washing/packing, etc.

Because y’all get the nitty gritty, behind the scenes look at what’s happening here at the farm, you get to see a before and after of our barn organization workday. As someone who generally tries to keep things tidy and organized, I’m cringing at what a disaster our barn area had become… but after spending a lot of time going through everything and working on a much better labeling system, I’m confident that the barn won’t get this bad ever again… at least I hope not! We do still have some cleaning/organizing to do in there, but it feels SO good to have made some progress this week.

BEFORE:

AFTER:

Whew, that felt good!

Another big project that we’re beginning to tackle is bittersweet… after a lot of thought, we’ve decided to downsize our laying hen flock and turn their pasture space into a wild + wonderful perennial garden that will be filled with berries, asparagus, medicinal plants, native wildflowers, etc. Over the past year, I realized it just wasn’t making sense economically to keep a larger flock for selling eggs, and I’m newly inspired to revamp this space to be even more productive and beautiful.

I’m especially looking forward to creating a nice gathering space in this new perennial garden, where we can hold outdoor workshops and classes that we’re eager to start hosting again in 2022. Below are some photos of our smaller flock with their new fencing that has a smaller footprint, and a photo of all the space we can now play with for our perennial garden!

Smaller flock, bigger possibilities..!

Future perennial garden area

Can you tell that I’m excited?! I promise to bring y’all through every step of the process of building out this new garden space, in hopes that it will help inform + inspire some of you in your own home gardens. If you have any specific questions as you start to think about your own growing spaces in the new year, please don't hesitate to reach out! That's what I'm here for. :)

Kitchen Notes

I’m not exaggerating when I say I look forward to making this salad every winter. This shredded brussels sprout salad is colorful, crunchy, a little salty, full of flavor, and it will hold several days in your fridge (so take my advice and double this recipe and enjoy the leftovers)! It does require a bit of patience as you thinly shred all the brussels by hand… but look at it as an opportunity to sharpen up your knife skills. And I know that toasting / removing the skins of the hazelnuts is a bit of extra effort too… but I promise it is absolutely worth it!

SHREDDED BRUSSELS SPROUT SALAD WITH apples, TOASTED HAZELNUTS & APPLE CIDER VINAIGRETTE

Serves 4-6

Photo Credit: Elle Republic

INGREDIENTS

  • 2 pounds Brussels sprouts, thinly shredded

  • 2 Honey Crisp or Pink Lady apples, cut into thin slices

  • 1 tablespoon lemon juice

  • 3/4 cup hazelnuts

  • Shaved Pecorino (or Parmesan) cheese for topping

Apple Cider Vinaigrette

  • 1 tablespoon dijon mustard

  • 1 tablespoon whole grain mustard

  • 1 tablespoon maple syrup

  • 1/4 cup apple cider vinegar

  • 1/2 cup olive oil

  • 1 teaspoon kosher salt

PREPARATION

  • For the vinaigrette: put all ingredients in a jar with a lid and shake to mix. Taste and adjust seasoning as needed.

  • Arrange a rack in the middle of the oven and heat to 350°F. Spread the hazelnuts on a rimmed baking sheet. Toast until lightly golden-brown and the skins are peeling away, 10 to 15 minutes (make sure to watch closely so they don’t burn). Transfer the nuts to a clean dish towel, wrap up the nuts, and let steam for a minute. Rub the nuts with the towel to remove as many skins as possible. (Not all of the skins will be removed, which is fine.) Coarsely chop the nuts and set aside.

  • Shave the brussels sprouts as thinly as possible, either by hand with a sharp knife, or carefully using a mandoline to slice as thinly as possible down to the stem, or until the sprout is too short to safely slice. Place the shaved sprouts in a large bowl.

  • Halve and core the apples, then use your knife or mandoline to slice into 1/4-inch thick slices. Place the apple slices in a small bowl and toss with 1 tablespoon lemon juice to prevent browning. Pour the dressing over the Brussels sprouts and use your hands to gently massage the dressing into the shaved sprouts, softening them a bit. Add the apples and nuts and toss to combine. Top with shaved Pecorino or Parmesan cheese and enjoy!

Today’s Stats

  • Low temp: 55F

  • High temp: 71F

  • Sunrise: 7:22am

  • Sunset: 5:05pm

  • Moon phase: Waxing Gibbous

  • Additional notes: Sunny and unseasonably warm

December 10

Farm Notes

The farm has officially been put “to bed” for the year and dang it feels good! Yesterday we finished cleaning up all the rows, putting away irrigation lines, etc – and then we covered everything up with our silage tarps. These tarps work wonders all winter long, as they smother any remaining weeds, the keep the soil warm and encourage biologic activity underground, and they keep the soil from running away due to winter winds and rain.

Before…

…and after!

Even though there are still a few weeks left in 2021, my mind is already focused on planning for our next season! In recent years, seed companies have been overwhelmed by the growing demand for seeds – which means it’s crucial to get your seed orders in early, or else your favorite varieties may sell out.

This week I placed my seed potato pre-order, which I source from our awesome local farm store. Based on the CSA survey that I sent out to our members, a LOT of people asked for more potatoes in their shares, so we’re definitely going to be scaling up our potato production next season!

Even if you don’t have much space, you can absolutely grow potatoes at home in grow bags – here’s a helpful video tutorial I found online if you’re interested in giving potatoes a try next season.

Listed below are the varieties we’re going to grow (along with info about the number of days from planting to harvest). And if you’re curious about all the nuances of the different varieties, here’s a great catalogue!

  • Dark Red Norland (55-75 days)

  • Red Pontiac (80-85 days)

  • Blackberry (80-90 days)

  • All Blue (100-110)

  • Gold Nugget (90-100 days)

  • German Butterball  (100-110)

  • Terra Rosa (90-100 days)

  • Austrian Crescent (110+ days)

  • Banana (110+ days)

Kitchen Notes

Now that the farm has pretty much been put to bed for the winter, I’ve got a lot more time on my hands to experiment more in the kitchen! Last week some friends got together for a taco party, and I was inspired to make this bright and citrus-y take on a slaw for the meal, and it was a hit! Don’t get me wrong, I love a good mayo-heavy slaw with a big plate of BBQ, but I’m digging how refreshing this slaw was, especially this time of year when I’m craving lots of crunchy + colorful veggies. The recipe below is very forgiving, so feel free to substitute other winter veggies you have on hand for the slaw, and if you don’t have lime or orange juice you can certainly use lemon juice instead.

Winter Slaw with Citrus Vinaigrette

INGREDIENTS

  • 1 medium green or red cabbage, shredded

  • 4-6 carrots, shredded or thinly sliced

  • 4-6 radishes, thinly sliced

  • 1/4 cup finely chopped scallions/green onions

  • 1/4 cup finely chopped parsley

  • 1/4 cup pepitas/pumpkin seeds (optional)

  • Zest and juice from 1 orange (about 1 teaspoon zest and 1/4 cup juice)

  • 1/4 cup fresh lime juice, from 2 limes

  • 2 tablespoons fresh orange juice

  • 1/3 cup olive oil

  • 1 clove garlic, minced

  • 1-2 tablespoons honey or maple syrup

  • 1-2 tablespoons dijon mustard

  • 1 teaspoon salt

  • 1/2 teaspoon freshly ground black pepper

INSTRUCTIONS

  1. Combine all of the veggies, fresh herbs, and pumpkin seeds (if using) in a large bowl.

  2. In a mason jar, combine the lime and orange juice, olive oil, minced garlic, honey or maple syrup, mustard, salt, and pepper and shake well to make the vinaigrette.

  3. Pour the vinaigrette over the veggies and use your hands to toss until well combined. If possible, dress the slaw at least 30 minutes before eating. Taste and adjust seasoning as needed – I often add a bit more lime juice and salt to give the slaw a bit more punch.

Today’s Stats

  • Low temp: 33F

  • High temp: 49F

  • Sunrise: 7:16am

  • Sunset: 5:03pm

  • Moon phase: Waxing Crescent

  • Additional notes: Clear and chilly

December 3

Farm Notes

Well friends, we’ve officially wrapped up our 2021 growing season!

Yesterday marked the last pickup for our fall CSA, and it was a real good one (see photo below for our full share box). In addition to growing heaps of veggies for lots of families this year, we also grew our family by one with this sweet babe and we couldn’t be more grateful. It takes a village to run a farm AND to raise a baby, and we really do have the best village.

While our CSA has come to an end for the year, our work on the farm is never really over! We have a looong list of winter projects to tackle, starting with putting the farm “to bed” for winter. Our process for winterizing the beds is pretty simple… the key – for large farms to small home gardens – is that the soil should never be left bare. Bare soil can easily wash away due to wind and/or rain, and bare soil is much more likely to be drained of its nutrients and underground biologic activity. One way to cover the soil is by planting cover crops that grow through the winter, while we opt to cover our beds with leaves and then tuck everything in under tarps.

Once a bed has been cleared, we collect heaps of leaves from around the farm and put down a thick layer of leaf matter over all the beds. Next, we will lay silage tarps over the leaf-covered beds, and let everything sit until the spring! All winter long, the leaves will slowly decompose and add organic matter to the soil, and the tarps heap speed up this decomposition + will keep weeds from coming back. This same method can certainly be applied on a home garden scale! Winter is a great time to add nutrients back into your soil, especially after a long and nutrient-extracting growing season. A note that if you need any help with winterizing your garden, I’m happy to help advise, just send me a message.

Another favorite winter activity is digging into all the new seed catalogues! I love pouring through stacks of seed catalogues to dream + scheme for the growing season ahead, flush with (maybe too much) hope and optimism. If you’re looking to order seeds for next year, I recommend placing your orders sooner than later due to all the supply chain issues that we’re facing right now. Here are my go-to sources for purchasing seeds:

Kitchen Notes

Every winter, the humble cabbage starts to make more frequent appearances in my cooking rotation. One of my favorite cabbage recipes has gotta be braised cabbage, but I also love whipping up some sauerkraut! Making your own sauerkraut may seem daunting, but I like to think of sauerkraut as the gateway into fermentation… it’s quick to make, requires no special tools, and it is so gosh darn good for you + your gut. All you do is combine some freshly shredded cabbage with salt, pack it all into a jar, and then wait a few weeks! You can also certainly substitute other vegetables in place of cabbage… shredded carrots, beets, turnips, kohlrabi, etc would all work great too. Keep reading for my full recipe + method:

HOMEMADE SAUERKRAUT

Photo Credit: Abra’s Kitchen

INGREDIENTS + EQUIPMENT

  • 1 medium head green or red cabbage (about 3 pounds)

  • 1 1/2 tablespoons kosher salt

  • 1 tablespoon caraway or fennel seeds (optional)

  • 1 quart-sized wide mouth jar with lid

INSTRUCTIONS

  • Prepare jar: Wash your mason jar and lid in hot soapy water, rinse and let air dry.

  • Slice the cabbage: Discard any wilted, limp outer leaves of the cabbage. Cut the cabbage into quarters and trim out the core. Slice each quarter down its length, making 8 wedges. Slice each wedge crosswise into very thin ribbons.

  • Combine the cabbage and salt: Transfer the cabbage to a big mixing bowl and sprinkle the salt and caraway seeds over top. Work the salt and caraway or fennel seeds (if using) into the cabbage by massaging and squeezing the cabbage with your hands until it softens and releases liquid, 5-10 minutes. 

  • Pack the cabbage: Grab handfuls of the cabbage and pack them into the canning jar. Pour any liquid released by the cabbage into the jar. Place one of the larger outer leaves of the cabbage over the surface of the sliced cabbage to keep the cabbage submerged in its liquid.

  • Cover the jar: Cover the mouth of the jar loosely with the lid, or with a cloth secured by a rubber band or twine. 

  • Press the cabbage every few hours: Over the next 24 hours, press down on the cabbage every so often with a clean utensil. As the cabbage releases its liquid, it will become more limp and compact and the liquid will rise over the top of the cabbage.

  • Ferment the cabbage for 1-2 weeks: As it's fermenting, keep out at room temperature and make sure the brine always covers the cabbage. When the sauerkraut tastes great, refrigerate!

  • Storage: Sauerkraut is a fermented product, so it will keep for up to six months refrigerated.

ADDITIONAL NOTES:

  • Add extra liquid, if needed: It’s very important for the brine to cover the cabbage at all times. If extra brine is needed, dissolve 1 teaspoon of salt in 1 cup of water and add enough to submerge the cabbage.

  • Canning sauerkraut: You can process sauerkraut for longer storage outside of refrigeration, but the canning process will kill the good bacteria produced by the fermentation process.

  • Skimming: While the sauerkraut is fermenting, you may see bubbles, foam, or white scum. These are all signs of a healthy, happy fermentation process. The scum can be skimmed off the top either during fermentation or before refrigerating.

Today’s Stats

  • Low temp: 43F

  • High temp: 69F

  • Sunrise: 7:11am

  • Sunset: 5:02pm

  • Moon phase: Waning Crescent

  • Additional notes: Sunny and warm (for December)!

November 26

Happy day-after-Thanksgiving friends! I hope your bellies and hearts and fridges are full of goodness.

Today I’m sharing something a little different… two curated gift guides for the holidays! See below for two different guides – the first “Eat Like a Farmer” guide is geared towards cooks/food lovers, and the second “Grow Like a Pro” guide is for all the (experienced or aspiring) gardeners in your life.

Below the visual for each guide, you’ll see handy links to purchase each item (a note that I did my best to link to a wide mix of different sources for these gifts, and if you can find any of these items at your local culinary or garden store, I of course recommend shopping small + local if you can)! I put a lot of thought and energy (and fun!) into these guides, and I promise that I can personally vouch for each and every item you see here.

Last but definitely not least, please do keep scrolling to the end, where I also share a list of inspiring food + farm non-profits for anyone looking to support some hard working organizations holiday season.

Okay, now on to the gift guides…!

1. Six Seasons Cookbook by Joshua McFadden – one of my favorite seasonal cookbooks that epitomizes what it means to #eatlikeafarmer!

2. Microplane – one of my most-loved (and easily overlooked) kitchen tools.
3. Canning Kit – I personally use and love this canning kit, and it has everything you need to preserve seasonal bounty via hot water bath canning.
4. Whetstone Magazine – food-lovers will delight in a (print or digital) subscription to this groundbreaking magazine, which focuses on diverse storytelling around food origins and culture.
5. Le Creuset Dutch Oven – it's an investment for sure, but a classic dutch oven will last for generations and is one of my most-used (and most beloved) tools in the kitchen. The 4.5 quart size is the most versatile, in my opinion!
6. Ronco Food Dehydrator – this is a perfect (and affordable) starter dehydrator for anyone looking to get into dehydrating + preserving fruits, veggies, herbs, etc.
7. Diaspora Co Spice Set – A set of the 9 most popular spices from Diaspora Co, a company dedicated to ethically sourced, single-origin spices from India / Sri Lanka.
8. John Boos Cutting Board – Not only are they useful, these John Boos wooden cutting boards are so beautiful that I happily leave mine out on the counter at all times.
9. Hedley & Bennet Carryall Apron You can't go wrong with an apron from Hedley & Bennet, and I've gotta say I'm in love with this apron in a perfect "Farmbelly Blue" hue!
10. Lodge Cast Iron Set – A five piece set of high quality Lodge cast iron pans for under $100?! This is a steal of a deal.
11. Souper Cubes – I'm kinda obsessed with these! Perfect for preserving seasonal bounty by freezing + portioning out soups, stews, sauces, etc.

1. How to Grow More Vegetables by John JeavonsThis is hands down my favorite book for getting started in gardening/farming (though it's also full of helpful info for experience growers too).

2. Felco #2 PrunersClassic and high quality pruners that any gardener will constantly use and love.
3. Grow BagsGrow bags are a great solution for growing plants at home if you don't have room for raised beds. Perfect for herbs, greens, potatoes, squash, etc!
4. Cobra Garden ToolThis is a super versatile (albeit funky looking) tool that can be used for weeding, cultivating, and planting. One of my top 5 favorite tools we use here on the farm.
5. Drying RackFor anyone growing lots of onions, garlic, winter squash, etc – this drying rack is the perfect way to store + cure the harvest!
6. Dovetail Overalls I got my first pair of Dovetail overalls this year, and I practically live in them! This clothing brand is specifically designed for women, and I'm a huge fan.
7. Row 7 SeedsGardners will love planting seeds from Row 7 – a seed company founded by chef Dan Barber, featuring vegetables specially bred for incredible and unique flavors. They also sell gift certificates.
8. Opinel #8 Pocket Knife – You can't go wrong with this classic and stylish pocket knife that is super useful for quick harvests and odd jobs working outside.
9. Harvest Basket – Who doesn't love a big, beautiful harvest basket to collect bounty from the garden?
10. Muckster Garden Boots I got my first pair of Muck Boots this year, and I'm a total convert. They are super comfortable, waterproof, and warm in the winter + cool in the summer. They have lots of different styles and colors to choose from!
11. Watering WandNot all watering nozzles are created equal, and this is one of the best for gently watering plants in your garden and/or tender seedlings in a greenhouse.


DONATE

If you aren’t looking to purchase any more physical items this holiday season, or are looking to donate to a great cause, here are some incredible options in the food + farming space:

November 19

Farm Notes

It’s about to get real chilly around here, so we’ve been soaking up this week of gloriously warm and clear fall weather. We’ve also been taking advantage of the wild amount of leaves that fall around the farm, by gathering them up and spreading them out over the beds before covering everything with a tarp, so the leaves can decompose and add organic matter to the soil all winter long. Leaves are nature’s way of fertilizing the soil, so don’t let all that fertility go to waste.

Yesterday was our Week 11 CSA pickup, which means there’s only one more pick up left for this year! I’ll admit that going into this fall CSA session, I was pretty nervous about whether I could really keep managing the CSA while welcoming + taking care of a newborn at home. But I shouldn’t have worried. Thanks to our absolutely wonderful team (made up of all wonderful lady friends + neighbors), this season went WAY more smoothly that I could ever have hoped for. In the spirit of Thanksgiving, I am just so darn grateful to get to do this work, to work alongside such amazing humans, and to get to put good food on lots of tables in our community.

No other big farm updates at the moment… we are just focusing on slowly but surely cleaning up and tucking in the farm for winter. In other news, stay tuned next week for a fun “Eat Like a Farmer” Holiday Gift Guide that I’ve been working on! It’s chock full of my favorite tools for the garden and in the kitchen, as well as some wonderful food + farm non-profits that you can donate to if you’re not as into physical gifts this season. Next week I’ll also release another batch of our Heal-All Herbal Salves, since our first batch sold out so dang quickly!

Kitchen Notes

Every season when the first of the fall carrots are ready to be harvested, I want to enjoy them in their purest and simplest form. Because when you cook with local vegetables at the peak of freshness, you really don’t need to do much to make a delicious, nourishing dish. This recipe for maple butter roasted carrots with pistachios is one of my favorite ways to cook with sweet + crunchy fall carrots. It’s super simple to whip up, and it would be a fabulous side dish for your Thanksgiving tables next week! Recipe adapted from The Almond Eater.

MAPLE BUTTER ROASTED CARROTS

WITH PISTACHIOS

INGREDIENTS

  • 2 lb carrots ends trimmed and cut in half lengthwise

  • 2 tablespoon butter melted

  • 1/4 cup maple syrup

  • 1/4 teaspoon salt plus more to taste

  • 14 teaspoon red pepper flakes

  • 1/4 cup pistachios chopped

PREPARATION

  • Preheat oven to 425°. Line a large baking sheet with foil or parchment paper and set aside (don’t skip the foil / parchment.. this dish gets a little sticky)!

  • In a small bowl, whisk together the butter, maple syrup, salt, and red pepper flakes.

  • Place the carrots onto the baking sheet and toss them with the maple butter until they're completely coated (there should be a little maple butter left… save it).

  • Place the carrots into the oven and bake them for about 30 minutes, flipping half way through to make sure they don’t burn.

  • When the carrots are tender and beginning to brown, drizzle them with the remaining maple butter. Taste and add more salt if needed. Serve topped with chopped pistachios and enjoy!

Today’s Stats

  • Low temp: 25F

  • High temp: 52F

  • Sunrise: 6:58am

  • Sunset: 5:07pm

  • Moon phase: Waxing Gibbous

  • Additional notes: Sunny and chilly!

November 12

Farm Notes

After living here for over two years, I finally feel ready to start planting more fruit trees and perennials around the farm. It’s taken two solid years to better understand the nuances of this land – where the cold spots are, where the shade falls in the afternoon, and how water flows during heavy rains (all important factors to consider when planting permanent trees and perennials). In our climate, fall is a great time to plant – as it’s when the ground hasn’t yet frozen and the young plant roots can begin to slowly grow and expand, and it’s when the weather tends to be wetter (and therefore less hand watering or irrigation needed to support the plants).

Our fruit tree expansion officially began yesterday, and we planted a smattering of figs, mulberries, and pear trees around the farm! I’ll be honest that it’s been a very humbling process expanding into the world of fruit trees. While I feel like I instinctually understand vegetables after farming for over a decade… fruit trees are a whole new world and I have so much to learn!

I’m excited to share what I’m learning with everyone here, in hopes that it will inspire you to give fruiting trees and perennial plants a try in your space. And so! Here are some resources that have been super helpful for me as I dip my toe into growing more fruit:

FRUIT TREE RESOURCES

  • Resources from The Giving Grove – this is a great organization that works to promote a network of small, sustainable orchards around the country, and their resources page is chock-full of great information around fruit tree planting, maintenance, pests, etc.

  • The Southern Gardener’s Guide to Growing Fruit Trees – I just purchased this book for my own education, and it looks like a great resource for growing quality fruit here in the south (where it can be notoriously difficult)!

  • Edible Landscaping – This is an amazing farm/nursery based in Afton, VA which has a great selection of fruit trees and other edible perennials. Locals can pick up from the farm, or they will ship across the country. Their website is a trove of information filled with growing tips, so I encourage you to explore all they have to offer!

  • Century Farm Orchards – For folks living in the south/mid-atlantic, this is an incredible farm that grows + sells heritage fruit trees (apples, pears, figs, etc) that are bred to do especially well in this climate. David Vernon, the owner of Century Farm, is a treasure trove of knowledge and has a TON of resources on his website here.

Kitchen Notes

Today’s kitchen notes aren’t exactly edible… but I’m excited to share my “recipe” for making homemade healing salves! I feel like the cosmetic/beauty industry has made us believe that skincare products have to be complicated and made in a science lab to work… but I’ve found that simple skincare products made from plants are the most nourishing and beneficial for your skin. I’ve been making salves for several years now, and I love using them to moisturize dry skin and/or for soothing cuts, scrapes, burns, rashes, etc.

I’ve just released a batch of my Heal-All Herbal Salves in our farm shop (Farmbelly Club members get first dibs on this small batch) – but I believe that sharing is caring, so I’m happy to share my salve-making secrets with y’all. The “recipe” is in two parts – first you infuse olive + coconut oil with a blend of dried medicinal plants (I use comfrey, calendula, and plantain). Once you have your infused oil, to make salve you just need to melt in some beeswax (a natural hydrating ingredient that increases moisture in the skin), and then I like to add some essential oils for extra nourishment, and finally just pour into tins to harden. The whole process does require a bit of preparation, but once you have all the components ready, it really does come together quickly and easily. See the full process below, and please let me know if you have any questions!

HERB-INFUSED OIL

INGREDIENTS

  • 1/3 cup packed dried comfrey leaves

  • 1/3 cup packed dried calendula blossoms

  • 1/3 cup packed dried plantain leaves 

  • 1 cup organic extra virgin olive oil

  • 1 cup organic, unrefined coconut oil

PREPARATION

  1. Place dried herbs in a small stainless steel saucepan with olive and coconut oil. NOTE: Feel free to substitute with other dried herbs, so long as you have 1 cup total. 

  2. Heat over a gentle heat (between 100°-150° degrees) for 2-3 hours.

  3. Strain your oil through a metal mesh strainer lined with cheesecloth or a flour sack cloth.

  4. Allow to cool, then squeeze the cloth around the herbs to get out as much remaining oil as possible. Discard herbs and use a funnel to pour the oil in a clean glass jar/container with a lid.

SKIN NOURISHING SALVE RECIPE

INGREDIENTS

  • 1 cup (8 ounces) of herb-infused oil (see recipe above)

  • 2 tablespoons (1 ounce) grated or finely chopped beeswax

  • ~20 drops essential oils (ex : 15 drops lavender + 5 drops tea tree oil)

PREPARATION

  1. Combine the infused oil (from previous recipe) with the grated/chopped beeswax in a saucepan. Heat the mixture very gently (on the stove’s lowest heat setting) and stir occasionally to help the mixture melt.

  2. Once the wax has fully melted into the oil, remove from heat and quickly stir in essential oils. 

  3. While warm, pour the salve into tins. This recipe makes enough for four 2-oz tins (you can easily double the recipe to make bigger batches). Allow to cool and solidify fully without the lid. When solidified – cap, label, and store away from direct heat.

NOTE: For an easily spreadable salve, use the above ratio of 8:1 (8 parts oil, 1 part wax). For a firmer salve (such as lip balm) use a 4:1 ratio of oil to wax.

Today’s Stats

  • Low temp: 41F

  • High temp: 69F

  • Sunrise: 6:50am

  • Sunset: 5:12pm

  • Moon phase: Waning crescent

  • Additional notes: Rain overnight, clear and sunny during the afternoon.

November 5

Farm Notes

This morning I woke up to the beautiful sight of a glistening, frost-covered farm – the first frost of fall here at Farmbelly HQ! The first frost marks the official end of our summer growing season – so goodbye to the few remaining peppers + eggplant – and helloooo to heaps more leafy greens and root veggies, which are made even sweeter by the cold temps.

Yesterday was an exciting day around here… next season’s garlic is officially in the ground! We planted 150 row feet of garlic, focusing on 4 different varieties: Music, Violet Spring, German Hardy White, and Purple Creole. To help control weeds over garlic’s long growing season (it won’t get harvest until next June) we plant them into landscape fabric – though you definitely don’t need to do that if you’re just growing a small amount of garlic in your home garden.

*A note that we have quite a bit of extra garlic seed leftover from our planting yesterday, so if you're local and you'd like some cloves just shoot me a message and I'll happily give you a bag of 20-30 cloves (for free of course)!

It may not look very exciting yet… but there is a LOT of garlic in the ground in these beds!

Did you know there are several different kinds of garlic? Here’s a quick rundown:

  • Hardneck garlic produce a stiff stem that grows up through the center of the bulb. Compared to softneck varieties, they have a sharper flavor, with more variation in flavor among the varieties. They are also hardier than softneck, so they are the best option for growing in cold climates. This is the variety that produces garlic scapes that need to be pulled (and then enjoyed!) in early summer before the garlic is harvested.

  • Softneck garlic don't produce a stiff central stem. Softneck garlic is the best choice for regions with mild winters, it has a more mild flavor than hardneck garlic, and it's the type to grow if you want to make garlic braids.

  • Elephant garlic resembles a giant head of garlic and, indeed, it does belong to the same genus, Allium. However, it isn't a "true" garlic but rather is more closely related to the leek.

Ok, now here are some helpful pointers for planting garlic:

  1. Plan to plant garlic in the fall, ideally between Halloween and Thanksgiving (aka right now)!

  1. Prepare your soil by loosening it with a fork/broadfork, and work in a good amount of compost into the bed. Garlic is a “heavy feeder” and requires a lot of nutrients, so having good quality soil is important to get a good crop.

  2. Purchase garlic seed from your local farm/garden store (not the supermarket)! Just prior to planting, break up the garlic heads into individual cloves, leaving as much of the papery covering on each clove intact as possible.

  3. Plant cloves 3"-4" deep and 4”-6” apart, orienting them so the pointy ends face up and root end is pointing down.

  4. Water gently to settle the soil, and then cover the bed with a 4" to 6" layer of leaves or straw. You will likely see some green shoots starting to grow before the end of the year, which is great! They will really start to take off in the spring.

Kitchen Notes

While we’ve got garlic on the brain, let’s talk about cooking with this delicious and powerful member of the allium family! Not only does garlic add heaps of flavor to dishes, it also has incredible health benefits – it helps boost your immune system, works as an anti-inflammatory, can help lower blood pressure, and has great anti-fungal + anti-microbial properties. And there are SO many different ways that garlic can get worked into your daily diet… don’t be afraid to think outside the box!

Here are some tips + links for all the ways that you can enjoy garlic:

ROAST IT – One of my favorite ways to cook garlic is roasting a whole head in the oven, until it becomes a sweet, nutty, caramelized delicacy. Here's a great guide on how to roast whole heads of garlic in the oven.

MINCE IT – You can’t beat simply minced raw garlic. My tip for mincing garlic quickly? Use a microplane!

SAUTE IT – So you’ve minced your garlic and you’re ready to throw it in a sizzling hot pan, right? WAIT! Garlic is super delicate and can burn to a crisp in the blink of an eye, so make sure your pot/pan isn’t blasting heat before adding and cooking your garlic. Sometimes if I’m adding garlic at the end of a dish, I’ll even turn the stove completely off before adding the garlic, and I’ll let the residual heat from the pan gently cook it.

FERMENT IT – That’s right, you really can ferment garlic! Here is a super simple recipe/method for making fermented garlic in honey. The end result is deliciously sweet + funky garlic, as well as honey that’s been gently infused with garlic flavor (delicious in vinaigrettes, with fried chicken, over pizza, cornbread, etc).

PICKLE IT – Another great way to preserve garlic is to pickle it! The process couldn’t be easier – just pack whole peeled cloves of garlic into an acidic brine, along with any other aromatics you’d like. Here is a great recipe to get you started.

Today’s Stats

  • Low temp: 29F

  • High temp: 54F

  • Sunrise: 7:43am

  • Sunset: 6:18pm

  • Moon phase: Waning crescent

  • Additional notes: First frost! Clear and sunny

October 29

Farm Notes

It’s been a quiet week on the farm, as we (both humans and plants alike) start to really lean into the the seasonal changes of less daylight and cooler temps. While there are still weeds galore to be pulled, their rate of growth has significantly decreased (yay!), and the grass no longer needs to be mowed every week (double yay!). Our greens and lettuces are thriving, while our summer eggplant and peppers are having their last hoorah (and will likely be pulled out in the next 1-2 weeks). Still no frost in the 7-day forecast, and I have a feeling that the first freeze will happen around the second week of November.

I had thought that the garlic would go in the ground this week, but we only had enough time to get the future garlic beds prepped… and so the garlic will definitely go in next Thursday! Garlic is an amazing plant that gets planted in late October-early November, and it will grow all winter + spring until it is ready to be harvested in the summer. It’s a crop that requires quite a bit of patience, but the payoff of getting to eat delicious, homegrown garlic is totally worth it. You don’t need much space to grow garlic, so now is a great time to give it a try! Not sure how to get started? Here are some helpful resources for planting fall garlic:

  • How to plant garlic – this is a quick and handy guide to growing garlic from the Hudson Valley Seed Co.

  • More garlic growing tips from our friends at Country Farm & Home, located down the road in Pittsboro, NC. If you are local to the Triangle area in NC, Country Farm & Home is our go-to spot to purchase garlic for fall planting, and NOW is the time to head over there and grab some garlic if you're looking to plant this fall! See a full listing of all their garlic varieties available here.

  • If you're more of a visual learner, below is a helpful video guide to all things garlic.

farmers_market_fall-9.jpg

Kitchen Notes

Hakurei.JPG

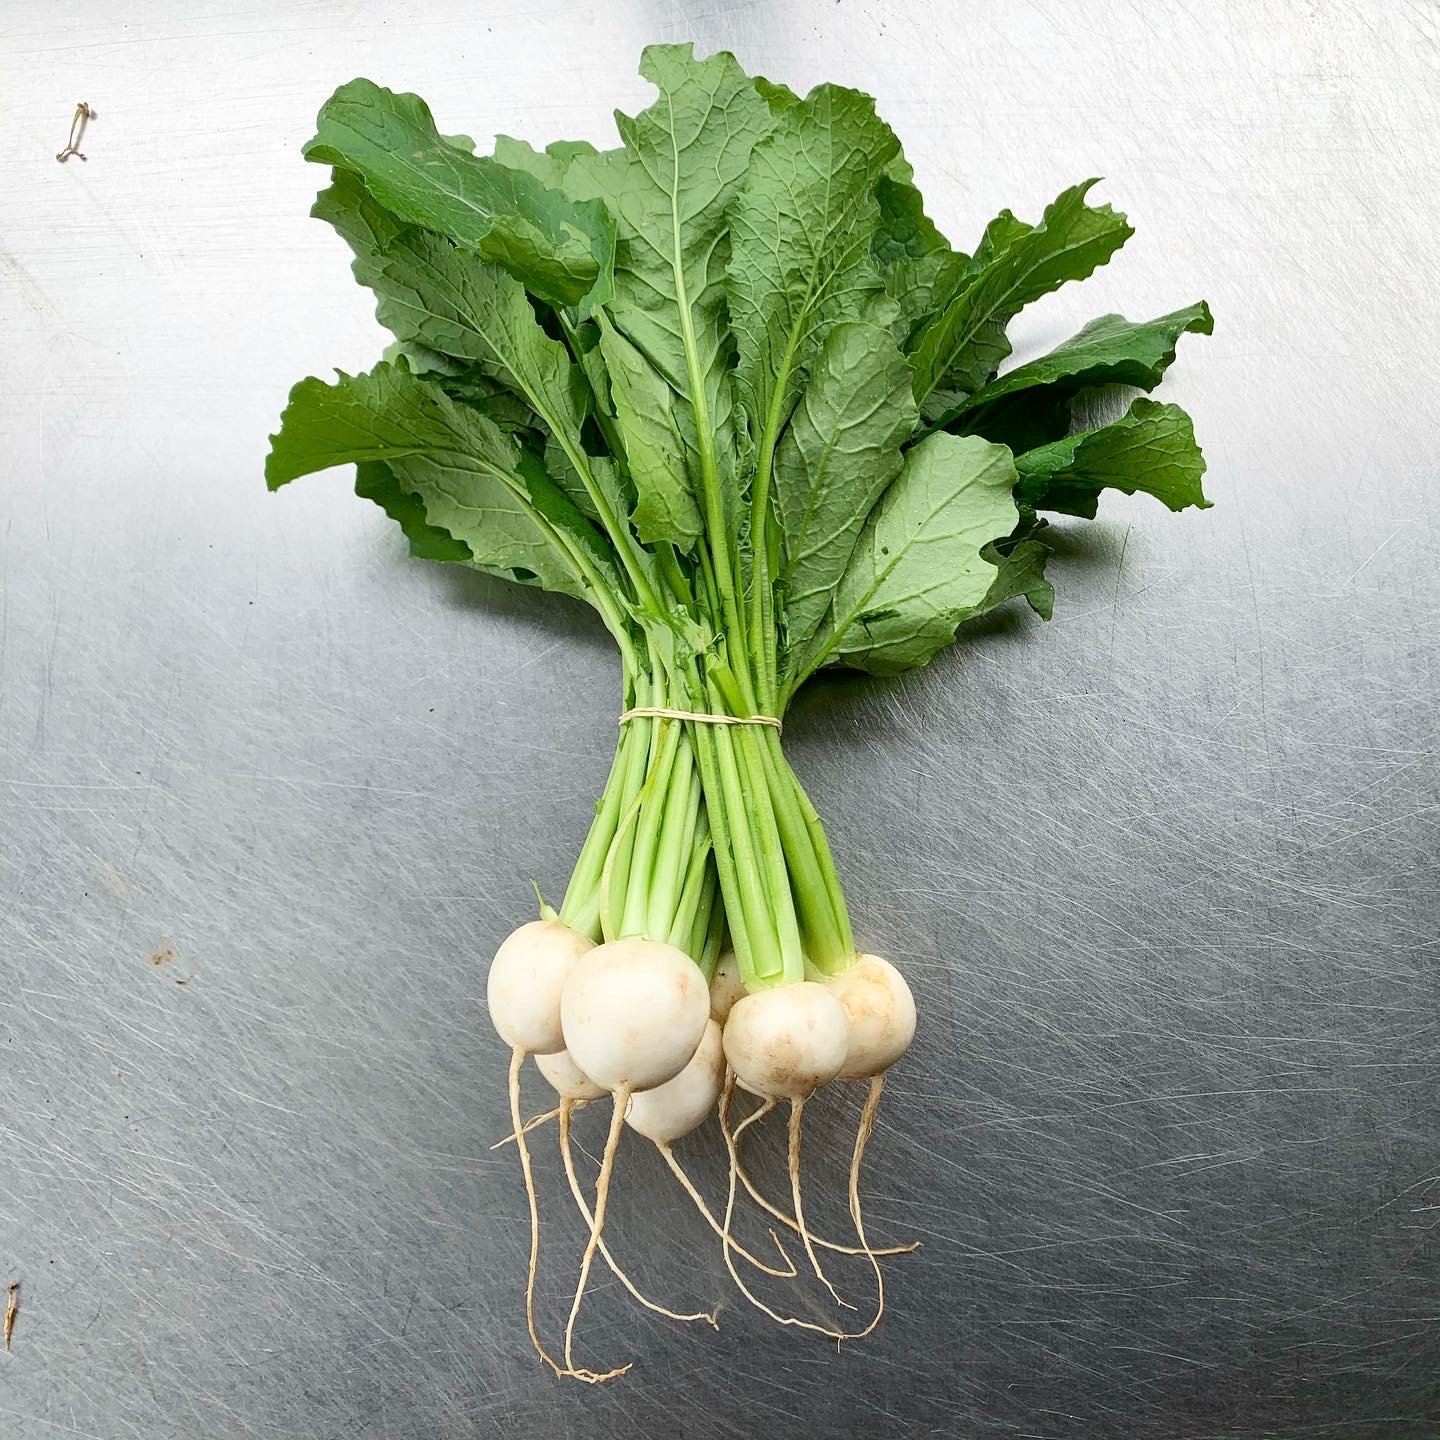
Our hakurei / japanese / salad turnips are at their peak right now, and they went into all our CSA shares this week. I’ll be honest that turnips were not a vegetable that I ate (or had any desire to eat) growing up, but now I’m busy making up for lost time!

These turnips are so tender and juicy that they’re delicious even when eaten raw, though they are especially good when sautéed in butter or roasted until crispy in the oven. I love cooking with both the turnip roots and the leafy green tops… bonus points if I can incorporate both the tops and roots in the same dish! Because I know many of you may think you don’t like turnips… I’m sharing a few of my favorite turnip recipes in hopes that you’ll give them a shot:

TURNIP RECIPES !

Today’s Stats

  • Low temp: 48F

  • High temp: 67F

  • Sunrise: 7:37am

  • Sunset: 6:24pm

  • Moon phase: Waning gibbous

  • Additional notes: Rainy morning turned into a lovely afternoon

October 21

IMG_7363.jpg

Farm Notes

After four months of slowly but surely growing underground, as of this week all of our sweet potatoes have been harvested! It was hard and tedious and dirty work, but thanks to our awesome crew + some very helpful friends, we harvested around 200lbs of tubers. While that’s not too shabby, I’ll be honest that I was hoping for a much bigger harvest. We definitely learned some important lessons in this first season of growing sweet potatoes, and I’m eager to give them another try next season.

Sweet potatoes take so long to grow (typically 90-120 days), and they produce a ton of green matter that takes up a LOT of valuable real estate in the main growing season. This means that sweet potatoes end up hogging a lot of bed space that we could otherwise devote to a more diverse range of vegetables. Sweet potatoes also thrive in soft, loamy soil with lots of organic matter, and much of the soil on our farm is still pretty heavy clay – which means most of our potatoes are super wonky sizes and shapes (as the tubers can't grow as freely in clay-heavy soils).

Sweet potato harvest, in progress!

Sweet potato harvest, in progress!

To address both of these issues, next summer we are going to try a totally different method of growing these tubers… grow bags! Grow bags are literally large bags made of plastic or cloth, which you fill with dirt/compost and can grow just about anything out of! One of my farmer mentors grows all their sweet potatoes in 15-gallon grow bags, and they’ve reported it works like a charm. By using grow bags, you can cultivate sweet potatoes without taking up precious bed space AND you can fill the bags with high quality compost that helps the tubers to grow especially nicely. For any of you hoping to give sweet potatoes a try, but you don’t have much space to spare, I highly encourage you to try the grow bag route as well next year.

No other big updates from the farm this week… but looking ahead to next week, we are planting our garlic for 2022! I’m excited to show y’all our process for planting garlic – it’s a super fun and satisfying plant to grow, and you don’t need a ton of space to give it a try.

Kitchen Notes

IMG_0234.jpg

This week, our full share CSA members got one of my favorite fall veggies in their boxes… mini honeynut butternut squash! (PS – don’t worry to our small share folks, you’ll get honeynuts next week)

Honeynuts are a relatively new type of butternut squash hybrid, which have been specially bred for their petite size and super sweet flesh (if you’re curious about the history of honeynuts, there is a great article here).

While you can cook these just like you would any other kind of butternut squash, my go-to method is SUPER simple – just cut the squash in half lengthwise, slather each half with a bit of olive oil (or butter), salt, and pepper and roast in a 400F oven for about 25-30 minutes until the flesh is super tender.

Here are some links to a few other recipes I found using honeynut squash, if you feel inspired to cook up some of these lil cuties this fall!

Today’s Stats

  • Low temp: 58F

  • High temp: 78F

  • Sunrise: 7:30am

  • Sunset: 6:33pm

  • Moon phase: Waning gibbous

  • Additional notes: Another glorious fall day!

October 19

Farm Notes

Oh, how I’m loving these chilly autumnal evenings and mornings! We’ve had a glorious stretch of sunny fall weather around here, with highs around 75F and lows in the 40s… though I’m preparing myself for the first frost which is surely coming soon. I’m not sure if all farmers feel this way, but I find myself pretty relieved and grateful for the first frost every fall.

IMG_6858.jpg

In this area, the first frost usually happens at the end of October or early November, and by then we have finished all of our planting for the year, and can take a deep breath of relief and gratitude that we made it through another growing season. Granted, there are lots of growers who continue planting + harvesting through the winter (bless them!), but for now I’m happy to take a bit of a break between December and February. Because even though we aren’t harvesting in the winter, there are plenty of farm projects that have been neglected all year that can finally be addressed! Because I’m a total type-A list kinda gal, I’ve already made a (continually-growing) list of farm projects that I’m eager to tackle this winter / early spring 2022.

Here’s what I have so far on our winter project list:

  • Plant additional fruit trees (figs, mulberries, persimmons, pear)

  • Prep + plant perennial pollinator hedge along blueberry patch

  • Prep + plant blackberry patch next to blueberries

  • Prep + plant asparagus 

  • Spread wood chips around berries and asparagus patches

  • Bush hog the “back 5” (aka the wild area on our farm outside the garden)

  • Clean + organize inside the barn !

  • Re-organize and streamline wash/pack area

  • Build a 3-bin composting set-up

  • Build raised bed boxes in front of barn for herbs and flowers

And now I’d love to know… how are you feeling about the first frost of the year? Has it already frosted where you live? What are some of your winter projects that you hope to tackle?

Kitchen Notes

1FCF8904-3A44-418D-AE83-4ED058CFFECE.JPG

One of the keys to eating like a farmer is learning how to properly store fresh produce, to help reduce unnecessary food waste. It’s not always intuitive to know how to best store things like carrots or beets or fresh lettuce – and there is nothing worse than having to toss perfectly good produce that has been languishing in the back of your fridge for far too long. Alas! Today I’m going to share some helpful produce storage tips for different types of produce, to help you maximize the life of your veggies.

PRODUCE STORAGE TIPS

  • BUNCHED GREENS (kale, collards, etc) – Store in a bag (ideally wrapped in damp paper towels) in the crisper drawer of your fridge.

  • LOOSELEAF GREENS – Store in bag (or in a container) in the crisper drawer of your fridge. If greens seem wet, insert a dry paper towel to absorb moisture.

  • LEAFY ROOT VEGETABLES (radishes, turnips, beets, carrots) – Make sure to first cut off any greens/tops (which will help the roots stay crisp) and then store the roots in a bag in the crisper drawer of your fridge. Root veggie greens are edible and versatile as well, so I encourage you to store the greens in a separate bag in your crisper drawer and cook with those too!

  • CUCUMBERS, SUMMER SQUASH & PEPPERS – If using in the next few days, it’s okay to leave these veggies out on your counter, as they don’t like to be super cold. If storing in fridge, store in the front where your fridge is warmest.

  • TENDER HERBS (basil, cilantro, dill, parsley, etc) – Store stems in a jar of water (like a bouquet of flowers) and keep out on your counter (or in your fridge). Keep water fresh and cut the stems periodically to extend shelf life.

  • HEARTY HERBS (rosemary, thyme, sage, etc) – Wrap herbs in a damp paper towel and store in a plastic bag in your fridge.

  • (DRIED) ONIONS & GARLIC – Store on your counter or in your pantry (ie room temp).

  • (FRESH/GREEN) ONIONS & GARLIC – Store in the crisper drawer of your fridge.

  • POTATOES – Store out of the fridge in a cool, dry, dark spot (a pantry is great).

  • TOMATOES – Store at room temperature on your counter, not in your fridge (the cold zaps all the great flavor).

  • WINTER SQUASH – Store out of the fridge in a cool, dry, dark spot (a pantry is great).

Today’s Stats

  • Low temp: 45F

  • High temp: 74F

  • Sunrise: 7:28am

  • Sunset: 6:36pm

  • Moon phase: Waxing gibbous

  • Additional notes: Glorious fall day!

October 14

Farm Notes

What a glorious week of fall weather here in the Piedmont of North Carolina! After a pretty brutal summer, these cool, clear, zero-humidity days remind us why we love farming in this part of the country. Right now we’re still harvesting the last of the summer peppers and eggplant, and the fall greens are really hitting their stride. Between collards, kale (including baby kale), arugula, and heaps of lettuces – there are so many gorgeous dark leafy greens coming out of the field right now, which are a welcomed sight after a tomato-filled summer.

Now for some farm updates:

  • Today we started harvesting our sweet potatoes! After first attempting to begin harvesting them a few weeks ago (when we realized they definitely weren’t ready yet..), we tried again today and were pleased to finally get some nice tubers out of the ground. I’ll be honest that harvesting sweet potatoes is pretty dang labor intensive – they break and scar super easily, so we have to carefully dig each potato by hand using trowels. We have about 150 row feet that need to be harvested over the next few days, and then we will set the potatoes out to cure for 10-14 days. After that, they will be ready to go into our CSA shares, and then hopefully get cooked up in some delish fall dishes.

  • Unfortunately, we’re dealing with a bacterial issue called black rot on some of our brassicas (ie plants like kale, cabbage, broccoli). Black rot is especially common in this region in the fall, when the weather is super hot and humid/wet. It’s incredibly frustrating to see our plants suffering, especially because we’re learning that our brassica seeds/seedlings were likely already infected with this bacteria before ever arriving at our farm, and once they were planted here the bacteria started showing up and causing our plants to wilt and show extensive leaf damage just a few weeks later.

    Thankfully, we’re still able to salvage most of our brassica crops, though our broccoli has been hit the hardest. I’m hopeful that we will still be able to harvest some nice broccoli crowns for our members in the next few weeks… but we will have to wait and see. See below right for a photo of what black rot looks like – if you are dealing with similar issues in your home garden, make sure to remove damage leaves and discard them far away from your garden. Also, in future seasons make sure to plant your brassicas in different beds, because the bacteria can stick around in the soil for long periods of time and re-infect your plants.

Time to dig sweet potatoes!

Time to dig sweet potatoes!

This is what the dreaded ‘black rot’ looks like.

This is what the dreaded ‘black rot’ looks like.

Farm chores with Sawyer!

Farm chores with Sawyer!

And because I know everyone is eager for a baby update… sweet Sawyer is doing great! Last week we tried out our baby carrier for the first time, and I was able to bring him out to the field with me to “help” with a few light farm chores, and it was AWESOME.

It’s hard to believe that this weekend, he will already be 1 month old! I once heard someone say that these early days of parenthood are the “longest shortest time” and I’m already finding that to be profoundly true.

Kitchen Notes

French breakfast radishes

French breakfast radishes

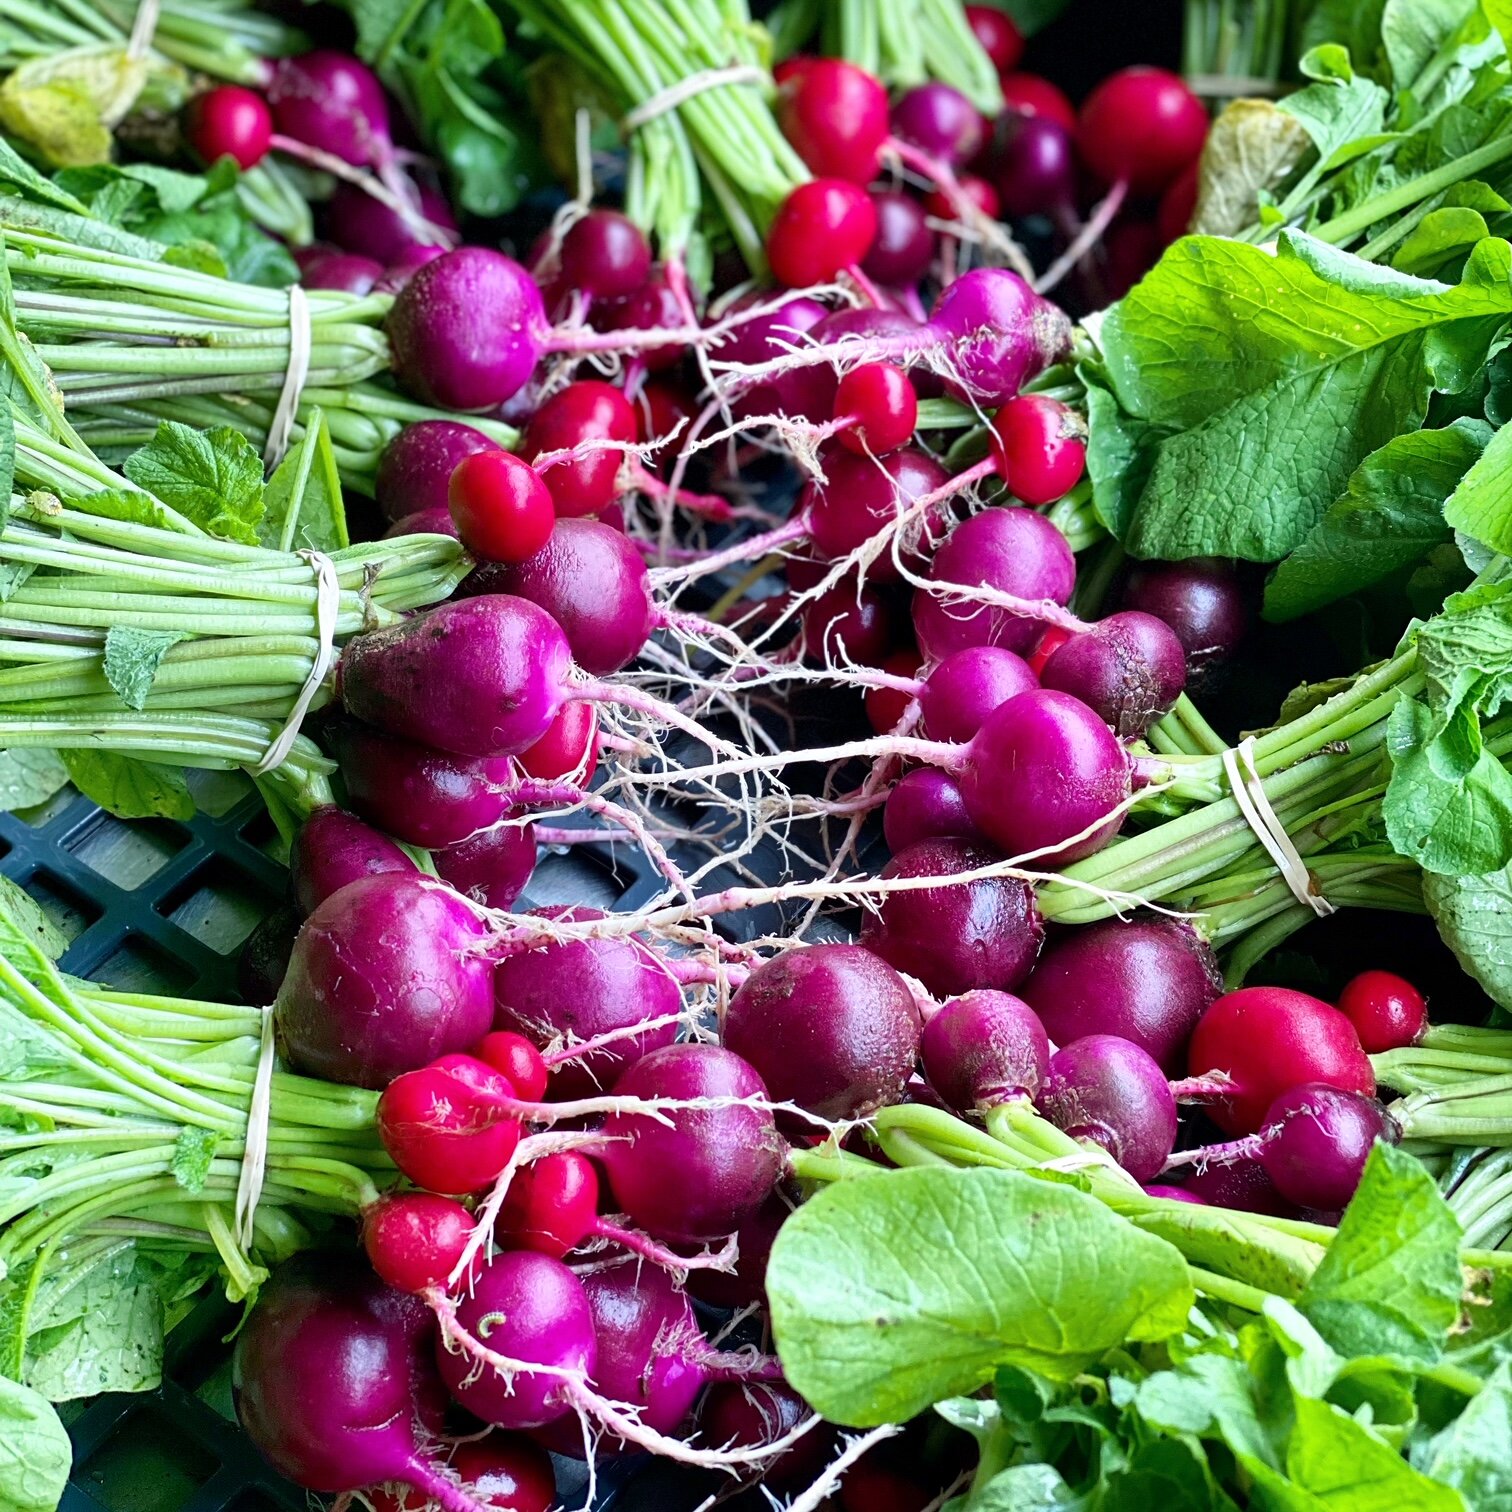
I’m not exactly sure why, but I have such a soft spot for radishes. Whether it’s growing them or cooking them or eating them – I get genuinely excited whenever radishes are around. Alas! I’ve come to realize that my love for this petite and colorful root veggie miiiight not be shared by the general population. Lots of folks tell me that radishes just aren’t “their thing” – or that they don’t know what to do with radishes. And so! In this moment when fall radishes are having a moment, I’d like to dig into some tips + recipes for enjoying radishes, in hope that more of you will join me over in the radish fan club. :)

COMMON TYPES OF RADISHES

  • Round Radishes – Classic round radishes that can be red, pink, or purple in color.

  • French Breakfast Radishes – A special variety of radishes featuring a long, slender shape and a distinctive ombre color from white to pink.

  • Watermelon Radishes – Heirloom variety of radishes with a pale exterior and hot pink exterior.

  • Black Radishes – Just as the name suggests, these are a special variety of radishes with a black exterior and bright white flesh.

HOW TO STORE RADISHES – If the tops are still on the radishes, use a knife to cut them off (as the greens will draw moisture out of the radishes and leave you with sad, limp roots). Store the roots (and greens if you’d like to use them) separately in bags or containers in the crisper drawer of your fridge.

RADISH FLAVOR PAIRINGS & RECIPES

Radishes range in flavor from mild to spicy, and pair well with salty cheeses like feta or goat; bright citrus or white wine vinegar; refreshing herbs like mint, parsley, and chives; as well as alongside cucumbers, avocados, dijon mustard, and salted butter. Here are so go to recipes:

Today’s Stats

  • Low temp: 58F

  • High temp: 81F

  • Sunrise: 7:23am

  • Sunset: 6:42pm

  • Moon phase: Waxing Crescent

  • Additional notes: Glorious fall day!

October 6

Farm Notes

7AA8785C-AAC8-4AFF-A093-B42E30763260.JPG

Baby Sawyer is napping, and I’m excited to hop on and give some updates from the farm! Our sweet babe is doing great, gaining weight like a champ, (mostly) sleeping well, and we are just so dang grateful. I’ll be honest that the first day or two at home as first time parents was a biiit overwhelming and sleep was pretty much non-existent, but thanks to all the incredible support from family and friends over the past few weeks, Matthew and I feel like we are finally getting the hang of things… for now at least!

I’m finding that one key to my mental health in this season is getting at least a little time outside each day – whether that's going for a walk down our country road, sitting out on our porch taking in the sunset, or spending time in the garden lightly weeding, watering, harvesting, etc. I was able to spend a solid hour outside working this morning, which was the longest stretch since Sawyer arrived! And while I'm grateful to be able to get time outside a bit each day, I'm lucky to have an awesome team of folks helping to run the farm this fall, so I can really just focus on spending this special and fleeting time with sweet Sawyer.

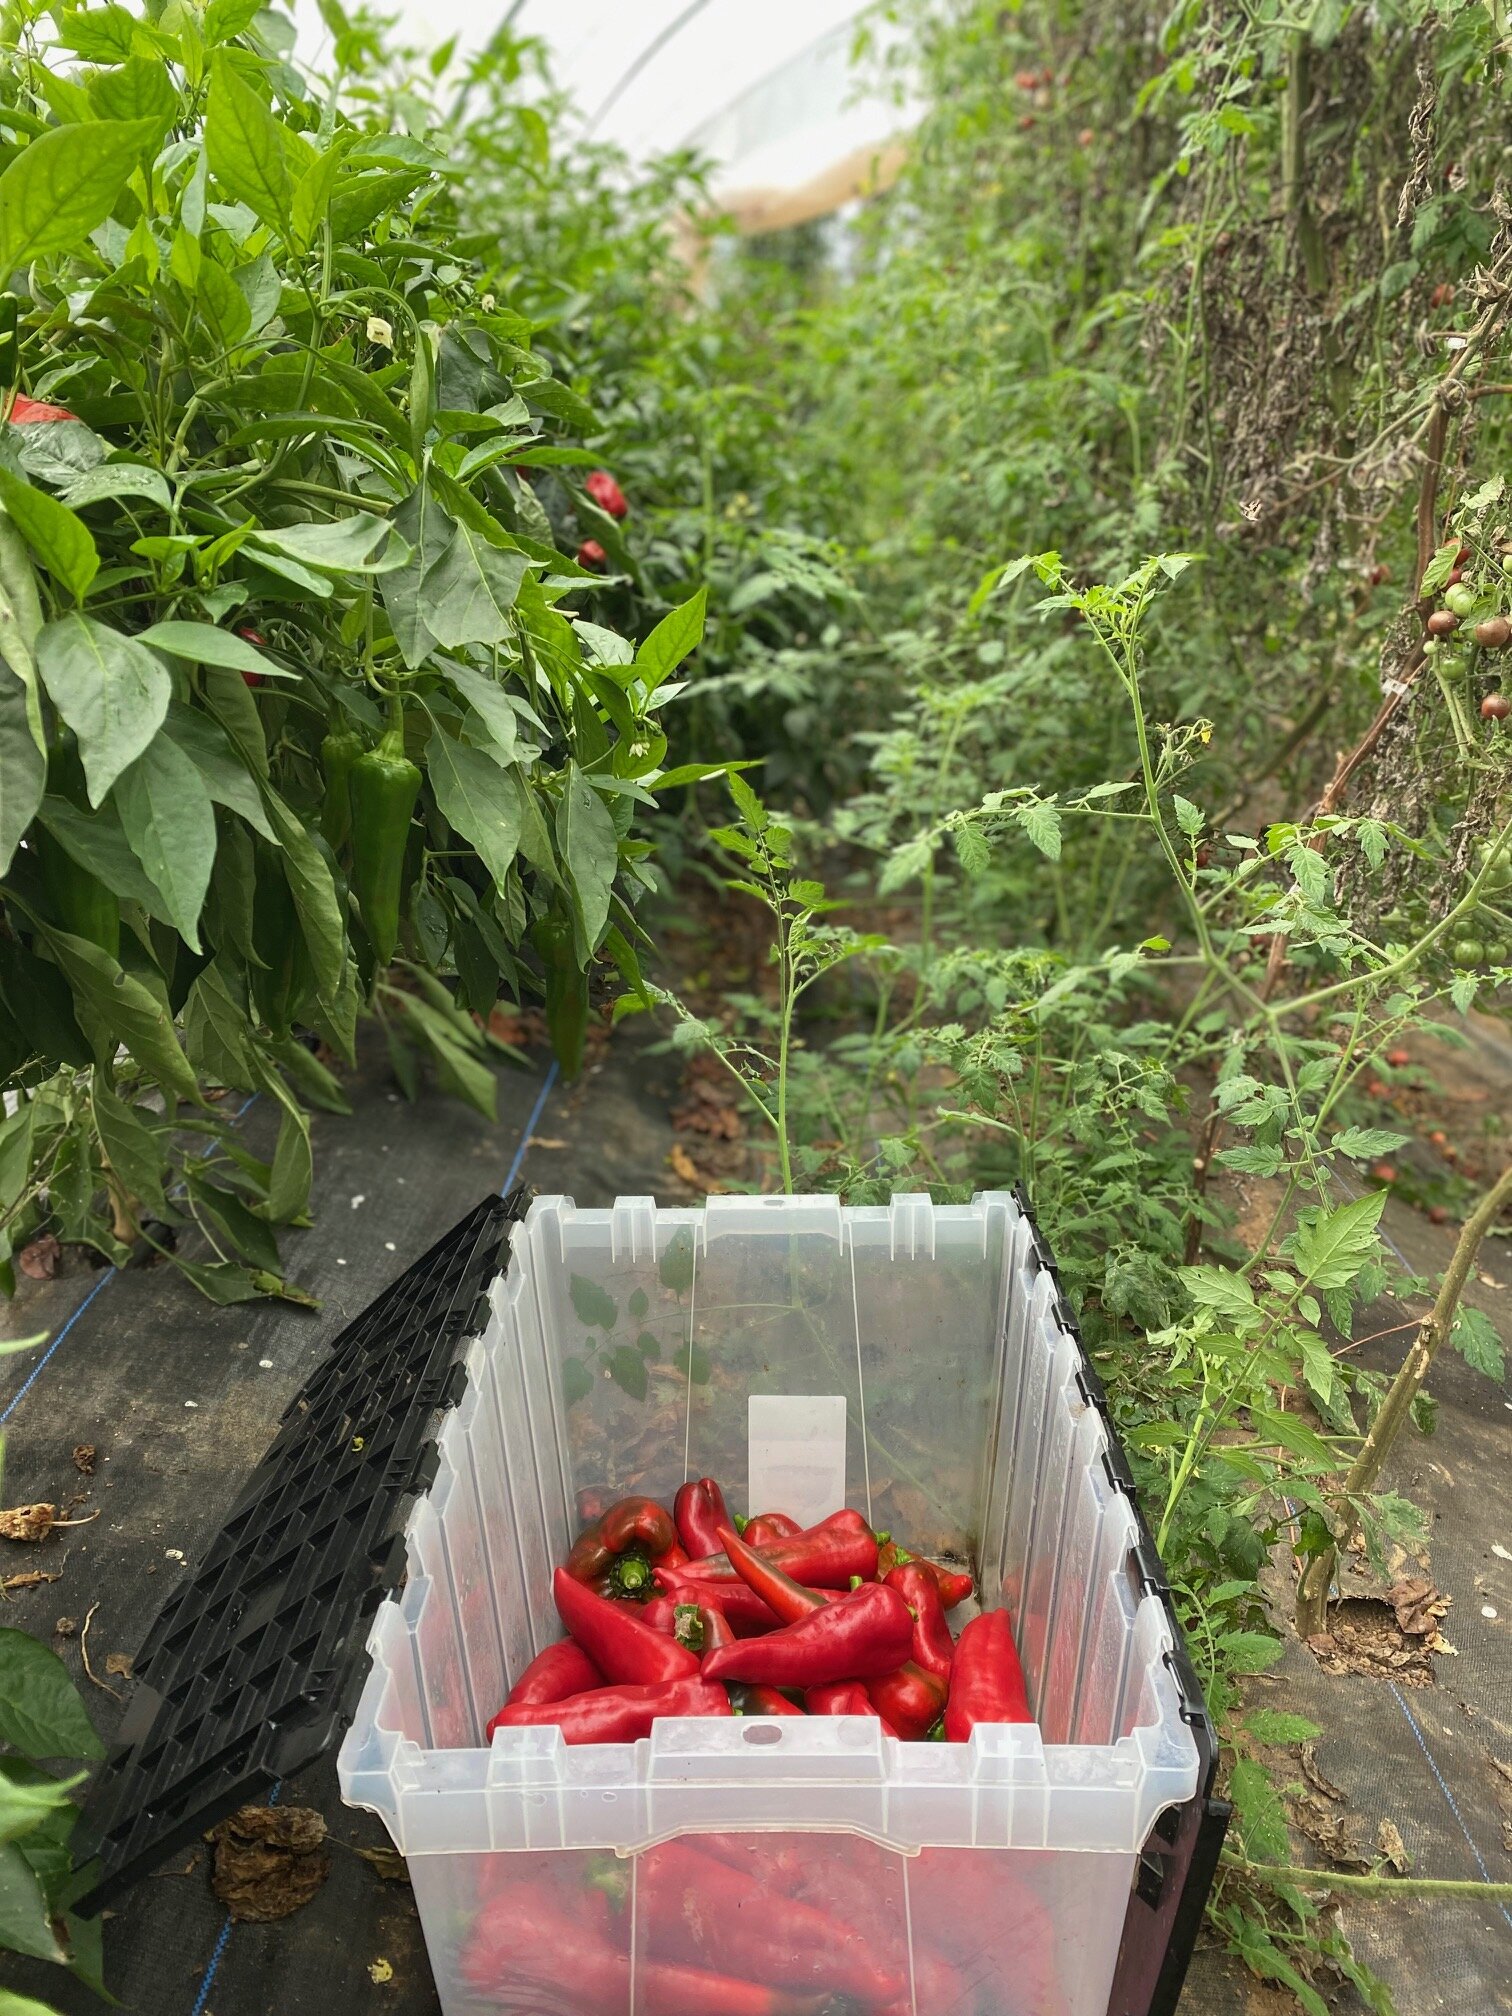
An abundance of peppers inside a jungle of a tunnel!

An abundance of peppers inside a jungle of a tunnel!

That said, I'm definitely learning to let go of some things as my priorities shift, and the farm isn't my only "baby" anymore! Let's just say the rows are a bit more weedy than usual, our tunnels have become a tangled jungle of late summer tomatoes and peppers, and the 10-foot tall okra has gone unpicked for weeks.

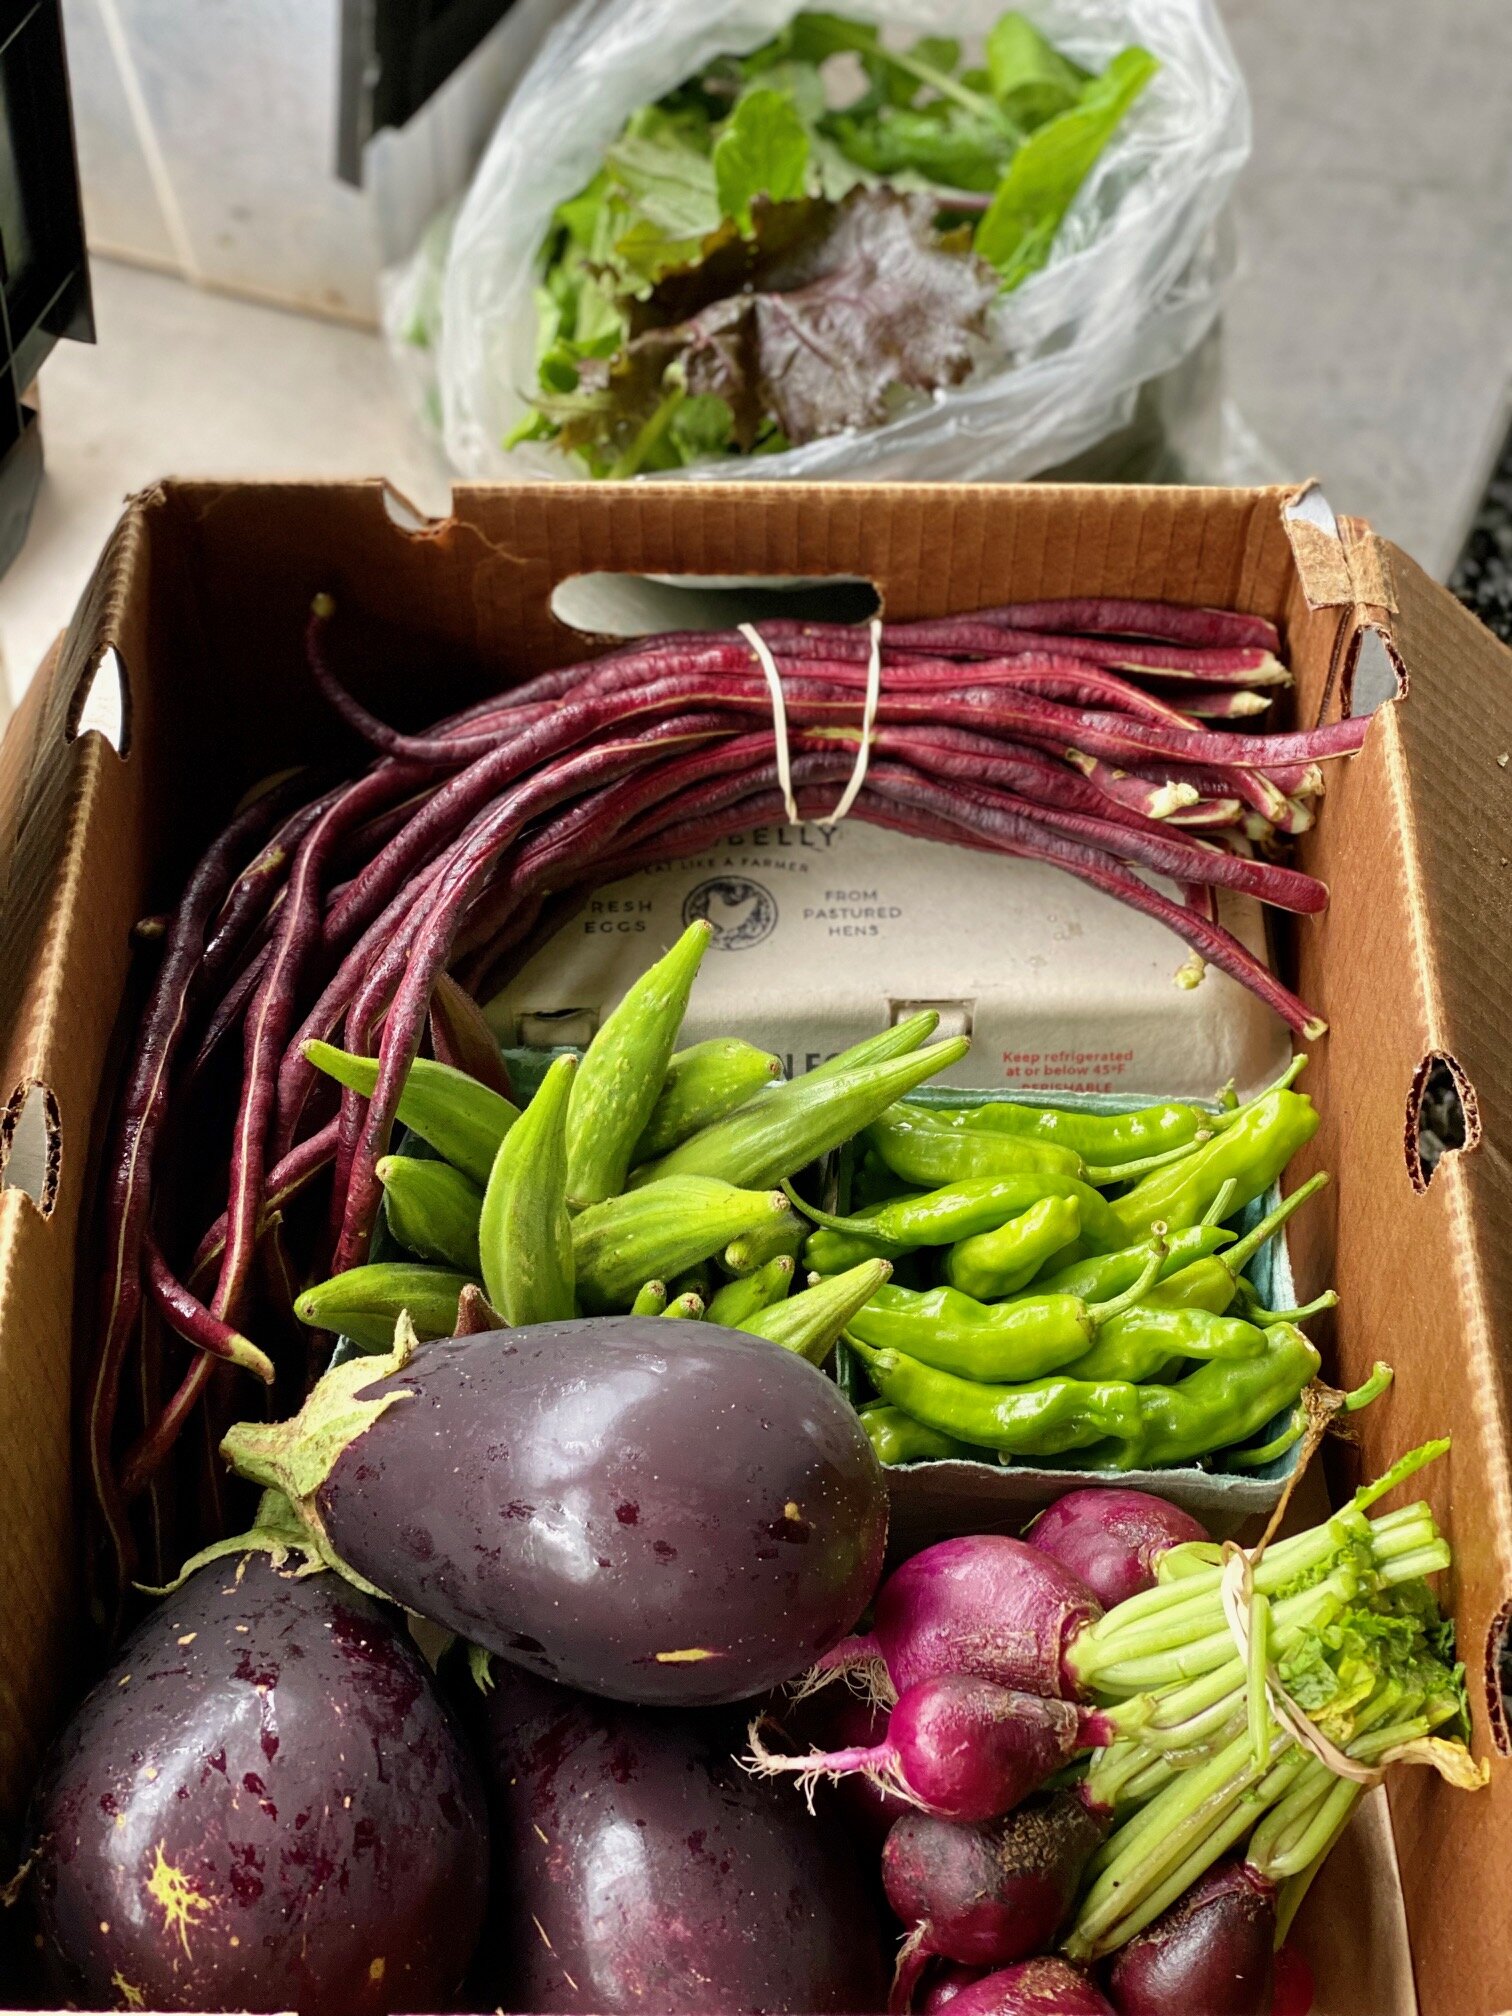
Alas! The farm is still productive as ever, and this week's CSA members will be getting a bounty of tender fall greens, root veggies, herbs, eggplant, peppers, etc etc.

It's a season of blessed abundance and the best kind of overwhelm, and I wouldn't want it any other way. Many thanks for your patience and understanding as I slowly ease back into farm life – I have a ton of recipes, growing tips, farmbelly specialty products, etc coming your way this fall, so stay tuned!

Kitchen Notes

I’ll be honest that I’ve done ZERO cooking since Sawyer arrived, but we’ve had no shortage of delicious meals thanks to the generosity of our village of family and friends who are keeping our fridge and bellies full. One meal that really hit the spot, especially as we head into cozy fall weather, was a classic meatloaf! I know meatloaf isn’t the sexist dish, and it’s probably not everyone’s cup of tea, but if you’re in the mood for this classic comfort meal, here is my go-to recipe, which is adapted from Smitten Kitchen.

MEAT LOAF WITH TOMATO GLAZE 

Photo credit: Taste and Tell blog

Photo credit: Taste and Tell blog

INGREDIENTS

  • 2 slices sandwich bread

  • 1 yellow onion, diced

  • 1 tablespoon minced garlic

  • 1 celery rib, chopped fine

  • 1 carrot, chopped fine

  • 1 scallion, roughly chopped

  • Olive oil, for cooking

  • 1 1/2 tsp kosher salt, plus more to taste

  • 1  tsp freshly ground black pepper

  • 2 tsp Worcestershire sauce

  • 1/3 cup ketchup 

  • 1 1/2 lb ground beef

  • 1/2 lb ground pork (or omit ground pork and use 2lbs ground beef)

  • 2 large eggs, beaten lightly

  • 1/3 cup minced fresh parsley leaves

TOMATO GLAZE

  • 1 tablespoon vegetable oil

  • 1/4 cup tomato paste

  • 2 tablespoons cider vinegar

  • 2 teaspoons honey

  • 2 teaspoons Worcestershire sauce

  • 2 teaspoons smooth dijon mustard

  • 1/4 teaspoon table salt

PREPARATION

  1. Preheat oven to 350°F.

  2. Tear the bread into chunks and then blend it, in a food processor, into breadcrumbs. Place the breadcrumbs in a large bowl. You should have about 1 cup.

  3. Add the onion, garlic, celery, carrot, and green onion to the food processor, and pulse it until they are finely chopped. Heat a large skillet over medium heat. Once the skillet is hot, coat the bottom with olive oil, and heat the oil for a minute; add the finely chopped vegetables, stirring frequently, until they begin to brown, about 5-8 minutes. Season with salt, pepper, Worcestershire sauce, and 1/3 cup ketchup and cook, stirring frequently, until they begin to brown, about 10 minutes.

  4. While the vegetables are cooking, make the Tomato Glaze: Combine glaze ingredients in a small saucepan, and simmer, whisking constantly, for 2 minutes until and glaze is satiny smooth. Set aside.

  5. Add the cooked vegetables to the large bowl with breadcrumbs, then add the remaining ingredients (ground meat, eggs, and parsley). Stir the ingredients together with a fork or your hands until evenly blended.

  6. Form mixture into a 10-by 5-inch loaf tin and spread tomato sauce over top of the loaf.

  7. Bake in oven 1 hour, or until a meat thermometer inserted in center registers 155°F.

Today’s Stats

  • Low temp: 64F

  • High temp: 80F

  • Sunrise: 7:16am

  • Sunset: 6:53pm

  • Moon phase: Waning Crescent

  • Additional notes: Overcast and humid

September 24

Farm Notes

277005BF-2080-4F2F-9AC1-9E365CBFB6B2.JPG

It’s been a little quiet over here, as we have some big news to share… our sweet baby boy has arrived earthside! Sawyer James Aronson arrived promptly at 9:36am on September 18th, weighing in at 6lbs 4 ounces & 20” long. Mom and baby are both healthy, happy and grateful for a smooth delivery and an amazing care team at UNC Women’s Hospital, and we were able to settle in back at the farm on Monday. We are absolutely smitten, more than a little sleep deprived, and still in awe that this tiny miracle is ours.

I will be a little quiet in the Farmbelly Journal & Farmbelly Club facebook page for the next few weeks as we focus our energy and love on Sawyer during these precious early days. I’ll be back to regular programming and will resume our weekly virtual farm tours soon, but ask for your understanding and grace as I take some time away to love on this little one!

Many thanks for all of the love and support that this community has given our farm + family, we are so grateful!

IMG_6697.jpg

September 17

Farm Notes

Popping in for a quick farm update after a busy, but good week here at the farm! We’re in Week 2 of our fall CSA, and we’re grateful to have a colorful variety of late summer and early fall veggies filling our CSA member boxes. Our summer peppers, eggplant, and okra are still going strong, and tomatoes are making their final swan song of the season. Coming in hot are lots of fall root veggies like radishes and turnips, along with leafy greens like arugula, kale, and collards.

This week we started to pull out tomatoes from our caterpillar tunnel, which is a big, messy job (see photo below)! Our tomatoes have been growing in our tunnels since April (so for 6 months!) and it’s finally time to say goodbye and make room for the next season’s fall greens.

Yesterday we checked our sweet potatoes to see how the tubers were shaping up, and I’ll be honest… we weren’t thrilled! I’m noticing that the soil where the sweet potatoes are growing is pretty tough and clay-heavy, which has probably kept the tubers from growing as nicely as they would in a more sandy/compost-rich environment. We’ve decided to give them a few more weeks to size up, and will check them again in early October to see how they are doing. This is my first time growing sweet potatoes, so I’m learning lots as we go, and fingers crossed we get a nice harvest soon…!

Tomatoes coming down!

Tomatoes coming down!

Lack-luster sweet potato check…

Lack-luster sweet potato check…

Kitchen Notes

Even though our sweet potatoes aren’t ready quiiiite yet, now I’ve got sweet potatoes on the brain, and want to share a few favorite sweet potato recipes today!

Here’s a round up of some delish sweet potato dishes to get you inspired:

sweetpotatobrusselsprout-2.jpg

Today’s Stats

  • Low temp: 65F

  • High temp: 82F

  • Sunrise: 7:01am

  • Sunset: 7:21pm

  • Moon phase: Waxing Gibbous

  • Additional notes: Partly cloudy and lovely

September 14

Farm Notes

I know it’s been a little quiet over here, but I’m back and all is well! I was without a computer for most of last week after accidentally spilling an entire bottle of water all over my laptop (yikes!) but thank goodness for laptop warranties and kind folks at the Apple store, who helped get me back up and running.

The plants and I are still soaking up this cooler and less humid September weather! This week will still be on the warm side, but it’s nothing compared to the crazy heat and humidity that we experienced back in August. Almost every bed on the farm is planted with fall veggies, and we are now in the process of beginning to “flip” our caterpillar tunnels from summer tomatoes/peppers to more fall greens.

IMG_6432.jpg

Speaking of fall… last Thursday we kicked off Week 1 of our Fall CSA! Right now we’re in an especially abundant seasonal sweet spot when summer veggies like tomatoes, peppers, eggplant, okra, etc are still going strong, while cooler weather crops like radishes, turnips, and leafy greens are making their fall debut… so it’s really the best of both worlds.

I’m so thankful to our CSA members (and the entire Farmbelly Club community!) for the continued support, especially in this season full of lots of exciting new adventures for our family. Speaking of which, I’ll be sure to keep y’all posted with any baby updates! This little dude could really arrive any day now (or it could still be 2 weeks from now..) and we are so excited to meet him. :)

Kitchen Notes

Over the weekend, I was feeling inspired by all of our sweet + nutty fall winter squash, so I whipped up a hearty, colorful, and nourishing autumnal dish that I’m excited to share with y’all! I just made this salad up as I went, so feel free to add/substitute ingredients based on what you have on hand. I love making salads with a grain base using quinoa, rice, or lentils because they are packed with protein, and they store well in your fridge so you can enjoy leftovers for days. A note that if you don’t have delicata squash, you can substitute with any other kind of winter squash or sweet potatoes.

QUINOA & KALE Salad with Delicata Squash, Apples & Apple Cider-Maple Vinaigrette

IMG_6489.jpg

INGREDIENTS

For the Salad

  • 3-4 cups cooked quinoa (or other grain like brown rice, lentils, etc)

  • 2 delicata squash (or any other winter squash or sweet potatoes), halved, seeded, and cut into 1/2" thick half moons

  • Olive oil

  • 1 bunch kale, de-stemmed and roughly chopped

  • 1-2 apples, diced

  • 1/2 cup toasted almonds, roughly chopped

  • 1/4 cup chopped fresh mint

  • 1/4 cup chopped fresh parsley

For the Vinaigrette

  • 3/4 cup extra virgin olive oil

  • 1/4 cup apple cider vinegar

  • 2-3 tablespoons dijon mustard

  • 2-3 tablespoons maple syrup

  • 1 clove garlic, minced

  • Salt and pepper to taste

PREPARATION

  1. Preheat oven to 400F.

  2. Slice the delicata squash (or whatever winter squash you’re using) in half lengthwise and scoop out the seeds with a spoon. Slice the squash in 1/2” thick half moons and toss together on a rimmed baking sheet with a few tablespoons of olive oil and some salt + pepper. Roast until tender and beginning to brown, about 20-30 minutes, tossing the squash at least once halfway through baking. When the squash is fully cooked and delicious, remove from oven and set aside.

  3. While the squash is roasting, cook your quinoa (basic quinoa cooking tips here) and add 3-4 cups of your cooked quinoa to a large salad bowl (note that I usually start with 2 cups of uncooked quinoa for this dish).

  4. Make the vinaigrette by adding all your ingredients into a jar and shake vigorously until emulsified. TASTE the vinaigrette and make adjustments as needed (you want to have a good balance between salt, sour, and sweet).

  5. Next add your de-stemmed and chopped kale to the salad bowl with your cooked quinoa, and add a few tablespoons of the vinaigrette on top of the kale and use your hands to gently massage the kale with the vinaigrette (this helps break down the kale a bit). Now add the roasted delicata squash, chopped apples, almonds, mint, and parsley to the salad bowl, pour in more of your vinaigrette and toss everything together. NOTE that you may not need to use all of the vinaigrette that you made - it’s up to you how much you want to use!

  6. TASTE and adjust seasoning to the salad as needed – you may want to add more salt or apple cider vinegar to give the salad a bit more punch.

Today’s Stats

  • Low temp: 67F

  • High temp: 89F

  • Sunrise: 6:59am

  • Sunset: 7:25pm

  • Moon phase: Waxing Gibbous

  • Additional notes: Sunny and warm

September 3

IMG_6189.jpg

Farm Notes

What a difference a new month makes! After a brutal August, the first few days of September have already felt like a very much needed breath of fresh, cool(ish) air. Our fall plants have rebounded from the intense heat over the past few weeks, and we’re continuing to plant heaps more fall greens, carrots, radishes, turnips, beets, etc for a bountiful season ahead.

Thursdays are still our main workday here at the farm, when I’m joined by my friend/fellow farmer Erin all day, and together we knock out some big to-do lists! Erin and I have been farming alongside each other for so long that we’ve established such a strong and smooth rhythm – we can anticipate what the other person needs without saying a word, we know and respect the other person’s strengths and weaknesses, and we both genuinely love farming… even on the toughest, hottest, and dirtiest days. I’m incredibly grateful to have Erin, and several other good friends + neighbors, who are going to step in big time while I’m on maternity leave, and I have full confidence that our little farm is in the very best hands.

Among other tasks, today we “flipped” (ie prepared and planted) 250 ft of bed space – here are some photos that show the progression of some of the beds that we flipped today! These beds started the morning covered by a tarp (as we had recently cut down and smothered a buckwheat cover crop on these beds) and ended being planted in lettuce seedlings and carrot seeds:

Wondering what you can be planting in your fall garden right now? For most climates in the US, now is a great time to plant the following (send me a message if you have questions about how to plant any of these crops): broccoli, cabbage, cauliflower, collard greens, kale, kohlrabi, fennel, scallions, leeks, beets, carrots, radishes, turnips, lettuces, cilantro, dill, parsley, etc!

Kitchen Notes

As we prepare for our baby boy to arrive, one thing that I’m whipping up in the kitchen and stashing in our freezer is some delishhh date + almond energy balls! These petite treats are awesome to have on hand, as they are full of healthy fats, protein, and omega-threes and antioxidants… not to mention they taste so dang good. Below I’m sharing my basic recipe for homemade energy balls, but feel free to mix it up and use whatever nuts, spices, etc that you have on hand.

Date + Almond Energy Balls

INGREDIENTS

  • 1 cup pitted Medjool dates (10-12 large dates)

  • 2 cups whole almonds

  • 2 tablespoons unsweetened cocoa or cacao powder (plus extra for dusting)

  • 2 tablespoons chia seeds

  • 1 tablespoon ground flax seed

  • 1 tablespoon coconut oil

  • 1/2 teaspoon cinnamon

  • 1/2 teaspoon vanilla extract

  • Pinch kosher salt

  • Optional toppings: chopped nuts, shredded coconut, cacao powder

INSTRUCTIONS

  1. Soak pitted dates in hot water for 5 minutes, then drain.

  2. Place almonds in a large food processor and process until nearly the consistency of almond meal. Add the dates and pulse until the dates are in very small pieces and fully combined with the ground almonds, and the mixture comes together in a sticky ball. 

  3. Add all additional ingredients and process, stopping occasionally to push the mixture down. Process the mixture until it is very smooth and fully blended. Taste and adjust seasoning. 

  4. Transfer mixture to a bowl and place in the freezer for at least 30 minutes. With a spoon or tablespoon, scoop the mixture then roll it into roughly 1-ounce balls. 

  5. At this point, you can also roll the balls into an assortment of toppings: finely chopped nuts, shredded coconut, cocoa powder, etc.

  6. Enjoy immediately, or transfer to an airtight container and store in the refrigerator for up to 2 weeks or freeze for several months.

Today’s Stats

  • Low temp: 68F

  • High temp: 81F

  • Sunrise: 6:50am

  • Sunset: 7:43pm

  • Moon phase: Waning Crescent

  • Additional notes: Sunny, breezy and beautiful

August 27

Farm Notes

While the weather still hasn’t cooled down one bit, I’m very happy to report that our fall veggies are faring much better compared to this time last week! We ended up removing the black landscape fabric from the majority of the beds where we had planted our fall seedlings, because the black fabric (while great at keeping weeds at bay) was getting waaay too hot for our tender plants to thrive. I also invested in a LOT more shade cloth (see photo below) to put over each bed, which makes a huge difference in keeping everything a bit cooler (and the cloth protects the plants from getting munched on by critters).

IMG_6099.jpg

I also made sure to spray all our new plant babies with fish emulsion – a gentle, organic way to boost plants with the essential macronutrients that they need to grow. Just dilute the fish emulsion in a watering can or sprayer, and apply all over your plants either in the morning or early evening every 1-2 weeks for best results.

Another simple tip for anyone also struggling through hot temps right now is to make sure your plants are getting plenty of water! The best time to water is either in the morning or early evening.

In other farm news… yesterday was a great work day, and we got a bunch more seeds in the ground (regular radishes, beets, and watermelon radishes), planted more lettuce seedlings, harvested the first of our roselle/hibiscus, and tarped a section of the farm where we had some buckwheat cover crop (and plenty of weeds) that are ready to decompose and be turned back into the soil.

This section is ready to be covered with a tarp, which will kill off any remaining cover crop/weeds, so we can plant in these beds again later this fall.

This section is ready to be covered with a tarp, which will kill off any remaining cover crop/weeds, so we can plant in these beds again later this fall.

Tarp is on and looking good!

Tarp is on and looking good!

And don’t worry, I have lots of help to keep this little farm on track while I start to really slow down in preparation for our sweet babe to arrive! Today I hit the 35 week mark of my pregnancy… and it’s crazy to think that in about a month, our whole lives are going to change forever. We are so excited to welcome this little one to our family, and I’m wildly grateful for all the friends and family rallying around us during this whirlwind season. I’ll be sure to keep y’all updated as my due date gets closer… thank you for all your support!

Kitchen Notes

IMG_2177.jpg

Earlier this week, I led a fun virtual lesson all about making homemade tea blends! I’m no expert herbalist, but I hope that the lesson (and the tips I’m about to share here) will help take some of the intimidation out of growing + creating your own homemade herbal teas. To watch the virtual lesson, check it out on our Facebook page HERE or via our private Google Drive folder HERE.

I dig into allll the details in the virtual lesson, but here are some of the basics for crafting your own tea blends at home:

1) GROW – There are so many amazing plants that you can grow at home for your tea blends, so do some research on what varieties you might be interested in growing. My go-to plants to grow for making teas are: lemon balm, lemon verbena, tulsi/holy basil, anise hyssop, lemon bergamot, and mint. All of these plants are super easy to grow, and you can get multiple harvests from them over the course of the growing season.

IMG_0207.jpg

2) HARVEST – The best time to harvest herbs is either around 10am (after the dew has dried, but before it gets too hot), or early evening. When harvesting, don’t make your bunches so big that the plants can’t dry properly. I also recommend stripping the leaves from the bottoms of each stem when making your bunches.

3) DRY – My go-to method for drying is to tie a string along a wall or across a room, and hang each herb bundle upside down along the string, making sure to give the bundles space between one another. To speed up the process, I will often put a dehumidifier in the room where the herbs are drying. The herb bundles are “ready” when they are totally dry to the touch and the leaves are very crinkly – the amount of drying time will vary, but usually takes 10-14 days for me.

4) PROCESS – Once your herbs are dry, you’ll need to strip the leaves + flowers from the stems. To do this, get a wide bowl and use your hands to strip the leaves/flowers from the stems, and discard the stems. If you’re processing several different plant varieties, make sure to keep them all separate as you are processing them. This can be a time-consuming process, but I find it’s quite enjoyable once you get into a rhythm! Once all the plant matter has been collected, I will usually pulse them in a food processor to break down the size of the leaves a bit (though I’m careful not to break them down TOO much… you don’t wan’t to be left with a pile of dust)! You can certainly skip this step if you life your tea blends to have large leaves.

5) BLEND – Now is the extra fun part! I like to experiment with different tea blends, and I’ll start by making small test batches, where I play with different ratios of various plants in each unique blend. To test a blend, I’ll go ahead and make a cup of tea by putting a tablespoon or two of the tea into a tea bag and steep in hot water. Taste and make adjustments to the ratios of your blend to fit your taste. A note that you can absolutely make an herbal tea with just one type of plant (ie all mint or lemon verbena), it’s totally up to you!

6) ENJOY – Once a tea blend is ready, store in a clean glass jar or container. To enjoy, I will put a tablespoon or two into a tea bag and steep in hot water, often with a spoonful of honey! :)

Today’s Stats

  • Low temp: 72F

  • High temp: 94F

  • Sunrise: 6:44am

  • Sunset: 7:53pm

  • Moon phase: Waning Gibbous

  • Additional notes: Hot and humid