August 24

Washed out beds after an intense rainstorm on Sunday.

Washed out beds after an intense rainstorm on Sunday.

Farm Notes

I’m going to keep it real here – the past week has been HARD. It started off great – all of our growing beds were prepped and looked beautiful, our fall seedlings had arrived, and we were ready to roll. But as I shared about in my previous post… I quickly realized that our fall seedlings weren’t as strong as I’d expected, and they really struggled in this August heat.

To make matters worse, in the days after we planted out most of our seedlings, we had several super intense rain storms which pummeled our tender seedlings and caused many of our beds to lose precious soil. And that’s not all! We’re also suddenly having a lot of trouble with rabbits coming in and munching on our plants. It feels like we just can’t catch a break, and it’s been wildly frustrating.

Thankfully, I’ve been able to find some extra seedlings to fill in the ones we’ve lost, and I have lots of extra hands helping out here pretty much every day to get back on track. So if any of ya’ll are struggling with your late summer gardens, know that I’m right there with you! Though we aren’t out of the woods quite yet… it looks like this weekend is going to be extra hot, so I’m about to invest in a lot more shade cloth, which will help with keeping our veggies cool AND will keep these pesky rabbits at bay.

Anyone else ready for fall?!!

IMG_6061.jpg

KITCHEN NOTES

Because I’m forcing myself to stay indoors/in air conditioning between the intensely hot hours of 11am-3pm, I’ve been keeping myself busy recently with some kitchen projects. This week, at the top of my to-do list is whipping up some homemade hot pepper powder/spices! Making your own ground pepper powder is ridiculously easy – all you need are some peppers, an oven, a few hours of patience, and a spice grinder or food processor. If you have a dehydrator, you can totally use it to dry out the peppers – I’m using the oven here because I know not everyone has a dehydrator, and I can dry bigger batches of peppers using an oven.

For this recipe, I used cayenne peppers, but you can absolutely use whatever peppers you have on hand. Not only will these be the freshest spices you’ve ever cooked with, but they make wonderful gifts!

DIY GROUND PEPPER POWDER

INGREDIENTS & MATERIALS

PREPARATION

  1. Preheat your oven to 180F.

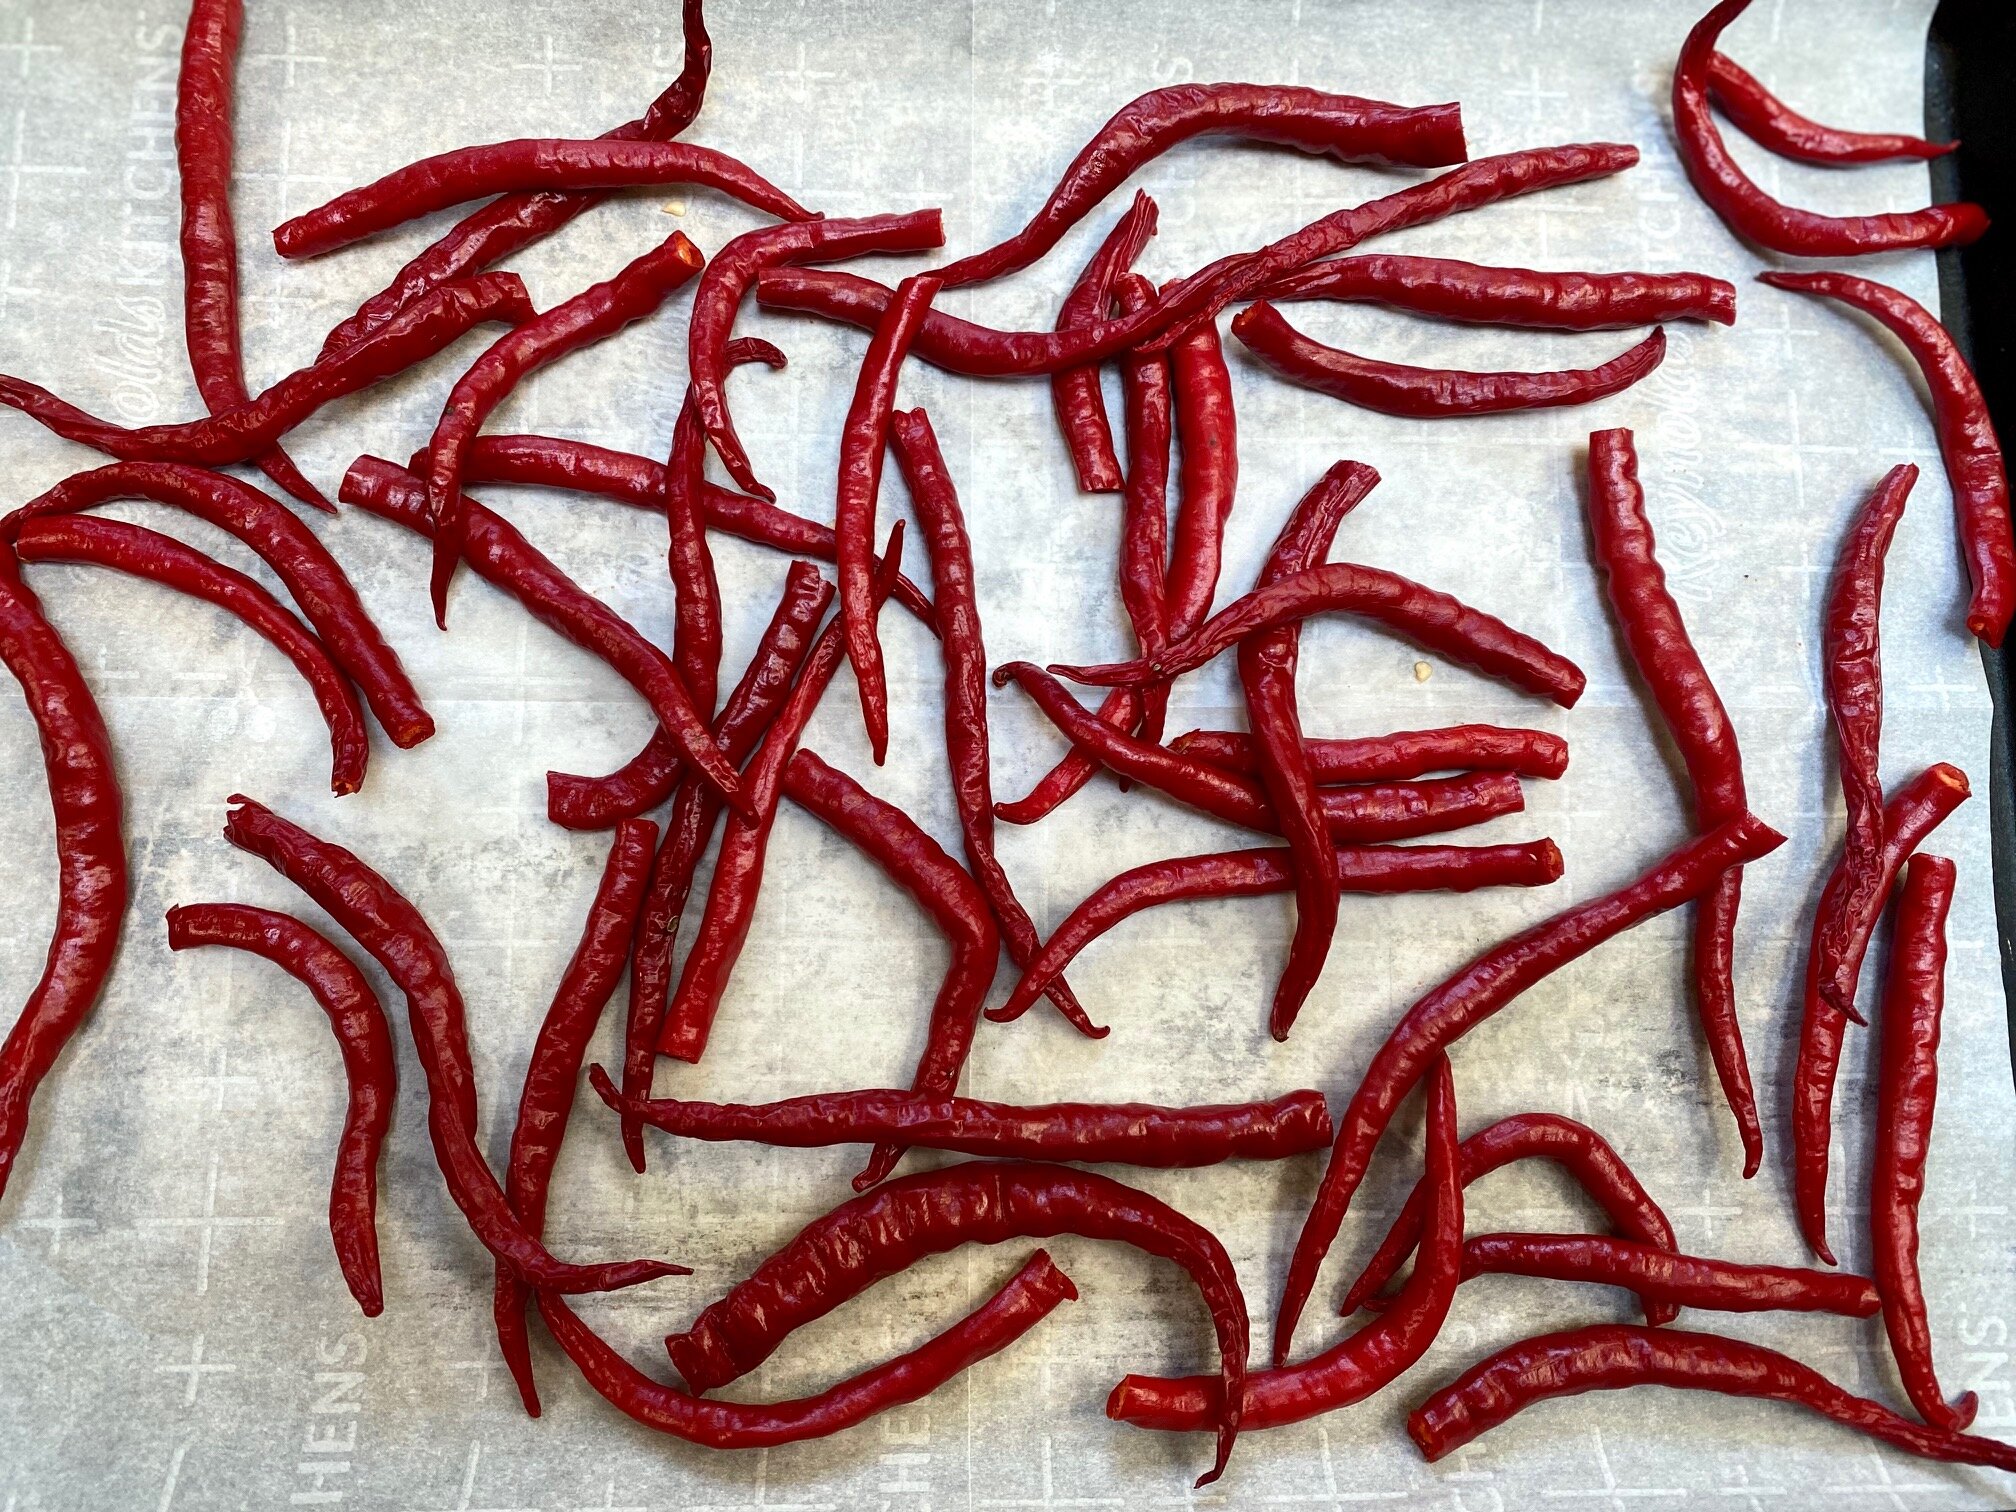
  2. Cut off the stems and any bad spots off each pepper. If you would like to have less heat in your powder, slice each pepper in half lengthwise and use a spoon to remove the pith/membrane and seeds (I usually skip this step). Place your prepped peppers on a baking sheet(s) in a single layer.

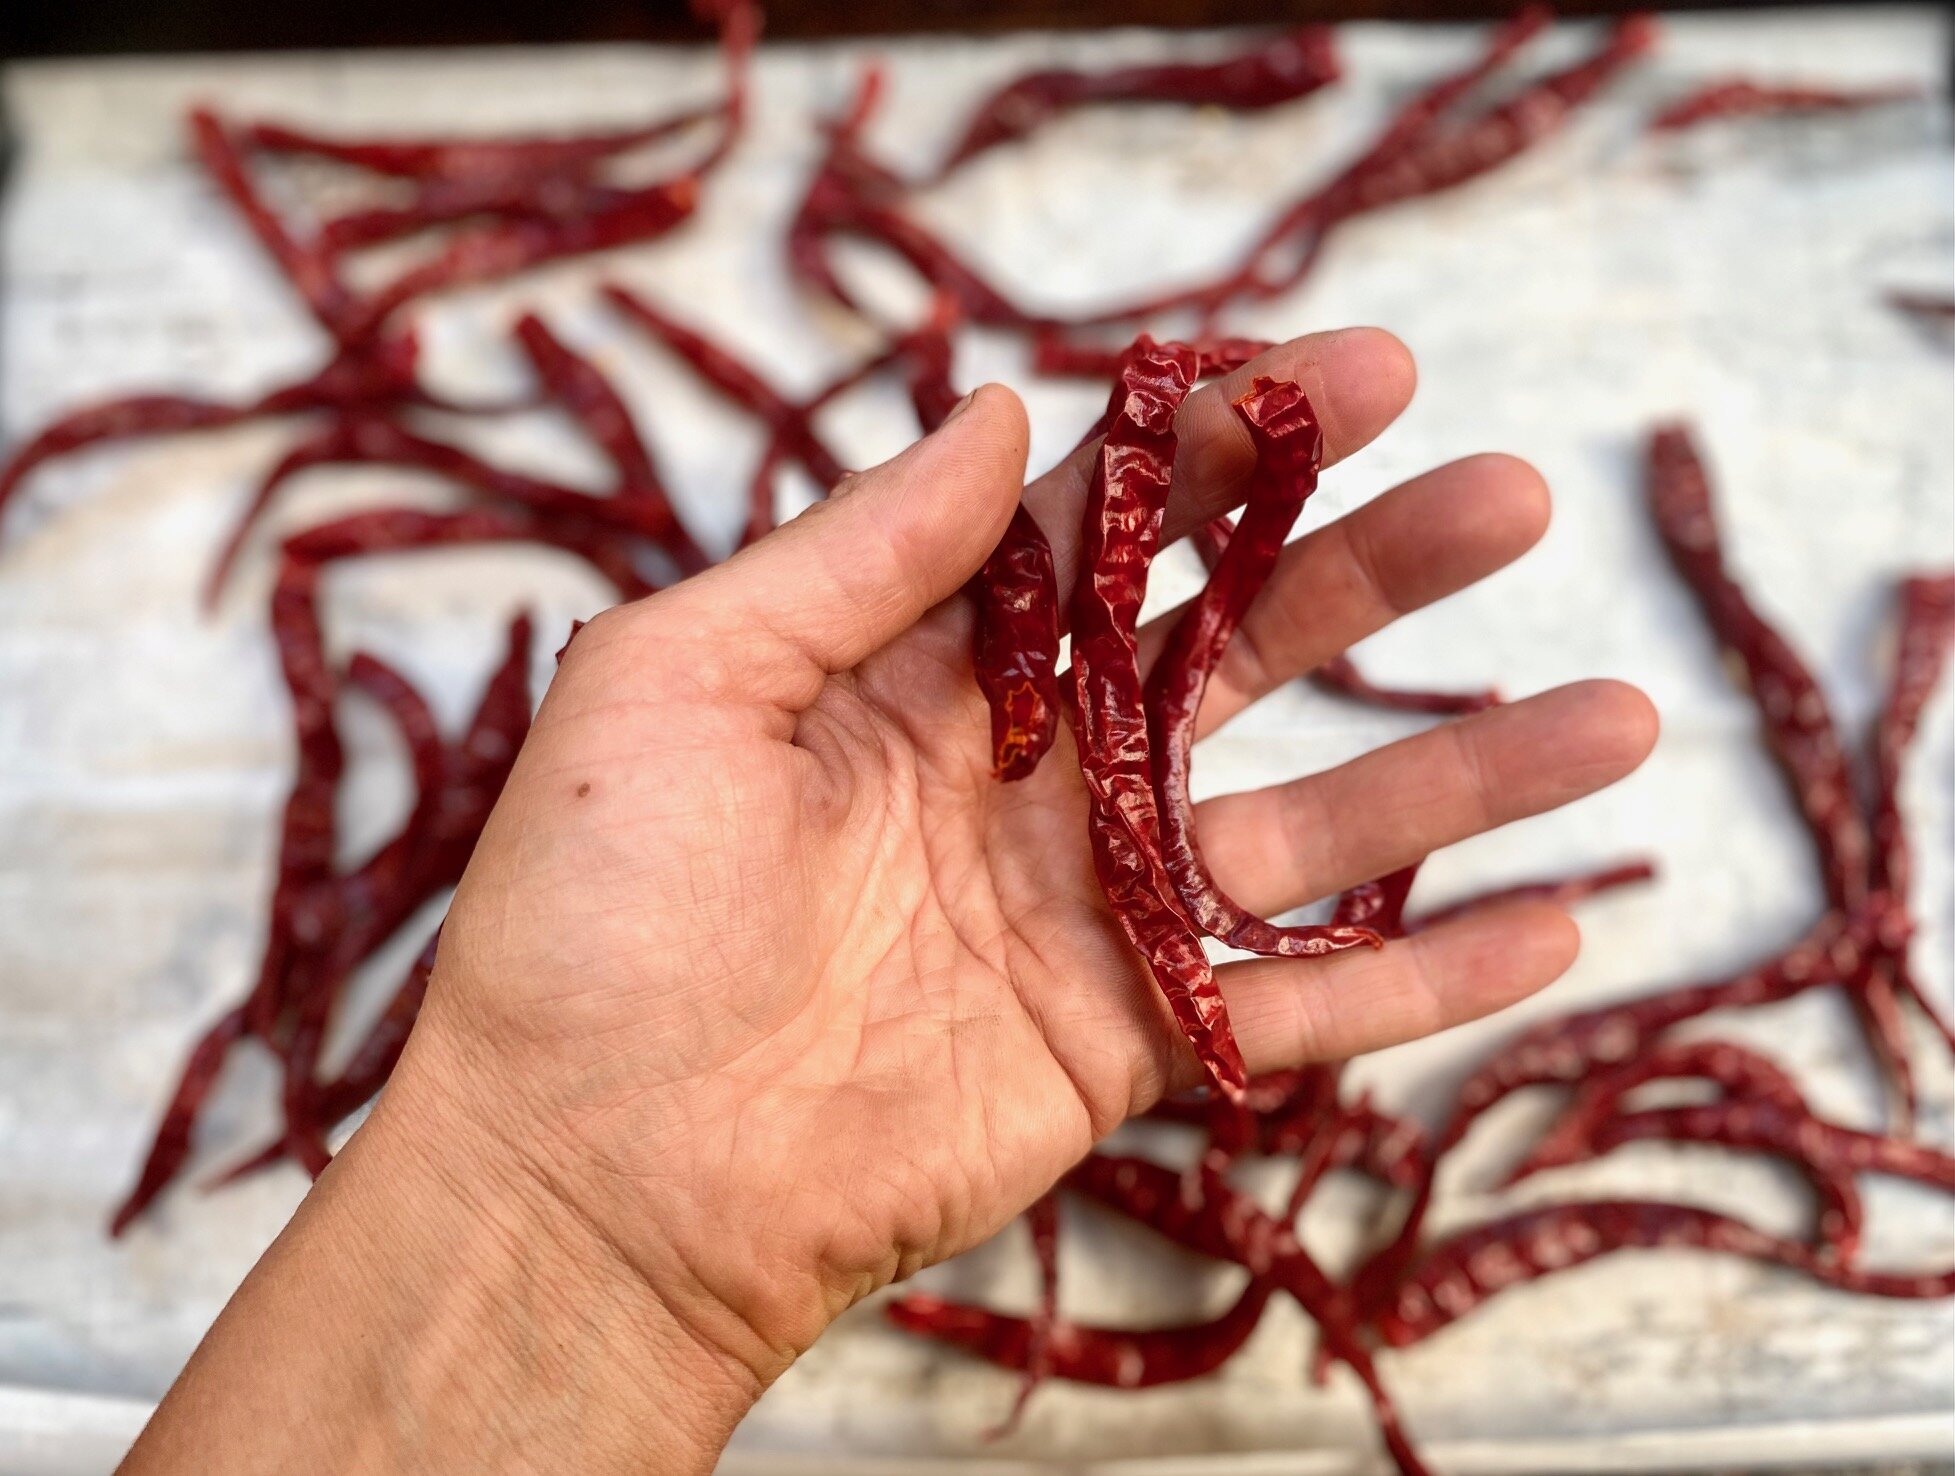
  3. Place the peppers in the warm oven and bake until they are fully dried, checking them every so often to ensure they aren’t burning. The amount of time will vary based on the peppers you’re using – it usually takes about 3-4 hours for cayenne peppers to dry.

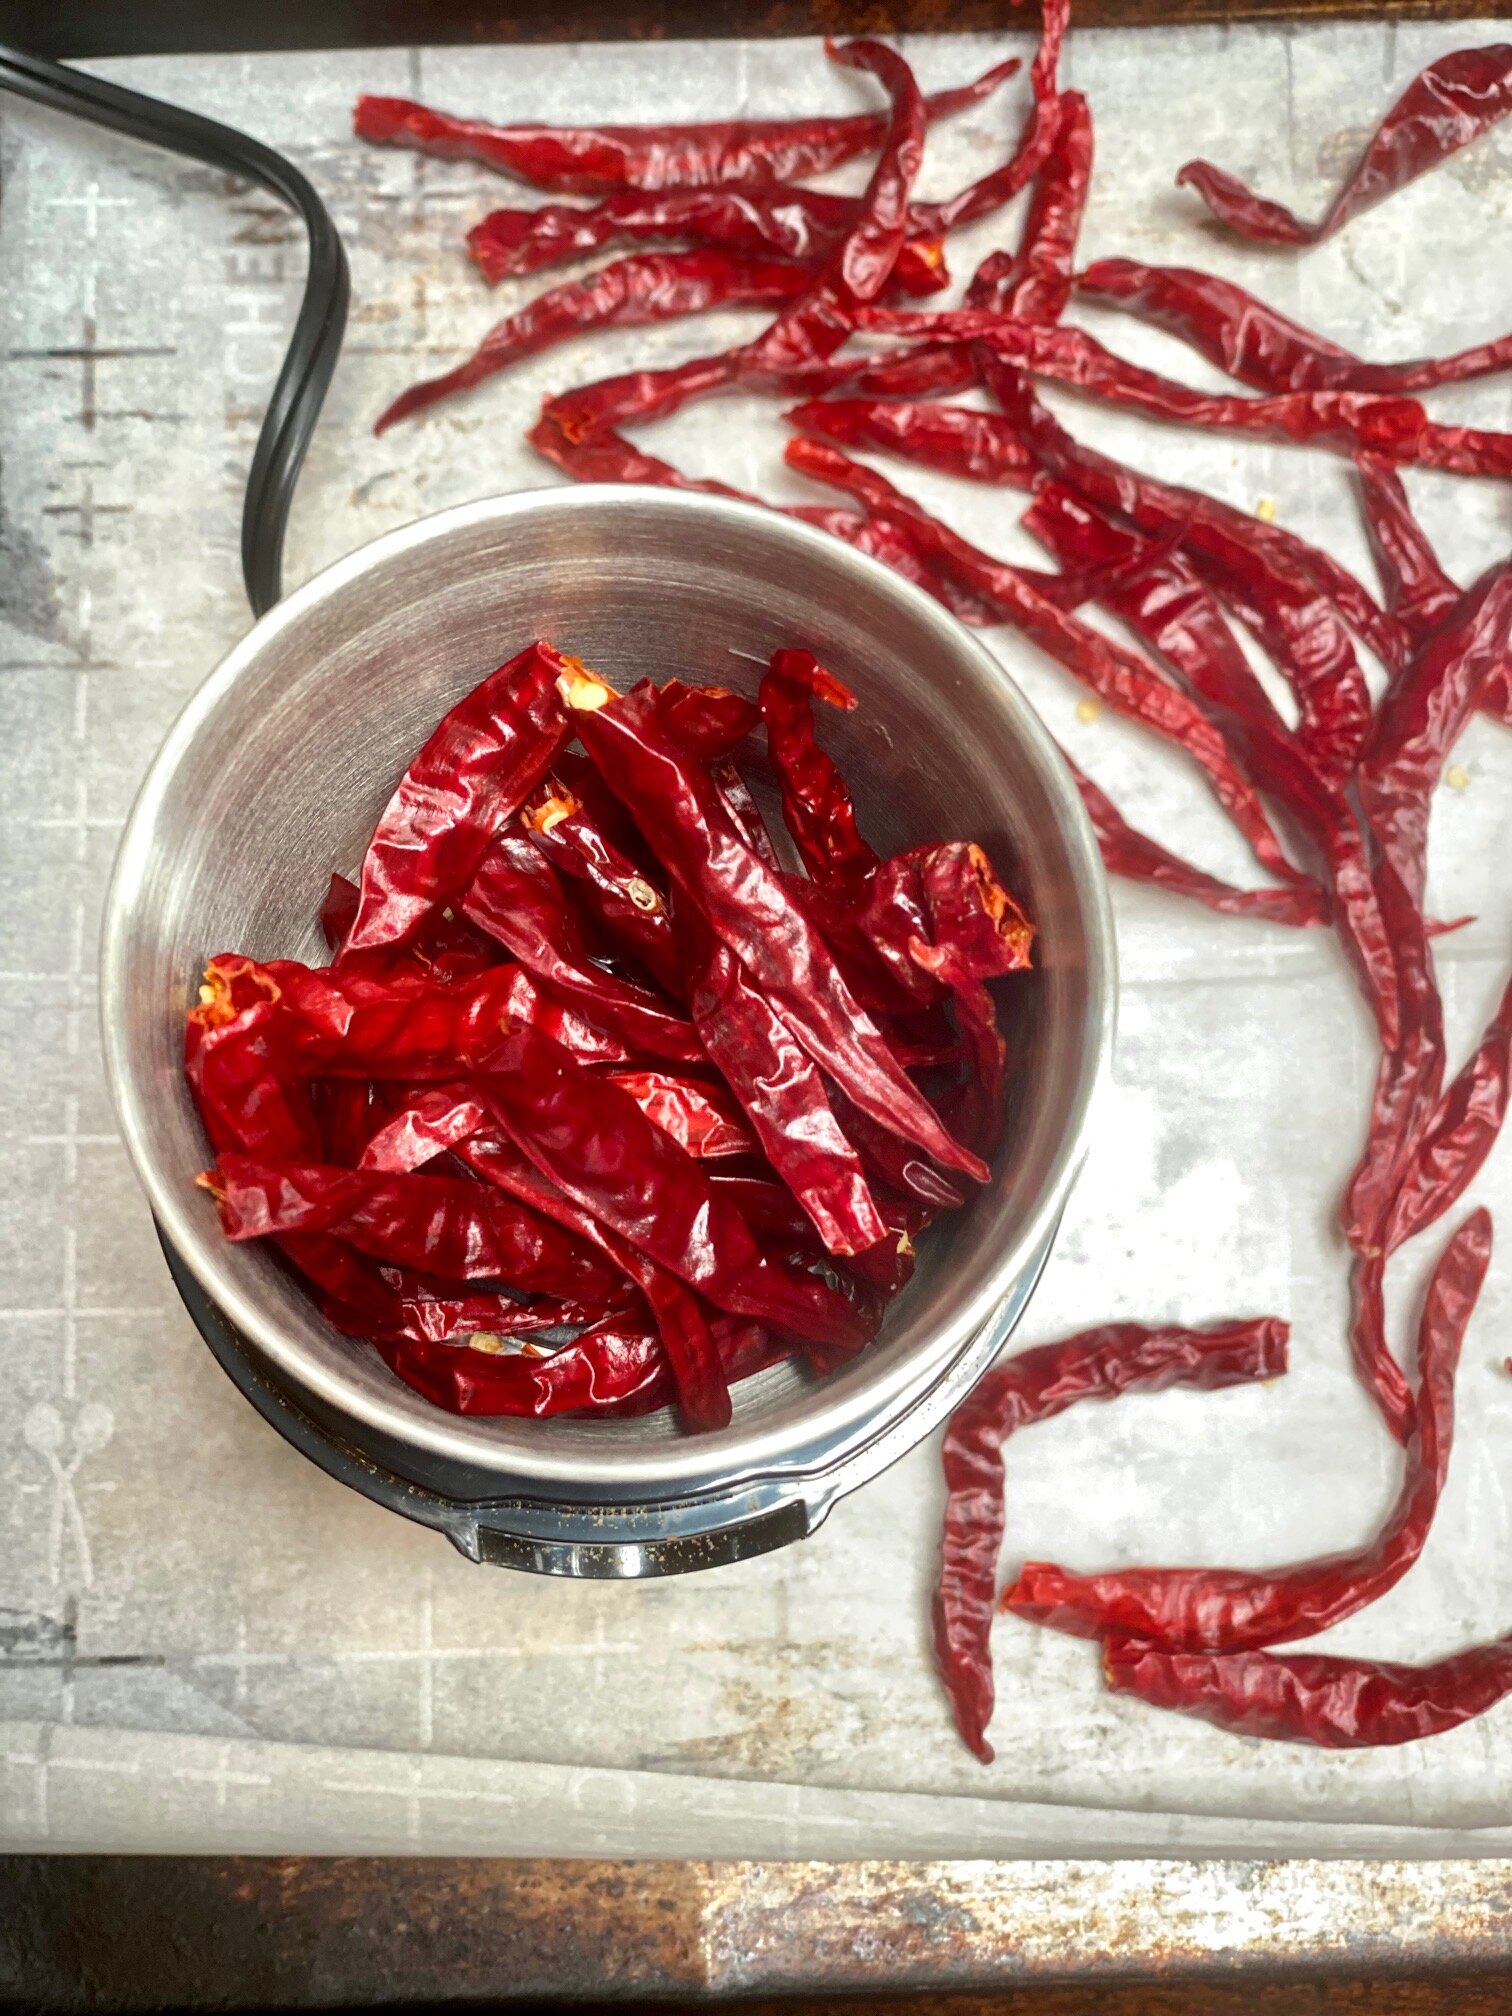
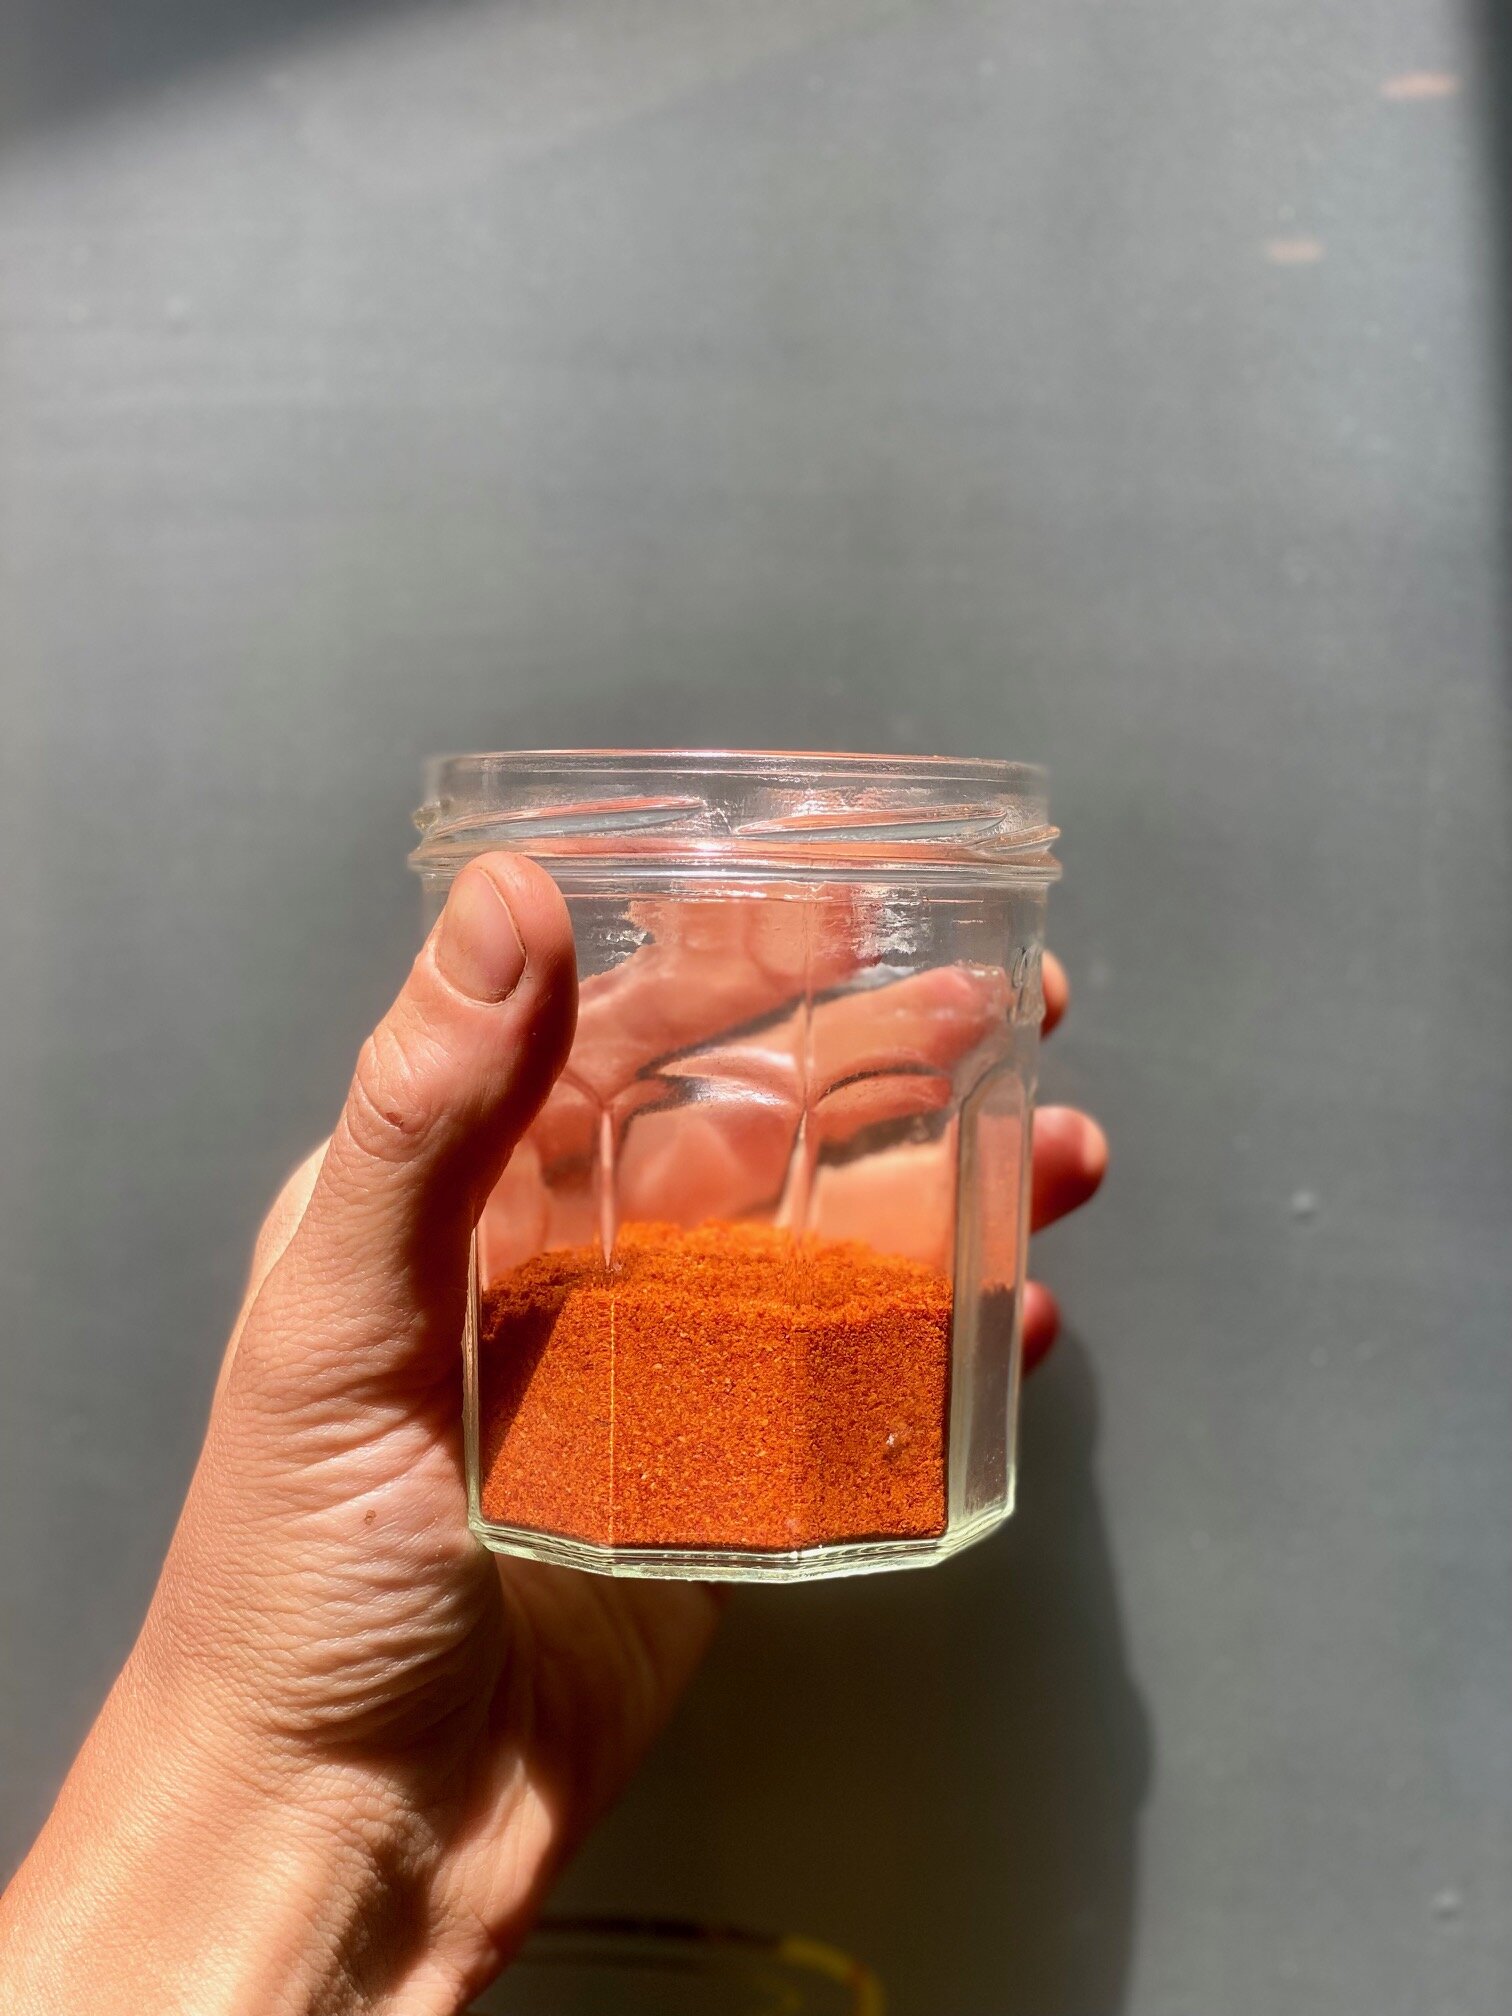
  4. Once the peppers have cooled, place them in batches in your spice grinder and pulse until at the desired powder consistency. Voila! You now have homemade pepper powder. Store in an air tight container for up to 6 months for maximum freshness – or you can freeze to keep even longer!

Today’s Stats

  • Low temp: 72F

  • High temp: 93F

  • Sunrise: 6:43am

  • Sunset: 7:55pm

  • Moon phase: Waning Gibbous

  • Additional notes: Hot and humid

August 20

Farm Notes

Our CSA is officially on break and this week has been all about getting fall plants in the ground. And to be honest, it hasn’t been easy! After several days in a row of intense rain, the weather has swung back to being super hot + humid (aka, typical August in North Carolina) – and unfortunately, a lot of our new fall plant babies are not happy.

Example of seedlings with minimal root system present (ie not a great start for transplanting).

Example of seedlings with minimal root system present (ie not a great start for transplanting).

I’ve done everything I can to ease the transition for our tender seedlings in their newly prepped beds – i.e., only planting in the early morning or evening, watering everything immediately by hand (and then additional waterings to cool things down in the afternoon), and even putting shade cloth over some of the beds right after they get planted… but despite these efforts, a lot of our starts have gotten fried by the heat, and we’ve lost a lot of plants. It’s been an incredibly frustrating few days, and it feels like such a waste of time, energy, and money.

So what went wrong? It seems that a lot of the seedlings that we received this week don’t have very strong root systems (see photo for what I mean… ideally there’s a lot more root matter present), and it’s clear that they just aren’t strong enough to handle being transplanted in this August heat. I haven’t had this issue before when I’ve gotten fall seedlings from our nursery partners, and I’m hopeful that it won’t happen again – though now I’m stuck scrambling to find replacement seedlings last minute. It’s a huge bummer.

And yet. With all of the pain and grief and hardship that is happening around the world right now, it feels silly to get upset about some perished fall seedlings. While this week has been stressful, I’m continually reminding myself how very lucky I am to be able to do this work, and that I can use this as an opportunity to learn + do better the next time around. I just wanted to keep it real with y’all on how things are going over here, as it’s not always puppies and rainbows and sungold tomatoes!

IMG_5958.jpg
IMG_5985.jpg

Today is a fresh start, and we’re getting some relief with cooler weather the next few days, so I’m on a mission to source some more seedlings this afternoon and we’re just gonna have to try again.

If you’re curious about what seedlings we’re planting (or attempting to plant!) this week, here’s a quick rundown:

  • Broccoli

  • Cabbage

  • Collard Greens

  • Fennel

  • Kale

  • Kohlrabi

  • Leeks

  • Lettuce

  • Scallions

Meanwhile, we are also busy planting the following from seed (ie not seedlings/transplants):

  • Arugula

  • Baby Kale

  • Carrots

  • Beets

  • Radishes

  • Turnips

Kitchen Notes

Even though our sweet corn has already come and gone, there is still plenty of corn to be had this summer! Today I’m sharing fresh take on Elote, which is a traditional Mexican street food of charred corn on the cob, topped with a creamy mayo sauce, chilis, cotija cheese, lime, and fresh herbs. Don’t get me wrong, I’m all about digging into sweet corn straight from the cob, but sometimes, you don’t want to deal with all the corn bits stuck in your teeth.. ya know? Enter this recipe for Elote Salad, which features all the classic Elote ingredients, but is made by first removing the corn kernels from the cob and charring them in butter (or oil) before combining with the other ingredients. I’ve also taken the liberty of adding some shredded purple cabbage to the dish, for a little added color + crunch. This recipe is pretty loose, so use what you’ve got / feel free to mix it up! Recipe adapted from Serious Eats.

Elote Salad

IMG_1589.jpg

INGREDIENTS

  • 2 tablespoons butter (or vegetable or olive oil)

  • 5 ears fresh corn, shucked, kernels removed (about 3 cups fresh corn kernels)

  • Kosher salt

  • 1 cup finely shredded purple cabbage

  • 1/4 cup feta or Cotija cheese, finely crumbled

  • 1/2 cup finely sliced scallions, green parts only

  • 1/2 cup fresh cilantro leaves, finely chopped

  • 1/2 of a jalapeño pepper, seeded and stemmed, finely chopped

  • 1-2 cloves garlic, pressed or minced on a Microplane grater

  • 3 tablespoons mayonnaise

  • 2 tablespoons freshly squeeze lime juice, plus more to taste

  • Chili powder or hot chili flakes, to taste

PREPARATION

  1. Heat butter or oil in a large nonstick skillet over high heat until shimmering. Add corn kernels, season to taste with salt, toss once or twice, and cook without moving until charred on one side, about 2 minutes.

  2. Toss corn, stir, and repeat until charred on second side, about 2 minutes longer. Continue tossing and charring until corn is well charred all over, about 10 minutes total. Transfer to a large bowl.

  3. Add shredded cabbage, cheese, scallions, cilantro, jalapeño, garlic, mayonnaise, lime juice, and chili powder and toss to combine. Taste and adjust seasoning (possibly adding more salt, mayo, lime juice, chili flakes, etc) to taste. Serve immediately.

Today’s Stats

  • Low temp: 94F

  • High temp: 71F

  • Sunrise: 6:39am

  • Sunset: 8:02pm

  • Moon phase: Waxing Gibbous

  • Additional notes: Hot and humid

August 13

Farm Notes

1FCF8904-3A44-418D-AE83-4ED058CFFECE.JPG

And just like that, the final week of our (first ever) Summer CSA is in the books! All things considered, it’s been a fun, abundant and successful first CSA session – and I’m especially proud of our team pulling it off after switching over to this distribution model midway through the season…

Alas! I’m already thinking about (and asking for feedback from our members via an online survey) on how we can evolve and improve in the growing seasons to come. Did folks get tired of receiving cherry tomatoes every week? Wish there had been more lettuce/greens? Were the recipe suggestions I emailed out each week helpful? – These are the sorts of questions that I love hearing the answers to, so I can better serve our community and truly help folks eat like a farmer. I love this work because the learning never ends, and every day / season / year is a brand new chance to nourish the soil and grow good food for our community - so all in all, I’m feeling wildly grateful (and tired..) right about now!

While we are technically on “break” for the next 3 weeks before our 12-week Fall CSA session begins, there is a LOT of work to be done over these next few weeks to prep + plant for fall! We’ve already seeded our first round of carrots, arugula, baby kale mix, radishes, and turnips – and next week, we’ll be getting hundreds of fall seedlings (like kale, broccoli, cabbage, fennel, collards, kohlrabi etc) from our friends at Banner Greenhouses. We custom order our seedlings from Banner 2-3 times per year (so we ordered our fall seedlings back in May) and we love working with them! It’s such a relief to not have to worry about keeping hundreds of baby seedlings alive in the middle of summer while we have a million other things to do, and I’m grateful that we have access to such a high quality nursery in our area.

I’d love to know, what are YOU excited to plant + grow as the temps start cooling down this fall?

As always, if you have any questions/need some advice for planting your fall garden, just send me a message – michelle@farmbelly.com!

Kitchen Notes

IMG_5488.jpg

Let’s talk peppers! Earlier this week, I led a mini virtual cooking lesson digging into all things peppers… which are in abundance right now in gardens and farmers markets pretty much everywhere right now. There are SO many different varieties of peppers that it can be confusing to know how to best use them all, so I’m here to help break it down! Here are some pepper basics, as well as descriptions + recipe ideas for a range of some of my favorite sweet, mild, and hot peppers.

1) PEPPER BASICS

  • Peppers range from sweet to very spicy, and a lot in between! In general, peppers will be spicier later in the growing season, and if the weather has been especially dry/hot while the peppers were growing.

  • Capsaicin (kap-say-sn) is the active component in peppers that make them hot. 

  • The Scoville scale is the scientific measure of a chili’s spice/heat, which ranges from 0 (no heat) to 1-2 million (very, very hot)!

    • A trick to reduce heat is to remove inner pith/membrane (which have highest amount of capsaicin)

  • Store peppers in the warmest part of your fridge (usually the front, in a bag, making sure there is no moisture). Or if using in next few days, it’s okay to leave peppers out on your counter.


2) SWEET, MILD, & HOT PEPPER OVERVIEW (+ recipes)

Sweet Peppers

Mild to Medium Frying Peppers 

Hot Peppers

Today’s Stats

  • Low temp: 95F

  • High temp: 71F

  • Sunrise: 6:34am

  • Sunset: 8:09pm

  • Moon phase: Waxing Crescent

  • Additional notes: Very hot and humid

August 6

Farm Notes

If you had told me earlier this summer that the weather during the first week of August here in North Carolina would be breezy, low humidity, sunny, and all around lovely… well, I’d have said you were crazy. Alas! By some meteorological miracle, this past week has been one of the nicest we’ve had all summer, with cooler mornings and evenings that have just the slightest hint of fall. And yet! I’ve lived here long enough to know that we still have a long way to go until fall, and it’s going to heat back up again real quick. Regardless, this week has been a welcomed respite and has given me a little extra pep in my step over the past few days as we wrap up Week 8 of our Summer CSA… just one more week to go!

I really can’t believe how quickly this summer has flown by, and I’m wildly grateful for our CSA members who joined us this summer, and I’m already looking forward to an abundant autumn. Speaking of which… yesterday I officially opened up sign-ups for our Fall CSA! Current CSA members (and the Farmbelly Club community) get first dibs on Fall CSA shares, and there are only a handful of shares left… so if you’re interested in joining for a veggie-packed 12-week CSA this fall, you can sign up here (and I dig into all the nitty gritty details + answer FAQs about the Fall CSA here).

One of the main changes for our Fall CSA is we are reducing the number of CSA pick up days/locations for this session, so we can focus our energy on welcoming our baby boy to the world, who should be arriving around the end of September/early October! We have a small (but mighty) team helping run the farm while I’m on maternity leave, so all pickups for the Fall CSA will be on Thursdays at Farmbelly HQ between 2pm-7pm. I know our decision to scale back a bit this fall means that it may not make sense for some folks sign up for a share this season, and we appreciate your understanding and look forward to adding back additional pickup days + locations in Spring 2022!

A look at our Week 8 Summer CSA Full Share for our Tuesday members!

A look at our Week 8 Summer CSA Full Share for our Tuesday members!

In other farm news….

  • We have harvested the majority of our winter squash, which is now curing (ie toughening the outer skin and sweetening the flesh) for a few weeks and then they will be heading out to our Fall CSA members. I’ll be honest that our winter squash yields this year weren’t great – a combination of getting the plants in the ground too late and some crazy pest pressure means we don’t have the abundance I was hoping for – though there is still plenty to enjoy and I’ve learned a lot of lessons as a grower… as a farmer we are constant students of Mother Nature!

  • We have hit #peakpepper! I’m especially happy with our Carmen peppers, which are a Sweet Bell/Italian variety that are one of my favorites to cook with. This week we also started harvesting our very special habanada peppers, which have the flavor of a habanero, but without the heat!

  • Fall planting has officially kicked into gear! This week we’ve started planting lots of fall greens like lettuces, arugula, and baby kale + we’ve seeded our first round of carrots. Coming next week… radishes, turnips, beets, etc! PS – If you have any questions about what to plant in your fall garden, I’m happy to help.. just send me a message.

Mini butternut squash curing

Mini butternut squash curing

Beautiful Carmen (Sweet Italian) peppers

Beautiful Carmen (Sweet Italian) peppers

Kitchen Notes

This week, our Full Share CSA members got a special Farmbelly culinary treat in their boxes… basil salt! I love making herb salts using whatever fresh herbs I have on hand, and basil salt is one of my favorites for seasoning summer veggies (especially tomatoes and corn), or any protein you may be roasting / grilling.

50FAADEC-9CC7-4076-B2A6-95CA9BCADB2D.JPG

As the name suggests, herb salt is literally just fresh herbs chopped together with kosher salt (and sometimes other aromatics like lemon zest, garlic, etc) - and it's a ridiculously easy way to add vibrant, fresh flavors to your dishes. I keep my herb salts close at hand for seasoning meat, fish, and veggies - and it pairs fabulously with eggs, grilled corn on the cob, and homemade popcorn. Keep reading for the full recipe + technique for making your own herb salt, and I encourage you to get creative with the different combinations of herbs you use, and think about types of dishes that will pair well with each blend.

Here are some of my tried and true herb salt flavor combos:

  • Fresh Summer Flavors: Basil, Chives, Dill, Lemon Zest - pair with fresh vegetables, eggs, toasted bread, and fish.

  • Classic Gremolata: Parsley, Garlic, Lemon Zest - pairs nicely with roasted asparagus, grilled salmon, and steak.

  • Savory & Rustic: Rosemary, Thyme, Sage, Garlic - pairs well with roasted root vegetables, potatoes, and roasted pork.

  • Classic French Fines Herbs: Parsley, Tarragon, Chives, Chervil - use with fish, steak, lamb, and toasted baguettes slathered in goat cheese.

  • Cilantro-Lime: Cilantro, Lime Zest, Garlic - perfect for Mexican-inspired fish or steak dishes, corn on the cob, and popcorn.

DIY HERB SALT

summerherbsalt-5.jpg

Ingredients:

  • 1 cup loosely packed assorted fresh herbs

  • 1 cup kosher salt

  • Optional aromatics: lemon zest, minced garlic, pepper flakes

Instructions:

  1. Preheat your oven to 180F.

  2. Put the salt and fresh herbs (and any aromatics, if using) into the bowl of a food processor and blend for a minute or two, until the mixture is homogenous and all of the herbs have been incorporated into the salt.

  3. Spread the herb salt onto a rimmed baking tray and put into your preheated oven for 30 minutes, stirring/breaking up the salt once or twice to ensure it doesn’t burn. Remove from oven when the herb salt feels very dry to the touch (this is important so the herb salt can be stored without going bad).

  4. Store the dried herb salt in a jar in a cool, dry spot in your pantry, where it will keep for several months.

Today’s Stats

  • Low temp: 85F

  • High temp: 68F

  • Sunrise: 6:28am

  • Sunset: 8:17pm

  • Moon phase: Waning Crescent

  • Additional notes: Sunny and lovely

July 30

Farm Notes

Holy guacamole, it’s been a hot one! It seems like around the country, we’re feeling the summer heat, and I hope that you (and your plants / animals) are taking care and staying cool in this sweltering late July season.

Heat and all, this week on the farm we’ve continued to have abundant harvests of summer veggies… alllll the peppers, tomatoes, okra, eggplant, etc etc! This week we’ve especially hit our stride when it comes to peppers – right now we’re harvesting shishitos, padrons, jalapeños, poblanos, serranos, sweet italian peppers, and colorful sweet bells… and we have a few more varieties still to come! I’d say my favorite pepper right now are the shishitos… I’m a total baby when it comes to heat, and these peppers are mild but still full of flavor, and I love blistering them in a hot pan with some oil, garlic, and a quick squeeze of lemon juice. Shishitos are often compared to (and confused with) padron peppers, which are a bit shorter/squattier and definitely pack more heat! Below is a photo of both kinds of peppers, in case it’s helpful to keep them straight (shishitos on the left, padrons on the right):

Shishito (on the left, smaller in size) and Padron (on the right, larger in size) peppers!

Shishito (on the left, smaller in size) and Padron (on the right, larger in size) peppers!

As for some other farm updates… we’re still hustling to get beds prepped for fall planting, which will begin next week and continue through mid-August. It always feels a little crazy to be planting so many tender cool weather crops in the blazing August heat, but somehow the little plants (mostly) pull through and make for a delicious fall, which will be full of dark leafy greens, colorful root veggies, and hearty winter squash.

Speaking of getting ready for fall – this week we got a load of beautiful compost that will last us through the fall/winter and into early spring. While we do compost our excess food and garden material here at the farm, the process of making super high quality compost that will properly nourish our veggies is a real science, so we buy in all of the compost that we use to amend our soil. Maybe someday we’ll dial in our composting to the point where I would feel confident using it on our beds, but for now we’re really happy with the product we get from Brooks.

PS – We’ve actually snuck off the farm again for a few days, as my brother is getting married this weekend in Kansas City! It’s always a lot of work to get off the farm, and I’m so grateful to all the friends and neighbors who help me keep everything humming along whenever we’re away.

Kitchen Notes

This week I made a giant batch of one of my favorite summer dishes… roasted ratatouille, served over a giant bowl of creamy polenta and topped with fresh basil from the garden. It’s my kind of meal for so many reasons – 1) it uses up heaps of excess (and imperfect) summer veggies, 2) requires minimal prep/mess, and 3) tastes even better the next day (ie perfect for leftovers). I’m excited to share the recipe here… which is a very loose and forgiving recipe, and is a much quicker technique than a traditional ratatouille recipe (which calls for sauting each vegetable separately in a pan… ain’t no one got time for that)! So feel free to mix it up and use whatever you have on hand, and I hope you enjoy this dish as much as we do. :)

ROASTED RATATOUILLE

Ratatouille-2.jpg

INGREDIENTS

  • 1 large eggplant, chopped to 1” dice

  • 2 bell peppers (red, orange, or yellow), chpped to 1” dice

  • 2 zucchini/summer squash (green and/or yellow), sliced into rounds or half moons

  • 1 red onion, sliced into half moons

  • 3-4 cloves garlic, smashed

  • 2-3 tablespoons olive oil

  • 1 spring fresh rosemary, finely chopped

  • 2 teaspoons fresh thyme, finely chopped

  • 1/2 teaspoon dried oregano

  • 2-3lbs tomatoes (heirlooms, slicers, or cherries), roughly chopped

  • Kosher salt and pepper to taste

  • 2 tablespoons balsamic vinegar

  • Fresh chopped basil (to garnish)

PREPARATION

  • Preheat oven to 400°F. 

  • Chop the eggplant, peppers, zucchini, red onion and smashed garlic and combine on a rimmed baking sheet. Toss the vegetables with 2 tablespoons of olive oil and the rosemary, oregano, thyme, and salt and pepper to taste. Make sure the veggies fit in a single layer (if needed, use two trays) and roast for 25 minutes, stirring halfway through to ensure even cooking.

  • After the vegetables in the oven have been cooking for 25 minutes and are beginning to brown, add the chopped tomatoes to the baking tray.

  • Continue to roast vegetables, turning with a spatula once or twice to ensure even cooking for about 30 more minutes, or until tender and browned and most of the liquid has evaporated. Season with a few tablespoons of balsamic vinegar, and add any additional salt and pepper to taste.

  • Serve warm on a large platter garnished with a few splashes of good olive oil and  finely chopped fresh basil.


CREAMY POLENTA


Today’s Stats

  • Low temp: 73F

  • High temp: 95F

  • Sunrise: 6:22am

  • Sunset: 8:25pm

  • Moon phase: Waning Gibbous

  • Additional notes: Sunny, hot and humid

July 23

Farm Notes

While it was so nice to have a few days off the farm last week, inevitably I returned to ALL the plants that were over-due for harvesting, weeds that exploded overnight, and general farm chaos that had to be reigned in. Thankfully, I had some great reinforcement help this week and I’m finally feeling like things are more under control(ish)! Right now we are deep in prep for fall planting, which means lots of weeding, broadforking, amending the soil, and just generally making room for cooler weather crops like brassicas (kale, broccoli, cabbage, collards, etc), radishes, turnips, beets, carrots, herbs, lots of greens, etc.

Buckwheat cover crop looking lush before cutting it down.

Buckwheat cover crop looking lush before cutting it down.

Speaking of prep for fall – we were able to sneak in a quick cover crop rotation in the rows where our early summer zucchini grew. We had a TON of pest pressure in those beds, and I could tell that they needed some extra love, so a few weeks ago we seeded the beds thickly with buckwheat, which is an awesome/quick-growing summer cover crop. Yesterday, we used a weed whacker to cut down the buckwheat and left all the plant matter on top of the soil. Then we immediately covered the beds with a black tarp to speed up the decomposition process so the beds will be ready for fall planting in about a month. While the window is closing, there is still some time to plant a summer buckwheat cover crop if any of you are looking to add some good organic matter to your garden this season. If you have any questions about cover crops and how to work them into your garden, just let me know!

We use a weed whacker to cut back the buckwheat and leave the plant matter on the beds to decompose.

We use a weed whacker to cut back the buckwheat and leave the plant matter on the beds to decompose.

Black tarps working their magic to help speed up the cover crop decomposition in the heat of summer.

Black tarps working their magic to help speed up the cover crop decomposition in the heat of summer.

The other highlight from this week is that the sweet corn is ready! Unfortunately, we didn’t have room to plant much corn this year, but the ears we do have are beautiful and delishhhh.

Kitchen Notes

Let’s talk gazpacho! There are so many different variations on this chilled summer soup, but it’s culinary roots can be traced back to Spain and Portugal.

At its most basic, a gazpacho is a chilled soup made of ripe summer tomatoes blended with peppers, cucumber, shallots/onion, and garlic, and seasoned with vinegar and good olive oil. Many traditional recipes also call for some day-old bread blended in with the veggies for some extra body, though it’s totally up to you (I omit the bread as I like to keep everything veggie-centric). Some gazpachos are blended to be completely smooth, while others are part blended / part diced veggies for some extra texture and crunch.

Here is my basic recipe for gazpacho, but you totally can (and should!) get creative and make this soup your own, using whatever summer veggies/herbs/fruits you have on hand.

SIMPLE SUMMER GAZPACHO

IMG_5599.jpg

INGREDIENTS

  • 3-4 lbs ripe heirloom, slicer, and/or cherry tomatoes (4-5 cups chopped)

  • 1-2 cucumbers (1-2 cups chopped)

  • 1-2 bell peppers, any color (about 1 cup chopped)

  • 1 shallot or 1/2 red onion (about 1/2 cup chopped)

  • 1 clove garlic

  • 1/4 cup fresh basil leaves

  • 2 tablespoons red wine or sherry vinegar

  • 1/4 cup olive oil

  • Kosher salt and freshly ground pepper

PREPARATION

  1. Prepare your ingredients by roughly chopping all of the tomatoes, cucumber, bell peppers, shallot/onion, garlic, and basil and combine in a blender or food processor and blend until smooth. NOTE: If you’d like some extra texture/crunch for your gazpacho, set aside some of the tomato, cucumber, bell pepper and shallot/onion and chop in a small dice, which you can add to the blended portion of the soup later.

  2. Add the vinegar, olive oil, kosher salt (start with 3/4 teaspoon), freshly ground pepper, 1/4 cup fresh basil leaves and blend all of the ingredients until smooth. Taste and adjust seasoning as needed – you may want to add more salt or vinegar to really make all the flavors pop.

  3. Stir in your diced veggies (if using) into the blended portion of the soup and chill in your fridge for 1-2 hours before enjoying (if time allows).

Today’s Stats

  • Low temp: 65F

  • High temp: 88F

  • Sunrise: 6:18am

  • Sunset: 8:29pm

  • Moon phase: Waxing Gibbous

  • Additional notes: Sunny and humid

July 20

Farm Notes

Today marked Week 6 of our Summer CSA! I can’t believe that here are only 3 weeks left of this session, then we will take a 3 week “break” (and by break, I really mean prep + plant like mad for fall) before we return with a 12-week Fall CSA session.

Speaking of the Fall CSA… more details + the opportunity to sign up will be coming very soon! We’re planning to start the Fall CSA the 2nd week of September, and it will run through the end of November/early December. In the next week or two I’ll first open fall sign-ups to our current CSA customers, and if any spots remain I’ll open them more widely. I’ll be totally upfront that there will be fewer shares available for this fall session, as I know that I’ll want to focus my energy on the sweet baby boy that we are preparing to welcome to the world (due Oct 1)! I’m so grateful to have an amazing team of ladies who are ready and excited to run the CSA while I take time to focus on our little one, and I just want to make sure that the CSA is an appropriate size/scale that they can easily manage things while I’m taking time off. This is all to say that we’re stoked for a delicious fall season ahead, so stay tuned for more details about all the goodness to come from this little farm and our small but mighty team!

Back to the present, here’s a snapshot of the contents of our Tuesday full shares:

Our Week 6 Tuesday full shares contained allll the tomatoes (cherries, romas, heirlooms and slicers), fairytale and globe eggplant, green beans, new potatoes, garlic and onion.

Our Week 6 Tuesday full shares contained allll the tomatoes (cherries, romas, heirlooms and slicers), fairytale and globe eggplant, green beans, new potatoes, garlic and onion.

Kitchen Notes

Okra is a summer veggie that keeps you on your toes… the pods start coming in at a trickle, and with each passing week the harvests begin to slowly (but exponentially) increase… and by the time late July rolls around, the okra goes GANGBUSTERS. We aren’t quite at "gangbusters” level just yet, but in the next 1-2 weeks we will definitely be hitting #peakokra…. so I feel like it’s a good time to talk about some of my favorite ways to cook this (sometimes divisive) veggie.

Okra has a reputation for being “slimy” – which isn’t inaccurate! My general philosophy for getting the most enjoyment out of okra is to either A) embrace the sliminess and make a stew/sauce (like this stew), or B) get rid of any hint of slime by roasting/grilling/broiling the pods at a high heat.

Today I’m going to share a recipe for the latter strategy, for simple roasted okra – which I LOVE to pair with some romesco sauce. This is a “no recipe” kind of recipe… just 4-5 ingredients and 15ish minutes in a hot oven, and you’re ready to dig in.

Crispy Roasted Okra

INGREDIENTS

  • 1 pound okra

  • 1-2 tablespoons olive oil

  • Kosher salt, to taste

  • 1 teaspoon paprika

  • Dash of wine wine vinegar or a squeeze of lemon juice

PREPARATION

  1. Preheat oven to 450°F.

  2. Cut the thicker stem end off each okra pod, then cut the okra in half lengthwise and place on a rimmed baking sheet.

  3. Add the olive oil, salt (I usually start with 1/2 teaspoon), and paprika, and use your hands to toss and coat the okra halves. Roast in your oven for 15-20 minutes, stirring the okra twice while cooking for even browning. The okra is ready when it is tender and lightly browned/crispy.

  4. Right when the okra comes out of the oven, add a splash of white wine vinegar or a squeeze of lemon juice for a little extra zip. Taste and add more salt and pepper if needed. Enjoy right away while hot for maximum crispiness!

Today’s Stats

  • Low temp: 65F

  • High temp: 85F

  • Sunrise: 6:15am

  • Sunset: 8:31pm

  • Moon phase: Waxing Gibbous

  • Additional notes: Cloudy, humid, cooler than usual!

July 16

7B241134-90A6-4236-A979-6C15D65281CE.JPG

Farm Notes

Hot dang, it's been a busy (and hot) week at the farm! We’re in the thick of constant harvesting of all the summer goodness... tomatoes and peppers and cucumbers and okra and eggplant and green beans (sooo many green beans). It's wildly rewarding to be reaping the fruits of a season's worth of hard work and careful tending, but the sheer amount of produce that needs to be picked and packed away on a daily basis can also feel overwhelming, especially on 90F+ degree days.

This week we had a few strange events happen on the farm... on Tuesday morning, I woke up to find a deer *inside* our deer fence! I have no idea how that happened, and the deer seemed as bewildered as I was, as she frantically struggled to escape. I was able to quickly open a gate to let the poor thing out, and thankfully it doesn't look like the deer did any damage to our crops. Fingers crossed that doesn't happen again!

Then later in the day on Tuesday, I was kneeling in one of our pathways harvesting cucumbers when I felt a few little bites on my knee. I looked down to see a few ants scurrying around (not a big nest by any means) and didn't think much of it... but within 5 minutes, my entire body broke out into hives! It was incredibly painful (and a bit scary) as I had an intense allergic reaction to the ant bites, and I had to take some Benadryl and put myself to bed early. Alas! The rest of the week has gone smoothly, and I was even able to sneak away to the beach for a few days with family. It's not easy to take a vacation from the farm, and I'm SO grateful for our amazing team who are running the show and taking care of the farm while we take some time away. It takes a village y'all!

PS – It was another delicious week for our Farmbelly CSA members… I can’t believe we are already halfway through our summer session! here’s a snapshot of our Tuesday full shares, which had okra, slicing cucumbers, shishito peppers, cherry & heirloom tomatoes, jalapeno peppers, green beans, and looseleaf lettuce.

24F6DE7D-7178-4A45-A1C5-58C9DA0E7199.JPG

Kitchen Notes

In the thick of these hot and humid days of summer, simple chilled soups are on repeat in our kitchen! Here’s a recipe for one of my favorite cold summer soups - cucumber and avocado with heaps of fresh herbs. I love this soup because it only takes a few minutes to whip up (literally just throw everything in a blender) and it strikes a perfect balance of being super refreshing, but also has lots of healthy fats (from the avocado and yogurt) that it will keep you feeling full and nourished.

CHILLED CUCUMBER & AVOCADO SOUP

WITH FRESH SUMMER HERBS

Serves 5-6

cukesoup.jpeg

INGREDIENTS

  • 1 cucumber | peeled and diced  (handful reserved for garnish)

  • 2 avocados | pitted, peeled, and diced  (1/4 cup reserved for garnish)

  • Juice + zest of 1 lime (or lemon)

  • 1/4 cup coarsely chopped fresh cilantro (handful reserved for garnish)

  • 2 tablespoons chopped fresh basil

  • 2 scallions/green onions | white and light green parts coarsely chopped

  • 1 jalapeno | seeded and coarsely chopped

  • 1 cup nonfat plain yogurt

  • 1 cup cold water

  • 1 teaspoon kosher salt (plus more to taste)

  • Freshly ground pepper

PREPARATION

  1. Puree ingredients in a blender until very smooth. Taste and adjust seasoning as needed.

  2. Chill in the fridge for at least 30 minutes, then divide among 4 bowls and top with reserved cucumber, avocado, a few sprigs of cilantro, and a drizzle of olive oil.

Today’s Stats

  • Low temp: 72F

  • High temp: 90F

  • Sunrise: 6:07am

  • Sunset: 8:37pm

  • Moon phase: First Quarter

  • Additional notes: Sunny, hot, and humid

July 7

Tomato harvesting hands!

Tomato harvesting hands!

Farm Notes

Well friends, we’ve officially hit peak summer here at the farm! There isn’t much new planting that happens in July here in NC (as there aren’t many plants that can thrive/get started in this heat), which means we spend most of our time harvesting all the colorful fruits of the season. The tomatoes, cucumbers, peppers, eggplant, okra, beans, etc pretty much all need to get harvested every other day, and we’re happily (aaaand a bit tiredly…) reaping the rewards from all the tending we’ve given these plants since the spring.

When we aren’t harvesting, we’re doing our best to keep up with weeds, as well as continuing to trellis/support the plants as they grow taller, managing pests, keeping everything irrigated, etc.

Believe it or not, we’re also hard at work planning for fall! We will do our big push of fall planting in mid-August, so now is the time to think about our fall crop rotations and making sure our growing beds will be in good shape and ready for planting in about a month. Back in May we ordered our fall seedlings from Banner Greenhouses, and it’s hard to believe that in a few weeks we’ll be putting cool-weather crops like broccoli, cabbage, kale, collards, etc in the ground!

Right now we’re in Week 4 of our Summer CSA, and I’ve loved putting together the boxes each week for our awesome CSA members. The way our CSA works, we have some folks who pick up on Tuesdays, and some who pick up on Thursdays, so the boxes do vary a bit based on pick up date... though we make sure to evenly distribute the veggie goodness each week, so that everyone will ultimately get all the same items throughout the course of the summer. Here are some shots of our Tuesday full shares from the past two weeks:

Tuesday Full Shares Week 3

Tuesday Full Shares Week 3

Tuesday Full Shares Week 4

Tuesday Full Shares Week 4

Kitchen Notes

Alright friends, let’s talk EGGPLANT! When grown well and cooked right + paired with complimentary flavors, eggplant can be a showstopper. That said, I know eggplant can be a divisive vegetable and miiiiight not be everyone’s cup of tea. So I’m here to get more folks on the eggplant train!

Last week, I dug into all things eggplant in my most recent mini virtual cooking lesson, (which you can watch HERE via our Farmbelly Club private facebook page, or HERE via our shared Google Drive folder) and I wanted to recap all the things you need to know here in the Farmbelly Journal. Today I’m going to dig into the different varieties of eggplant, what to look for when shopping for eggplant + how to store, and lots of cooking tips and recipes.

TYPES OF EGGPLANT TYPES

While there are LOTS of different varieties of eggplant in a range of sizes, shapes, and colors – it’s most helpful to understand the three main types of eggplant: globe, asian, and fairytale.

  • Globe – Globe eggplants are likely what first come to mind when you think of eggplant, and they’re what you’ll most likely find in a grocery store. Globe eggplant are large and meaty and tend to have thicker skins. They are versatile and can be grilled, roasted, stir-fried, etc. I especially recommend using globes if you’re making a dip/sauce (like baba ganoush) from the creamy flesh after it has been cooked.

  • Asian – Asian/Chinese/Japanese eggplant are known for their long, slender shape. I find that asian eggplant have thinner skins and fewer/smaller seeds than globes. Use this type of eggplant for stir-frying, grilling, or sautéing (ie quicker cooking methods).

  • Fairytale – This specialty variety has become more popular in recent years, and is known for it’s adorable, miniature size! They can be prepared in the same way as larger eggplants, but are especially nice when grilled, since they’re so tender and can fall apart/lose their cute shape when roasted (which isn’t necessarily a bad thing, just something to keep in mind).

    Pictured below (L to R) are globe, asian, and fairytale eggplant.

WHAT TO LOOK FOR: When shopping for eggplant, look for heavy, firm fruits with shiny skin. The stems should also be green, which shows that they were freshly harvested.

STORAGE: Eggplant doesn’t like to be super cold, so store in the warmest part of your fridge (usually the front part of the fridge). If you know you’ll be using the eggplant within a day or two from harvesting/purchasing, it is also fine to leave out on your counter.

COOKING TIPS:

  • If you find the outer skin of eggplant to be tough/rubbery, just peel it before cooking with a vegetable peeler! While it’s not necessary to peel eggplant, it’s quick and easy to peel if you don’t prefer the skins.

  • Eggplant has a lot of water/moisture inside, so if you want a super crispy/caramelized eggplant, it’s recommended (but certainly not required) to first chop up your eggplant, sprinkle it with salt, and allow to sit for 15-30 minutes to draw out excess moisture. If you go with this pre-salting route, use a towel to pat the flesh dry before cooking.

  • Another tip for getting nicely caramelized roasted eggplant is making sure to give it plenty of room when cooking… so if you’re roasting and the baking tray feels too crowded, divide up the eggplant into multiple trays.

  • Eggplant is one of those vegetables that really needs to be fully cooked to be enjoyed. When properly cooked, the flesh should be extremely tender! If roasting eggplant, I recommend using a higher heat, around 425F.

  • Be thoughtful about your flavor pairings! Here are some ingredients that pair especially well with eggplant:

    • Tangy/acidic ingredients like plain greek yogurt, bright lemon juice, or tart pomegranates

    • Alliums like garlic, onion, leeks, etc

    • Mediterranean spices like cumin, coriander, cinnamon, paprika, and za’atar

    • Fresh herbs like mint, chives, basil, and thyme

FAVORITE RECIPES:

Still have eggplant questions? Don’t hesitate to send me a message!

Today’s Stats

  • Low temp: 67F

  • High temp: 91F

  • Sunrise: 6:07am

  • Sunset: 8:37pm

  • Moon phase: Waning Crescent

  • Additional notes: Sunny, hot, and humid

June 25

Farm Notes

Considering that it’s late June in North Carolina, I’ve been very pleasantly surprised by how lovely the weather has been this week! (Mostly) clear skies, cool, and super low humidity… I know it’s too good to stick around, but I’ll take it while it lasts.

We’ve officially rounded out Week 2 of our Summer CSA, and the boxes have been filled with a rainbow of color. From new potatoes to beets, tomatoes, eggplant, cucumbers, onions, zucchini, fresh herbs, etc… it’s an especially delicious time of year as we enjoy the both the late spring and all the early summer veggie goodness.

3468A38C-666A-49FD-97BC-F42805DAA3B9.JPG
CD2F205B-B140-4F9F-B480-35E902C4E0FD.JPG
22E45A4A-5CCE-49CB-804F-115DDF69A2AD.JPG

I’ll be honest that I was a little worried going into our new CSA model about whether we’d have the abundance and diversity to fill our boxes each week… and as we get rolling into summer, I can say I’m relieved by how well things are working out. In general, farms using a CSA model need to design a careful crop plan to ensure enough diversity and well-timed successions of veggies to keep the boxes varied and abundant from week to week. But because I didn’t go into this season planning to do a CSA (we decided to make the shift after realizing that I would be 6-8 months pregnant through this summer, and the farmstand model was going to be too tough of a workload for me to handle) – our crop plan wasn’t exactly designed with a CSA in mind, but so far, so good!

That’s not to say that everything has gone perfectly… I think it’s important to also talk about some of the failures and things I know we can improve on for next season. For one thing, we’ve really struggled with pest pressure on our cucurbits (zucchini, cucumbers, winter squash, etc). Unfortunately, the pests (mostly vine borers and squash bugs) got too far ahead of me on our zucchini, and our whole crop (and attempts for a 2nd succession) are already basically finished for the season. I also wish that I had planned better successions for summer lettuces… we have more lettuces that will be ready to harvest soon, but next time I’ll have more regular plantings so we have a consistent supply through the summer.

How are YOUR gardens growing this season? I’d love to hear how things are going, and if you have any questions or need help trouble-shooting any issues, don’t hesitate to let me know! A reminder that our next Zoom Q&A session is this Sunday, June 27th @ 3pm-4pm EST! This is a great time for us to connect one on one and I’ll happily answer any questions you have around growing + cooking seasonal veggies. You can submit questions ahead of time HERE, and HERE is the Zoom link to join on Sunday.

Kitchen Notes

It feels like all of the sudden, there is an epic abundance of summer veggies that we get to cook with! Even though I don’t have much time/energy to cook these days, the nice thing about summer veggies like tomatoes, cucumbers, zucchini, etc is they are so fresh and delicious on their own that you don’t have to do much to make a nourishing and vibrant meal.

Ratatouille-3.jpg

June 18

Farm Notes

Week 1 of the Farmbelly Summer CSA is officially in the books! It’s been a gorgeous, sunshine filled week, and our new CSA distribution model has already done wonders to help lighten/streamline my workload… which I’m especially grateful for as I enter the 6th month of my pregnancy. Speaking of which, many of y’all have asked for more updates on how we’re doing over here! Overall I’m still feeling great, though I am finding that I definitely need to take more breaks and ask for a lot more help when it comes to lifting + carrying things that I could normally easily tackle on my own. It’s been a good (and humbling) experience to slow down and ask for help… two things that don’t usually come naturally to me (!) so I’m very grateful for the many hands that help this little farm run.

Back to the veggies! Pictured here is our Tuesday full share (plus eggs): spring onions, looseleaf lettuce, zucchini, new potatoes, slicing cuke, basil, beet root medley and cherry tomatoes:

84D71BD7-F530-40B1-8B95-553F6405FBD1.JPG

Looking ahead to the next few weeks, the okra is starting to come in, along with our eggplant and cucumbers. We’ve harvested + cured about 1/2 of our potatoes, and overall we’ve had great production from our tubers this season. Peppers tend to take a little longer and still have a few weeks before we’ll be harvesting those. We were a little late getting our first succession of green beans in the ground, but they are growing leaps and bounds every day and we should be harvesting in the next week or two, and our 2nd succession of beans has just been seeded. Lots of deliciousness ahead my friends!

Kitchen Notes

Tomato season is here! This week our cherry and heirloom tomatoes started hitting their stride, and I feel like I’ve incorporated tomatoes into every meal (and not complaining one bit…)!

In honor of this beloved fruit of summer, yesterday I led another mini virtual cooking lesson on all things tomatoes! In the lesson, I dig into the 4 main types of tomatoes (cherries, paste, slicers, and heirlooms) and talk about proper storage, harvesting, and cooking with each type of tomato. HERE is the link to watch the recording via Facebook, or you can find it on our Google Drive folder HERE.

In this lesson, I also quickly demo how to make the easiest / most luxurious tomato dish ever…. slow roasted cherry tomato confit! HERE is the recipe (which is barely a recipe) if you’d like to enjoy an explosion of tomato flavor – I like to enjoy these slow roasted tomatoes over some creamy polenta, on top of some crusty bread + goat cheese, scrambled up with some eggs, or just straight from a spoon! What are some of YOUR favorite recipes for sweet tomato tomatoes?

tomatoconfit-9.jpg


Today’s Stats

  • Low temp: 55F

  • High temp: 90F

  • Sunrise: 6:00am

  • Sunset: 8:37pm

  • Moon phase: Waxing gibbous

  • Additional notes: Sunny and hot all day

June 11

Farm Notes

Goodness gracious, it feels like we are farming in the rainforest! The past week has been wildly hot and humid and wet, and it hasn’t been the most pleasant weather for farming… but that’s just summer here in North Carolina, and we can’t complain about all the gorgeous veggies that are starting to flow in from our garden. Zucchini, cucumbers, tomatoes, eggplant, etc have arrived, and so have the days of needing to harvest daily to keep up with all the abundance.

We officially held the last farmstand of the season this week, and next week we begin our Summer CSA! I’m beyond grateful for all the support from our community as we make this shift mid-season, which will really help me lighten and streamline my workload as we prepare to grow our family this fall. Our first official week of the CSA looks like it will be a delicious one… with a new crop of looseleaf lettuce, zucchini, onions, cherry tomatoes, new potatoes and lots more on the harvest list.

Yesterday we planted sweet potatoes, and it’s my first time ever growing them! When growing sweet potatoes, you plant what’s known as a ‘slip’ – which typically need to be ordered from your local farm/garden supply store. We got ours from our favorite local farm store in Pittsboro, Country Farm & Home. There are lots of different sweet potato varieties out there, and I had to practice some serious self control to not try them all! We ended up planting just two varieties: Beauregard and NC-122 (for a full list of different varieties and their characteristics, here’s a great resource).

IMG_5041.jpg

A few additional notes about planting sweet potatoes:

  • Sweet potatoes prefer loose, well-drained soil for best results. If you have clay soil or drainage problems, work in lots of compost or other organic matter and make raised beds, hills, or planting ridges approximately 8 inches high.

  • Plant your slips at least 4-6 inches deep, spaced about 12” apart in rows at least 3 feet apart, to make room for all the sprawling vines! Water newly planted slips immediately and keep the soil moist for at least the first week as roots develop.

  • Sweet potatoes like the soil to be quite warm, so we planted ours under black landscape fabric (which also helps keep down weed pressure) though you can certainly plant them directly in your garden without the use of any fabric.

  • Time to practice some patience! Sweet potatoes take 3-4 months to mature, so we plan to harvest these in October/November. I’ll keep y’all posted on their progress!

Kitchen Notes

Native elderberry bush

Native elderberry bush

If you live in the south east/mid-atlantic region, chances are that Elderberry bushes are in bloom on roadsides all around you! Elderberries are a spreading shrub grows to be about 8-10 feet and with a spray of creamy-white flowers in mid-summer, giving way to loose clusters of delicious black fruits that are high in nutrients and antioxidants, which have long been used by Native Americans for all their medicinal properties.

Every year around this time, I can be found scurrying along the sides of the road to collect the fragrant blooms, which I soak in simple syrup to made a fabulous elderflower syrup that I look forward to every summer.

Elderflower syrup is delicious stirred into a glass of cold club soda or ginger beer for a refreshing, non-alcoholic spritzer, and it is also divine added to a glass of sparkling wine or your favorite gin or vodka cocktail. I also enjoy drizzling it over fresh fruit, fruit sorbet, or over some tangy greek yogurt.

The syrup is super simple to make at home, here’s the recipe I used, adapted from the blog Lemon & Olive Oil.

Elderflower Syrup

IMG_5068.jpg

INGREDIENTS

  • 3 packed cups elderflower blooms

  • 1 organic lemon, sliced

  • 2 cups granulated sugar

  • 2 cups filtered water

  • 1/4 teaspoon citric acid or 1 tablespoon lemon juice

INSTRUCTIONS

  1. Trim stems of the elderflower blooms, getting as close to the base of the florets as possible (the stems are mildly toxic and, while a few won’t hurt, you definitely want to get rid of as much as possible). Make sure there aren’t any bugs hiding in your blooms!

  2. Place the flowers in a clean quart-sized mason jar, along with the slices of lemon.

  3. In a saucepan, heat sugar and water together until simmering and sugar is completely dissolved. Stir in citric acid or lemon juice.

  4. Pour warm syrup over flowers. Cover the jar with a cloth or paper towel (with a rubber band around it to keep it tight) and store in your fridge for 4-6 days, stirring the mixture once per day, until the flowers start to turn brown and the syrup takes on a pale yellow hue. Strain syrup through a fine mesh sieve lined with a clean cheesecloth, discarding leftover flowers and lemon slices.

  5. At this point the syrup can be refrigerated in a jar for up to 1 month.

Today’s Stats

  • Low temp: 68F

  • High temp: 84F

  • Sunrise: 6:00am

  • Sunset: 8:34pm

  • Moon phase: Waxing crescent

  • Additional notes: Hot, humid and scattered storms

June 4

Farm Notes

0795523A-9C64-4359-9280-102849DEAA5D.JPG

Holy guacamole, how is it JUNE?! Last week, Matthew and I were able to sneak away for a few days to the gulf coast of Florida for some sunshine-filled time off with family. After a whirlwind spring, this trip was just what we needed to rest and restore ahead of an even busier summer season ahead. Once we got back to the farm, it felt like summer had officially arrived.

And now all of the sudden, I’m up to my elbows in tomatoes, zucchini, and cucumbers… not to mention a lot of weeds! Let’s just say this week has been a lot of playing “catch up” and whipping the garden back into shape. And after an incredibly dry few weeks, all of the sudden we have been inundated with rain around here. While we definitely needed the moisture, of course now all I want is some sunshine! We’re in an important window where we are starting to harvest garlic (which has been growing for over 6 months) and potatoes (which we planted in March), and all of the rain means it’s harder to cure/properly dry these veggies after they are harvested… which isn’t good, obviously! Thankfully, it looks like there is sunshine in the weekend forecast and we’re slowly but surely crossing things off the never-ending farm to-do list.

Over the next week or so, we will be planting heaps more veggies… from sweet potatoes (!) to our 2nd successions of cherry tomatoes, cucumbers, zucchini, and summer lettuce. I’m especially excited about the sweet potatoes, because I’ve never grown them before and I’m eager to give them a try. Stay tuned for a tutorial on how we plant the sweet potatoes slips next week. :)

Kitchen Notes

Earlier this week, I hosted a mini virtual cooking lesson focused on Knife Skills! In case you missed it, the link to watch via our private Facebook group is HERE, or you can tune in via our shared Google drive folder HERE. In this lesson, I dig into the main knives you need in your arsenal, how to keep your knives sharp (and safe), how to hold your knife, and how to properly chop, dice, chiffonade, and mince!

Here are a few links to the knives/tools I recommended in this lesson:

And now for an early Summer recipe! This is a quick, colorful salad is perfect for hot summer days when zucchini is flowing from the garden, and you don’t feel like turning on your oven or stove. For this recipe, it’s best to use small to medium sized squash, as larger squash will have tougher skin and larger seeds. This recipe is lightly adapted from the cookbook 'Ruffage' by Abra Berens.

Shaved Summer Squash With Herbs, Lemon & Parmesan

summersquash-4.jpg

INGREDIENTS:

  • 2-3 zucchini summer squash, shaved thinly into 1/8" slices (a mandolin works best for this)

  • 1 cup assorted coarsely chopped herbs

  • 4 oz Parmesan cheese, peeled into ribbons

  • 1 teaspoon kosher salt

  • 1/2 teaspoon freshly ground black pepper

  • Between 1/4 - 1/2 cup olive oil

  • 2 tablespoons lemon juice

INSTRUCTIONS:

  1. Toss together the shaved squash, chopped herbs, Parmesan ribbons, salt + pepper, 1/4 cup of the olive oil, and the lemon juice.

  2. Taste and adjust the seasoning, adding more olive oil and/or lemon juice as needed to make it well dressed and flavorful.

  3. Serve within the next 30 minutes. If serving later, shave the zucchini in advance but dress just before serving.

Today’s Stats

  • Low temp: 77F

  • High temp: 66F

  • Sunrise: 6:01am

  • Sunset: 8:30pm

  • Moon phase: Waning crescent

  • Additional notes: Rainy all day!

May 27

Farm Notes

Well friends, I’m writing this from the sunny gulf coast of Florida, where we’ve snuck away for a few days to spend time with family and to get some much needed R&R. It’s our first time off the farm for more than 48 hours all year, and we’re grateful to have great friends and neighbors keeping everything alive and tended while we’re away!

IMG_4820.jpg

It has been a wildly busy week… with the biggest harvests (thus far) of the season, while still planting (and watering and trellising and pruning…) ALL the summer veggies, AND we also officially launched our Summer CSA! We opened up signups for the Summer CSA to Farmbelly Club members on Sunday evening, and by Tuesday afternoon all of the shares were sold out, which is pretty amazing. While I’m SO grateful for all the support from our community, I’m also bummed that there are quite a few people who missed out on shares… and if that’s you, then there is still time to add your name to our waitlist, in hopes that we can open up a few more shares later this summer. If you are signed up to join the CSA, I’ll be in touch early next week with more information (the 1st pickups for the CSA start on June 15th).

Now for a few more farm-focused updates…

  • Our zucchini and cucumber plants have been growing strong over the past month, and starting next week we will start harvesting! These members of the cucurbit family are incredibly prolific once they start producing fruit, and it’s important to harvest them before the get too big. Next week I’ll show y’all the ideal sizes for zucchini and cucumbers, so you know what to look for in your home gardens.

  • This week I’ve noticed we’ve had some pest pressure from flea beetles (on our eggplant) and cucumber beetles (on our cucumbers and squash), and in case you are also struggling with these pests, I’d recommend an organic OMRI approved application called Pyganic. Pyganic is created from botanically-derived pyrethrins, which are natural pesticides found in chrysanthemum flowers. You simply dilute a few tablespoons in a 1-gallon sprayer and apply on your plants either in the morning or early evening. As an organic grower, our main method of pest control is to have healthy soil and practice good crop rotation + companion planting – but very occasionally using a few naturally-derived products like Pyganic are part of our process for maintaining healthy plants. If you have any questions about any of this, feel free to send me a message!

  • The winter squash seeds that we planted last week have (mostly) germinated and are looking good! Now’s the time to plant winter squash, and if you have any questions please let me know! Here’s a good guide on growing winter squash and some recommended varieties.

Kitchen Notes

One of the things on my to-do list before we left the farm was whip up my first batch of homemade basil herb salt! I had a ton of beautiful, tender basil after pruning back our plants last week, and I wanted to make something that would be shelf-stable while we were away.

As the name suggests, herb salt is literally just fresh herbs chopped together with kosher salt (and sometimes other aromatics like lemon zest, garlic, etc) - and it's a ridiculously easy way to add vibrant, fresh flavors to your dishes. I keep my herb salts close at hand for seasoning meat, fish, and veggies - and it pairs fabulously with eggs, grilled corn on the cob, and homemade popcorn. Keep reading for the full recipe + technique for making your own herb salt, and I encourage you to get creative with the different combinations of herbs you use, and think about types of dishes that will pair well with each blend.

HERB SALT

summerherbsalt-5.jpg

INGREDIENTS

  • 1 cup packed fresh herbs

  • 1 cup kosher salt (this is my favorite brand)

  • Optional aromatics: lemon zest, fresh garlic, pepper flakes

INSTRUCTIONS

  • Preheat your oven to it’s lowest temperature (usually around 180F).

  • Combine the fresh herbs and salt (and any other aromatics, if using) in the bowl of a food processor. Whiz the herbs and salt together for a minute or two, until everything is well combined and the herbs have fully incorporated into the salt.

  • Pour the herb salt onto a rimmed baking sheet and gently dry out the mixture in your preheated oven for ~30 minutes (or until the salt feels very dry to the touch). Stir/toss the herb salt at least once while in the oven to prevent any burning.

  • Once the herb salt is dry, pour it into a clean jar and seal with a lid. It will last in your pantry for months!

Here are some of my tried and true herb salt flavor combos:

  • Fresh Summer Flavors: Basil, Chives, Dill, Lemon Zest - pair with fresh vegetables, eggs, toasted bread, and fish.

  • Classic Gremolata: Parsley, Garlic, Lemon Zest - pairs nicely with roasted asparagus, grilled salmon, and steak.

  • Savory & Rustic: Rosemary, Thyme, Sage, Garlic - pairs well with roasted root vegetables, potatoes, and roasted pork.

  • Classic French Fines Herbs: Parsley, Tarragon, Chives, Chervil - use with fish, steak, lamb, and toasted baguettes slathered in goat cheese.

  • Cilantro-Lime: Cilantro, Lime Zest, Garlic - perfect for Mexican-inspired fish or steak dishes, corn on the cob, and popcorn.

Today’s Stats

  • Low temp: 65F

  • High temp: 92F

  • Sunrise: 6:04am

  • Sunset: 8:25pm

  • Moon phase: Full moon

  • Additional notes: Hot and humid!

May 21

993AC20D-A546-458B-861A-A7EA6A85583E.JPG

Farm Notes

Happy Friday friends! It’s been a wildly busy week around here, with our biggest farmstand week yet (by far) and heaps of beautiful spring veggies headed out the door to folks in our community. It was also my birthday this week, and we celebrated by going out on our first real restaurant date in over a year! For folks who live around us in NC, we love Oakleaf in Carrboro… it’s a hidden gem with an incredible menu that changes every day, and I can attest that the chef really does source from and support local farmers.

And if you’re a farmstand customer, you hopefully received a big announcement from me yesterday that I’m excited to talk more about here… starting in mid-June, we will be transitioning away from our current farmstand model to a more traditional CSA-style farm. Why the change? The honest answer is that while I have loved our weekly farmstand where folks can place customized pre-orders each week…. the reality is that the added time and complicated back-end logistics that come with this farmstand model are not sustainable long term, especially as I start needing to slow down a bit during my pregnancy! Thankfully, everyone has been super supportive and understanding thus far, which I am incredibly grateful for. It’s exciting times around here, and I’m proud of how well everything is growing thus far, and I have a feeling this summer will be our most abundant and delicious yet.

For our local friends who might be interested in signing up (or anyone interested in how we’re organizing our CSA), you can find ALL the details about our Summer CSA right here. And some good news for Farmbelly Club members interested in becoming a CSA member… to make sure that y’all get a spot in the CSA (I have a feeling we will sell out), I’m giving Farmbelly Club members early access to sign up! As a thank you for your continued support, I will email out the link to sign up for a CSA share around 6pm on Sunday, May 23rd (regular sign-ups will open at 9am on Monday, May 24th).

Last but not least, a reminder that our next Farmbelly Club Zoom Q&A session is THIS SUNDAY, May 23rd @ 3-4pm EST! During these calls we get to hang out, get to know one another, and I'll answer any and all of your questions about growing + cooking good food. Here is the Zoom link to join, and you can submit questions ahead of time here.

Whew! That’s all I have for now. Keep reading the learn all about the art of making quick pickles…!

IMG_4781.jpg
Mixed-Vegetable-Quick-Pickles-002.jpg

Kitchen Notes

Last night I hosted another mini virtual cooking class for Farmbelly Club members, all about making quick pickles! Watch the full cooking lesson via our Facebook group here, or you can watch via our Google Drive folder here.

Quick pickles are a super easy (and delicious) way to preserve your seasonal produce, and it’s perfect for transforming any veggies that may be languishing in your fridge into something colorful, crunchy, and nourishing.

Quite simply, quick pickles are made by covering vegetables with an acidic brine, which prevents any bad bacteria from growing. Quick pickles are always stored in your refrigerator, and the cool environment in the fridge acts as a second line of defense against any bacterial growth.

The foundation of every pickling recipe is the vinegar-based brine, which usually has just four basic ingredients: 1) VINEGAR  for acidity, 2) WATER to cut the harshness of the acid, 3) SUGAR to balance the acid and 4) SALT for flavor. Once you get the basic formula down, the pickling possibilities are endless! Below is a full rundown of exactly how to make your own quick pickles:

INGREDIENTS + EQUIPMENT

  • 1 pound of fresh seasonal vegetables (such as cucumbers, carrots, cauliflower, green beans, summer squash, radishes, asparagus)

  • Optional seasonings: fresh herbs, whole spices, garlic, lemon zest, ginger, etc.

  • 2 pint-sized (or 1 quart-sized) wide mouth jars with lid

Brine Ingredients

  • 1 cup vinegar (such as white, apple cider, or rice wine) 

  • 1 cup water

  • ¼ cup sugar

  • 1 tablespoon kosher salt 

INSTRUCTIONS

  • Prepare the jar: Wash your mason jar and lid in hot soapy water, rinse and let air dry.

  • Make the pickling liquid: Combine the vinegar, water, salt, and sugar in a small saucepan over high heat. Bring to a boil, stirring to dissolve the salt and sugar. 

  • Prep the vegetables: Wash + dry the vegetables, peel (if necessary) and cut vegetables into desired shapes/sizes.

  • Pack the vegetables and flavorings: Pack the vegetables, herbs/spices/aromatics into the jars in layers, making sure there is a 1/2 inch of space from rim of the jar to the tops of the vegetables. Pack as tightly as you can without smashing.

  • Pour brine over the vegetables: Carefully fill each jar to within 1/2 inch of the top with the brine. Note: this recipe makes enough brine for 2 pint-sized jars, or 1 quart of pickles. 

  • Remove air bubbles and seal jars: Gently tap the jars against the counter to remove air bubbles. Top off with more brine if needed. Screw on lids until the rings are tight.

  • Cool and refrigerate: Let the jars cool to room temperature. Store the pickles in the refrigerator. These will taste good after 48 hours, but are much better after a couple days to a week. Keeps for at least a month – the cleaner you keep the jar, the better! 

Tried and True Quick Pickle Combinations

  • Classic Cucumber: Cucumbers, Red Onion, Peppercorns, Dill, Garlic

  • Carrot + Cauliflower: Cauliflower, Carrots, Roasted Red Pepper Flakes, Peppercorns, Garlic

  • Citrus + Fennel: Fennel, Radishes, Lemon Zest

  • Spicy Radish: Daikon radish, Red radishes, Ginger, Red Pepper Flakes

  • Okra: Okra, Red Pepper Flakes, Garlic, Peppercorns, Cumin

Today’s Stats

  • Low temp: 52F

  • High temp: 81F

  • Sunrise: 6:07am

  • Sunset: 8:21pm

  • Moon phase: Waxing Gibbous

  • Additional notes: Clear, sunny, and warm all day.

May 12

ECBB98C5-FBF6-4FA4-9B5D-87EA8035533E.JPG

FARM NOTES

Today I’m so gosh darn excited to share news that we’ve been keeping a secret since January… we’re having a baby! Holy guacamole. I’m definitely feeling all the feelings over here… SO grateful, AND tired, AND energized, AND a little/a lot overwhelmed, AND filled with so much giddy anticipation. While I don’t know if anyone ever feels “ready” to welcome a new life into the world, my husband Matthew and I feel like we’re as ready as we’ll ever be, and we are just so darn excited for this next chapter.

We know that our worlds are about to be totally rocked, and we’ll never be the same. And as a small farmer, I know that being a mom is really going to rock my world! I’m used to being able to work completely on my own schedule and to push my body to its limit doing all the weeding, planting, irrigating, harvesting, washing, packing etc that comes with this job that I love. Already I’m finding myself totally reimagining what it will look like to both a mom and a farmer, and I’m (slowly but surely) getting better about asking for help when I need it. As someone who is fiercely independent and introverted, I know that this new season is going to be a roller coaster to navigate at times. But I also know there is a new whole side of me (and of Matthew) that will emerge when this baby is born, when we will get this incredible opportunity to grow leaps and bounds as humans and parents and partners.

I know I’ll have a lot more to say on this topic in the coming weeks and months, but I’m just excited to be able to share the news with y’all today! Raising this sweet baby boy is going to take a village, and I’m wildly grateful to have such an amazing village of friends and family both near and far. :)

KITCHEN NOTES

Now that you know what I’ve been cooking up over the past 5 months, it might make a little more sense why I haven’t been in the kitchen as much recently! By some miracle, I haven’t dealt with any morning sickness during my pregnancy (which I definitely don’t take for granted), but most days, all I want to eat is a plain bagel with cream cheese, or a bowl of cereal, or a cheesy black bean quesadilla! Don’t worry, I’ve been eating HEAPS of vegetables and nourishing foods in this season, but it’s all been pretty simple and not too inspiring… so thanks for bearing with me!

But really. I’m craving quesadillas these days. And if you’re willing to get a little creative, I’ve found that quesadillas can be a great vehicle for veggies and other nourishing ingredients, nestled in between two cheesy tortillas. So today, I’m sharing links to some veggie-filled quesadilla recipes that have been getting me through the past few months!

TODAY’S STATS

  • Low temp: 40F

  • High temp: 52F

  • Sunrise: 6:14am

  • Sunset: 8:13pm

  • Moon phase: Waxing Crescent

  • Additional notes: Chilly and rainy all day.

May 9

Farm Notes

One of the topics I covered in my most recent farm walk (you can watch the video HERE) was about my must-have tools on the farm! As promised, here’s a list of my favorite tools + links to purchase:

296459B1-0357-4645-9A21-B1BED491A483.JPG

Kitchen Notes

Over the weekend, I was inspired by all our abundance of kohlrabi and fresh herbs, so I made a colorful + crunchy coleslaw that hit the spot. I’ll be honest that I was totally making it up as I went, so here’s my best stab at a recipe… coleslaw is super forgiving in my opinion, so feel free to substitute with what you have available / what feels good to you!

Herby Spring Coleslaw

IMG_4637.JPG

INGREDIENTS

  • 6-8 carrots, grated (or 1lb bag pre-shredded carrots)

  • 1/2 head red or green cabbage, finely shredded/sliced

  • 2 kohlrabi, de-stemmed, peeled, and shredded

  • 1 bunch scallions, light green and green parts sliced into thin rounds

  • 1/4 cup finely chopped dill

  • 1/4 cup finely chopped parsley

  • 1/2 cup plain greek yogurt

  • 1/4 cup mayonnaise

  • 1/4 cup tablespoons apple cider vinegar

  • 2 tablespoons olive oil

  • 2 tablespoons honey

  • Salt & pepper, to taste

INSTRUCTIONS

  1. Combine the shredded carrots, kohlrabi, cabbage, scallions, and chopped herbs in a large bowl.

  2. In a smaller bowl, whisk together the yogurt, mayonnaise, apple cider vinegar, olive oil, honey, salt and pepper. Taste and adjust seasoning to your liking.

  3. Pour the dressing over the slaw, and mix until fully coated. Best enjoyed after being chilled for a few hours before serving, to allow all the flavors to meld.

Today’s Stats

  • Low temp: 65F

  • High temp: 80F

  • Sunrise: 6:14am

  • Sunset: 8:13pm

  • Moon phase: Waning Crescent

  • Additional notes: Warm, sunny, and breezy all day.

May 7

Farm Notes

As we get deeper into the growing season, time seems to speed up and my to-do list grows longer by the day… which is why it’s been a little quieter over here! While there’s always an overwhelming amount to do this time of year, I still think that May is one of my favorite months to grow food… days are longer + warmer, but the heat + humidity of NC summers haven’t arrived, we aren’t being bitten by bugs (yet), all the plants and trees are vibrant shades of green, and there’s an abundance of gorgeous spring + early summer veggies making their way to our tables.

Yesterday we got a lot done on the farm… we started the day by fertilizing everything with fish emulsion, then pruned + continued trellising the tomatoes (which seem to be growing at lightning speed), planted heaps more peppers, eggplant, and zucchini, and tackled weeds!

Over the next few weeks we will be planting more of our late summer veggies – like corn, melons, winter squash, and sweet potatoes. I’ve actually never grown sweet potatoes before, and I’m really excited to give them a try (ps – if you’re local to central NC and want to pick up some sweet potato slips, TODAY is the last day to pre-order them from Country Farm & Home in Pittsboro… here’s the link to all their sweet potato info).

And there was a bit of a disaster with our winter squash seedlings… last weekend I seeded TONS of winter squash seeds (butternut, acorn, delicata, etc) and tucked them in our mini greenhouse setup inside our house over the weekend while we were away. When we got home and I checked on the seedlings to see if they had germinated, I discovered that a mouse had gotten into the mini greenhouse and eaten every. single. seed! I was so upset. Not only because it was a total waste of seeds, but also a waste of time spent carefully seeding each tray. Alas! I’ve decided to pivot and instead of starting our winter squash ahead and transplanting them into their beds, I’ll be direct seeding them into the ground outside in a week or two and all will be well. If you have any questions about growing winter squash, let me know and I’d be happy to help!

IMG_4603.JPG

Kitchen Notes

Let’s talk vinaigrettes! In case you missed it, yesterday I hosted a mini virtual cooking class, which was all about making homemade vinaigrettes + tips for whipping up delish salads!

Here are two ways to watch the video, and keep scrolling for ALL my tips + recipes to help you make your own flavorful and nourishing vinaigrettes at home:
1) Watch via our private Facebook page
2) Watch via the Farmbelly Club google drive folder

Okay, time for Vinaigrettes 101!

Salad dressings can be divided into two main types - vinaigrettes and creamy dressings - and both have a multitude of variations. Simply put,  a vinaigrette contains an acid (vinegar or citrus), an oil, and salt

Here are all my tips + recipe suggestions for DIY vinaigrettes:

1) Remember Your Ratio

  • The traditional formula is 3 parts oil to 1 part acid BUT 95% of the time, I lean towards more acidic dressings, and use a 2:1 ratio of oil to acid (so 2 parts oil to 1 part acid)

  • The oil is typically extra-virgin olive oil (ideally cold pressed, in a dark glass container), but you can also use grapeseed oil, sunflower oil, canola oil, etc. 

  • The acid can be either vinegar (white/red wine vinegar, apple cider, balsamic, sherry) or citrus (lemon, lime, orange) - you can also mix multiple types of acid into a single vinaigrette.

2) Balance Your Vinaigrette

To “balance” a vinaigrette means combining ingredients so they temper and complement one another, with no one aspect overpowering the whole. 

  • Salt is crucial to temper the acid while amplifying flavor.

  • Sweeteners like sugar, honey, maple syrup, and agave are optional, but help temper acidity.

  • Aromatics like spices, fresh herbs, shallots, garlic, ginger, and lemon zest add tons of flavor.

3) Emulsify + Stabilize Your Vinaigrette

Oil and acid naturally want to separate, which is why they need to be emulsified. The following kitchen staples also help oil and acid emulsify into a cohesive mixture - not to mention add great flavor!

  • Tahini - made from ground sesame seeds, pairs well with lemon, olive oil, garlic and honey.

  • Miso - Miso is a fermented soybean paste that is widely used in Japanese and Korean cuisines.

  • Mustard - lends a creamy and delightfully tangy flavor to vinaigrettes. 

TRIED & TRUE VINAIGRETTE COMBINATIONS:

  • Balsamic Vinaigrette

  • 3 tablespoons olive oil

  • 1 tablespoon balsamic vinegar

  • 1/2 teaspoon dijon mustard

  • 1/2 teaspoon honey

  • Salt & Pepper, to taste

  • Creamy Lemon-Mustard Vinaigrette

  • 3 tablespoons olive oil

  • 1  tablespoon lemon juice

  • 1 teaspoon dijon mustard

  • 1/2 teaspoon honey

  • Salt & Pepper, to taste

  • Apple Cider Vinaigrette 

    • 3 tablespoons olive oil

    • 1  tablespoon Apple Cider Vin.

    • 1 teaspoon dijon mustard

    • 1 teaspoon honey

    • Salt & Pepper, to taste

  • Tahini-Lemon Dressing

    • 2 tablespoons lemon juice

    • 2 tablespoons tahini

    • 1 tablespoon water

    • 1 teaspoon maple syrup

    • 1/4 teaspoon minced garlic

    • Salt & Pepper, to taste

Today’s Stats

  • Low temp: 42F

  • High temp: 65F

  • Sunrise: 6:18am

  • Sunset: 8:10pm

  • Moon phase: Waning Crescent

  • Additional notes: Chilly and cloudy with scattered showers.

April 26

Farm Notes

It was a fairly quiet and restful weekend on the farm, with a welcomed (for me at least) day of rain all day Saturday. Waking up on Sunday morning, there wasn’t a cloud in the sky and it felt like the drenching rain had made every leaf and blade of grass turn an extra bright shade of green. And this week it is finally (finally!) time to plant out the rest of our summer veggies. I’ve already planted our first round of eggplant and cucumbers, and later this week our zucchini, okra, basil, and first round of peppers will also go in the ground.

I know everyone’s garden layout/situation is different, but in case it’s helpful, here is some more detailed info about how far apart we space most of our summer veggies. Spacing is always an important detail when planning + planting, because while you want to maximize your growing space, your plants will suffer if they are spaced too close together.

  • Basil – 2 rows per bed, 18” apart

  • Eggplant – 1 row per bed, 18” apart

  • Okra – 1 row per bed, 24” apart

  • Peppers – 1 row per bed, 18” apart

  • Tomatoes – 1 row per bed, 18” apart

  • Zucchini/summer squash – 1 row per bed, 24” apart

No other major news to report around here… the farmstand is humming along and I’m so grateful for all the support we get from our community each week. Seeing photos of dishes that people make with our veggies (and items from other growers that we offer through the farmstand) really does make all the work worth it!

Kitchen Notes

I’m going to be real honest, there hasn’t been a ton of creative cooking happening around here recently! Let’s just say that the most creative thing I made recently was a (very delicious, I might add) quesadilla filled with black beans, red onion, and roasted broccoli.

Alas! I promise that more Farmbelly recipes will be coming soon. In the meantime, I wanted to share a few woman that I have especially enjoyed following recently for cooking inspiration:

Today’s Stats

  • Low temp: 48F

  • High temp: 74F

  • Sunrise: 6:30am

  • Sunset: 8:00pm

  • Moon phase: Waxing Gibbous

  • Additional notes: Sunny, breezy and beautiful.


April 21

Farm Notes

I can’t believe it’s been a week since my last update! I’ll be honest that the past few days have been a whirlwind, filled with spring planting and harvesting and mowing and weed whacking and weeding and fertilizing and running the farmstand… not to mention managing work for my other job, which thankfully can all be done from my phone/computer. It’s that time of year when I’m up with the sun and using up every bit of daylight to do all the things, and the farm is exploding with green and flowers (and lots of pollen…) in every direction!

IMG_4398.JPG

Since it’s been a few days, here are some updates from the farm:

  • Last Thursday we finished planting the rest of our tomatoes, which are thankfully (mostly) all in our caterpillar tunnels, so I can lower all the sides on the tunnels to keep them protected and warm as the temps get down to freezing over the next two nights. Each season we grow 3 different types of tomatoes (mixed cherries, larger heirlooms/slicers, and romas/paste tomatoes) and in total I think we are growing about 16 different varieties of tomatoes – which may seem like a lot, but I’m actually pretty proud of my restraint because it’s so hard to narrow down all the options from the plethora of tomato varieties that are available these days.

  • We were supposed to be planting heaps of summer veggies this week (zucchini, cucumbers, basil, okra, eggplant, peppers, etc) BUT with the freezing temps that are forecasted for the next two nights, we’re going to hold off and plant all those babies over the weekend + into next week. Just goes to show that Mother Nature is always in charge, and as farmers sometimes we have to throw our plans out the window and work with whatever the weather throws our way.

  • LOTS of beautiful spring veggies getting harvested this days! Just to give you a sense for what we’re picking these days for the farmstand + restaurant customers, here’s a quick list: looseleaf lettuce mix, pac choi/bok choi, arugula, hakurei turnips, radishes, kohlrabi, kale, swiss chard, mint, cilantro, dill, parsley. Looks like over the next few weeks, our spring fennel, kohlrabi, and beets will also be ready for harvesting.

Kitchen Notes

IMG_4403.JPG

I’m excited to announce that tonight I’m hosting the first (of many) Farmbelly Club mini virtual cooking lessons via Zoom + Facebook Live!

TONIGHT, April 21, at 7:45pm EST I’ll be leading a quick (10-15 minute), fun, and informative lesson all about HERBS! During this lesson, I’ll talk about the difference between spices and herbs, when to use dried vs fresh herbs, how to properly store different kinds of herbs, AND how to safely chop various herbs.

Want to join live tonight @ 7:45pm (EST)?! Here are the links for two ways to watch:

If you're not able to join live, no worries! The video will be saved on Facebook live, and I’ll also record the video on Zoom and will add it to our Farmbelly Club video google drive HERE.

Today’s Stats

  • Low temp: 32F

  • High temp: 72F

  • Sunrise: 6:36am

  • Sunset: 7:56pm

  • Moon phase: Waxing Gibbous

  • Additional notes: Sunny, breezy and beautiful… getting chilly by the evening!