April 14

Farm Notes

IMG_4307.JPG

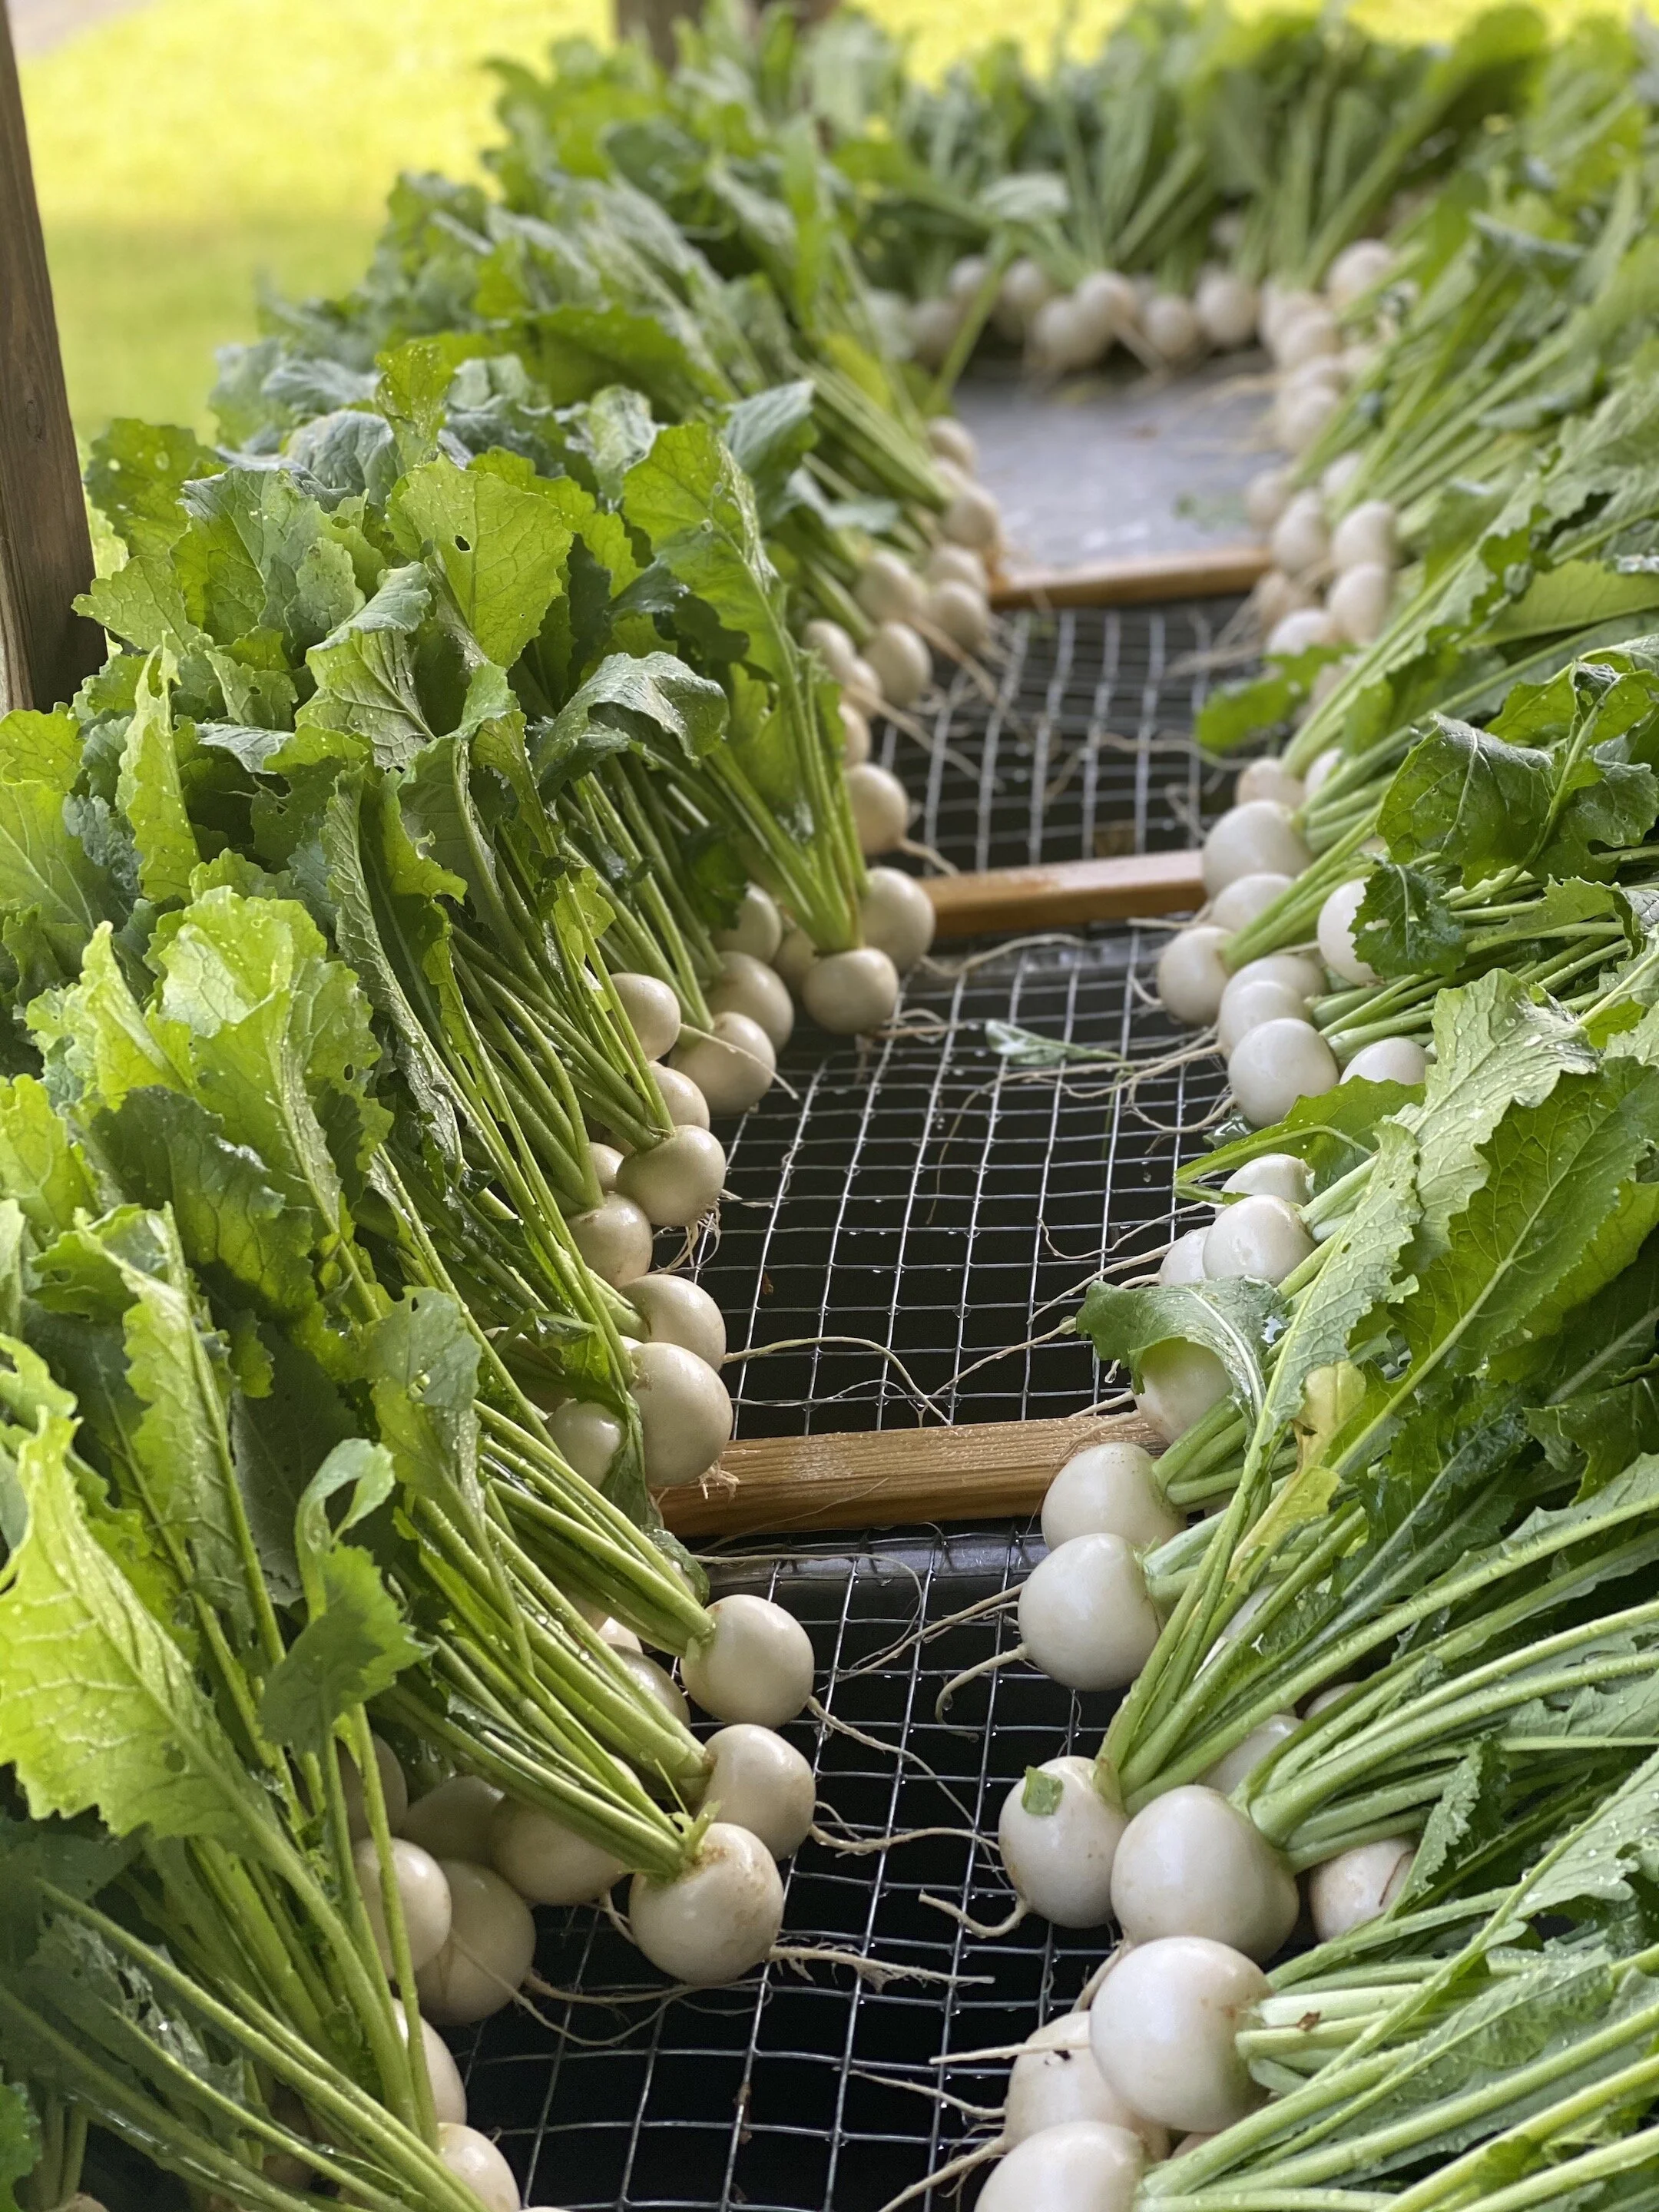
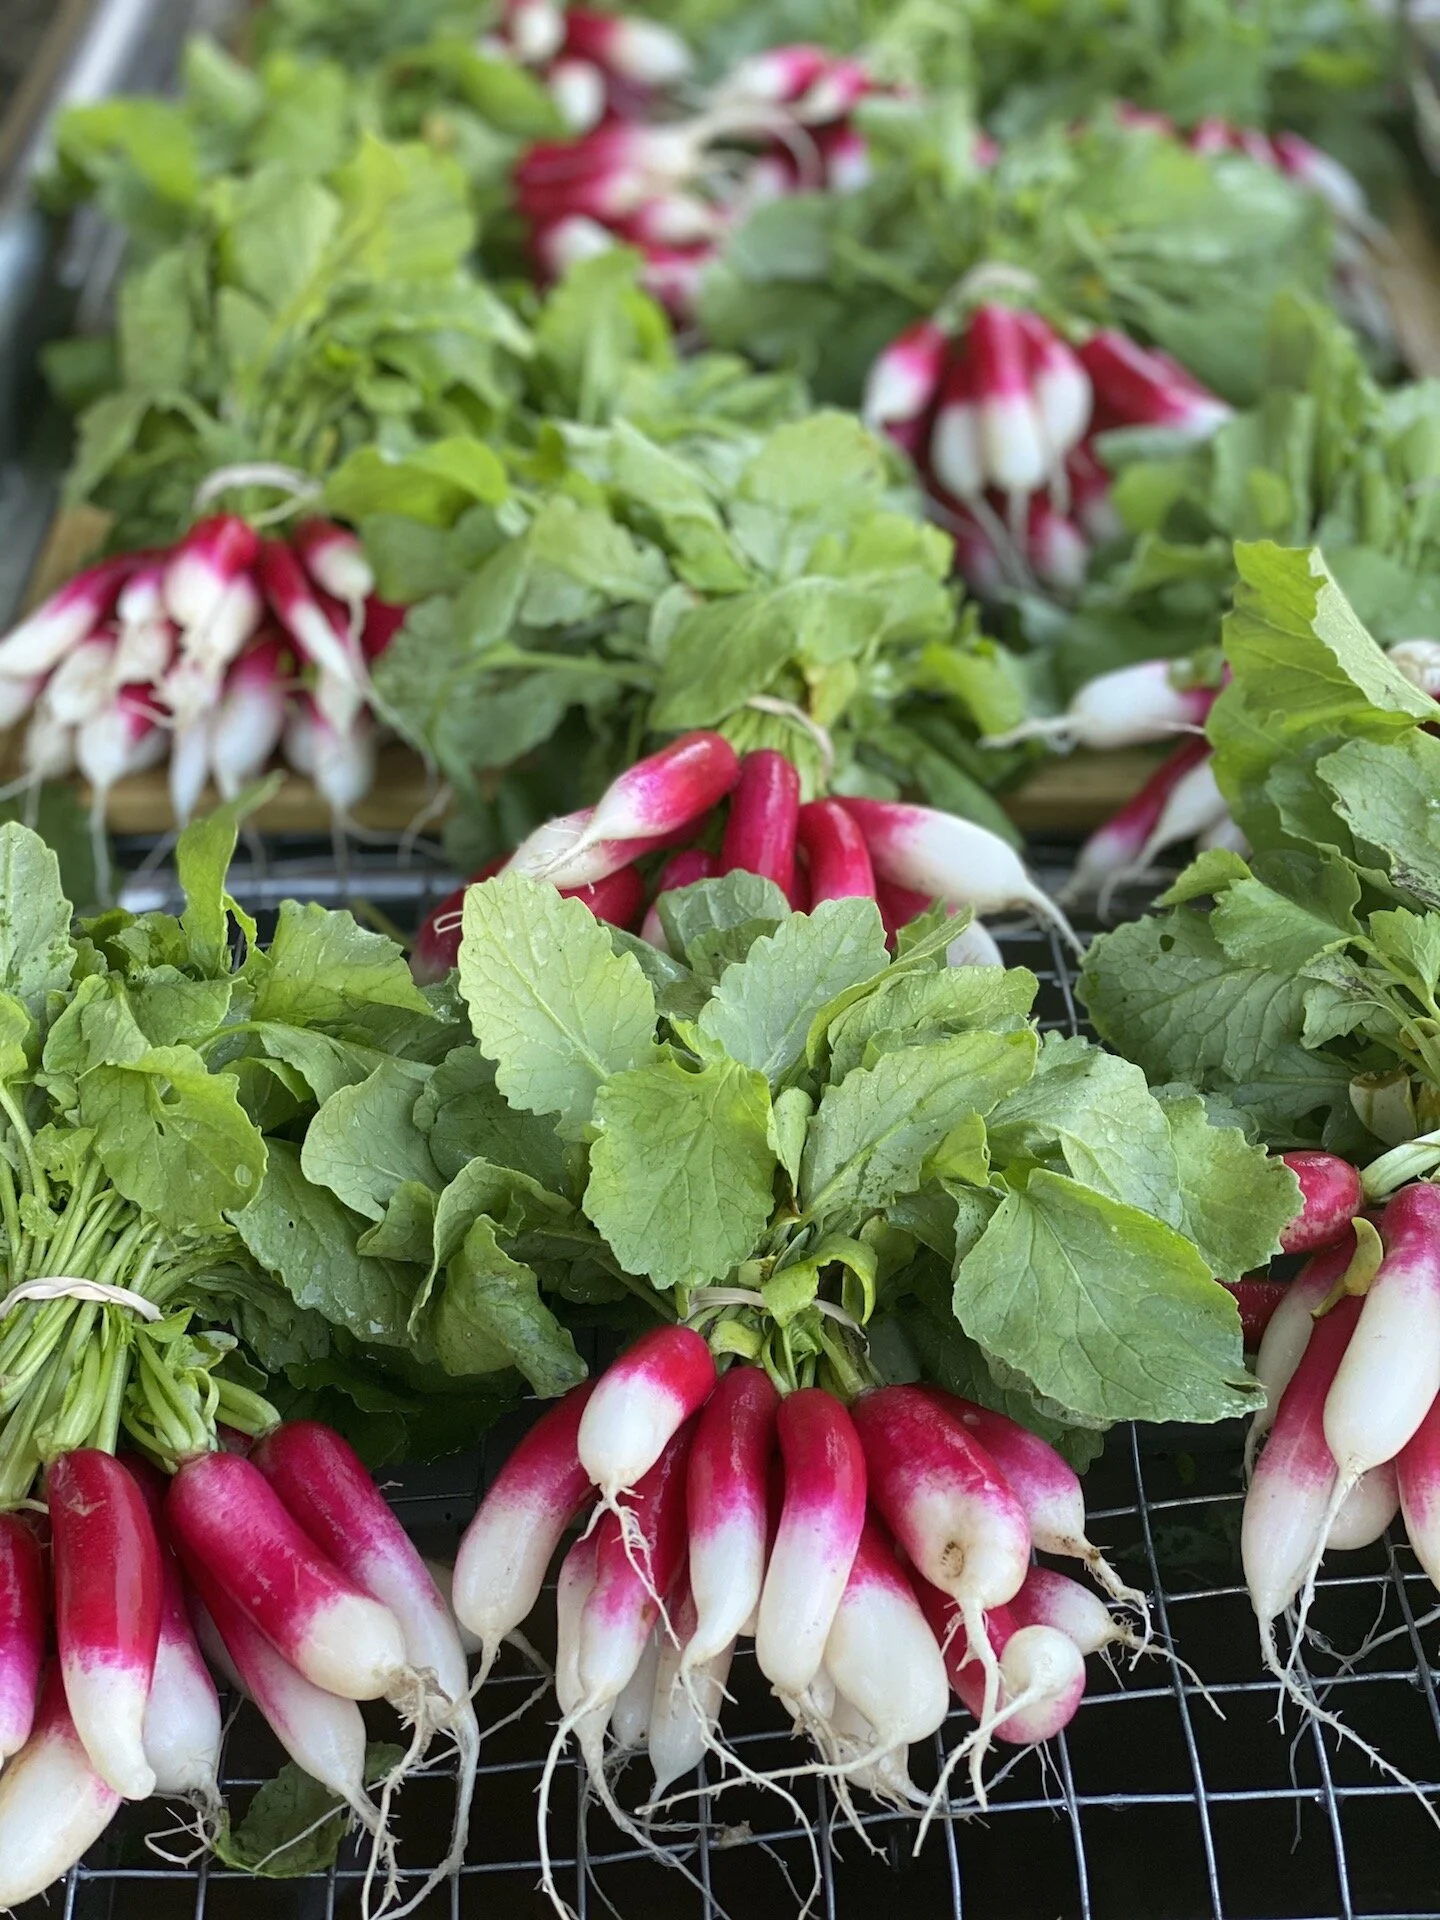
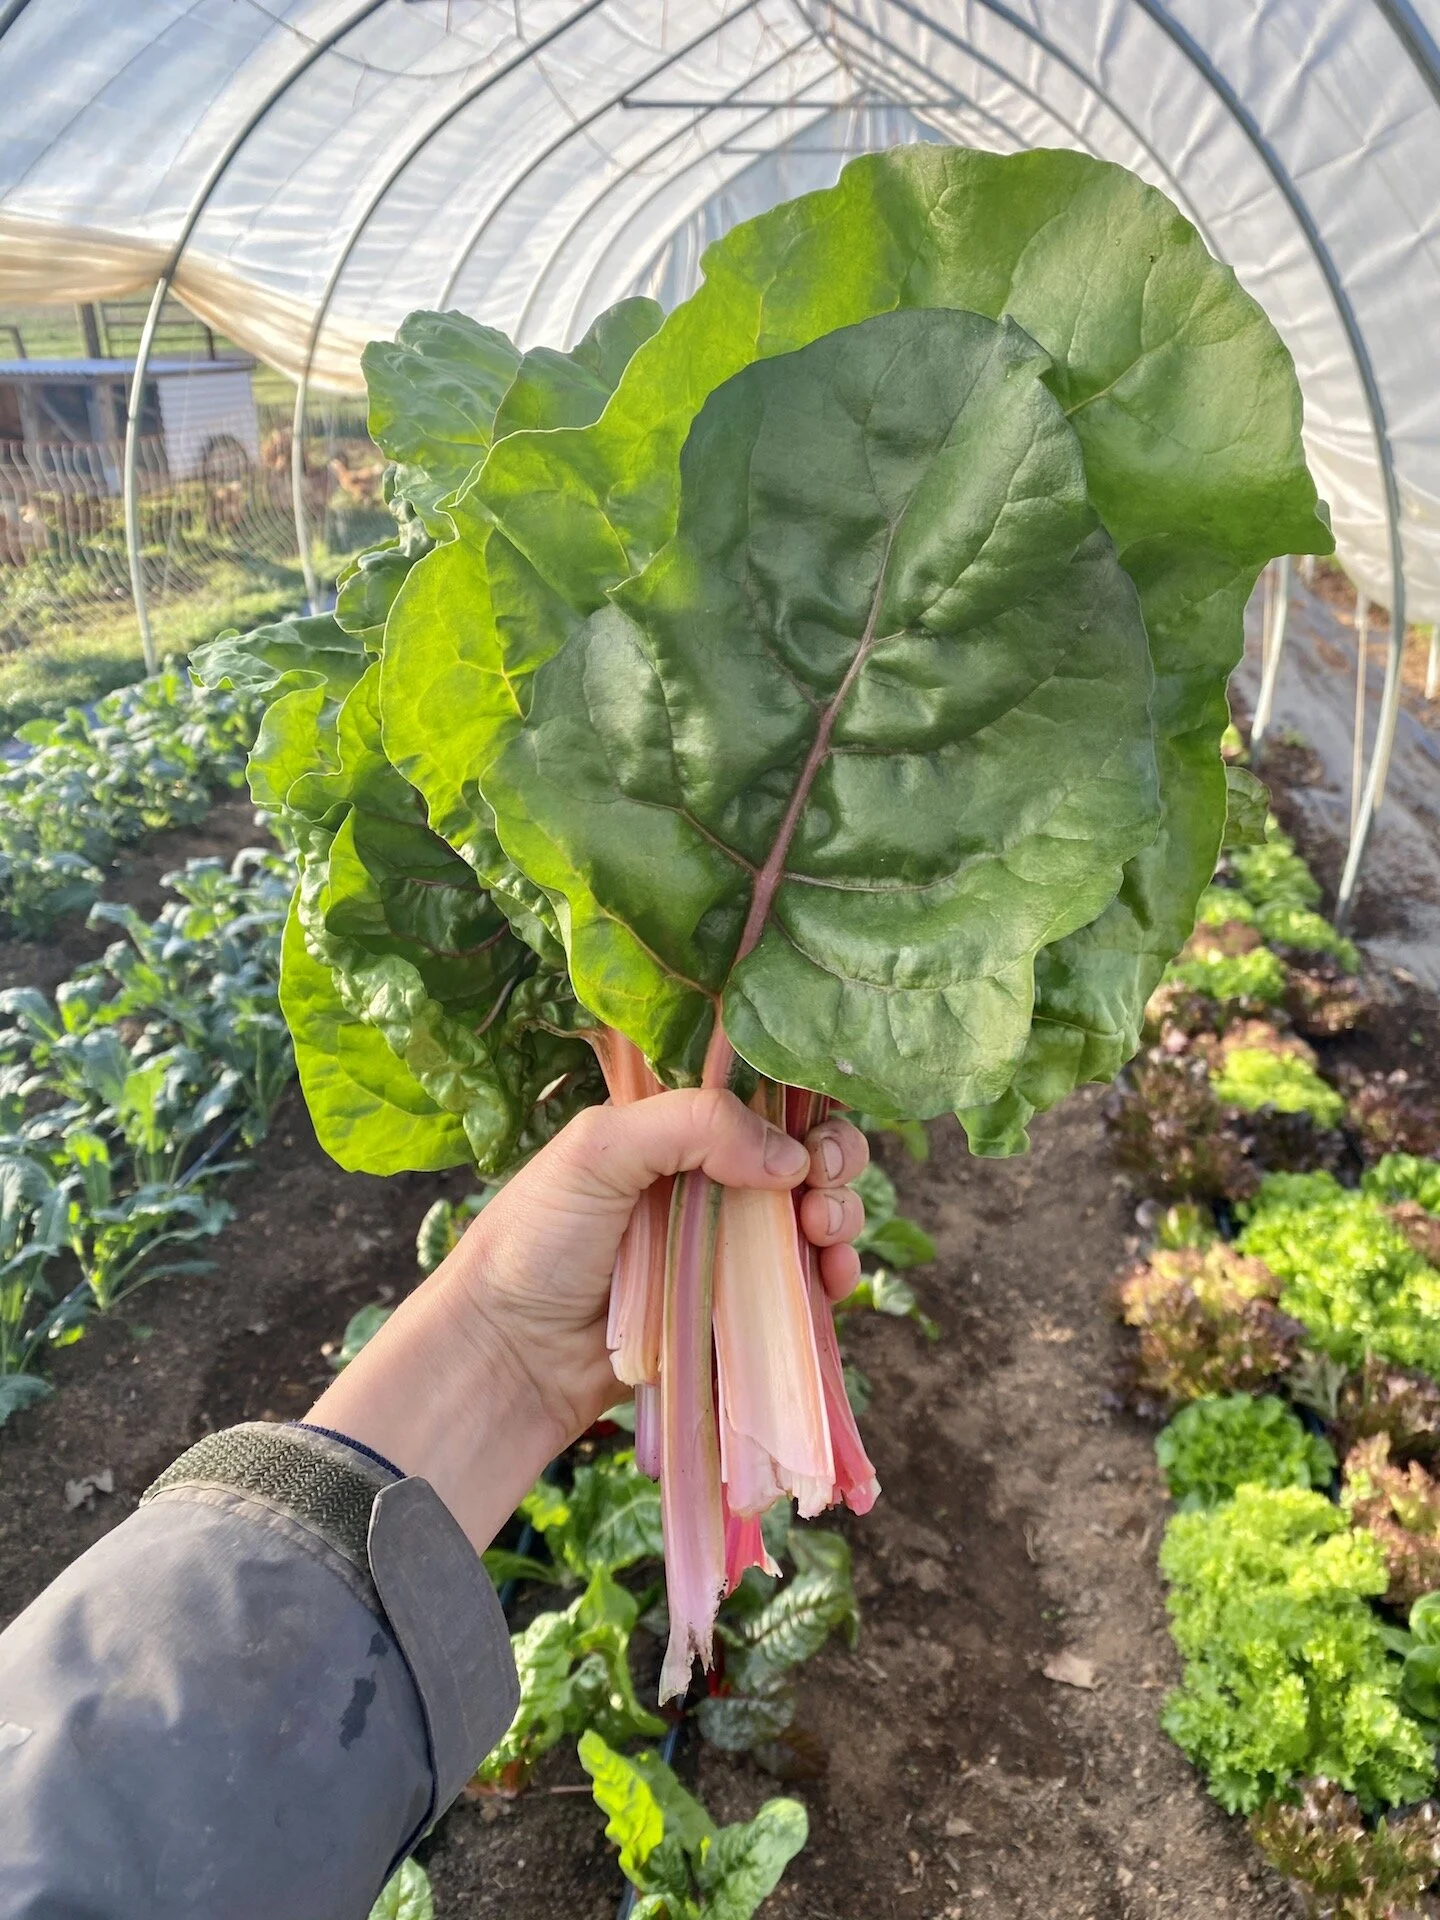
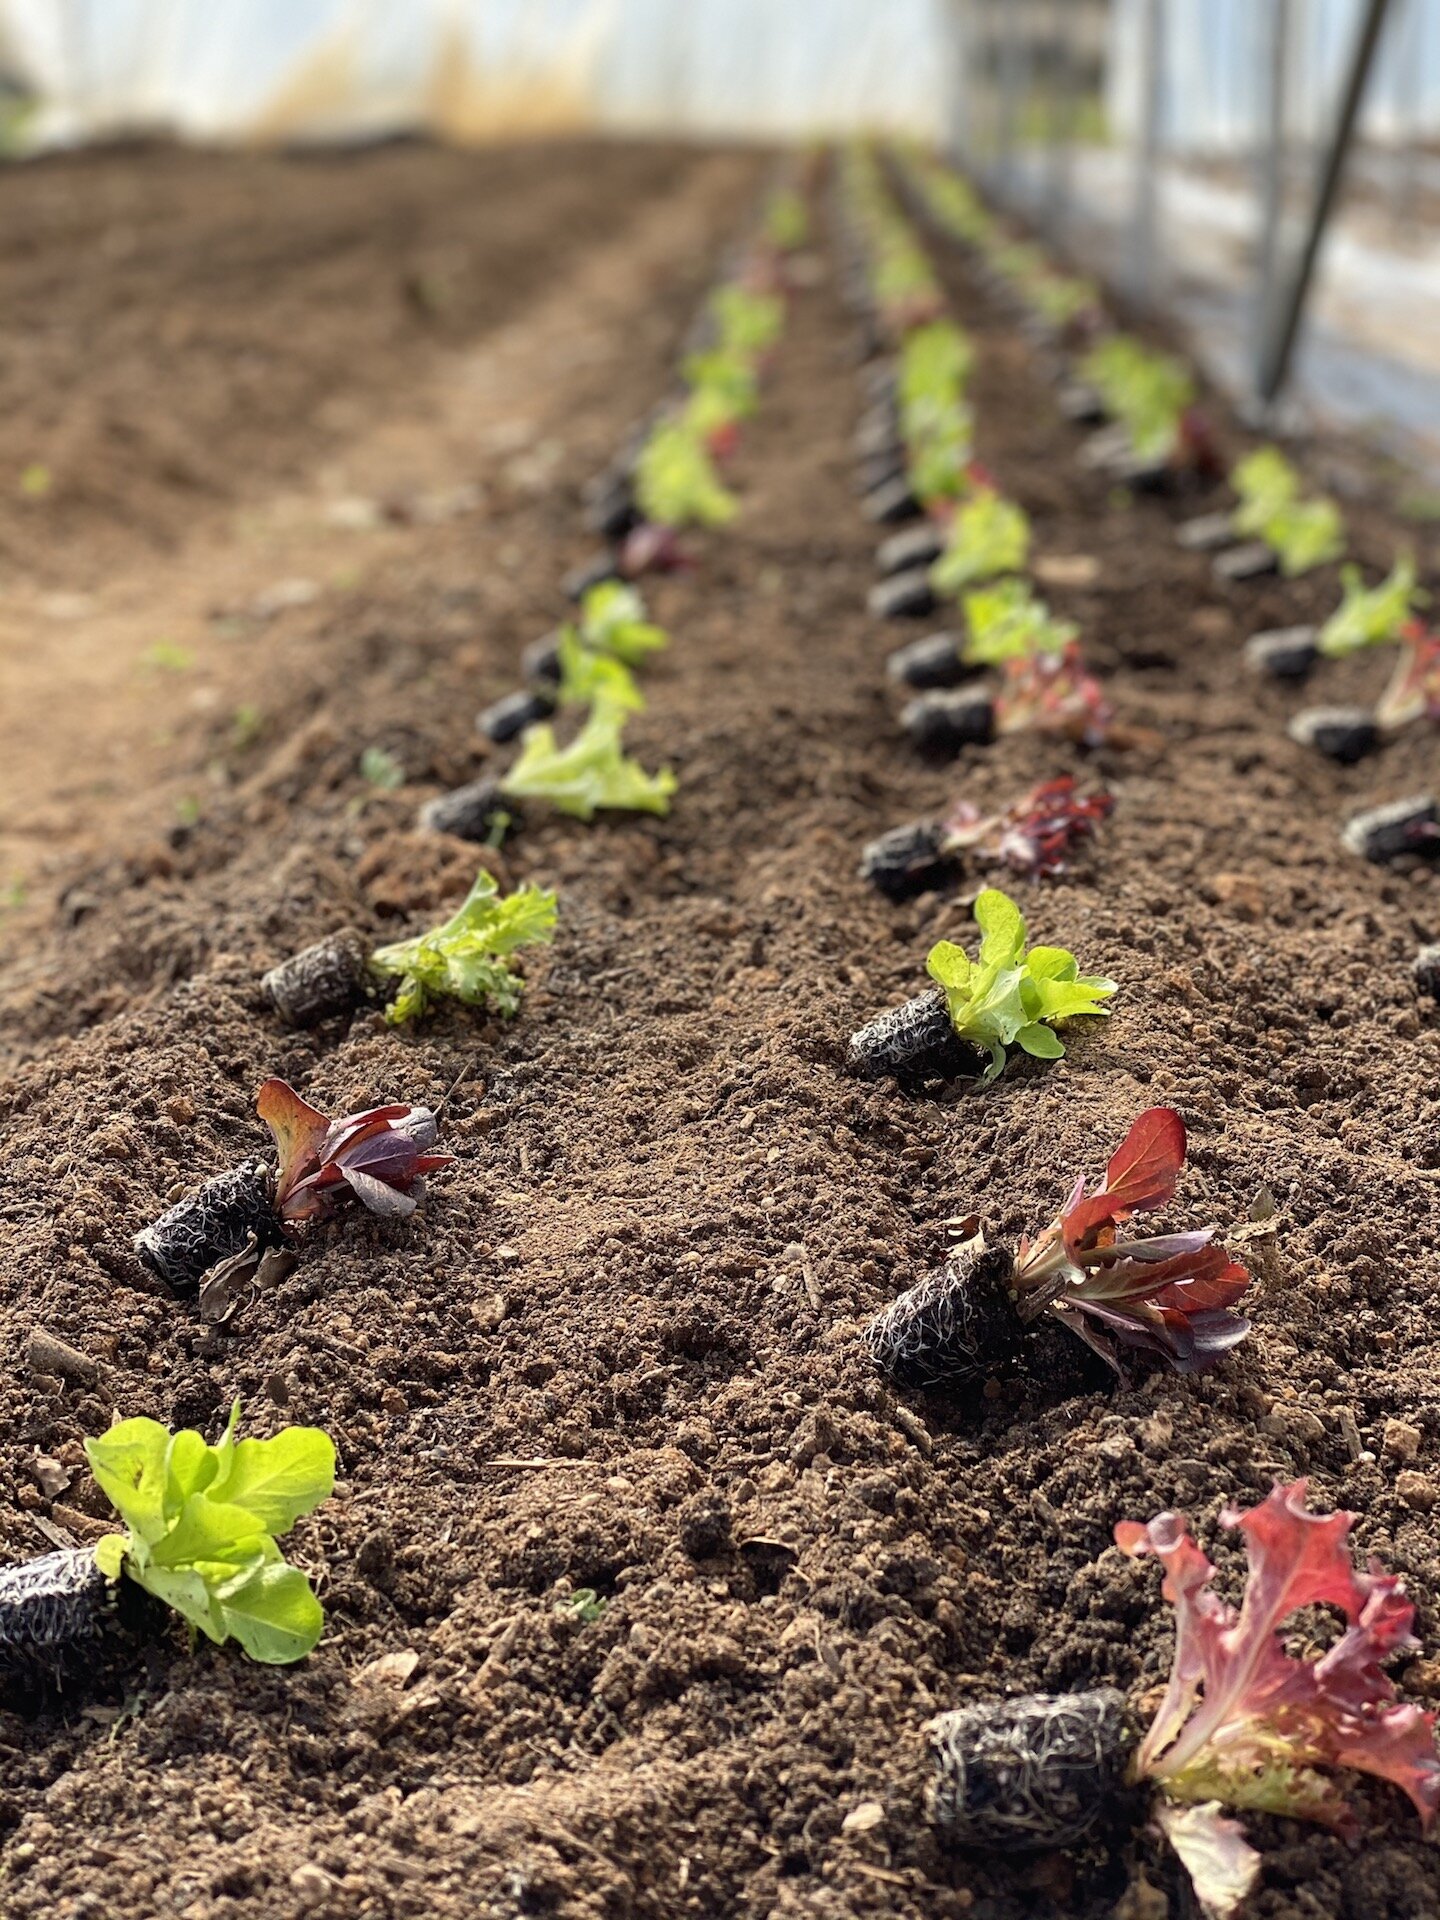
After accidentally whacking myself in the head with a shovel during the farmstand last Tuesday, I’m happy to report that yesterday’s farmstand went smoothly and without any head injuries! Jokes aside, it was a gorgeous day, and I’m really proud of all the veggies we’ve been able to share with our community this spring – SO much lettuce, radishes, turnips, kale, swiss chard, pac choi, edible flowers, etc with lots more to come…

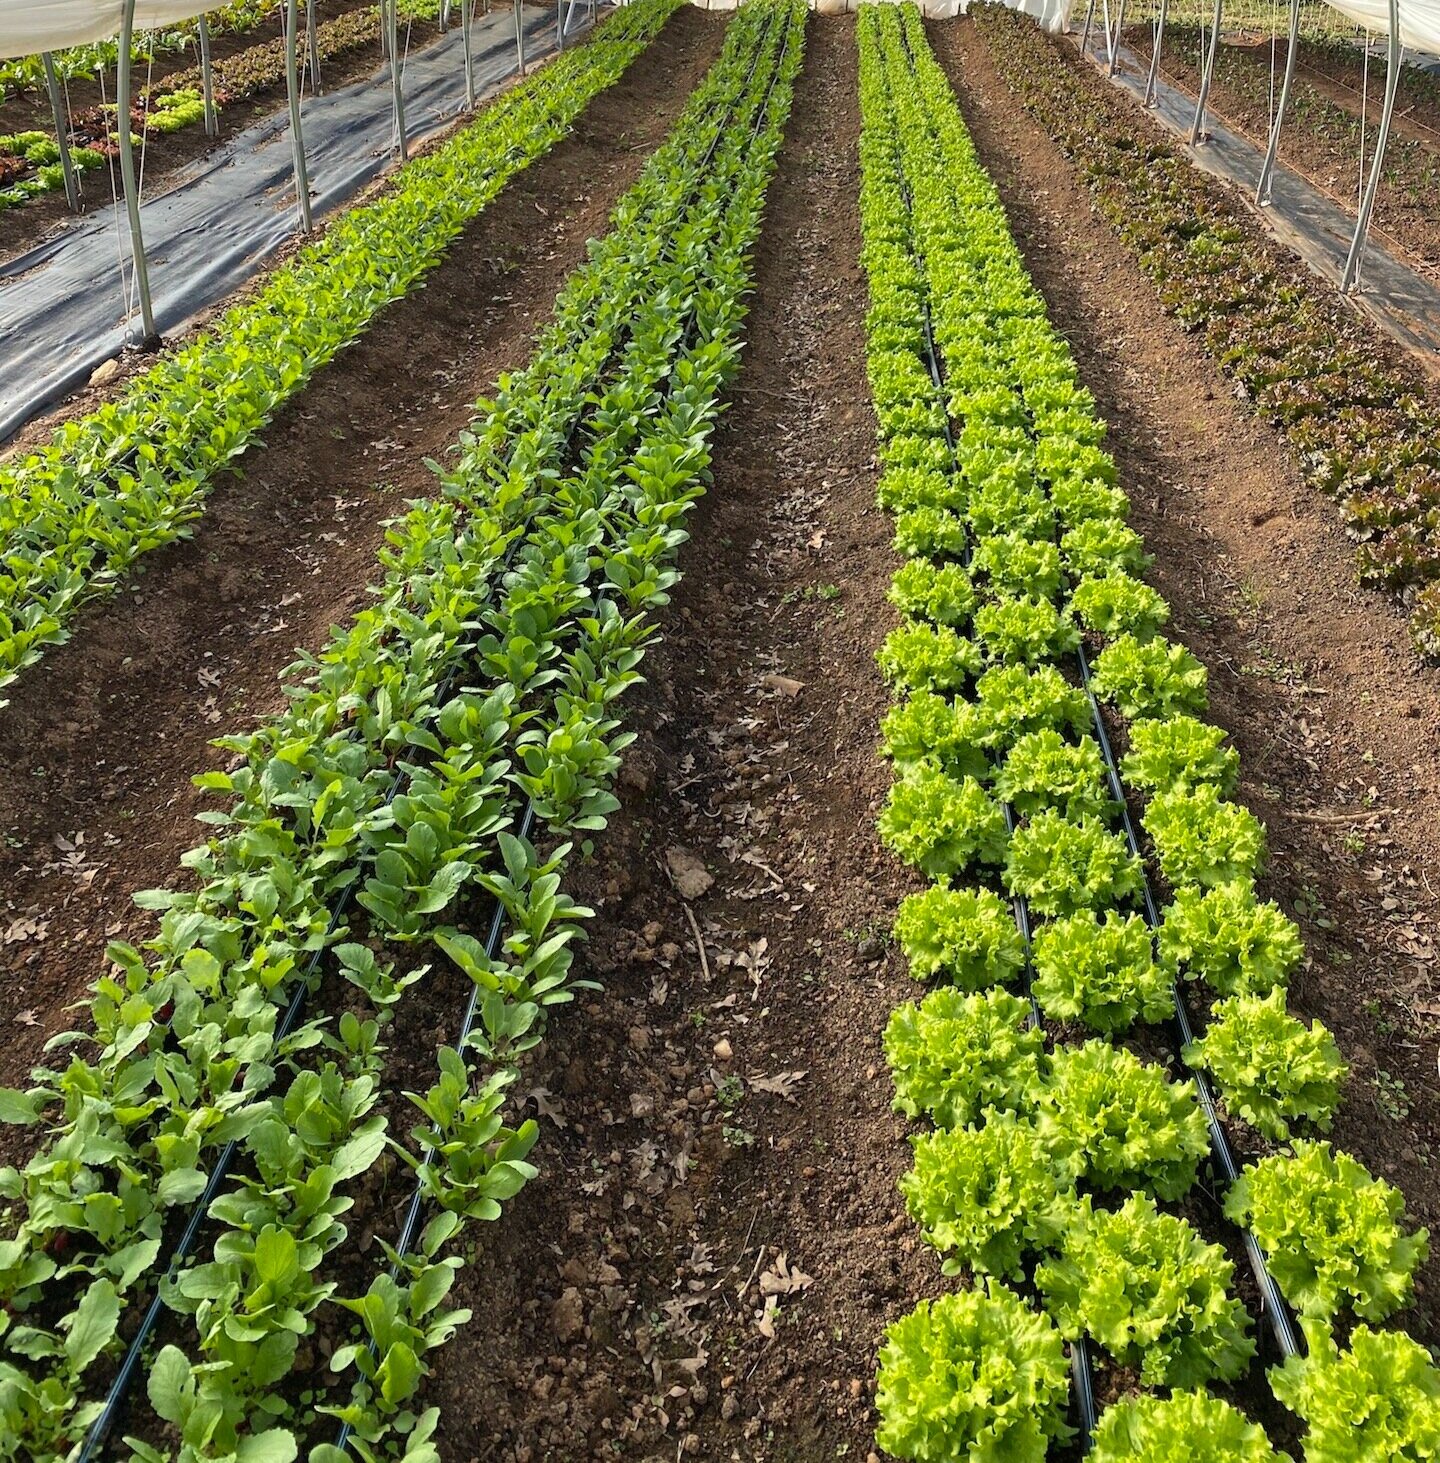
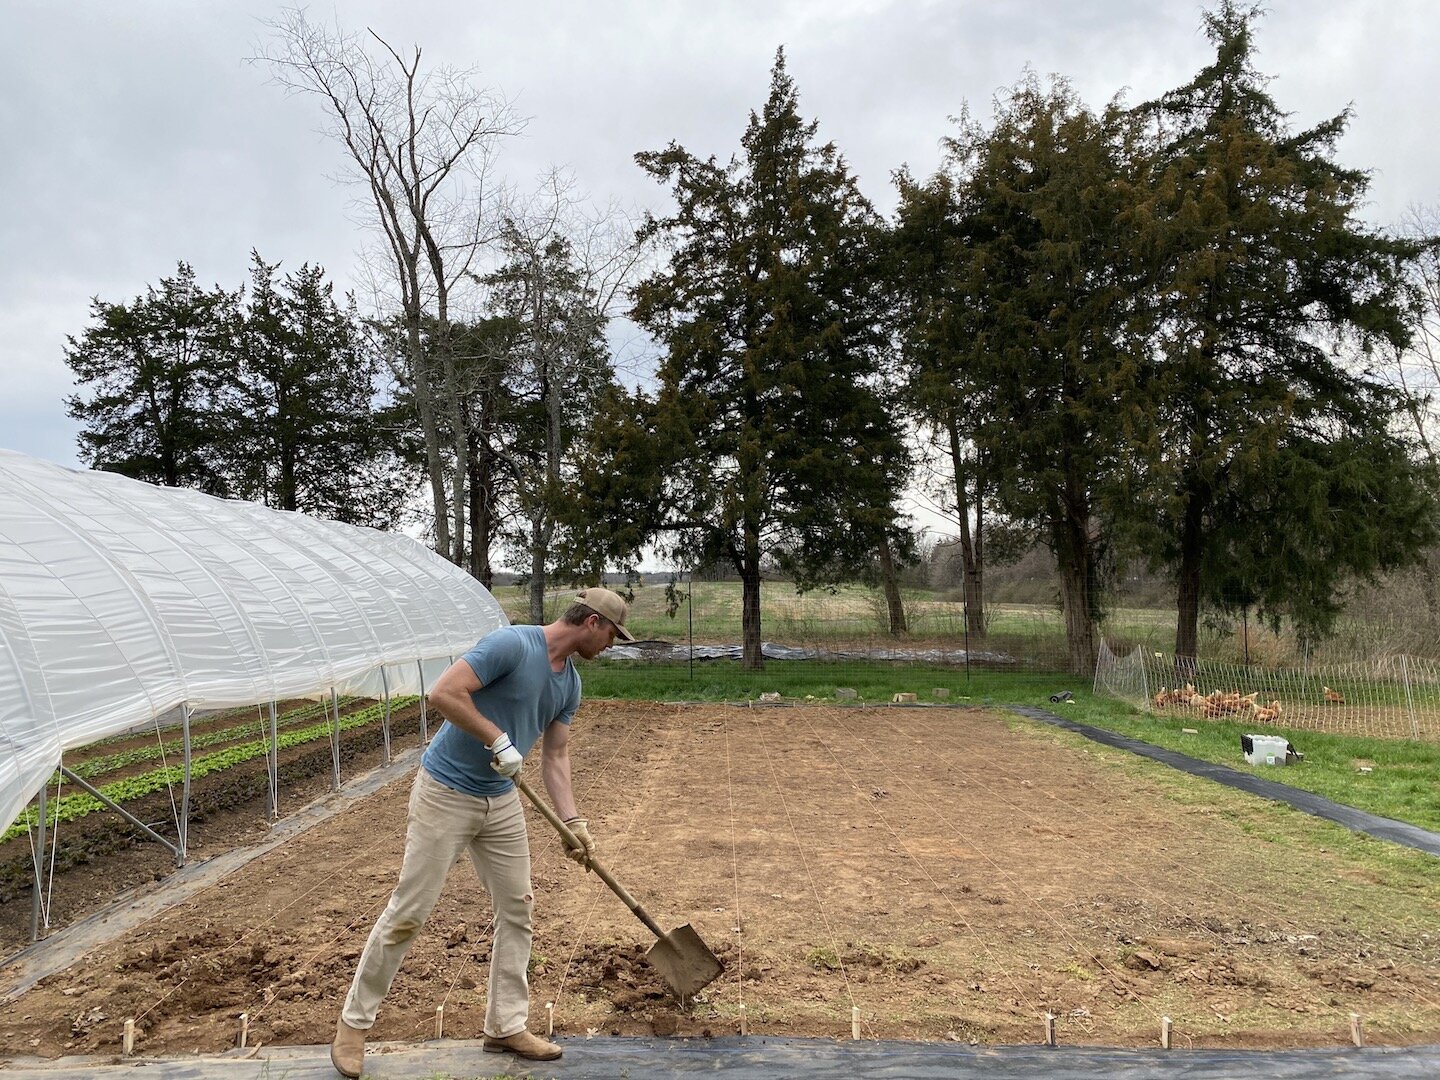
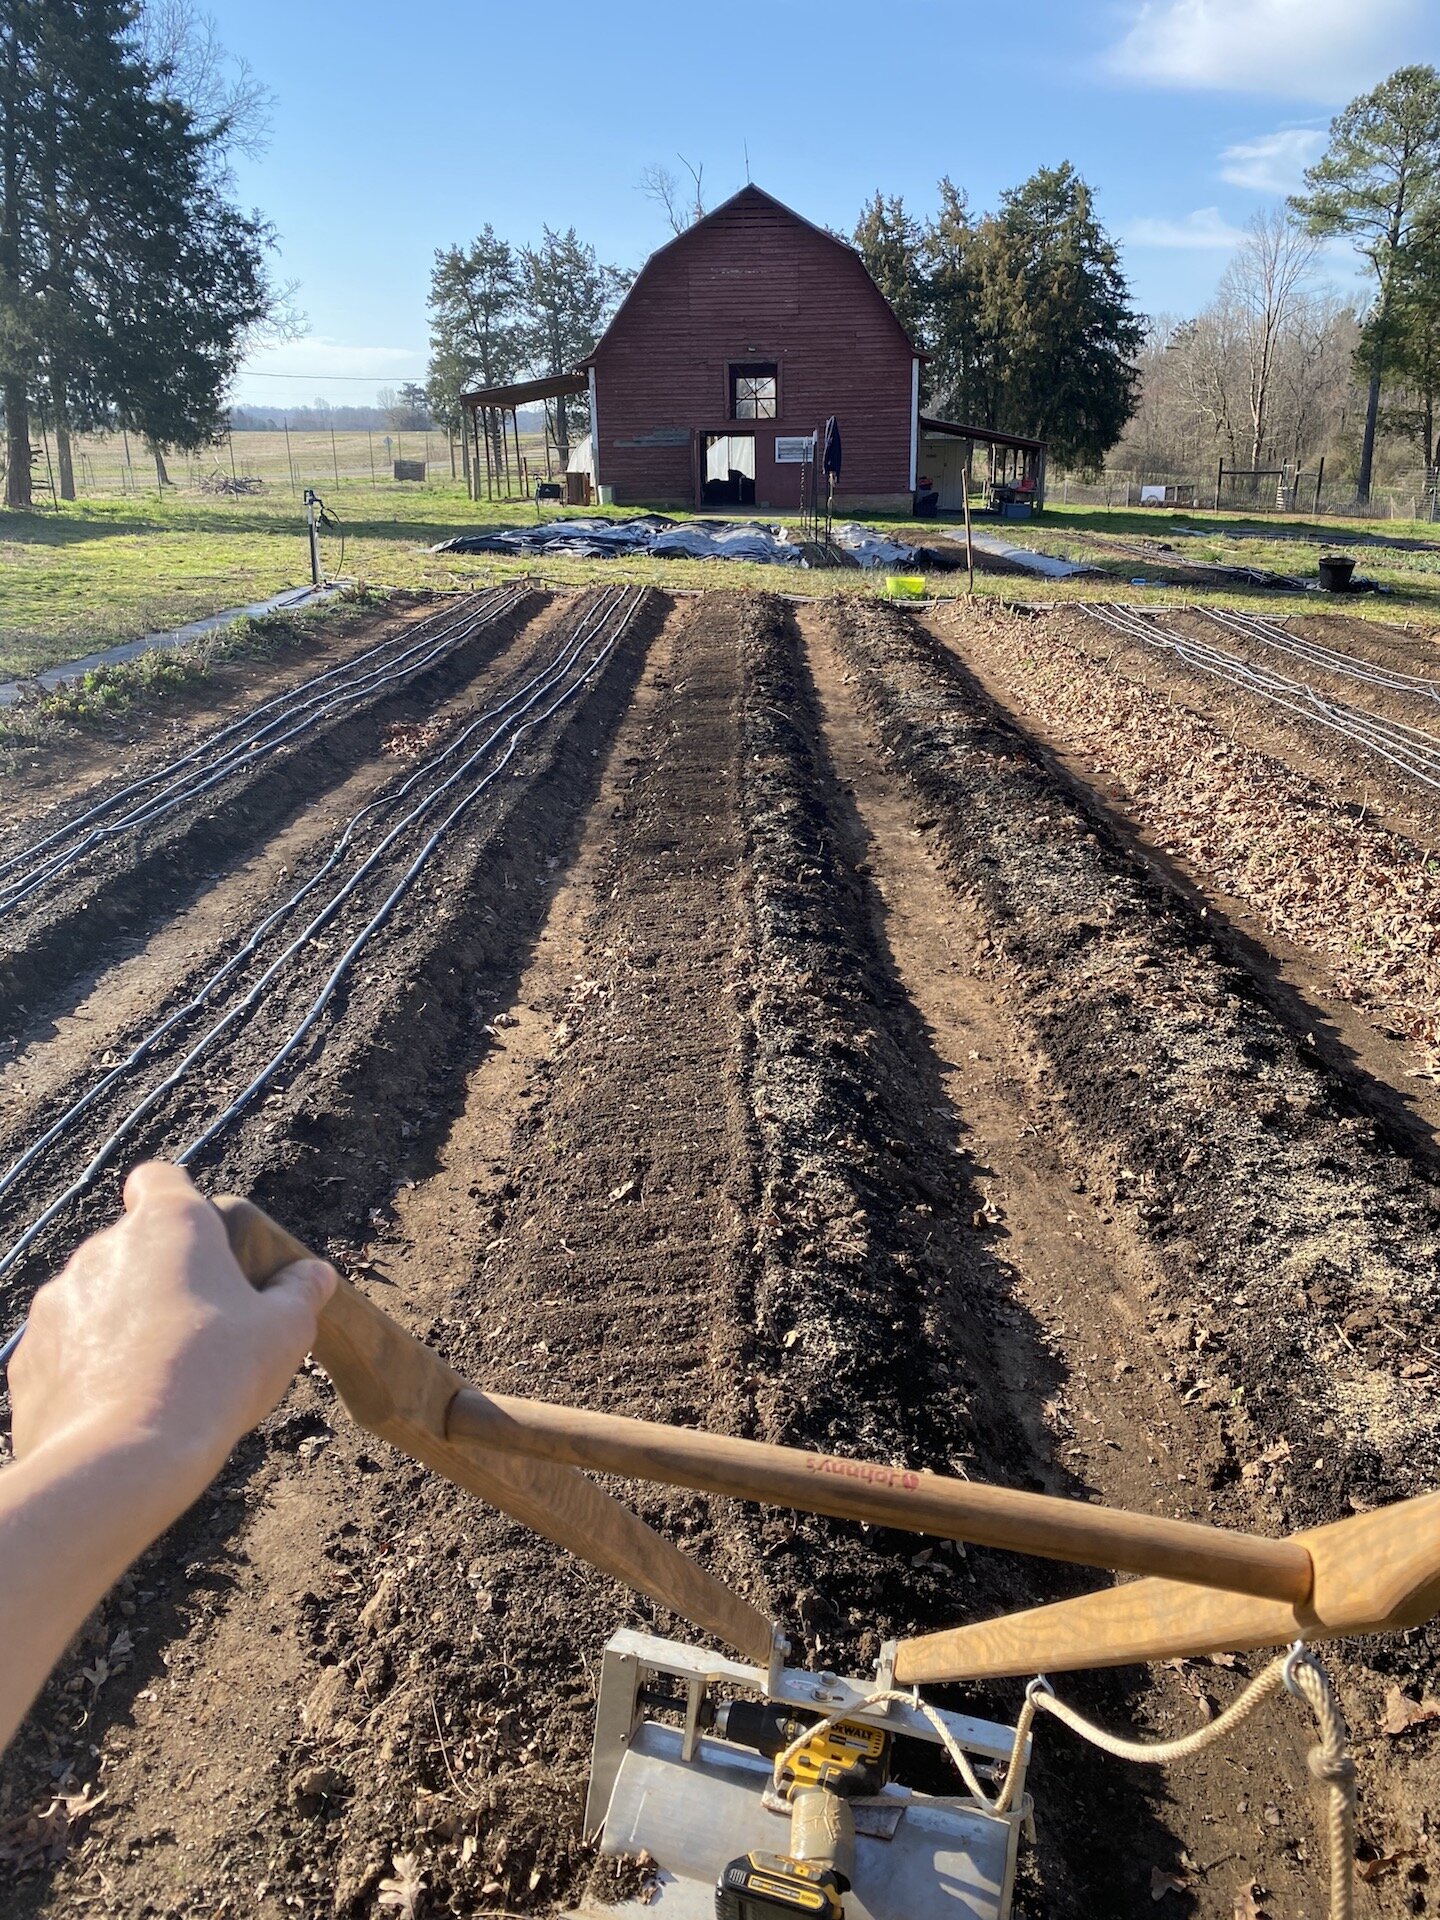
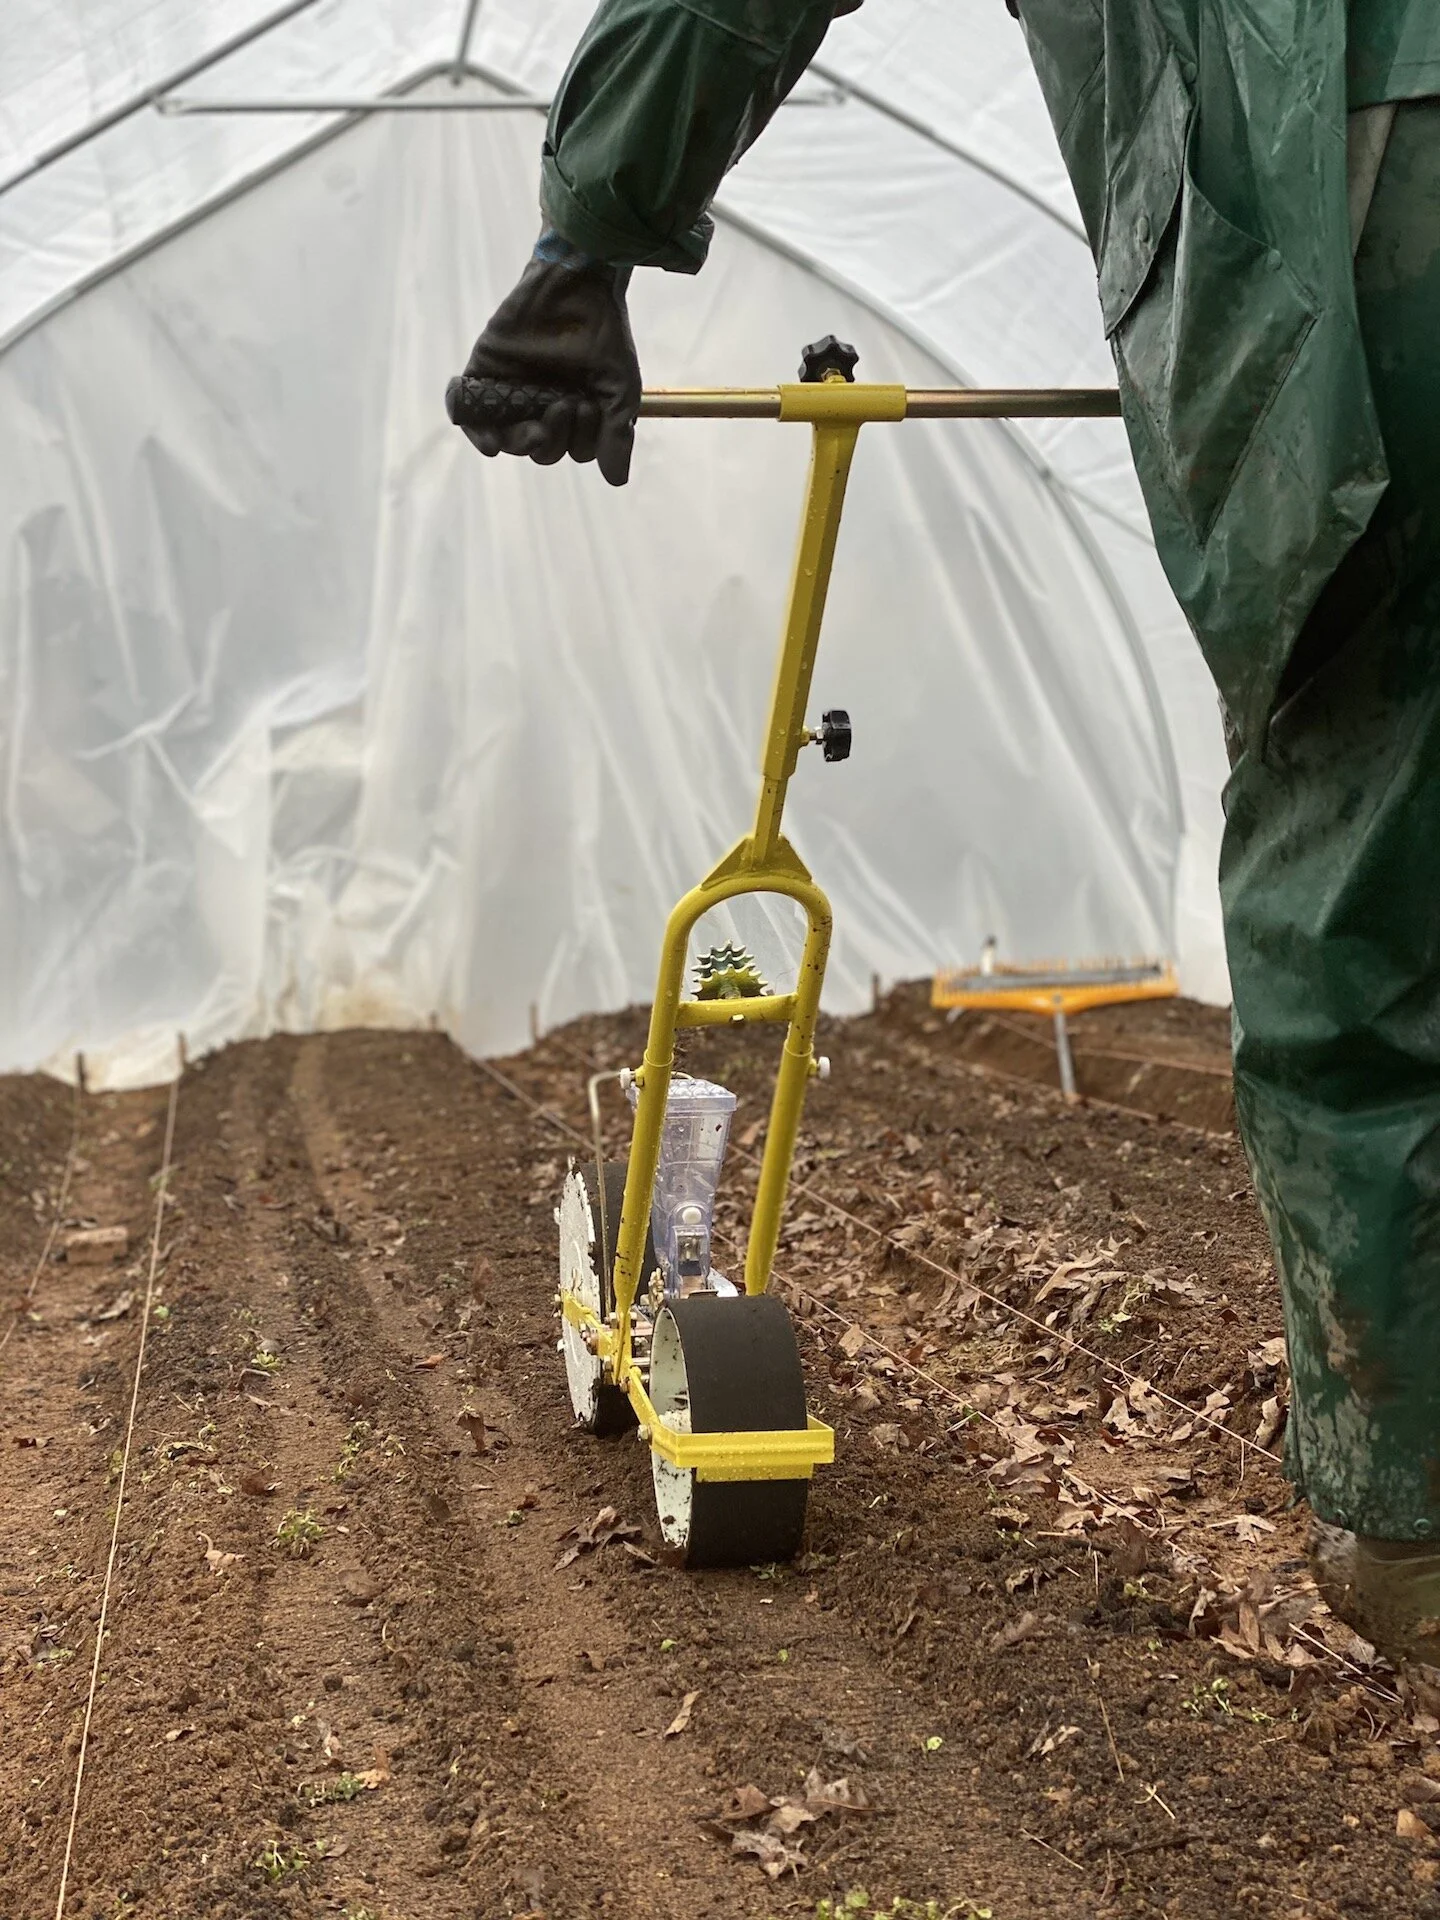
Speaking of which, while we’re harvesting all this spring goodness, we’re also hustling hard to get all our summer plants in the ground! This week, we will finish planting our tomatoes, and we’ll get started on planting our peppers, eggplant, zucchini, cucumbers and basil. The 10-day forecast looks warm and no signs of frost ahead, so we are moving forward to summer in full force!

A reminder that this Friday at 12pm EST I’ll be hosting our weekly Farm Walk just for Farmbelly Club members! This week I’ll give an update on all our new summer plantings (with tips about ideal spacing for summer veggies in your garden), how/why we fertilize our plants with fish emulsion, and my favorite edible flowers (which you can grow at home)!

There are now THREE ways to watch these weekly virtual farm walks:
1) Tune in live on Zoom (this link will be the same every week)

2) The video will be broadcast live to our private Facebook group page. If you can't join the live call, the video will be recorded and saved on the Farmbelly Club Facebook group page, where you can watch back at any time.

3) If you’re not on Facebook and want to watch the recorded videos, I’m now archiving all the Farm Walks in this google drive folder (let me know if you have any trouble accessing this folder).

Kitchen Notes

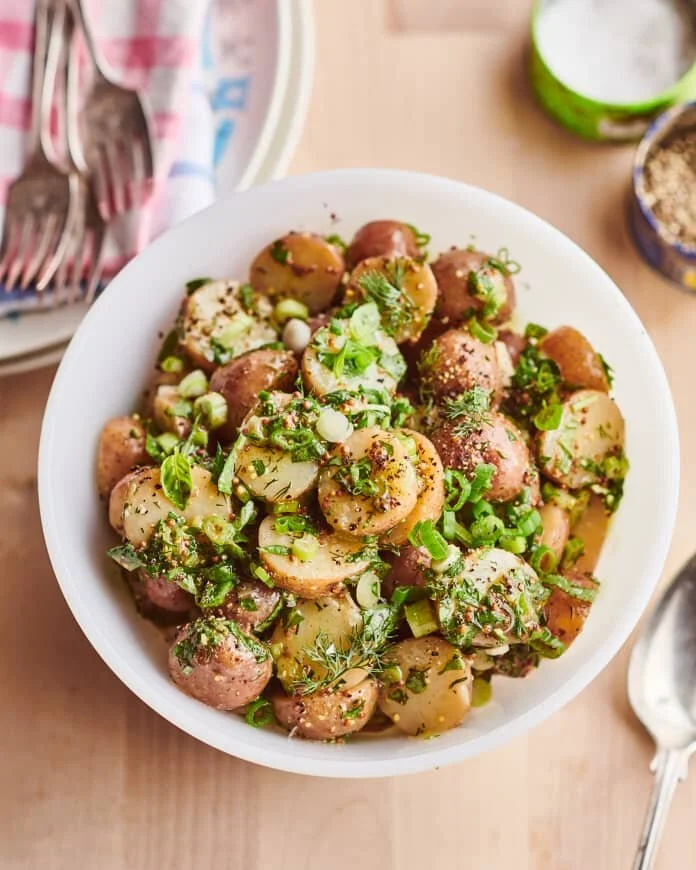
I was extra excited to cook dinner tonight, because I’ve been dreaming about this Sesame Noodle Salad that I used to make when I worked at Flagstone Pantry in Santa Barbara, and it’s as good as I remembered! It comes together super quickly and it’s very forgiving – feel free to swap out some of these veggies (cucumber, carrots, scallions) with whatever you have on hand (like radishes, turnips, sugar snap peas, steamed broccoli, etc). If you’d like some extra protein, it pairs well with some marinated steak, chicken, fish, or tofu. Also! This salad is great at room temp, so you can totally make it ahead and enjoy whenever you’re ready.

Sesame Noodle Salad

IMG_4336.JPG

INGREDIENTS

  • 1/4 cup honey

  • 1/4 cup soy sauce

  • 1 tablespoon sesame oil

  • 1 pound soba noodles, cooked until tender (or use whole wheat spaghetti or udon noodles)

  • 1/2 cup green onions, thinly sliced on the bias

  • 1/2 cup carrots, thinly sliced on the bias

  • 1/2 cup cucumber, peeled, seeded, and thinly sliced or diced

  • 1 cup dry roasted peanuts or cashews

  • Handful chopped fresh cilantro (and/or mint)

  • 2 tablespoons black (or white) sesame seeds

INSTRUCTIONS

  1. In a small bowl, whisk together honey, soy sauce, and sesame oil.

  2. In a larger bowl add the cooked noodles with the green onions, carrots, cucumber, peanuts, cilantro/mint, and sesame seeds. Pour over the soy sauce mixture, mix thoroughly and enjoy!

Today’s Stats

  • Low temp: 57F

  • High temp: 82F

  • Sunrise: 6:45am

  • Sunset: 7:50pm

  • Moon phase: Waxing Crescent

  • Additional notes: Sunny, breezy and beautiful all day.

April 11

Farm Notes

It was a picture perfect spring weekend around here, and we took advantage of the good weather by spending as much time outside as possible. I was able to tie up some loose ends like weeding, installing irrigation lines, potting up some peppers, planting out some edible flowers, etc – and with Matthew’s help, we started tackling a big project of clearing out invasive plants from around all the trees in the “back five” outside the main garden. Not only did all the invasive plants around all the trees make the area look terrible, but the more established trees were also suffering and being choked out from all the roots and vines competing for space. I wish we had taken a before / after of ALL our progress, but here’s a before / after of a small section that we worked on this afternoon:

BEFORE

BEFORE

AFTER

AFTER

Even though it was a LOT of work, it’s super satisfying to see this area slowly transforming into a more open and beautiful space. Our hope is to eventually raise a few pigs back here every year, though we’ll need to get some infrastructure in place first (fencing, shelter, waterer, etc)… but let’s just take it one day at a time!

Also! In case you missed our weekly Friday Farm Walk this week, you can view the video via our private Facebook group page here, or if you’re not on Facebook I’ll be saving all the weekly recordings in this google drive folder (let me know if you have any trouble accessing this folder). This week I showed y’all the tomatoes we planted this week (and our different methods for trellising), demonstrate some methods for harvesting lettuce, and I talked in more detail about how we "flip" our beds from one crop to the next. If you have any questions from anything I covered in the video from Friday, just let me know!

Kitchen Notes

Before I dig into today’s recipe, I have a question…. are you interested in some quick, virtual cooking lessons? I'm gauging interest in hosting some short (20 minutes or less) and accessible group cooking lessons, focusing on super helpful topics to give you more confidence and joy in the kitchen! These mini virtual cooking lessons would be included in your Farmbelly Club membership. If you're interested in this idea, please fill out this super quick survey to let me know what kind of topics you'd like to cover, and the best day/time of the week for these lessons! And a big thanks to everyone who has already filled out the survey… it seems like there is a lot of interest in something like this, and I’m hoping to get started in the next week or two.

Okay, time to talk cooking. Whenever I’ve feeling especially tired or un-inspired to cook, I’ve found that the secret to jazzing up an otherwise boring meal is to have a delish sauce on hand. Pesto is one of my go-to sauces for adding heaps of flavor to a meal, and today I’m sharing my recipe for arugula pesto… mostly because I suddenly have a LOT of arugula coming in right now, and also because I like it even better than basil pesto! In general, pesto is a super forgiving sauce, so don’t feel like you have to measure things out exactly… just eyeball it, taste, and adjust seasoning as needed.

ARUGULA PESTO

Photo: The Kitchen Girl

Photo: The Kitchen Girl

INGREDIENTS

  • 1/2 cup walnut pieces

  • 1 garlic clove, minced

  • 2 cups tightly packed arugula leaves

  • 1/2 cup freshly grated Parmesan cheese

  • 1/2 cup extra-virgin olive oil, plus more to taste

  • 2 tablespoons lemon juice (and some lemon zest, if you like)

  • Kosher salt

INSTRUCTIONS

  1. In a food processor, combine the walnuts and garlic and pulse until well blended.

  2. Next, add the arugula, parmesan, olive oil, lemon juice (and some lemon zest, if using) and 1/2 teaspoon salt and pulse to blend. If the pesto seems too dry, add a bit more Taste and adjust the seasoning (adding more salt, lemon juice, etc) as needed. Enjoy!

Today’s Stats

  • Low temp: 50F

  • High temp: 77F

  • Sunrise: 6:49am

  • Sunset: 7:48pm

  • Moon phase: Waning Crescent

  • Additional notes: Sunny, breezy and beautiful all day.

April 7

Farm Notes

IMG_4150.JPG

Well, we had quite an exciting farmstand yesterday! For starters, we filled more orders yesterday than for any other week in the history of the farmstand, which is pretty darn awesome. And with LOTS of beautiful spring veggies to harvest / wash / pack and heaps of orders to fill, I’m grateful to have a friend and fellow food lover, Alison, working with me every Tuesday to get all those orders out the door, because I really couldn’t do it without her help.

Unfortunately, part of yesterday’s excitement involved me accidentally whacking myself in the head and causing all kinds of commotion! It happened so quickly that at first I didn’t understand what had happened… turns out I had dropped a 50lb bag of chicken feed onto the floor of the barn, and I unknowingly dropped it on one end of a shovel, and the shovel’s handle shot right into my face… yikes. At first, I didn’t think it was a big deal, so I was just going to get back to work when I realized that I was bleeding pretty badly. Thankfully, some friends and Matthew were there to help me get bandaged up, and then I had to get back to work to get our record number of orders out the door and make deliveries! (I should mention that when the accident happened, I was no where near any of the veggies, as they were already all washed and packed away, and I fully changed my clothes and was all cleaned up before returning to work.) But it wasn’t until I got home after making deliveries several hours later that I was able to take a better look at the cut, consult with some medical friends + family, and determined that I wouldn’t need stitches, which was a relief. But you better believe I’m rocking a sweeet shiner…

Needless to say, yesterday was a doozy. But we survived! And it was a good reminder that farm work really can be dangerous, and it’s so important not to rush around and loose awareness of your surroundings. Be careful out there friends!

Friday Farm Walks

Okay, now on a much brighter and more fun note – I wanted to quickly talk here a new weekly perk for Farmbelly Club members… Friday Farm Walks! I kicked off this new series last Friday and had a BLAST, so moving forward, every Friday around 12pm EST I will host a (virtual) live tour of our farm, for Farmbelly Club members only! These farm walks will be brief (10-15 minutes), super fun + informative, you'll see what we're planting / harvesting / working on here at the farm, and I'll share helpful tips + resources to help you on your own gardening/farming adventures.

There are TWO ways to watch these weekly virtual farm walks on Fridays @ 12pm EST:
1) Tune in live on Zoom (this link will be the same every week)
2) The video will also be broadcast live to our private Facebook group page. If you can't join the live call, the video will be recorded and saved on the Farmbelly Club Facebook group page, where you can watch back at any time.

Whether you watch live or afterwards in the Facebook group, please do leave any questions in the comments section of the video, which I’m happy to answer for you!

Kitchen Notes

We have officially reached peak pac choi here on the farm, so I figured I needed to whip up some dishes featuring these delishhh spring greens! (Side note, I’ll be real honest that I still don’t know / understand the difference between bok choy, pac choi, tatsoi, etc., despite tons of google researching… so if any of you know the difference, by all means, tell me)!

Tonight I wanted to keep it super simple and let the pac choi shine, so I just made a simple, flavorful stir-fry with the greens, and it was refreshingly good. Because these greens cook super fast, this is an incredibly quick / easy dish to make, and feel free to mix up your sauce ingredients based on what you have on hand.

Simple Stir-Fried Asian Greens

IMG_4227.JPG

INGREDIENTS

2-3 pounds baby bok choy and/or pac choi

3 tablespoons soy sauce

3 tablespoon rice wine vinegar

1 teaspoon granulated sugar

2 tablespoons vegetable or peanut oil

2 garlic cloves, minced

1 1-inch piece fresh ginger, peeled and minced

Splash of sesame oil

Toasted sesame seeds (optional garnish)

INSTRUCTIONS

  1. Trim and discard the rough bottoms from your asian greens. Roughly chop the greens and set them aside.

  2. In a small bowl or mason jar, combine the soy sauce, rice wine vinegar, and sugar. Shake well and set aside.

  3. Heat a wok or large skillet over medium-high heat until hot. Add the vegetable (or peanut) oil and swirl to coat the bottom and sides. Add the garlic and ginger and stir-fry until aromatic, about 1 minute. Add the greens, half the soy sauce mixture, and stir-fry for about 2 minutes, until tender.

  4. Add the remaining half of the soy sauce mixture and cook for another 30 seconds. Turn off the heat, and drizzle with a splash (ie a teaspoon or two) of sesame oil and top with toasted sesame seeds (if using). Transfer to a serving plate and serve hot.

Today’s Stats

  • Low temp: 53F

  • High temp: 86F

  • Sunrise: 6:54am

  • Sunset: 7:44pm

  • Moon phase: Waning Crescent

  • Additional notes: Sunny and beautiful all day.

April 4

Farm Notes

It was a somewhat stressful weekend around here, as we had two nights in a row with temperatures below freezing, which meant we had to hustle around to cover nearly all our veggies to protect them from frost (the only things we didn’t cover were our alliums – garlic, onions, scallions, etc). While Thursday night ended up only getting down to about 30F, on Friday night it got down to the mid 20’s, and while most of our veggies fared alright, we did still get some frost damage in a few areas, which is a total bummer. Fingers crossed that this was the last hard freeze of the spring, because I really don’t want to have to get that row cover out again! Speaking of which, we buy big rolls of row cover from our local farm store, but if you’re looking for some frost protection for your home garden, here is a similar product to what we use that you can buy online (and that come in shorter lengths).

In other news, let’s talk potatoes! In this area, most people plant potatoes in mid/end of March. Keep in mind that potatoes are frost sensitive, so I’m actually glad that we were a little late getting our spuds in the ground this year, because the shoots still haven’t emerged above ground, which meant we didn’t have any frost damage during the past few chilly nights. so if you haven’t planted potatoes yet, now is the time!

IMG_4119.jpg

Here are some instructions and tips for planting potatoes:

BEFORE YOU PLANT

1) Source your seed potatoes from a reputable local farm/garden store. While you technically can plant potatoes from the grocery store, your best bet is to buy seed potatoes that are specifically bred to be used to for growing potatoes (as grocery store potatoes are often treated to prevent sprouting).

2) It’s recommended to “green sprout” your seed potatoes a 1-3 weeks before you plant them, which means putting your whole seed potatoes in a box and leaving them in a warm (70-85 F) and dark place to encourage their eyes to begin sprouting. Be careful when handling to avoid breaking off sprouted eyes.

3) If your potatoes are especially large (over 4 ounces) and have lots of eyes, you can cut them into smaller pieces, which allows you to get more out of each potato. Think of the size/weight of a chicken egg as your ideal size, and try to have at least 2 eyes per seed piece. If you are going to cut your potatoes, I recommend doing this the day before you plant, to allow the cut part of the potato to heal over.

IMG_3945.JPG

PLANTING YOUR POTATOES

1) Prepare the soil by adding compost and any other amendments to you bed. Dig a trench in your bed about 4”-6” deep.

2) Lay seed pieces eyes pointing up in the trench spaced 8”-12” apart for standard potato varieties and 12”-18” apart for fingerling varieties.

3) Cover potatoes with a few inches of soil, leaving a bit of a trench in the bed (because over time, you’ll want to “hill” your potatoes with additional soil from the sides of your trench).

TENDING YOUR POTATOES

1) Generally, potatoes need between 1-2 inches of water per week, which can be provided by rain or you to make up the difference.

2) You should “hill” your potatoes 2-3 times per season by loosening surrounding soil in the bed and pulling it up around the leaves and stems. Try to hill before the stems grow too long and start to flop over. You should pull between 2”-6” new soil up around the plants each time you hill.

After planting and covering your potatoes with soil, you should still have a bit of a trench in the bed, which will help with hilling the potatoes as they get larger over the next few months.

After planting and covering your potatoes with soil, you should still have a bit of a trench in the bed, which will help with hilling the potatoes as they get larger over the next few months.

HARVESTING YOUR POTATOES

1) When buying your seed potatoes, make sure to check the recommended days to harvest for each variety. Some potato varieties will be ready to harvest in 60-70 days, while others will need 90-100 days to fully mature.

2) In general, potatoes are harvested after they go to flower and once the foliage begins to die back and turn brown. I’ll cover potato harvesting in more detail when that time comes this June! If you have any other questions about growing potatoes, feel free to send me a message. :)

Kitchen Notes

As someone who loves to cook, but doesn’t love doing dishes / spending hours in the kitchen, I’m all about sheet-pan dinners (ie, when a protein and side dish can cook together at the same time on a sheet pan and voila! you’ve got dinner and only one pan to clean). Last night, we had a darn good sheet pan dinner, and I’m so excited to share the recipe, which is adapted from Food52. It’s for Harissa Chicken with Potatoes, Leeks & Herby Yogurt Sauce. It’s packed with bright Mediterranean flavors, takes only a few minutes to prep, cooks for about 45 minutes in the oven, and makes for a fabulous weeknight meal that also feels special enough for a weekend dinner party.

SHEET PAN HARISSA CHICKEN WITH POTATOES, LEEKS & HERBY YOGURT

IMG_4110.JPG

INGREDIENTS

  • 1.5-2 lbs pounds bone-in, skin-on chicken thighs

  • 2 lbs Yukon Gold potatoes, cut into 1” chunks

  • 3 teaspoons kosher salt, divided

  • 3/4 teaspoon freshly ground black pepper

  • 3 tablespoons harissa

  • 1 teaspoon ground cumin

  • 5 tablespoons extra-virgin olive oil, plus more as needed

  • 2-3 leeks, white and light green parts, halved lengthwise, rinsed, and thinly sliced into half-moons

  • Zest and juice of 1 lemon, divided

  • 1 cup plain Greek yogurt

  • 1 small garlic clove

  • 1/2 cup chopped soft fresh herbs such as dill, parsley, mint, and/or cilantro leaves

INSTRUCTIONS

  1. Heat the oven to 425°F.

  2. Combine the chicken and potatoes in a large bowl. Season them with 2½ teaspoons of the salt and ½ teaspoon of the pepper. In a small bowl, whisk together the harissa, cumin, and 3 tablespoons of the olive oil. Pour this mixture over the chicken and potatoes, and toss to combine.

  3. Arrange the chicken and potatoes in a single layer on a large rimmed baking sheet, and roast for 20 minutes.

  4. While the chicken and potatoes are roasting, combine the leeks, lemon zest, ¼ teaspoon of the salt, and the remaining 2 tablespoons olive oil in a medium bowl.

  5. After the chicken and potatoes have been cooking for 20 minutes, use a spatula to toss the potatoes lightly, then scatter the leeks over the baking sheet. Roast until the chicken is cooked through and everything is golden and slightly crisped, 20 to 25 minutes longer.

  6. While the chicken cooks, put the yogurt in a small bowl. Grate the garlic clove over the yogurt, add a handful of your chopped herbs and season with the remaining ¼ teaspoon salt, ¼ teaspoon pepper, and juice of your lemon. Taste and adjust seasoning as needed.

  7. To serve, you can spoon the yogurt over the chicken and veggies in the baking sheet, or you can transfer everything to serving platters/bowls. Scatter remaining herbs over everything, add a pinch (or two) of flakey sea salt, and drizzle with additional olive oil and/or lemon juice and enjoy!

Today’s Stats

  • Low temp: 43F

  • High temp: 74F

  • Sunrise: 6:59am

  • Sunset: 7:42pm

  • Moon phase: Waning Crescent

  • Additional notes: Sunny and beautiful all day.

March 31

Farm Notes

Our first farmstand of the season is officially in the books! The weather yesterday was pretty darn perfect – sunny, but still relatively cool and breezy, and I was so proud to send our veggies out into the world and onto the tables of so many friends (both new and old) in our community.

IMG_4015.JPG

These farmstand Tuesdays are FULL ON – I’m up with the sun and have pretty much every moment of the day planned out in order to make it all happen.

In the early morning hours there is still some harvesting, washing, and packing to finish, then around 9:30am I make a round of pickups around Saxapahaw to get goods from some local vendors that we offer through the farmstand. I’m usually back by around 10:15am, and then I have a friend who joins me every Tuesday to help finish all the prep and packing the orders. I definitely couldn’t do it all myself, so it is amazing to have an extra pair of hands.

IMG_4028.JPG
IMG_4024.JPG

By 12pm we move all the washed and cooled veggies to under our carport area, and we start packing the orders! This week we filled about 50 orders – many folks pick up at the farm, but about half go to our 4 other pick up locations (Burlington, Chapel Hill, Hope Valley, and Durham). We put the orders that are heading to the other pickup locations in big bins, and on top of each bin we write the names of the people whose orders are inside that particular bin.

By 1:30pm, I need to be in the car with the bins and I head east to drop off the orders in Chapel Hill, Hope Valley, and Durham. And by 3pm, I need an iced coffee! Thankfully, my last drop-off is right across from a great local coffeeshop, and I may or may not have indulged in a $6 latte and it was worth every penny (though I definitely won’t be able to keep up that habit every week…)! I’m usually home by around 4pm, at which point I usually will do some additional work out in the garden, so that folks who are picking up at the farm can come over and chat if they’d like. By the time it gets dark we sit down for our Tuesday tradition of pizza + salad, and I’m usually asleep not too long afterwards… ;)

So that is what my Tuesdays will look like for the foreseeable future! A note that if you’re someone looking to start your own farmstand and have any questions about our process, just give me a holler, I’m happy to dig into even more detail.

Kitchen Notes

Yesterday we kept our tradition of Tuesday pizza + a big salad going strong, but over the weekend I made a french-inspired herby potato salad that we LOVED and I’m excited to share the recipe (which I found over at The Kitchn) with y’all! A note that I actually doubled this recipe, because… LEFTOVERS!

Herby French Potato Salad

Credit: Photo: Joe Lingeman; Food Styling: Cyd McDowell, The Kitchn

Credit: Photo: Joe Lingeman; Food Styling: Cyd McDowell, The Kitchn

INGREDIENTS

  • 2-3 pounds small red or Yukon gold potatoes (no larger than 2-inches in diameter)

  • 1 tablespoon plus 1 teaspoon kosher salt, divided

  • 1/2 cup loosely packed fresh tender herbs, such as parsley, basil, dill, tarragon, or a combination

  • 4 medium scallions

  • 1/3 cup olive oil

  • 1/4 cup red wine vinegar

  • 1 tablespoon Dijon mustard

  • 1 tablespoon whole-grain Dijon mustard (or additional 1 tablespoon regular Dijon)

  • 1/4 teaspoon freshly ground black pepper

PREPARATION

  1. Place 2 pounds small red or Yukon gold potatoes and 1 tablespoon of the kosher salt in a large saucepan. Cover by 1 inch with cool water, then bring to a boil over high heat. Reduce the heat to medium and simmer until the potatoes are easily pierced with a knife, 15 to 20 minutes. Meanwhile, chop the herbs and scallions, and make the dressing.

  2. Coarsely chop 1/2 cup loosely packed fresh tender herbs. Thinly slice 4 medium scallions.

  3. Place 1/3 cup olive oil, 1/4 cup red wine vinegar, 1 tablespoon Dijon mustard, 1 tablespoon whole-grain Dijon mustard, 1/4 teaspoon black pepper, and the remaining 1 teaspoon kosher salt in a large bowl. Whisk well to combine and emulsify.

  4. Drain the cooked potatoes in a colander and rinse under cold water just until they are cool enough to handle but still warm. Halve the potatoes (or quarter if large) and transfer to the bowl of vinaigrette. Gently toss to coat the potatoes. Add the herbs and scallions and toss lightly to combine. Set aside for 10 minutes to allow for the flavors to meld. Serve warm or at room temperature.

Today’s Stats

  • Low temp: 41F

  • High temp: 68F

  • Sunrise: 7:04am

  • Sunset: 7:38pm

  • Moon phase: Waning Gibbous

  • Additional notes: Cloudy and rainy.

March 26

Farm Notes

IMG_3956.JPG

Yesterday was a big day around here, as we officially re-stocked the Farmbelly Farmstand for the 1st time in 2021! We’ve been preparing for this week since the end of last year, with countless hours spent carefully planning, bed prepping, planting, weeding, irrigating, fixing broken machines, etc etc. It feels so good to get to this moment, and I’m grateful that (despite an incredibly wet winter) we’ve had a lovely spring thus far, and our veggies are coming along really nicely.

It’s crazy to think that this time a year ago, the world was shutting down due to a (still ongoing) global pandemic. In the midst of all the uncertainty, exactly one year ago we started our little farmstand, and what started as just a few loyal customers has since grown to an incredible network of folks who trust in us to provide nourishing food for their tables. And I couldn’t be more honored to help feed our community and to do this work.

Needless to say, I was overwhelmed by the incredible support when we re-stocked the farmstand at exactly 7pm last night for pre-orders! Within an hour, ALL of our veggies sold out, and many of the items from our other wonderful vendors sold just as quickly. While I suppose it’s a great problem to have, I never want folks to be disappointed when items they want sell out so quickly, and I’m doing my best to ramp up our production as quickly/efficiently as possible to meet the demand. It’s still very early in the season, and most of our veggies still need some time before they are ready for harvest…. but I promise that more will be available soon, and I’m so grateful for the continued support from our friends, both near and far.

In other news, it’s been another busy week of spring planting! This week we planted another round of scallions, radishes, turnips, and 7 different varieties of potatoes. Over the weekend I’ll be sharing all the details and my tips for planting potatoes, so stay tuned!

Our tunnels are bursting with veggies and we can’t wait to share these gorgeous greens with folks!

Our tunnels are bursting with veggies and we can’t wait to share these gorgeous greens with folks!

If you know me, then you know I have a soft spot for edible flowers. How gorgeous are these spring pansies?

If you know me, then you know I have a soft spot for edible flowers. How gorgeous are these spring pansies?

It looks like we’ve got a beautiful weekend ahead, and I have LOT on our to-do list!

  • Weed, weed, weed all around the farm

  • Mow + weed whack the entire farm

  • Organize and deep clean our veggie processing area

  • Organize and clean inside the barn

  • Enjoy the gorgeous weather :)

greengoddess-3.jpg

KITCHEN NOTES

It’s been another one of those weeks when there’s been a lot of time in the dirt, and not quite as much time in the kitchen! But now that our spring greens are slowly but surely coming in, I’m suddenly way more inspired to get cooking. Over the past few days I’ve been amassing a list of recipes that I’m eager to make, and I figured I share them here too. Some of these recipes I shared in my March newsletter that went out on Thursday, but I’ve added a bunch more here just for all you wonderful Farmbelly Club members. :) What are YOU excited to cook in the weekend/week ahead?!

Spring recipe inspiration…

Today’s Stats

  • Low temp: 50F

  • High temp: 83F (!)

  • Sunrise: 7:12am

  • Sunset: 7:34pm

  • Moon phase: Waxing Gibbous

  • Additional notes: Warm and sunny all day. :)

March 22

Farm Notes

Mondays are mostly spent working at my computer, but I was able to sneak outside for a few hours in the late afternoon to enjoy the gorgeous day and knock a few things off my to-do list. Many people don’t know that I also have a part-time job managing communications for a local non-profit, but it’s a significant part of my life and how I spend my time, so I figured I should talk about it! I’m incredibly grateful to get to work alongside an incredibly kind and understanding and inspiring team, and my work is pretty much fully remote, which makes it easier to manage with all the demands of the farm. While it can be a lot to juggle at times, I genuinely enjoy that my days and weeks are wildly varied in the kind of work that I do, and it means I get to flex a lot of different muscles (both literal and figurative) on a daily basis.

So as the sun was starting to set today, I worked on some much-overdue weeding and then revved up our zero-turn mower for the first mowing session of 2021! Y’all might think I’m crazy, but I actually LOVE mowing. For one thing, it is incredibly satisfying to turn a weedy, overgrown field into a crisply cut lawn. Whenever I’m mowing, I like to pop in my headphones and listen to a podcast or some music, and it’s my time to just zone out, think, dream and scheme. All that said… I don’t love mowing quiiiiite so much when it’s June and the grass (and all the weeds) grow like crazy and I can barely keep up… but I can say that this first round of spring mowing has been pretty darn lovely.

First mowing session of the season!

First mowing session of the season!

Also! At the beginning of every week, I always write down a list of tasks to tackle on the farm in the week ahead, and I think it would be fun to start sharing these weekly lists with y’all… so here’s what’s on deck this week:

  • Plant all our potatoes (we’re a week or two behind, but better late than never)

  • Seed another round of radishes and turnips

  • Finish laying down landscape fabric in our blueberry patch (and gently remove any flowers from our 1st year blueberry plants)

  • Install trellis netting for our row of sugar snap peas

  • Weed-whack around the farm

  • Start spring cucurbits in our indoor greenhouse (zucchini and cucumbers)

  • Finish installing drip tape irrigation lines on all planted rows

IMG_3914.JPG

Kitchen Notes

As it starts feeling more and more like spring, today I was craving a refreshing salad with heaps of herbs and spring veggies, with some kind of grain to make it a bit more hearty. So I decided to whip up my version of a Spring Tabbouli Salad, and it absolutely hit the spot. This is one of my go-to salads to make ahead and portion out for a few lunches or dinners, because it and stays fresh + crisp in your fridge for several days. It’s also incredibly forgiving, so feel free to substitute with whatever herbs/veggies you have on hand, and you can certainly use a different salad dressing/vinaigrette. You do you!

Spring Tabbouleh Salad

springtabbouleh-2.jpg

INGREDIENTS:

For the salad

  • 2 cups quinoa

  • 3 cups water

  • Kosher salt

  • 1 bunch asparagus, chopped into 1 inch pieces (if available)

  • 1 cup green peas (fresh or frozen)

  • 1/2 cup sliced sugar snap or snow peas

  • 4-5 radishes, thinly sliced

  • 3 scallions/green onions, thinly sliced

  • 1/4 cup toasted pepitas/pumpkin seeds

  • 1/4 cup chopped fresh Italian parsley

  • 1/4 cup chopped fresh mint

  • 2 tablespoons chopped fresh dill

  • 4 ounces feta cheese, diced (optional)

For the lemon vinaigrette

  • 1/4 cup freshly squeezed lemon juice

  • 1/2 cup good olive oil

  • 1 tablespoon dijon mustard

  • 1 tablespoon honey

  • 1 garlic clove, minced

  • Kosher salt

  • Freshly ground black pepper

INSTRUCTIONS:

  1. Pour 3 cups of water and 1/2 teaspoon kosher salt into a medium saucepan and bring to a boil. Stir in the quinoa, lower the heat and simmer, covered, for 15 minutes. Turn off the heat and allow quinoa to steam with the lid on for 5 minutes, then uncover and fluff with a fork. Transfer quinoa to your salad bowl.

  2. While the quinoa is cooking, blanch asparagus in a large pot of salted boiling water for about 1 minute, then add the peas and cook for another 30 seconds. Drain and immerse the asparagus and peas in a cold water bath. Drain once more and dry the blanched vegetables by laying them out on a clean kitchen towel.

  3. While the asparagus and peas are drying, make the lemon vinaigrette: Simply combine all the vinaigrette ingredients in mason jar and shake well. Taste and adjust seasoning as needed.

  4. Add the blanched veggies to the salad bowl with the cooked quinoa. Add the sliced sugar snap peas, radishes, green onions, chopped herbs, pepitas, feta cheese (if using) and pour over the vinaigrette (using only as much vinaigrette as you need), gently stirring everything together.

  5. Taste and adjust seasoning as needed (such as adding a bit more salt or lemon). This bright, hearty salad keeps very well in the fridge for several days.

Today’s Stats

  • Low temp: 38F

  • High temp: 63F

  • Sunrise: 7:17am

  • Sunset: 7:31pm

  • Moon phase: Waxing Gibbous

  • Additional notes: Warm and sunny all day. :)

March 19

Farm Notes

Hot dang, I feel like a lot has happened on the farm over the past few days. I’m going to keep these updates quick and dirty because, well, it’s Friday and I can’t wait to hop on the couch and watch Netflix’s new cooking show (for kids of all ages…) Waffles & Mochi! I haven’t watch any episodes yet, but I can already tell I’m going to LOVE it, and have a feeling that y’all will too. :)

Okay, so here’s what’s been happening on the farm the past few days:

Yesterday, Erin and I hustled all morning to finish prepping beds for our spring brassica patch (ie most of our kale, broccoli, and cabbage) before a big storm descended. Thankfully, we got it all done in record time and beat the rain. You’ll see in the photo below that we’re planting these brassicas into landscape fabric, which really helps with weed suppression. We are doubling the amount of vegetables that we are growing this season, and I’m anticipating that means 2x the weeding… so we’re doing everything we can to help manage weeds from the start.

Racing to prep beds before the storm.

Racing to prep beds before the storm.

Brassica babies going in the ground!

Brassica babies going in the ground!

Then yesterday evening I emailed my list of amazing farmstand customers to let everyone know that the Farmbelly Farmstand will be restocked next Thursday, March 25th @ 7pm, and our first pickup will be on Tuesday, March 30th! I’m so ready to kick off the spring season, especially because each week we will once again be offering local baked goods, flowers, honey, mushrooms, garden seedlings, freshly milled grains, etc from our favorite local growers + artisans. If you are local and want to shop the farmstand this year and didn’t receive an email from me last night, please let me know and I’ll add you to the list!

Our mower has been in the shop for the past few weeks getting tuned up for spring, and I’ve been anxiously awaiting its return because our grass is already growing like crazy. We have a lot of weeds mixed in with the grass around the farm, and it’s important that we get everything cut before the weeds send all their seeds into our garden beds. Thankfully, the mower was returned earlier today, which means there will definitely be some mowing happening here this weekend.

Those itty bitty green sprouts are carrots!

Those itty bitty green sprouts are carrots!

I’m also happy to report that our carrots (which we seeded over two weeks ago on March 4th) have finally begun to germinate, which is a relief. Carrots are notorious for taking a long time to germinate, and every year I’m left questioning whether we will have any carrots at all… and every time, they make their fashionably late appearance when I’ve just about given up on them.

A quick reminder that our March Farmbelly Club Zoom Q&A call is this Sunday, March 21st @ 3-4pm EST! Here is the Zoom link to join, and you can submit any questions ahead of time here. Hope to see you there!

Kitchen Notes

I mentioned earlier this week that I made a slow cooker chicken tikka masala recipe that I found over at The Kitchn, and we loved it so much that I wanted to share it with y’all.

But first, I want to be clear that this is a tikka masala inspired recipe, not an authentic recipe. I think this is an important distinction because all too often, well-meaning cooks/recipe writers claim ownership over cuisines that they know nothing about, which I think can be really hurtful to people from the country or culture where a culturally significant dish originates. So if you’ve heard of tikka masala, but aren’t quite sure exactly what it is – it’s a traditional Indian sauce/dish made from tomato and cream (either in the form of heavy cream, yogurt or cashews) with traditional Indian spices like ginger, turmeric and red chili powder, garam masala, coriander and cumin. It is slightly sweet and earthy in flavor, and is delicious over a bowl of rice and some toasty naan.

So this is a very simplified version of an authentic tikka masala, but it is still incredibly delicious and comes together super easily thanks to the slow cooker. The one (very non-authentic) addition I made (which is included in the recipe below) is adding some chopped potatoes and carrots, because who doesn’t love some extra veg? ;)

Slow Cooker Chicken Tikka Masala

Photo credit: The Kitchn

Photo credit: The Kitchn

INGREDIENTS

  • 2 pounds boneless, skinless chicken thighs, cut into 1-inch pieces

  • 2 lbs yukon gold or small red potatoes, quartered

  • 3-4 carrots, sliced into rounds

  • 1/2 cup whole-milk plain yogurt (not Greek)

  • 1 1/2 teaspoons kosher salt, divided

  • 1 large yellow onion, diced

  • 3 cloves garlic, minced

  • 1 tablespoon peeled and minced fresh ginger

  • 2 teaspoons ground coriander

  • 2 teaspoons garam masala

  • 1 teaspoon ground cumin

  • 1 teaspoon ground turmeric

  • 2 tablespoons tomato paste

  • 1 (15-ounce) can diced tomatoes, drained

  • 3/4 cup heavy cream or coconut milk

  • Chopped fresh cilantro

  • Cooked rice or naan, for serving

INSTRUCTIONS

  1. Place the chicken, potatoes, carrots, yogurt, and 1 teaspoon of the salt in a 4-quart or larger slow cooker and stir to combine.

  2. Heat the oil in a large frying pan over medium heat until shimmering. Add the onion and cook, stirring occasionally, until tender, about 8 minutes. Add the garlic, ginger, coriander, garam masala, cumin, and turmeric and cook until fragrant, about 1 minute. Add the tomato paste and cook until darkened in color, about 1 minute. Add the drained tomatoes and remaining 1/2 teaspoon of salt and bring to a simmer, scraping up the browned bits from the bottom of the pan. Transfer to the slow cooker and stir to combine with the chicken.

  3. Cover and cook on the HIGH setting for 4 hours or LOW setting for 8 hours. Stir in the cream or coconut milk. If you prefer a thicker sauce, leave the slow cooker uncovered and cook on the HIGH setting for 30 minutes. Taste and season with salt as needed. Serve garnished with cilantro with rice or naan.

Today’s Stats

  • Low temp: 32F

  • High temp: 50F

  • Sunrise: 7:22am

  • Sunset: 7:28pm

  • Moon phase: Waxing Crescent

  • Additional notes: Cold and rainy in the morning, beautiful sunshine by later in the afternoon.

March 16

Farm Notes

It seems I was a little too optimistic about spring’s arrival with all the beautiful, warm weather we had last week… alas, all the cold + rain we’re getting this week is putting me back in my place! On the bright side, I’m grateful for the extra hour of daylight in the evening thanks to daylight savings, though it has not been easy to wake up in the morning when it is still pitch-dark out! Let’s just say I’ve been hitting the snooze button the past few days…

Over the weekend, Matthew and I took advantage of the warm, dry weather and got a lot done on the farm. The main task we tackled was prepping a new planting area, on a spot where we’ve had a silage tarp for the past several months to kill any grass/weeds in the area.

Our task over the weekend was prepping this area for spring veggies – this is how it looked after we initially took off the tarp.

Our task over the weekend was prepping this area for spring veggies – this is how it looked after we initially took off the tarp.

After we removed the tarp, we measured out the dimensions of the new growing area, and then laid down landscape fabric around the perimeter. We get 4-foot wide landscape fabric (also known as ground cover, sourced from Country Farm & Home in Pittsboro, NC) and fold it in half and staple it down with 6” landscape staples, which does an amazing job preventing grass/weeds from creeping into the beds over time. It’s an extra step, but very worth it.

Laying down the permanent perimeter of landscape fabric.

Laying down the permanent perimeter of landscape fabric.

Next, we pulled out the measuring tape again and staked out our rows (30” wide) and our pathways (19” wide). For this area, we had room for 7 new beds (with 6 pathways in between). All of our beds around the farm are 50 feet long – we keep this standard so that all our irrigation lines, frost cover, shade cloth, etc can all be cut to 50 feet and will fit on any row. I mark the edges of each bed by hammering in these wooden stakes, and then we tie twine to the stakes and string the length of the row, so we can clearly see where the beds and pathways should be. Next is my least favorite task… digging out dirt from the pathways and placing it on top of the beds (and thankfully Matthew did most of the digging this time)!

Matthew starting to dig out the pathways…

Matthew starting to dig out the pathways…

… and a few hours of back-breaking work later!

… and a few hours of back-breaking work later!

That’s as far as we got this weekend, but over the next few days I’ll work on broadforking each bed, and then we will apply compost + any other amendments, and use the tilther to work everything in and create a smooth bed.

Kitchen Notes

I’m a liiiiitle embarrassed to report that there has been very little cooking going on here over the past few days. Alas – I’m really excited to try out this slow cooker recipe tomorrow for Chicken Tikka Masala that I found over at The Kitchn. During especially busy times of the year when I don’t have quite as much culinary imagination/bandwidth, there are a few blogs + online recipe sources that I turn to, and I thought I’d share some of my favorite recipe sites with y’all, for whenever you need some inspiration in the kitchen!

My favorite sources of culinary inspiration:

  • The Kitchn – a great place for resources and to answer almost any kitchen question you can imagine.

  • Smitten Kitchen – I’ve yet to make a recipe from Smitten Kitchen that hasn’t been a total crowd pleaser. Deb is an amazing recipe tester and I trust anything she writes!

  • Cookie & Kate – I feel like these recipes strike the perfect balance of being healthy and vegetable-focused, while still being absolutely delicious and packed with flavor.

  • Minimalist Baker – my go-to spot for plant-based/vegan recipes.

  • Dishing Up the Dirt – these recipes by farmer + cookbook author Andrea Bemis are pretty much the epitome of what I love to cook… dishes that are simple, seasonal, flavorful, and delicious!

Today’s Stats

  • Low temp: 41F

  • High temp: 45F

  • Sunrise: 7:26am

  • Sunset: 7:26pm

  • Moon phase: Waxing Crescent

  • Additional notes: Cold and rainy all. dang. day!

March 12

Farm Notes

Holy guacamole, it has been a WEEK. I’m tired and covered and dirt and a little sunburned, but couldn’t be more grateful for this glorious spring weather during a week full of prep + planting. For the last week we’ve been working to get our beds ready for 4,000+ seedlings that arrived yesterday from Banner Nursery, and I can happily say that all the hustling paid off, because when our plants arrived promptly at 10:30am, we were ready to start planting! I’m grateful that I took the time to map out where all the plants were going ahead of time, as it made the actual planting process super smooth and streamlined. While we didn’t get all of the seedlings planted yesterday, we got the majority of them in the ground, and we will get the rest in over the next few days.

One of the things to keep in mind when planting in your garden is having the right spacing between your plants, which will vary greatly depending on the plant! In case it’s helpful, I’m including here some info about how we space various spring veggies/herbs. A note that we plant in 30” wide beds, so when I say “3 rows” I mean that we fit 3 rows of that plant into a single 30” wide bed (so in a bed with 3 rows, each row is ~8” apart). I should also mention that because we try to grow (and sell) as many veggies as possible, we tend to plant pretty intensively/tightly.

  • Beets – 4 rows, 4” apart

  • Broccoli – 2 rows, 18” apart

  • Cabbage – 2 rows, 20” apart

  • Fennel – 3 rows, 8” apart

  • Head Lettuce & Asian Greens – 3 rows, 6-9” apart (depends on variety)

  • Kale – 3 rows, 12” apart

  • Spring herbs (cilantro, parsley, dill, chives, etc): 4 rows in a bed, 4-6” apart

  • Swiss Chard – 3 rows, 12” apart

If you have any questions as you start planting your spring seedlings, give me a holler!

So. Many. Plants!

So. Many. Plants!

IMG_3754.JPG
IMG_3724.JPG

Kitchen Notes

I’ll be honest that my focus this week has been more outside in the dirt than in the kitchen, so there’s been quite a bit of takeout (and at least one frozen pizza) this week! So while I don’t have a recipe to share, I realized that I haven’t talked at all about the many cooking videos I’ve made on my Farmbelly YouTube channel. About two years ago, a friend with lots of video skillz helped me make a series of videos where I demonstrate lots of simple, but super helpful culinary techniques – everything from making your own delicious vinaigrettes, how to dice an onion, knife skills, how to whip up homemade butter from scratch, and many more! I had a blast making these videos, and I hope that you’ll find they help you cook and eat like a farmer. :)

Today’s Stats

  • Low temp: 51F

  • High temp: 79F

  • Sunrise: 6:32am

  • Sunset: 6:22pm

  • Moon phase: Waning Crescent

  • Additional notes: Sunny and warm all day.

March 7

Farm Notes

Ever slowly but surely, the farm (and me!) are getting back into spring shape! It was a deliciously sunshine-filled weekend, with chilly blue sky mornings that warmed up to t-shirt weather by the afternoon. I spent much of the weekend in the dirt prepping beds for our spring seedlings arriving this Thursday. There are over a dozen beds that each need to be weeded, broad-forked, covered with compost, and tilthed before they are ready for plants… so we’ve got some work to do!

IMG_3621.JPG

In additional to prepping beds for the many thousands of plants coming this week, we checked a bunch of things off our farm to-do list this weekend… like pruning fruit trees, cleaning out the barn, weeding in the caterpillar tunnels, etc. But you want to know the MOST exciting thing that happened? I can’t believe I’m saying this, but getting our driveway re-graveled was one of the most satisfying things EVER. It’s been on my to-do list since we first moved here a year and a half ago, so needless to say it felt real good to cross that one off the list.

Pruning our very old and very prolific pear tree.

Pruning our very old and very prolific pear tree.

Is there anything more beautiful than a freshly re-graveled driveway?

Is there anything more beautiful than a freshly re-graveled driveway?

Kitchen Notes

I’ll admit that I get into cooking ruts, where I’ll cook the same few recipes that I know and love over and over and over. And while there’s something comforting about cooking dishes that you know inside and out, I’m trying to be better about cooking more new-to-me dishes each week. Today I got some inspiration for our #SundaySoup tradition by combing through my (ever growing) stack of cookbooks. There were a few different recipes for red lentil soup that caught my eye, and ended up creating my own unique version that drew from elements found in several different recipes.

The result is a curried sweet potato and red lentil soup and DANG… it turned out so good! It all comes together super quickly and easily, and it was full of complex flavors from the classic combination of ginger, garlic, curry powder, coconut milk and lime juice. You can blend this soup until it is completely smooth, though I just gave it a few pulses with my immersion blender, as I wanted to keep some of the texture from the lentils and sweet potatoes. You do you!

Curried Sweet Potato & Red Lentil Soup

Photo credit: A Chef’s Kitchen

Photo credit: A Chef’s Kitchen

INGREDIENTS

  • 4 tablespoons extra-virgin olive oil

  • 2 onions, diced

  • 2 garlic cloves, minced

  • 2 teaspoons minced fresh ginger

  • 2 tablespoons tomato paste

  • 1 tablespoon curry powder

  • 1/4 teaspoon red pepper flakes

  • 3/4 teaspoon kosher salt, more as needed

  • Black pepper, as needed

  • 2 small or one large sweet potato, peeled and chopped into 1/2” cubes

  • 1 cup red lentils

  • 4 cups chicken stock

  • 1-2 cups water

  • 1 (15-ounce) can coconut milk

  • Juice of 1 lime

INSTRUCTIONS

  1. In a large pot, heat oil until hot and shimmering. Add onion with a pinch of salt and cook over medium-high until soft and no longer translucent, 4-5 minutes.

  2. Stir in the garlic, ginger, tomato paste, curry powder, red pepper flakes, salt and pepper and cook for 2 minutes, stirring frequently.

  3. Stir in the chopped sweet potatoes and lentils. Pour in broth and 1-2 cups water (if you want a thicker soup, just add 1 cup and for a looser soup add 2 cups). Bring mixture to a simmer over medium-high heat; reduce heat to low and partially cover. Simmer until lentils and squash are soft, 25-30 minutes.

  4. Stir in the coconut milk and juice of 1 lime and heat through. Taste and adjust seasoning as needed.

  5. Using an immersion blender (or working in batches in a blender), puree soup to your desired consistency (or don’t blend at all, if you like the consistency as-is). Enjoy topped with fresh cilantro, pumpkin seeds, and a dollop of plain greek yogurt.

Today’s Stats

  • Low temp: 28F

  • High temp: 51F

  • Sunrise: 6:39am

  • Sunset: 6:18pm

  • Moon phase: Waning Crescent

  • Additional notes: Chilly morning and evening, warmer in the afternoon and blue skies all day.

March 4

Farm Notes

March = time for LOTS of spring planting around here, and that’s exactly what we did all. dang. day! Thank goodness for our new seeder, which we put to good use seeding allllll the things: 6 varieties of carrots, radishes, hakurei turnips, arugula, and a baby kale mix. We also had some extra lacinato kale seedlings leftover from last week, so we popped those in the ground too.

Here’s a quick before + after photos from our carrot beds:

IMG_3552.JPG
IMG_3587.JPG

Next week, we’re getting 4,000+ (!) seedlings that I custom ordered from Banner Nursery, so we have a LOT of work to do over the next few days getting beds ready for their arrival. We’re getting incredibly lucky with this stretch of dry + sunny weather, so I’m keeping my fingers crossed that our luck holds and we can get all these new plant babies in the ground over the next week or two.

PS – If you have any questions about what you can be planting this time of year in your home garden, please do reach out!

Kitchen Notes

When in doubt, the best way to jazz up a dish from meh to amazing is a delicious sauce! Tonight I was craving something vibrant and green, and I knew that some chimichurri sauce would be just the thing. Chimichurri is a traditional Argentinean condiment with countless variations, but it pretty much always involves fresh parsley, garlic olive oil, vinegar, and some red pepper flakes or chili powder. I like to describe this sauce as “punchy” – ie you should really taste the vinegar, garlic, and fresh herbs in every bite.

Tonight we had the chimichurri with some creamy polenta, roasted cauliflower, and pan-fried local fish – though it’s fabulous spooned over pretty much anything… cooked grains, roasted veggies, grilled proteins, etc etc. I've learned to always make extra, because it never goes to waste. The best part? It takes approximately 5 minutes (or less) to make – just combine all the ingredients in a food processor and viola!

Chimichurri Sauce

chimichurri.jpg

INGREDIENTS

  • 1 large glove of garlic (or 2 small cloves), peeled

  • 1 small shallot (or 1/2 of a red onion), coarsely chopped

  • 1 packed cup parsley leaves

  • 1/2 packed cup cilantro leaves

  • 1/2 cup extra virgin olive oil

  • 3 tablespoons red wine vinegar

  • 1/2 teaspoon red pepper flakes

  • 1/2 teaspoon salt

INSTRUCTIONS

  • Combine all the chimichurri ingredients in a small food processor and pulse until well chopped, but not pureed.

  • Taste and adjust seasoning as needed - keep in mind you want the sauce to be pretty punchy from the vinegar, garlic, fresh herbs, etc!

Today’s Stats

  • Low temp: 36F

  • High temp: 62F

  • Sunrise: 6:43am

  • Sunset: 6:15pm

  • Moon phase: Waning Gibbous

  • Additional notes: Blue skies and sunny all day, windy!

March 1

FARM NOTES

Holy guacamole, how is it already March?! This month we will be planting a TON of veggies outside, which means that the next week or two will be focused on getting our growing beds prepped and ready for planting.

Our process for prepping each bed goes like this: 1) Thoroughly weed the bed, 2) use a broadfork to lift/loosen the soil, 3) put down compost (about 3 wheelbarrows per bed) and any other natural amendments, and 4) use the tilther to blend in the compost/amendments and create a smooth bed for planting. Bed prep is actually one of my favorite farm tasks, as I find it incredibly satisfying to take a bed that has gotten a bit weedy and disheveled, and to get it back into shape for a new round of plants to grow and thrive.

Prepping beds for spring veggies! (this photo is from last season)

Prepping beds for spring veggies! (this photo is from last season)

Kitchen Notes

On Sunday night, I was rooting around the pantry and fridge to figure out what to make for our #sundaysoup, and I’ve gotta say, the final result may be a new house favorite! I ended up making a tuscan-style kale, white bean and sausage soup, which came together super quickly, and was made from staple ingredients that you most likely already have on hand. If you wanted to make this vegetarian/vegan, you could certainly leave out the sausage (though I’d suggest adding another hearty vegetable like potatoes for some extra body/protein if you leave out the sausage). One secret to making this soup uber delicious is throwing in a wedge of parmesan cheese (or a leftover parmesan rind) to simmer with all the other ingredients. The parmesan (while optional) is highly encouraged, as it adds a bit of salty / umami flavor that makes this soup just a liiiiitle something extra that will have you going back for seconds (and thirds)!

Kale, White Bean & Sausage Soup

whitebeansoup.jpg

INGREDIENTS

  • 1 tablespoon olive oil

  • 12 oz beef Polska Kiebasa Sausage , sliced into 1/4” thick slices

  • 1 medium yellow onion, diced

  • 2 cups chopped carrots (4-6 carrots)

  • 2 cups chopped celery (4-6 stalks)

  • 4 cloves garlic, minced

  • Parmesan wedge/rind (optional, but highly encouraged)

  • 5-6 cups chicken or veggie broth (or water)

  • 2 teaspoons dried oregano

  • 1 teaspoon dried rosemary

  • Salt and freshly ground black pepper, to taste

  • 1 bunch kale, thick ribs removed and roughly chopped

  • 3 cans cannellini or great northern white beans

  • 2 tablespoons red wine vinegar

INSTRUCTIONS

  1. Heat olive oil in a large pot over medium heat. Add sausage and cook until slightly browned, tossing occasionally, about 5 minutes. Remove sausage, while leaving any fat in the pot, and side aside sausage on a plate lined with paper towels.

  2. Return to pot with oil to medium heat, add onion, carrots, and celery with a pinch of salt and saute for 4-5 minutes (while scraping bottom of pan to get the browned bits). Add garlic, dried oregano, and dried rosemary and saute another minute longer.

  3. Stir in chicken/veggie broth (or water) and parmesan wedge/rind and season with salt + pepper to taste. Bring to a boil over medium-high heat, then lower heat to a simmer and cook for 15-20 minutes, until the soup begins to thicken a bit.

  4. Stir in chopped kale, cooked sausage, white beans (I like to include the liquid from the cans of beans, but you can drain if desired), and red wine vinegar and allow the flavors to meld over medium-low heat for about five minutes. Serve warm, top each serving with parmesan cheese.

Today’s Stats

  • Low temp: 34F

  • High temp: 61F

  • Sunrise: 6:47am

  • Sunset: 6:12pm

  • Moon phase: Waning Gibbous

  • Additional notes: Cloudy and rainy most of the day.

February 26

Farm Notes

Yesterday was one of those days when I’m reminded exactly why I love farming. On an early spring day with zero humidity and 100% sunshine, I’m wildly grateful to be outside, in the dirt, moving my body, and having something beautiful and productive and nourishing to show for it at the end of the day. Aaaand it’s days like yesterday that I need to remember come August, when it’s 100% humidity and hot and dry and I’m asking myself who the hell would want to be a farmer?!

With help from my friend and fellow farmer Erin, we crossed off some big items from our to-do list yesterday. We finished prepping the beds inside our other caterpillar tunnel, and we got it completely planted by the end of the day! Here’s what we planted (with a few notes about spacing, in case it’s helpful):

  • 2 beds of lacinato kale – our beds are 30” wide, and we can fit 3 rows of kale in each bed. We space each kale plant about 12” apart within each row.

  • 1 bed of swiss chard – 3 rows per bed, planted 12” apart.

  • 1 bed of head lettuces – 3 rows per bed, planted 9” apart.

After planting out the beds, we first watered them in by hand with a hose and long soaker nozzle, and then we hooked up 3 drip tape irrigation lines per bed. Even if you have drip irrigation at your garden/farm, I’ve found that it’s best to first water new seedlings by hand to make sure they get nice and settled into their new home, and then we’ll use the drip lines for irrigation for the remainder of their time in the ground.

A fully planted tunnel is a beautiful sight!

A fully planted tunnel is a beautiful sight!

Baby lettuces going in!

Baby lettuces going in!

This is our “farm hack” for marking rows.. a big rake with some excess irrigation pipe taped on works like a charm!

This is our “farm hack” for marking rows.. a big rake with some excess irrigation pipe taped on works like a charm!

Kitchen Notes

Last night Matthew and I cooked up some delishhh herb-filled beef patties with an equally herby yogurt sauce to enjoy alongside some Green Power Salad leftovers, and it was a feast! My favorite dishes tend to have a few things in common… like lots of herbs, bright lemon and tangy yogurt, so this meal checked all the boxes! It’s easy enough for a weeknight dinner, but feels special enough for the weekend. Happy cooking friends!

Herbed Pistachio Patties with Arugula & Yogurt Sauce

Makes ~16 patties

Photo credit: Cooking Light

Photo credit: Cooking Light

INGREDIENTS

For the patties

1/2 cup shelled pistachios

1 packed cup arugula, plus several cups more for serving

1/4 cup chopped fresh mint

1 yellow onion, quartered

1 large garlic clove, peeled

1.5 lbs ground beef

1 tablespoon olive oil

1 teaspoon kosher salt, plus more to taste

Freshly ground pepper

Vegetable oil (for pan-frying)

Lemon-Herb Yogurt Sauce

1 cup plain greek yogurt

2 tablespoons lemon juice + 1 teaspoon lemon zest

1 tablespoon olive oil

1 clove garlic, minced

1/4 cup freshly chopped herbs (like mint, parsley, chives, etc)

Kosher salt, to taste

INSTRUCTIONS

  • Make the yogurt sauce: Mix together all the ingredients for the yogurt sauce in a bowl and keep in the fridge until needed. 

  • Make the patties: Put the pistachios in the bowl of a food processor. Blitz for a few seconds, to roughly chop, then put into a medium bowl. Add the arugula to the processor, blitz for a few seconds to roughly chop, then add to the bowl of pistachios. Continue with the onion and garlic, to form a smooth paste, and add to the bowl. Add the ground beef, 1 tablespoon olive oil, 1  teaspoon salt, and a good grind of pepper into the bow. Mix well to combine, then shape into about 16 patties (~2 ounces each). 

  • Cook the patties: Put 1 tablespoon of vegetable oil into a large non-stick frying pan and place over medium-high heat. One the oil is hot and shimmering, add the patties – as many as you can fit without crowding the pan – and cook for 6-7 minutes total, turning halfway through cooking, until golden brown and cooked through. Keep warm while you repeat with the remaining patties. If you need to, add another tablespoon oil to the pan during the process. Alternatively, you can also cook the patties on your grill!

  • To serve: Toss a few cups of arugula with a bit of lemon juice and olive oil and pile the greens on a platter. Serve the patties on top of the arugula alongside the yogurt sauce.

Today’s Stats

  • Low temp: 37F

  • High temp: 47F

  • Sunrise: 6:51am

  • Sunset: 6:09pm

  • Moon phase: Full moon

  • Additional notes: Cold and rainy all day.

February 24

Farm Notes

Two days in a row of warm, sunshine-filled weather? I must be dreaming! The past two days, I’ve been able to spend some time in the late afternoon working in the dirt, and it has been absolutely glorious and soul-filling. I’ll be honest that at the end of the 2020 growing season (which for me, wasn’t until mid December), I was left feeling completely exhausted and burnt out. I desperately needed a break from the farm, and I’m so grateful to have had the past few months to rest, watch Netflix on the couch, sleep in, and fill my cup back up.

As I was working out in the garden today, surrounded by air that was warm and filled with the sound of frogs singing in the nearby creek, I was suddenly struck with such happiness and gratitude to be able to do this work. Which was a wonderful feeling after being so utterly tired at the end of last year. I’m continually in awe of the healing rhythm of the seasons – how the winter months can certainly be dark and dreary, but it’s also an essential time to rest and be restored for the growing season that lies ahead.

Time to share a quick seed starting tip, for what to do if/when your seedlings suddenly get way too tall! I had this issue with some bachelor button seeds that I started a few weeks ago. They were still super tiny, but had gotten so tall that they were falling over – mostly because I didn’t realize they had germinated so quickly, so they spent a few days stretching to find light before I turned the grow lights on. So in case any of you have the same problem, I’m going to show you what to do:

First, you’ll need to fill a new seeding tray with fresh, moist potting soil. You can get the soil wet by first filling the tray with dry soil, and then spraying it gently with a hose OR get your soil wet (but not dripping) first and then fill the tray. Then get a chopstick (or a pencil or pen would probably work too).

Start with your very tall baby seedlings…

Start with your very tall baby seedlings…

Fill a new tray with fresh, moist potting soil. Grab a chopstick (or similar shaped utensil)

Fill a new tray with fresh, moist potting soil. Grab a chopstick (or similar shaped utensil)

Next, use the chopstick to make small holes in each cell of the seedling tray. Then take the chopstick again and very gently prick out the seedling, making sure not to cut the stem.

IMG_3371.JPG
IMG_3373.JPG

Now gently transfer your leggy seedling over to the new tray that you’ve prepared. This is the part that takes a little practice… you want to lay the seedling over the hole and very gently use the chopsticks to fold the long stem + root end into the hole. The key is to get the stem and roots tucked in the hole, without breaking the delicate stem. I promise, you can do it! Finish by soaking the whole tray in a tub filled with a few inches of water, then put back under your grow lights (if using).

Because these seedlings are still super tiny, I potted them into the same size tray (72 cells) as they were originally in. But as your plants get bigger (and as they have absorbed all the nutrients from the potting soil that they first germinated in), you’ll need to “pot up” each seedling into new potting soil, and typically they will step up to larger cells or pots.

IMG_3374.JPG
IMG_3388.JPG

If you have any questions about this process (or any other issues you may be having with your baby seedlings), just give me a holler!

Kitchen Notes

If I could only eat one salad for the rest of my life, this one might be it. It has all the things I’m looking for in a good salad… it’s colorful, has a great crunch, filled with bright flavor, and is chock-full of protein and healthy fats. This recipe is very forgiving (which was first inspired by The Sprouted Kitchen)– so feel free to mix up, add, or omit ingredients depending on what you have on hand. Another perk of this salad is that it’s super hearty and won’t wilt in the fridge, so it makes great leftovers for several days.

Green Power Salad

Photo credit: The Sprouted Kitchen

Photo credit: The Sprouted Kitchen

INGREDIENTS 

For the salad

  • 1 bunch of lacinato kale, de-stemmed and chopped 

  • 3 cups cooked French green/black lentils 

  • 1 green apple, diced 

  • 1 avocado, diced 

  • 1 english hothouse cucumber (or 3 persian cucumbers), diced 

  • 1 cup pumpkin seeds/pepitas 

  • 1 pint blueberries 

  • 1/2 cup chopped parsley 

  • 1/4 cup chopped mint

  • 1/2 cup freshly grated parmesan cheese (optional) 

Lemon Vinaigrette 

  • 1/2 cup olive oil 

  • 1/4 cup lemon juice (juice of ~2 lemons) 

  • 2 tablespoons freshly chopped parsley 

  • 1-2 tablespoons Dijon mustard 

  • 1-2 tablespoons honey (or maple syrup) 

  • 1 clove minced garlic (1 teaspoon) 

  • Kosher salt and freshly ground pepper to taste 

PREPARATION 

  • To cook the lentils: Fill a medium saucepan with water and bring to a boil. Add 1.5 cups of uncooked lentils and simmer for 15-20 minutes, stirring occasionally, until al dente (make sure to taste them to see when they are finished). When the lentils are finished cooking, drain immediately and set aside. 

  • Make the vinaigrette: Combine all vinaigrette ingredients in a mason jar and shake, shake, shake! Taste and adjust seasoning as needed. 

  • De-stem the kale, roughly chop, and set aside in a large salad bowl. 

  • Pour a few tablespoons of the vinaigrette into the salad bowl with the chopped kale. Using your hands, massage the kale for 1-2 minutes, until the it breaks down and turns dark green.

  • Add the cooked lentils, chopped apples, avocado, cucumber, parsley, mint, pepitas, blueberries and parmesan cheese (if using) to the salad bowl with the massaged kale. 

  • Pour additional vinaigrette over the salad and toss well to combine (you may have some extra vinaigrette). Taste and adjust seasoning as needed.

Today’s Stats

  • Low temp: 35F

  • High temp: 70F

  • Sunrise: 6:53am

  • Sunset: 6:08pm

  • Moon phase: Waxing Gibbous

  • Additional notes: A bit chilly in the morning, then sunny and warm all day!

February 21

Farm Notes

It was a pretty quiet (and delightfully sunshine-drenched) weekend here at the farm. It feels good that at least one of our tunnels is fully planted with spring veggies (radishes, turnips, and lettuces), and tomorrow I’m picking up a bunch of seedlings (kale and swiss chard) that we’re planting inside our other tunnel on Thursday. After several months of not having any plants to keep alive, it’s exciting to finally feel needed again out in the garden.

I’m also happy to report that several of the seeds I started last weekend have germinated, and later this week I’m going to share how I “pot up” seeds that have germinated and have grown to be too big/tall for their seed trays.

Today was also the first of our monthly Farmbelly Club Zoom Q&A calls! We had a great group of folks from all over the world (!) join, and it was so awesome getting to know one another a bit better and dig into specific questions around cooking and growing. To help set the date/time for our March Zoom call, please take a moment to fill out this super quick survey.

Kitchen Notes

I’ll be honest that it’s a little harder for me to get super inspired to cook in late February… I mean, I love me some hearty winter root veggies, but I’m so ready for some spring veggies to start coming in!

Alas. Sundays are for soups, and tonight I couldn’t resist whipping up another pot of chickpea stew with coconut and turmeric from Alison Roman. I jazzed up the recipe by adding some extra chopped carrots, sweet potatoes, and cauliflower that I had on hand, and it was so dang good, as always!

Today’s Stats

  • Low temp: 30F

  • High temp: 45F

  • Sunrise: 6:57am

  • Sunset: 6:05pm

  • Moon phase: Waxing Gibbous

  • Additional notes: Early morning frost, but sunny and clear all day.

February 18

Farm Notes

While the weather was nothing to celebrate today… we had quite an exciting afternoon over here. Today we started direct seeding in our new caterpillar tunnel, and instead of planting every. dang. seed. by. hand. (like we did all last season) – we got to use our new push seeder, which is a TOTAL game changer!

IMG_3316.JPG

Here’s the thing – seeding by hand works great for home gardens and smaller plots, but for the amount of seeds we plant each season, it was totally inefficient to be doing it all by hand. The problem was that push seeders are not cheap, so I’ve been saving up and finally bought one at the end of last year (specific model is a Jang JP-1). In addition to the seeder, you have to buy a whole assortment rollers (which are also $$$), in various sizes to fit all the different sizes of seeds (here’s a guide for all the roller sizes). It definitely takes a few minutes to get the seeder calibrated correctly based on the seed you are planting (today we planted a few varieties of radishes), but once you get rolling, it’s blazingly fast.

A note that if you’re in the market for a push seeder, but you’re looking for a more economical option, the Earthway Seeder is also quite popular and is about 1/3 of the price of the Jang seeder.

If y’all have any other questions about push seeders, let me know!

Kitchen Notes

I’m usually not very hungry in the morning, and I’m often rushing out the door to do chores outside, which means that many days I realize it’s 11am, I haven’t eaten anything, and I am HANGRY. Which is 0% enjoyable for anyone. So to combat my hangry-ness, I’ve starting making jars of overnight oats, and I’m loving it.

If you’re new to overnight oats, it’s pretty straightforward – literally just soak rolled oats in liquid along with chia seeds and whatever other fruit/nuts/sweeteners you’d like, let sit overnight, and enjoy the next morning! It makes a great on-the-go breakfast/snack, since it’s already in a jar and you can just pop it in your bag to wherever you’re headed. This is definitely a “no recipe” kind of recipe – and while I give specific measurements here, when I make these I never measure anything, so feel free to just “eyeball” the ingredients, use what you have on hand, and taste as you go!

Overnight Oats

Photo: One Lovely Life

Photo: One Lovely Life

INGREDIENTS

  • 1 cup rolled oats

  • 1.5 cups almond milk (or whatever milk you prefer), plus more to taste

  • 2 tablespoons chia seeds

  • 3 tablespoons peanut butter or almond butter (or other nut or seed butter)

  • 3 tablespoons maple syrup

  • 1/2 cup blueberries (or other fruit of your choice like bananas, peaches, apples, etc)

  • 1/4 cup chopped almonds (or other chopped nuts/seeds)

  • 1 teaspoon cinnamon

  • 1/4 teaspoon kosher salt

INSTRUCTIONS

  • In large (quart sized) mason jar or in bowl with a lid, add all ingredients and stir well to combine. If the mixture seems dry, add a bit more milk. Taste and adjust seasoning (ie sweetness, saltiness, other spices) to taste.

  • Cover securely with a lid/seal and set in the refrigerator overnight (or for at least 6 hours) to set and soak.

  • The next day, open and enjoy as is or garnish with other toppings (like additional fruit, nuts, yogurt, maple syrup, etc). Overnight oats will keep in the refrigerator for 3-4 days (if it lasts that long)!

Today’s Stats

  • Low temp: 31F

  • High temp: 38F

  • Sunrise: 7:01am

  • Sunset: 6:02pm

  • Moon phase: Waxing Crescent

  • Additional notes: Cold and freezing rain throughout the day.

February 15

Farm Notes

I’m about ready to build an ark with the nonstop rain that we’ve been getting around here! I know a lot of folks all over the country are dealing with winter storms right now, and I hope everyone is staying safe, warm, and dry. On the bright side, starting spring seeds is a great activity when you’re cooped up inside. I did my first round of seeding over the weekend, and took a bunch of photos to walk y’all through the process. So if you’re interested in learning more about starting seeds, here’s the rundown:

Materials You’ll Need

Instructions

  • Fill each seed tray with potting soil, tapping the whole tray firmly against the ground as you go so the soil settles. Gently soak the soil-filled trays with a hose (make sure you have a nozzle so you can water the trays gently). Alternatively, you can get the soil wet before your fill your tray – but I find it’s easier to first fill with the trays with dry soil and then to gently soak them.

IMG_3254.JPG
IMG_3255.JPG
  • Make holes in each cell using your finger, a pencil, or a dibbler. A general rule is to plant the seed to a depth twice its size. Drop 1 or 2 seeds into each hole.

IMG_3261.JPG
IMG_3265.JPG
  • Cover the tray with a light dusting of fine vermiculite or seed starting mix, making sure all seeds are covered.

  • Label the tray with the variety name and date sown.

IMG_3270.JPG
IMG_3271.JPG
  • Set freshly sown trays into a plastic tub with an inch of water in the bottom and let them soak up the water from below. Remove once the soil surface is evenly moist. Seed trays should not be watered from overhead until the plants have their first set of true leaves, as a strong blast from your hose can damage your plants.

Photo credit: Floret Farm

Photo credit: Floret Farm

  • Cover trays with a clear plastic dome (OR place in your indoor greenhouse) and set onto a 70°F heat mat (optional) or just in a warm corner of the house, consistently above 65°F. Check your seed packet to see if any of your seeds need light to germinate – most seeds do not need light for germination, but some do – and you’ll obviously want to turn your grow lights on for seeds that need light! A note that many plants can take a long time to germinate (anywhere from 1-3 weeks) so patience is key!

  • Once your seeds have germinated – if using plastic dome lids over your trays – remove the dome and take off heat mat (if using) once seeds have sprouted. Move trays to your greenhouse space and turn on the grow lights. If you don’t have a space with grow lights, a sunny south-facing window is your next best bet.

  • Once your seeds have germinated – if not using the dome lids and your trays are already in your indoor greenhouse space – turn on your grow lights. If it seems too wet in your greenhouse space at any point, roll up the plastic (if possible) to lower the humidity level.

  • Make sure your grow lights are suspended a few inches above seedlings, keeping them on for 14 to 16 hours per day. As the plants get taller, keep raising the lights so that they are 2-3 inches above the tallest plant.

  • Use your finger to feel the soil moisture levels in the trays – if the plants just seem a little dry, gently spritz with a spray bottle filled with water. If the plants see really dry, water them from below by placing in a tub filled with an inch of water on the bottom (like you did when the seeds were first sown).

I hope these are some helpful tips for starting your own seeds this season! In a few weeks I’ll talk about what to do when your plants need to be potted up into bigger trays, and how to “harden off” your plants before they go in the ground outside.

Kitchen Notes

This winter weather has me leaning into allll the comfort foods, and tonight I made one of my go-to comfort side dishes – crispy smashed potatoes with parmesan and garlic. The secret to this recipe is cooking the potatoes two ways: first by par-boiling them in salted water until tender, and then smashing and roasting them in a hot oven until crispy and golden. The extra steps are 100% worth it, and once you cook potatoes this way, you won’t go back! This recipe is inspired by Cookie & Kate.

Crispy Smashed Potatoes with Parmesan & Garlic

These potatoes may not win any beauty contests, but they will win any taste test!

These potatoes may not win any beauty contests, but they will win any taste test!

INGREDIENTS

  • 2 pounds small-to-medium red or yellow potatoes

  • 3 tablespoons plus ¼ teaspoon salt, divided

  • 4 tablespoons olive oil, divided

  • Freshly ground black pepper, to taste

  • 2 cloves garlic, minced

  • Parmesan cheese, freshly grated

  • 2 tablespoons chopped fresh parsley, chives and/or green onion

  • A few lemon wedges

INSTRUCTIONS

  1. To prepare the potatoes, scrub them clean if dirty and rinse under running water. Remove and discard any nubby sprouting areas. Place the potatoes in a large Dutch oven or soup pot.

  2. Fill the pot with water until the potatoes are submerged and covered by 1 inch of additional water. Add 3 tablespoons of the salt. Bring the mixture to a boil over medium-high heat and continue cooking until the potatoes are very easily pierced through by a fork (smaller potatoes are done around 20 minutes, and medium around 25 minutes).

  3. While the potatoes cook, preheat the oven to 425 degrees Fahrenheit and drizzle 1 tablespoon of the olive oil over a large, rimmed baking sheet. Brush the oil so it’s evenly distributed over the sheet.

  4. When the potatoes are done, drain them in a large colander and let them cool for about 5 minutes, until they can be handled safely.

  5. Evenly distribute the potatoes over the prepared baking sheet, and use a potato masher or a serving fork to gently smash each potato to a height of about ½ inch. (Thinner potatoes are more crispy.)

  6. Drizzle the remaining 3 tablespoons of olive oil over the smashed potatoes. Add ¼ teaspoon salt and freshly ground pepper over the potatoes.

  7. Bake until the potatoes are nice and golden on the edges, about 20 minutes. Remove from oven and toss the potatoes with the minced garlic and a hefty dusting of freshly grated parmesan, and bake for an additional 5 minutes.

  8. Remove from oven and sprinkle with chopped fresh herbs, a squeeze of lemon juice, and an extra bit of parmesan cheese if you feel inclined!

Todays Stats

  • Low temp: 32F

  • High temp: 36F

  • Sunrise: 7:04am

  • Sunset: 5:59pm

  • Moon phase: Waxing Crescent

  • Additional notes: Cold and freezing rain throughout the day.

February 12

Farm Notes

Yesterday was an exciting day at the farm… tunnel #2 is officially up! Erin and I got the plastic secured down to the frame just in time before the rain arrived. There was even a roll or two of thunder, which you don’t often hear in February! It was delightfully dry and cozy inside the tunnel as we began prepping beds with the sound of rain pounding down over our heads. (Though it was a lot less cozy having to continually trudge out in the pouring rain to load compost into the wheelbarrow and bring back into the tunnel…)

Securing the plastic onto the frame of the tunnel.

Securing the plastic onto the frame of the tunnel.

Bed prep inside the tunnel begins!

Bed prep inside the tunnel begins!

We will finish preparing the beds over the next few days, and next week we will plant this new greenhouse with lettuces, a baby kale mix, radishes, and turnips. Over the weekend, I’m going to do some seed starting for our indoor greenhouse, so early next week I’ll share some photos and tips on starting your own seeds. Now is a good time to start tomatoes, peppers, eggplant, as well as brassicas like kale, broccoli, cabbage, etc!

Kitchen Notes

Time for a “no recipe” kinda recipe!

Last night I kicked my oven up to 425F, chopped up a bunch of random vegetables languishing in our fridge/pantry (a half a head cauliflower, some broccoli, 2 sweet potatoes, and a red onion), drizzled everything with olive oil, some salt, and a teaspoon or two of garam masala (a classic Indian spice blend of cinnamon, coriander, nutmeg, cardamom, cumin black pepper, etc) – then I roasted everything for 30-35 minutes until tender and beginning to brown. Whenever I’m roasting veggies, I make sure to check them halfway through cooking to toss everything around with a spatula, making sure that everything is browning evenly.

While the veggies were roasting, I made one of my favorite sauces – a miso-ginger & almond concoction. Here’s the basic list of ingredients in the sauce – all you have to do is whizz everything together in a food processor (here’s my favorite small food processor, btw) and enjoy!

  • 2 cloves garlic

  • 1/3 cup tahini

  • 1/4 cup peanut or almond butter

  • 1/4 cup rice vinegar (or white wine vinegar)

  • 2 tablespoons white miso (can omit if needed)

  • 2 tablespoons maple syrup

  • 1 tablespoon soy sauce (or gluten free liquid aminos)

  • 2 teaspoons grated fresh ginger

  • 1/4 teaspoon red pepper flakes

  • 1/4 cup water + additional to thin if necessary

I know it’s super simple… but when it’s cold and you’re tired, sometimes all you need are some roasted veggies and a yummy sauce to make the perfect weeknight dinner, amirite?

Today’s Stats

  • Low temp: 30F

  • High temp: 33F

  • Sunrise: 7:07am

  • Sunset: 5:56pm

  • Moon phase: Waxing Crescent

  • Additional notes: Cold and freezing rain throughout the day.

February 9

Farm Notes

I know spring is still a good while away, but something about today felt like spring for the first time all year… and it was GLORIOUS. I was able to spend several hours this afternoon outside just working in the dirt, wearing a t-shirt and giant smile. I can finally feel the days getting longer, the air has a gentle warmth to it, and life around the farm is beginning to buzz back to life. Just in the last day or two – we’ve been surrounded by the sound of frogs singing in the creek at the edge of the farm, and it’s the most magical chorus after a silent winter.

Today I took soil tests from several spots around the garden, which we do once a year in early spring. Here in North Carolina, we send the soil samples to get analyzed through NCDA&CS – it’s $4 per sample, and they will come back in a few weeks to let us know the different nutrient values, pH, amount of organic matter, etc in our soil, which helps us make informed decisions for adding amendments to the soil for the season ahead. My whole philosophy around growing good food starts with having healthy, living soils – so these tests are an important benchmark to track our progress as we build soil that is (hopefully) teeming with life and organic matter.

If you’re new to soil testing and need some tips on how/where to start, here are some best practices:

  1. For best results, invest in a soil sample probe (this one is $34 on Amazon). In a pinch, a garden spade will work, but these probes are specifically made for this job!

  2. In each area where you’d like to soil test, pull a minimum of 8 to 12 soil cores to produce a representative sample.

  3. Soil samples should be pulled from a consistent depth. Using the soil sample probe, I’m able to get to a depth of 8-10” for each sample.

  4. Mix sample cores from each area in a clean bucket/container. If the soil seems especially wet, I recommend spreading it out on a baking sheet and letting it dry overnight. Place the soil in a properly labeled soil test bag or box — one for each field/area (you’ll likely have quite a bit of extra soil that won’t fit in the bag/box). Usually the lab where the samples are being sent will have you fill out a form with information about the area that you are testing.

** A note that in my experience, this type of soil testing is most important when growing vegetables/fruit directly in the ground. If you are growing in raised beds where all the the soil has been brought in, I don’t think that soil testing through a lab is really necessary (though you can certainly still give it a try, if you feel like your soil nutrients are out of balance in your raised beds).

IMG_3201.JPG
IMG_3204.JPG

Kitchen Notes

It’s Tuesday, which y’all know means frozen pizza and a big salad over at our house… it hit the spot, as always! I promise more kitchen inspiration coming later this week. :)

Today’s Stats

  • Low temp: 34F

  • High temp: 55F

  • Sunrise: 7:10am

  • Sunset: 5:53pm

  • Moon phase: Waning Crescent

  • Additional notes: Cloudy and cool morning, warm sunshine in the afternoon.