February 8

Farm Notes

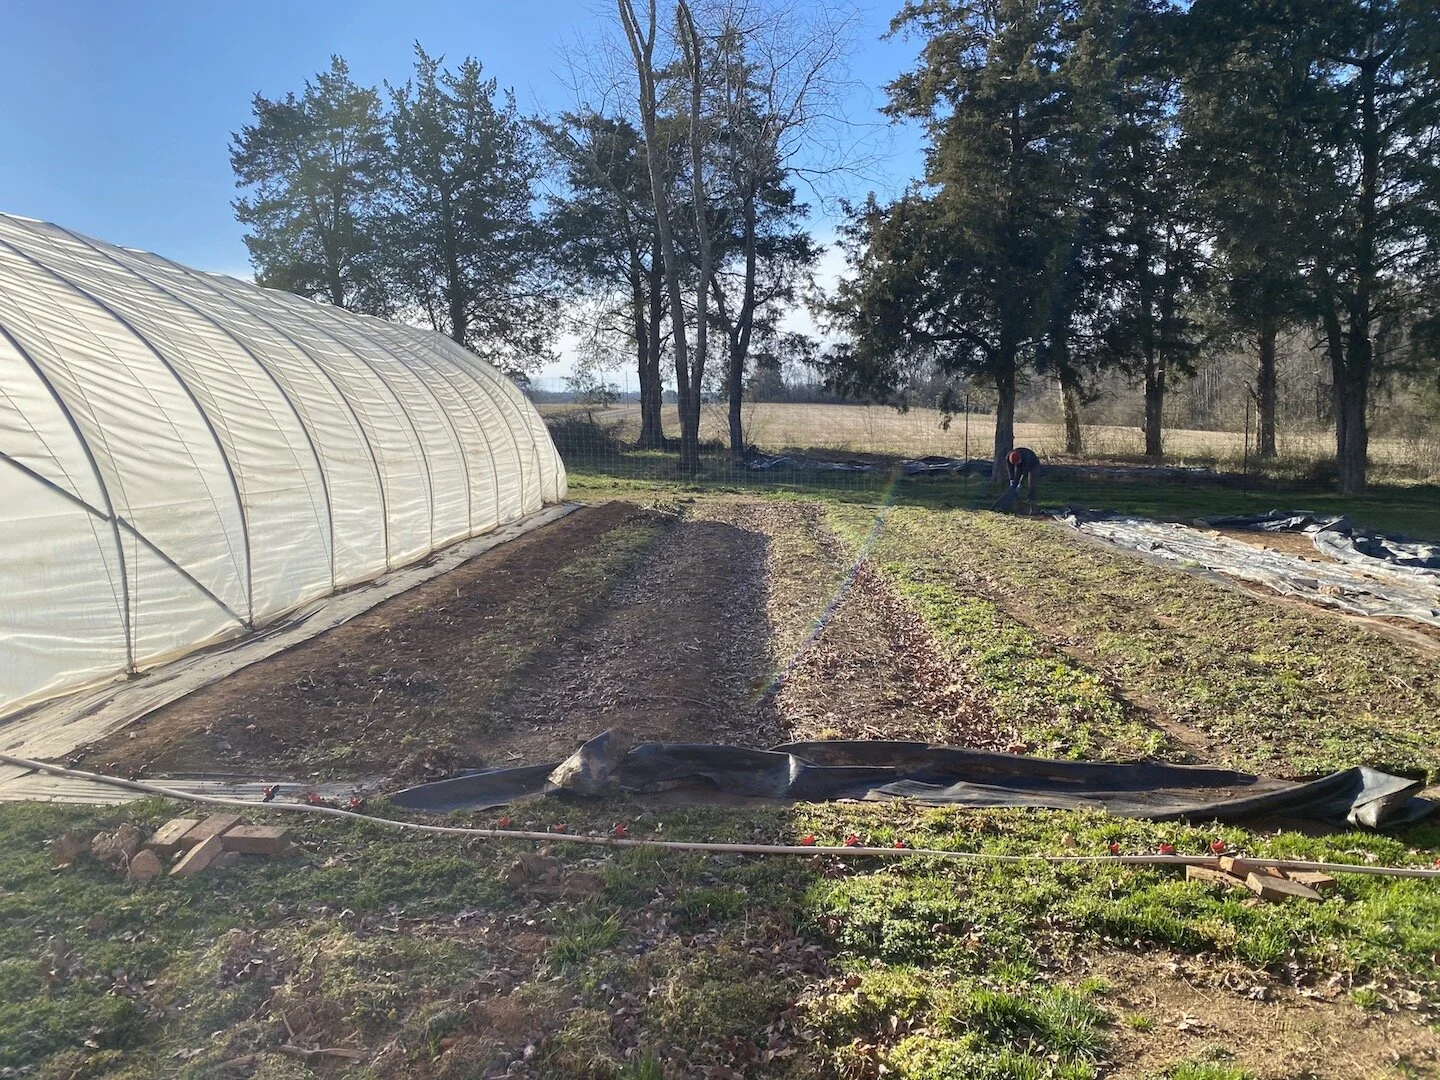
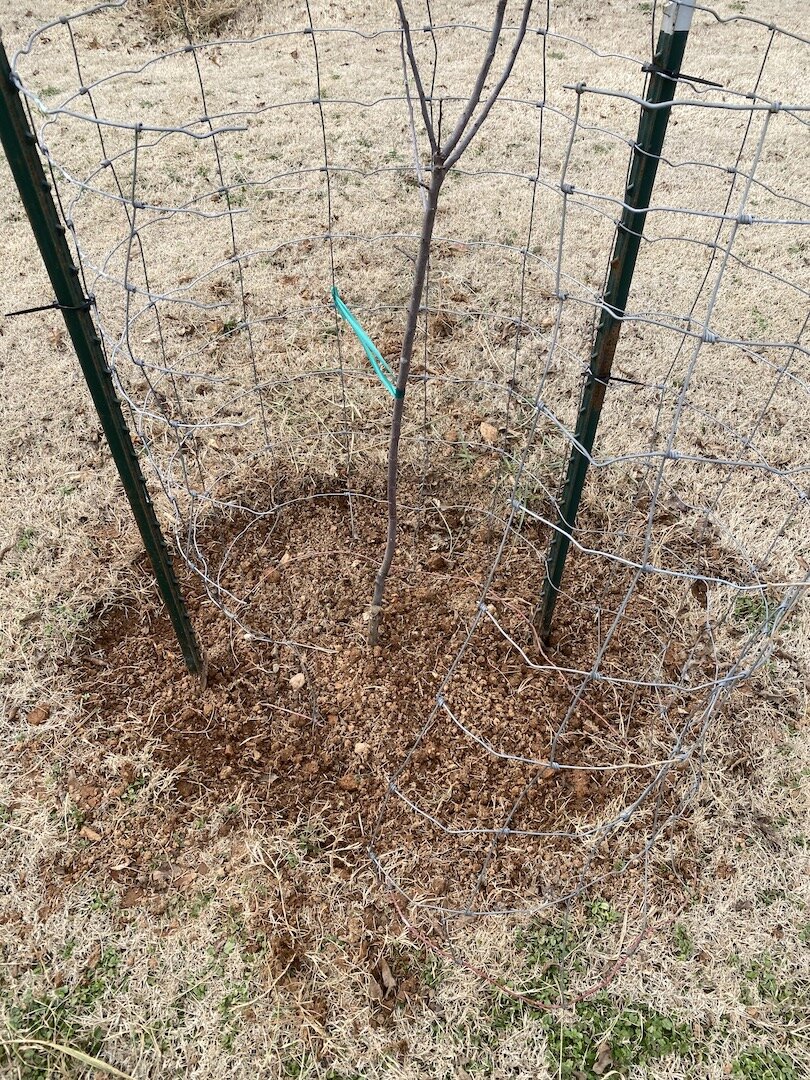
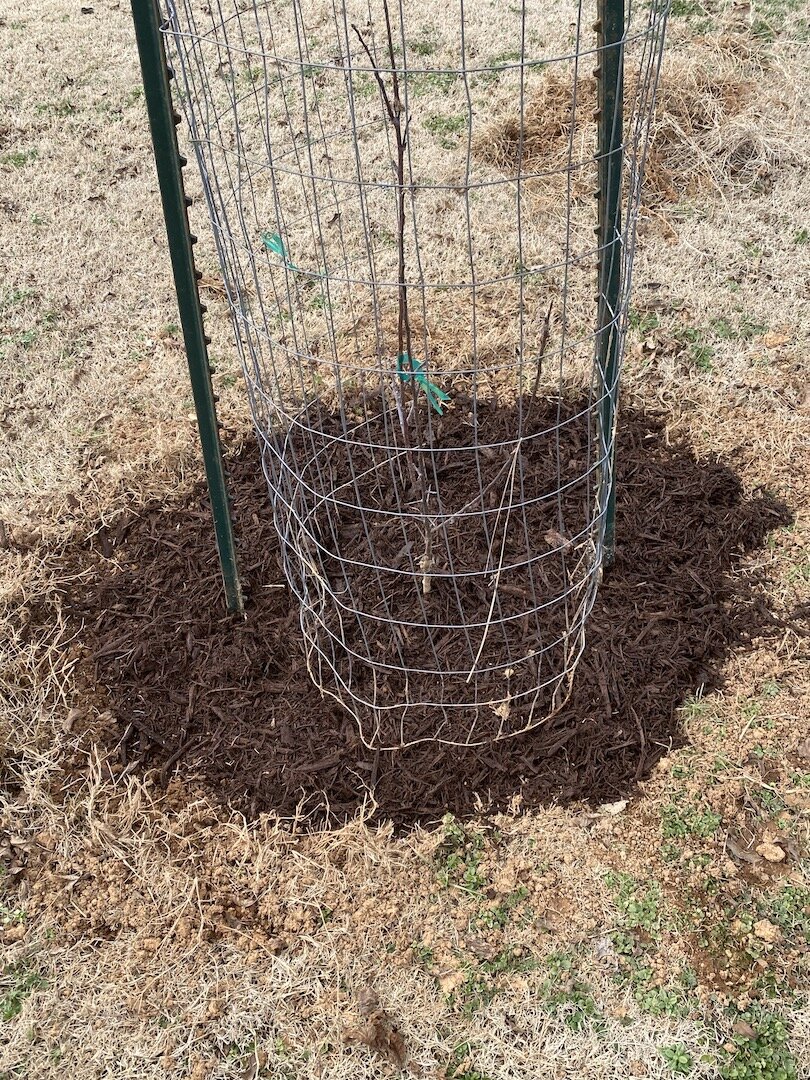
Over the weekend, Matthew and I did a bit more work on our second caterpillar tunnel. At this point, the only step remaining is stretching the plastic over the frame and securing it down. Erin and I will finish this last step Thursday morning, and then by the afternoon (when the forecast is calling for lots of rain) we will be able to stay dry and work inside the tunnels prepping the beds for planting.

In other news…. the most exciting thing that happened today was when I went to put my foot into my boot, which I quickly realized was filled with almonds. Yes, almonds. Why would my boot be filled with almonds, you ask? Well, I’ve lived in this 100 year old farmhouse long enough to know exactly who the culprit is… mice! Yep. Mice are notorious for packing away nuts and seeds (and honestly, whatever they can find) and storing them in closets, shoes, etc for later. One time, we even found a small mound of dog food stashed away inside the back corner of our oven. That was weird. We do set traps, which helps, but every now and then (especially in the winter) something strange like this will happen and we’ve learned to live with it (sorry mom). ;)

Later this week I’ll also be starting some seeds for our mini indoor greenhouse, so I’ll be sure to share some photos and resources about my method with y’all, as I know many of you are also planning to start your own seeds this year. Spring is around the corner!

Kitchen Notes

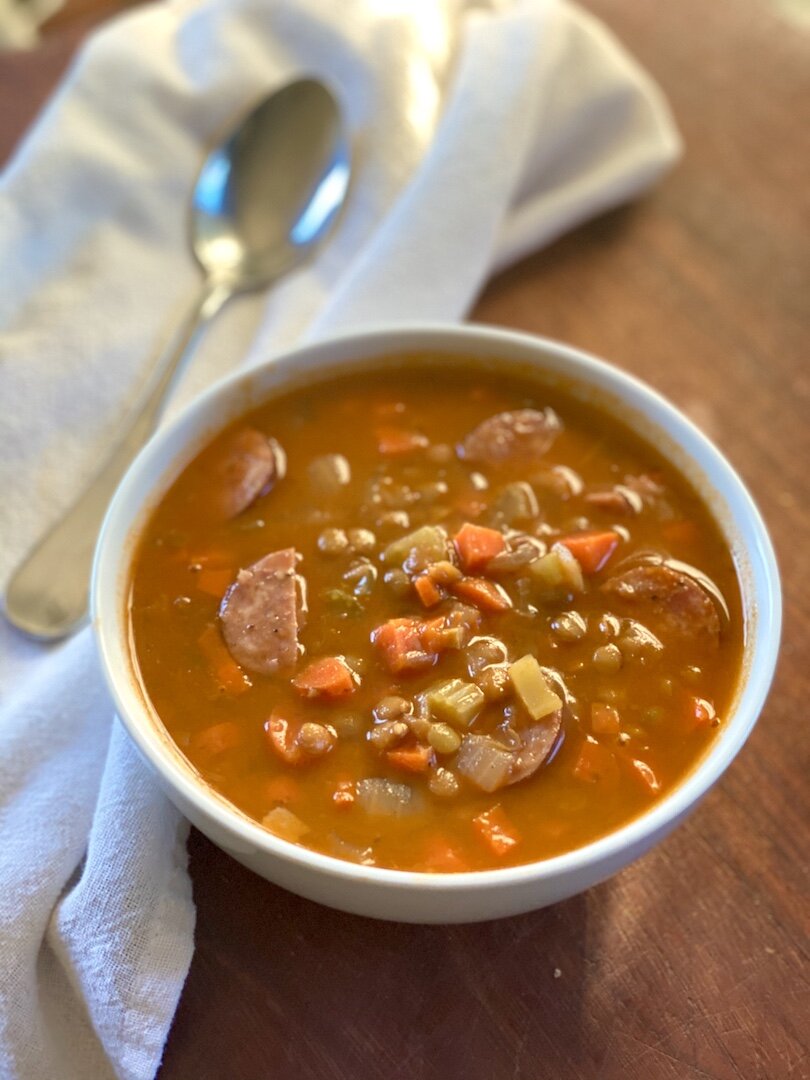
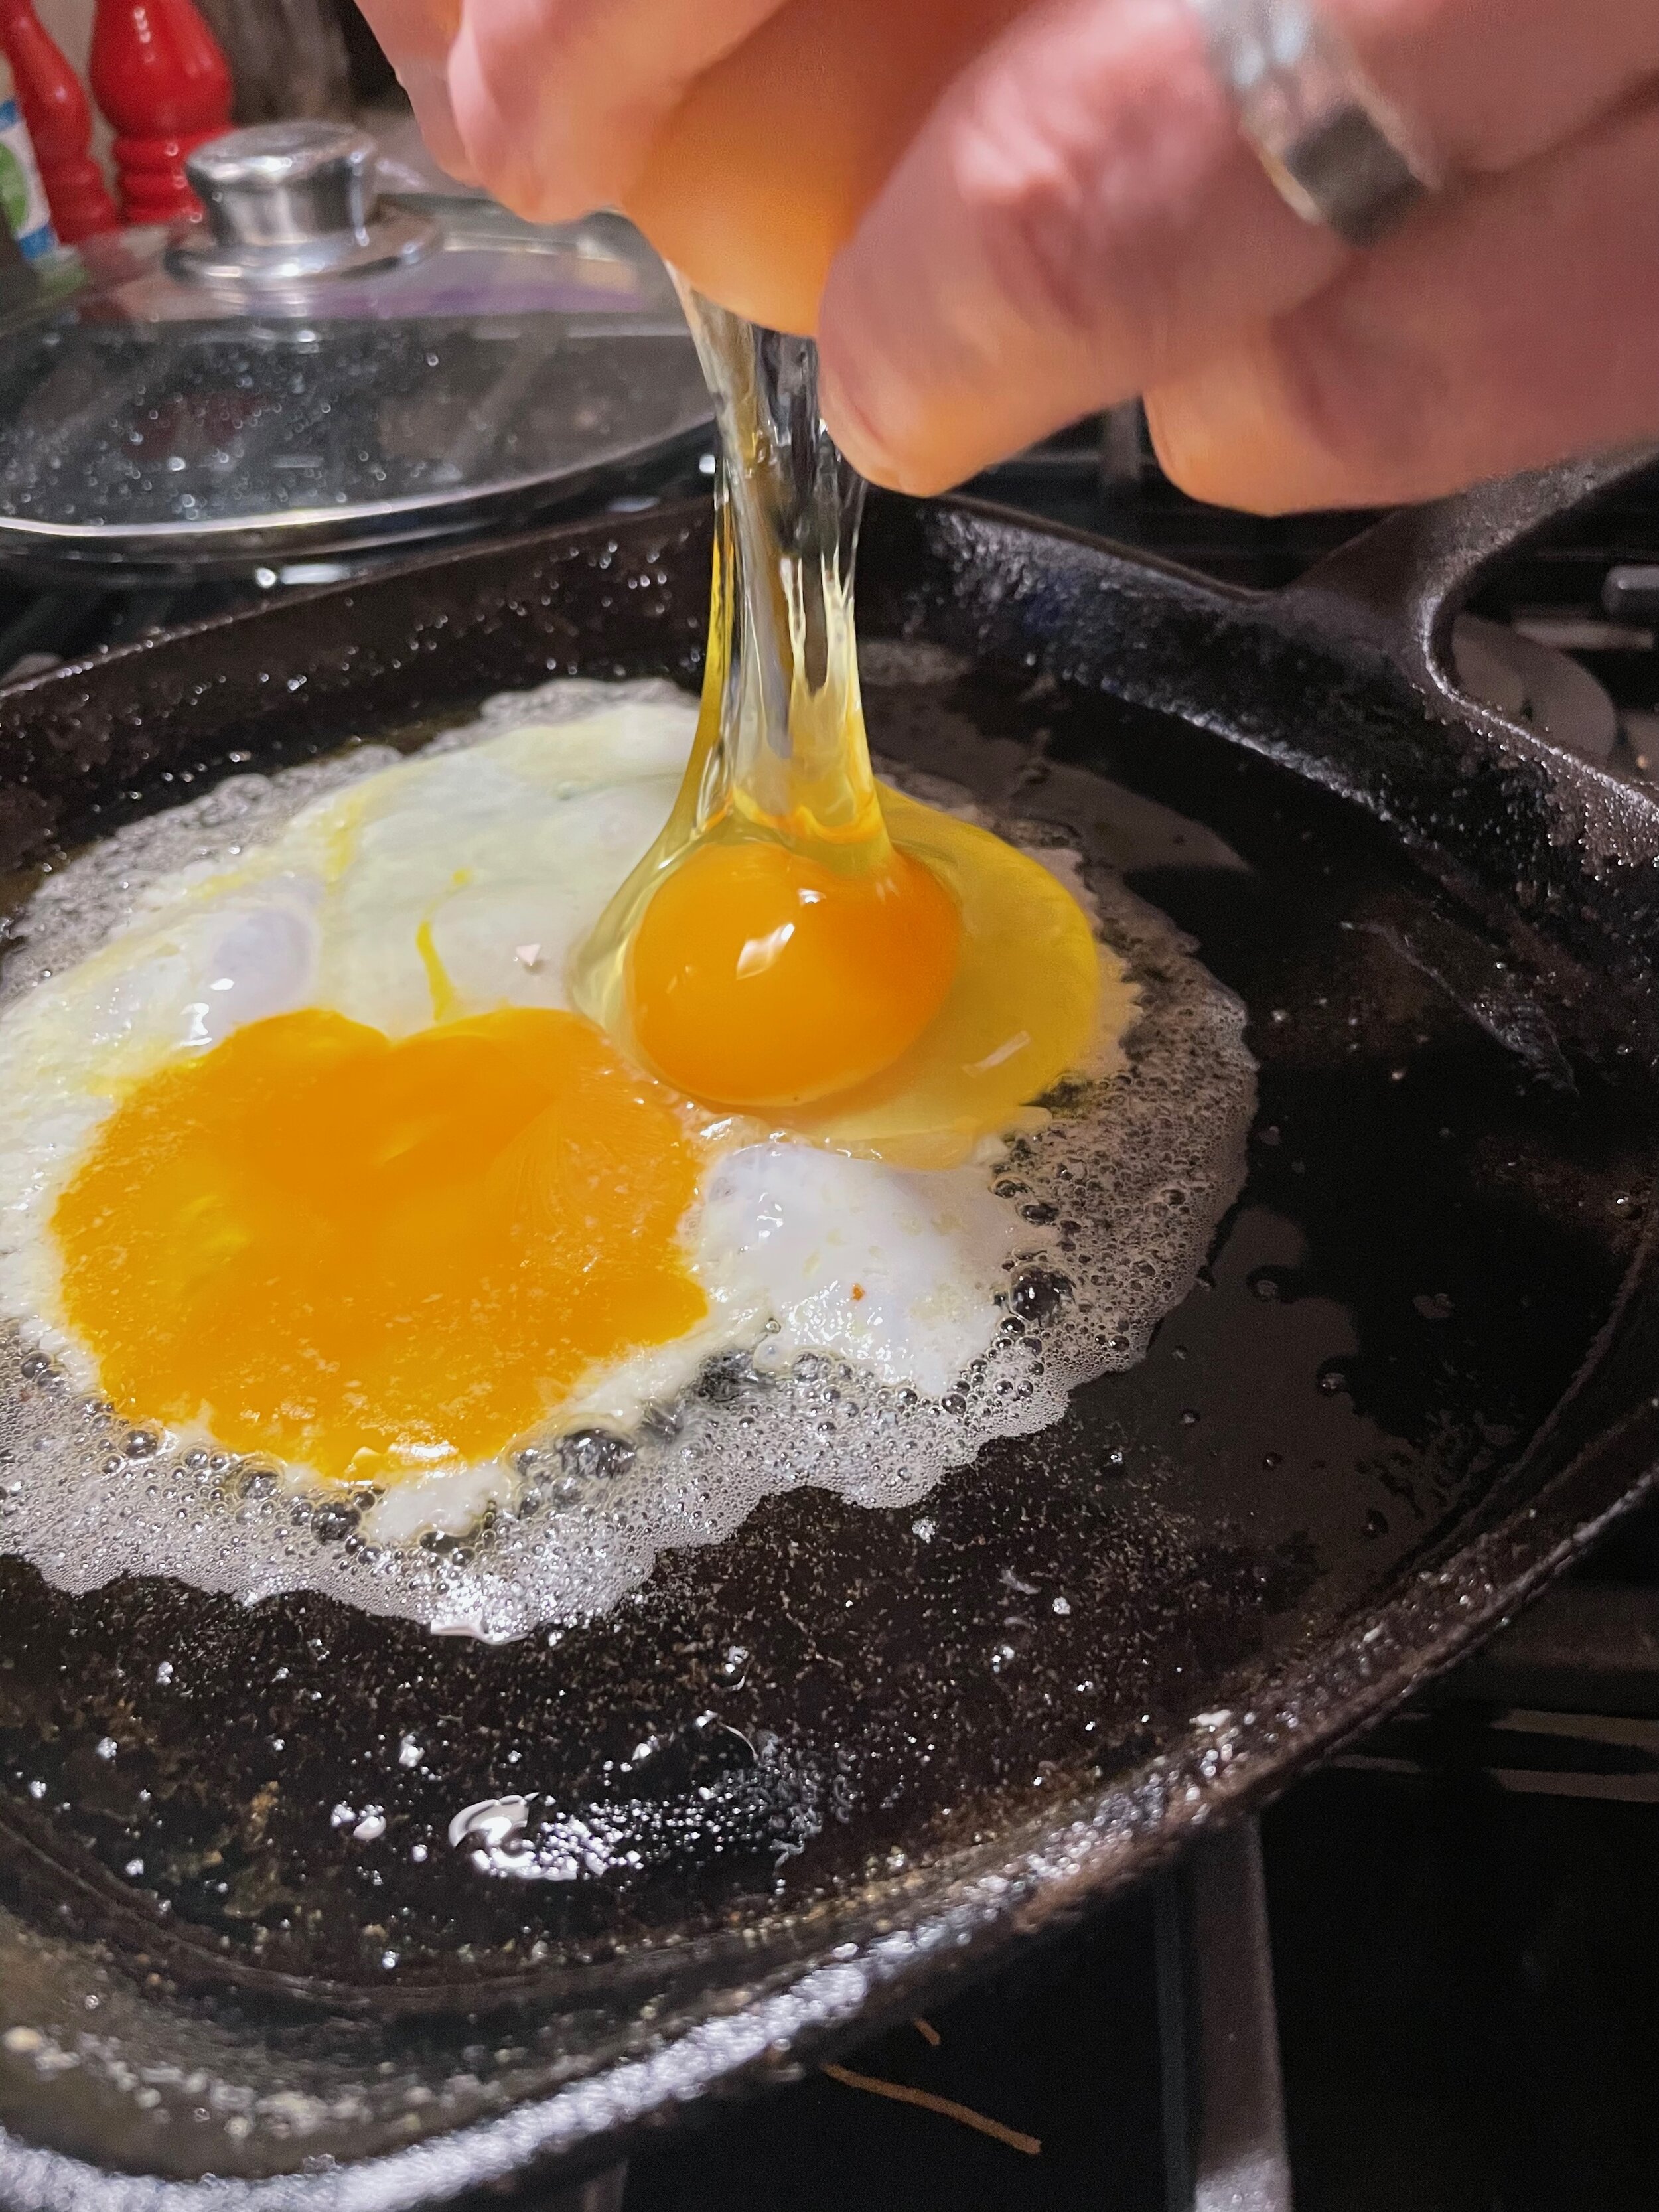
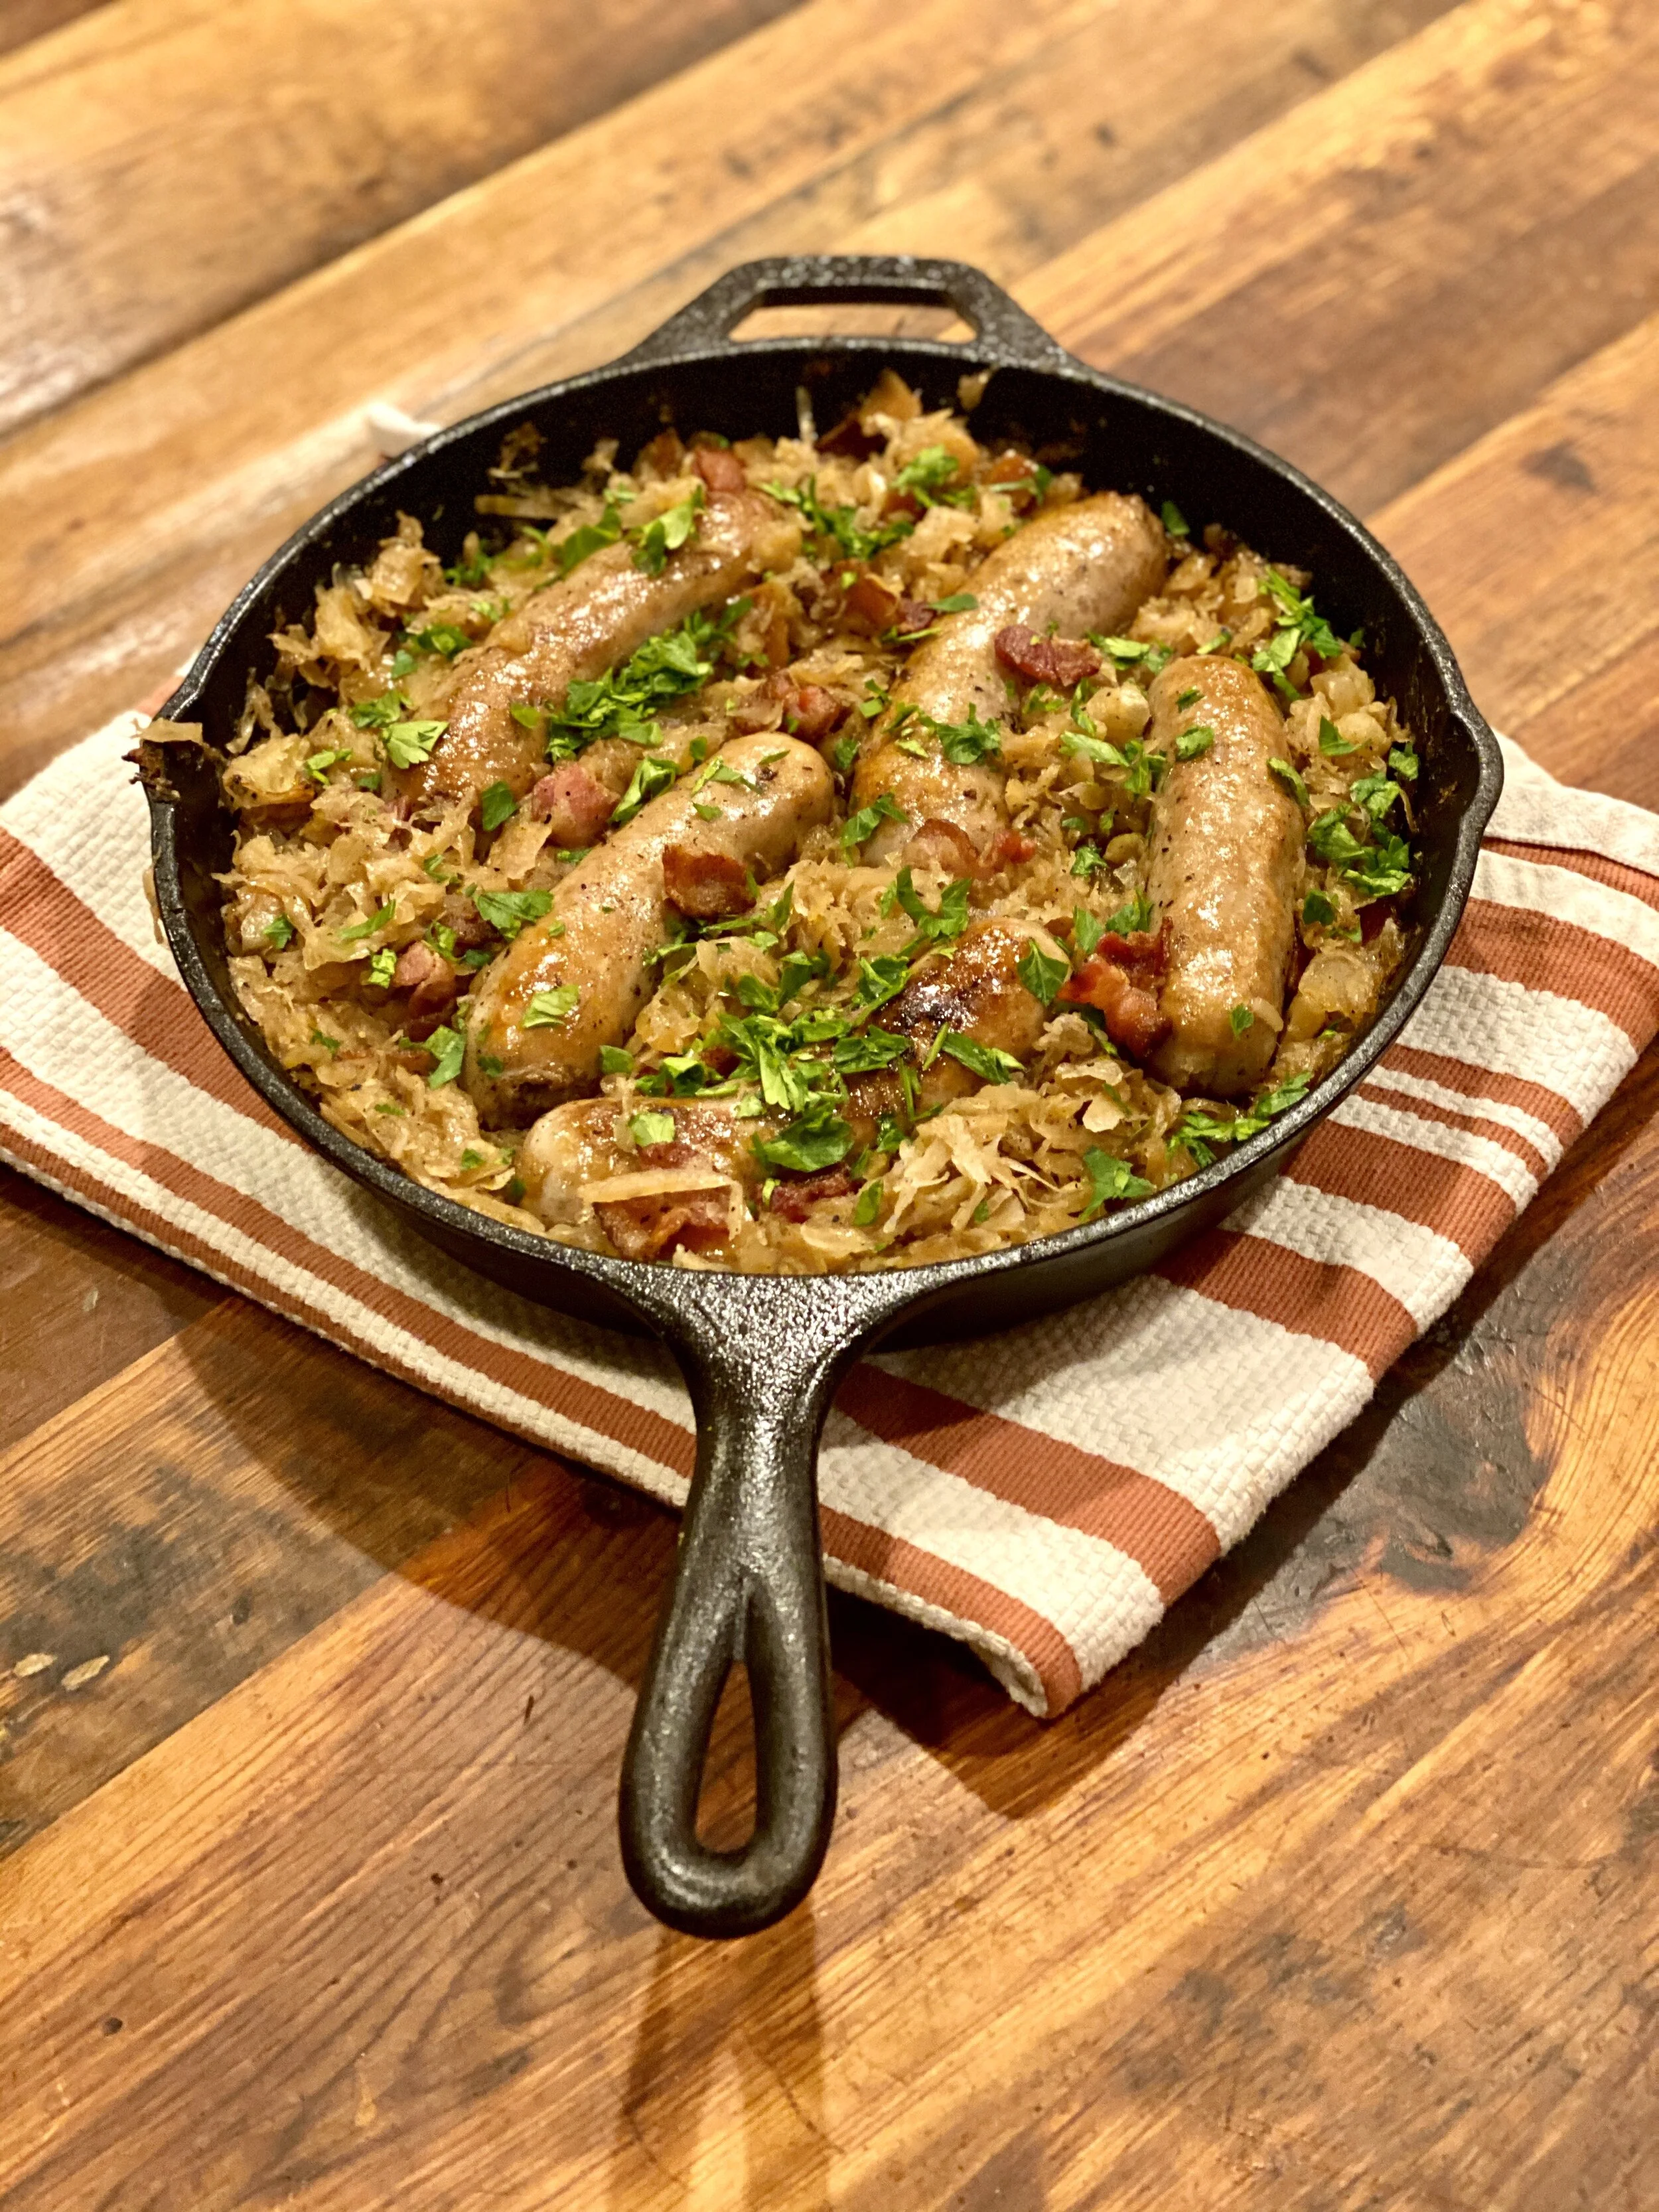
While I don’t reeeally care about sports / the superbowl, I never say no to an excuse to whip up some good food! So while it was just a party of two this year (ie Matthew and me), yesterday we made a feast of different snacks, dips, and some White Bean Chicken Chili to enjoy while I pretended to watch the football game. ;)

chickenchili_landscape-1.jpg

So let’s just focus on the chili, shall we? The recipe is below, but first I'm sharing a few quick tips for layering complex flavors into simple, nourishing soups.

The key to elevating a dish is layering flavor throughout the cooking process – so here are four tips for the next time you pull out your soup pot:

IT ALL BEGINS WITH AN ONION. Plain and simple – something magical happens when onions are softened in butter and/or olive oil. When sautéing onions, make sure the butter or oil is hot and sizzling before you toss in the onions, and add a pinch of kosher salt to pull out some moisture. As the onions begin to turn translucent and begin to caramelize, use a flat wooden spoon to scrape up and spread out those slightly browned bits (that's where all the flavor lives)!

TOAST YOUR AROMATICS. Once your onions are softened and golden, it’s time to add your minced garlic, spices, and/or dried herbs. Continually stir and toast the spices over medium heat for a minute or so before adding any additional liquid - you're building another key layer of flavor here!

ADD SOME FLAVOR BOOSTERS. The next time you have an extra rind of parmesan cheese hanging around, don't throw it away! I keep a ziplock bag in my freezer full of extra parmesan bits, because they are a dreamy addition to simmering soups. I throw in the rinds whenever I add the broth, as it adds creaminess and depth without overpowering the other flavors. Other go-to flavor enhancers for soups is a bit of acid - my favorites are lemon juice and apple cider vinegar, which add a little zip to an otherwise ho-hum soup.

FINISH WITH FRESH HERBS. This soup wouldn't be the same without a few handfuls of chopped parsley tossed in just before serving. If you're going to add fresh herbs, make sure to do it at the end of cooking, as fresh herbs have a more delicate flavor, which can get lost if added too early. Basil, cilantro, dill, and chives are some of my other favorite herb garnishes to kick a dish up a notch. 

Alright, time now for the recipe!

WHITE BEAN CHICKEN CHILI

chickenchili-5.jpg

INGREDIENTS

  • 2 tablespoons olive oil

  • 2 yellow onions, diced

  • 1 can (4-oz) diced mild green chiles

  • 2 tablespoons ground cumin

  • 1 tablespoon dried oregano

  • Kosher salt

  • 1/4 teaspoon crushed red pepper flakes

  • 4 cloves garlic, minced

  • 4-5 carrots, chopped in 1/4-inch rounds

  • 1 lb small red potatoes, washed and quartered

  • 3-4 lb cooked rotisserie chicken, meat removed and shredded

  • 5-6 cups chicken broth (or you can just use water)

  • 3 15-oz cans white beans

  • Handful of freshly chopped parsley

  • Shredded parmesan cheese (optional)

  • Plain greek yogurt (optional)

INSTRUCTIONS

  1. Heat olive oil over medium-high heat in a dutch oven or large saucepan. This recipe makes a lot of soup, so be sure to use a big pot! I usually use my 5.5 quart dutch oven. Add the diced onions and a pinch of kosher salt and cook until translucent and beginning to brown, stirring occasionally, 4-5 minutes.

  2. Stir in the can of diced green chiles and cook for 2 minutes, stirring occasionally. Add the cumin, oregano, red pepper flakes, garlic and 1 teaspoon kosher salt and cook for 1-2 minutes, until fragrant. Stir in the carrots and potatoes, coating them in the spices.

  3. Pour in the chicken broth (or water), bring to a boil, then lower the heat and gently simmer - partially covered and stirring occasionally - until the potatoes and carrots are tender, 15-20 minutes. Next, add the shredded chicken and white beans (I usually add the beans with their liquid, which gives the soup extra body), heat for until warmed through, 5-10 minutes. Taste and add more kosher salt to taste, and thin with more broth (or water) if needed.

  4. Turn off the heat and let the soup sit for 15-20 minutes to let the flavors meld together. Reheat if needed and serve topped with chopped parsley and shredded parmesan. This may sound weird, but I also love eating this with a dollop of tangy plain greek yogurt!

Today’s Stats

  • Low temp: 26F

  • High temp: 50F

  • Sunrise: 7:11am

  • Sunset: 5:52pm

  • Moon phase: Waning Crescent

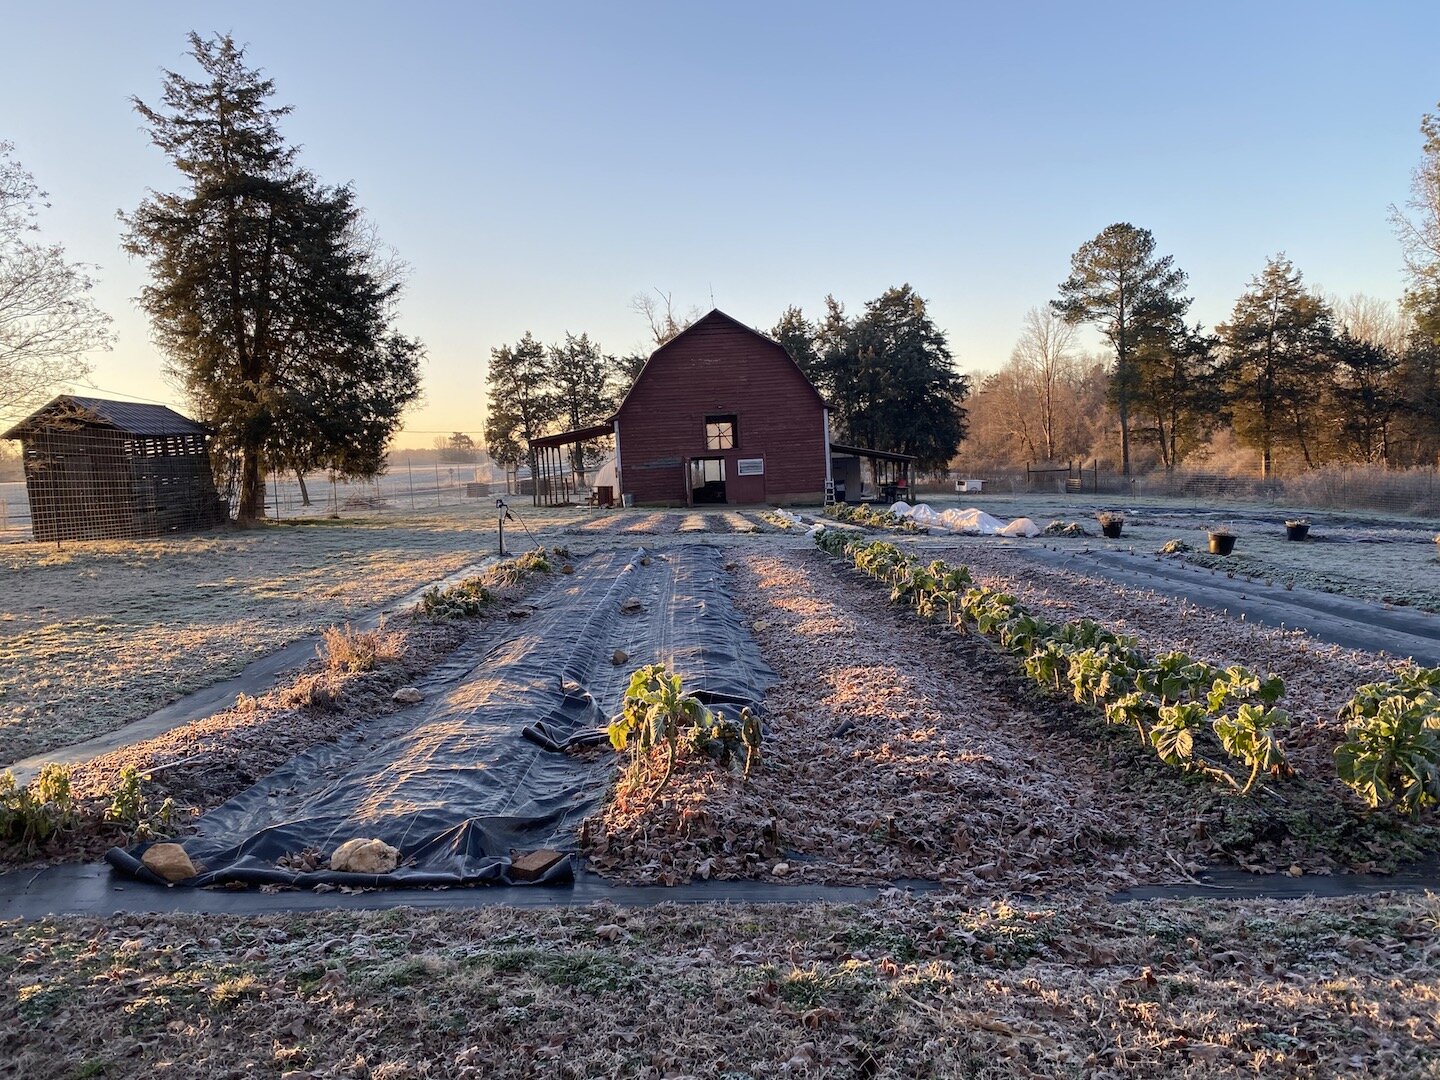
  • Additional notes: Hard frost in the morning, clear skies and sunny all day.


February 5

Farm Notes

Yesterday was a great day for building our second caterpillar tunnel! My friend and fellow farmer Erin joined me for a full day of first prepping the area where the tunnel is going, and then beginning the tunnel construction. (In case you missed it, I wrote a bit about our tunnels and how we use them in my previous post). Overall, everything went super smoothly, and we got a ton done. There are still a few steps to go before the tunnel is finished, but Matthew and I are going to do some work over the weekend, and we will have it completely finished by the end of next week.

Here are some photos from yesterday showing our progress:

This is the space where tunnel #2 is going – but first we had to rework the beds and measure out the space, and lay down landscape fabric along the long sides of the tunnel.

This is the space where tunnel #2 is going – but first we had to rework the beds and measure out the space, and lay down landscape fabric along the long sides of the tunnel.

Photo of the space after we measured out the space, laid down landscape fabric, and pounded in rebar every 5 ft down the long sides of the tunnel.

Photo of the space after we measured out the space, laid down landscape fabric, and pounded in rebar every 5 ft down the long sides of the tunnel.

After prepping the area for the tunnel, we focused on building out all the frames, which went surprisingly quickly. Once the frames were assembled, we carried them over one by one, and they slide over the rebar that we had pounded into the ground every 5 ft. We finished the day by installing the center purlin that goes across the very peak of the tunnel, which is by far the hardest task – but we got it done!

Frame assembly line!

Frame assembly line!

Tunnel frames in their proper places.

Tunnel frames in their proper places.

Just a few more framing steps to go, and then we can stretch the plastic covering over the frame and lock it into place. The tunnel is getting finished just in time, because our first seeds + seedlings are getting planted the week of February 15th (the week after next). We are timing our plantings with the goal of having veggies ready to re-launch the farmstand on the 3rd week of March... it’s crazy to think that spring is just around the corner!

Kitchen Notes

On Wednesday night this week, I was craving a really good roast chicken. No need to re-invent this well-worn culinary wheel… I turned to a favorite recipe from Alison Roman’s most recent cookbook, Nothing Fancy, for One-pot Roast Chicken with Caramelized Lemon and Dates. While one version of the recipe has you using a whole chicken (which is delicious) – but I didn’t have the time/patience to roast a whole chicken, so I used a version of the recipe that’s meant for smaller chicken parts, like thighs or quarters. All in all, the recipe took just 10 minutes of prep, followed by 25 minutes in the oven, and viola! We had a most delicious, one-pot dish of juicy, crispy-skinned chicken and some mouth-watering caramelized lemons, dates, and shallots that we spooned over brown rice.

So if you also find yourself craving a darn good roast chicken dish that goes from pot to plate in under 45 minutes, give this recipe a go. PS – If you’re looking for more crave-worthy recipes, I definitely recommend subscribing to Alison Roman’s weekly newsletter and/or tuning into the videos on her YouTube channel. There is a new video of Alison making this very chicken dish, so go check it out!

Alison Roman’s One-Pot Chicken with Caramelized Lemon & Dates

INGREDIENTS

  • ~3 lbs. bone-in, skin-on chicken quarters or chicken thighs

  • Kosher salt

  • Freshly ground pepper

  • 1 tablespoon canola oil

  • 1 lemon, cut into thick slices crosswise (about 1/4” thick), seeds removed

  • 2 shallots, peeled if you want, halved lengthwise (or one red onion, peeled and cut into wedges)

  • 6 medjool dates, pitted

  • 4 sprigs thyme or oregano, plus more for serving  

  • 1–2  teaspoons crushed red pepper flakes

INSTRUCTIONS

  1. Preheat oven to 425°.

  2. Season chicken with salt and pepper. Heat oil in a large dutch oven over medium–high heat. Place chicken, skin side down and using tongs or your hands (be careful!) press lightly to make sure the skin comes into even contact with the pot.

  3. Cook, without moving, until chicken is nice and browned, 5– 8 minutes. You will likely need to brown the chicken pieces in batches. Once you’ve finished browning a piece, remove it with tongs to a plate and a new piece in its place. A note that during this step while the chicken is browning, I’ll slices the lemons, shallots, and dates to speed up the prep for this dish.

  4. As you get to the end of browning the chicken, add the lemon slices to the pot, maneuvering the chicken as needed so that the slices come into contact with the bottom of the pot. Some of the chicken pieces will probably need to stay out of the pot a bit longer, for the lemon slices to fit.

  5. Let the lemons sizzle in the chicken fat until caramelized on one side, about 2 minutes. Add all the chicken pieces back into the pot (skin side up), along with the shallots, dates, thyme and 1.5 cups of water. Sprinkle the top of the chicken with crushed red pepper flakes and another pinch of salt.

  6. Place dutch oven in the oven (with the lid OFF the pot so the chicken skin can get crispy) and roast until the dates are plump, the lemon is jammy and the chicken is cooked through and golden (and a thermometer inserted into the thickest part of the chicken reads at least 165F).

  7. Remove from oven and let chicken rest in the dutch oven for 10 minutes before transferring it to a serving platter. Serve alongside shallots, lemons, and dates with some more thyme sprinkled over. I recommend enjoying with rice, and spooning some of the yummy juices from the dutch oven spooned over the rice.

  8. DO AHEAD: This chicken can be made a few hours ahead, kept in the dutch oven. If you wish to reheat it before serving, pop it back into the oven without a lid for 10–15 minutes or so.

Today’s Stats

  • Low temp: 38F

  • High temp: 55F

  • Sunrise: 7:14am

  • Sunset: 5:48pm

  • Moon phase: Waning Crescent

  • Additional notes: Cloudy and cool all day.

February 2

Farm Notes

It looks like we’re going to have a (small) window of dry weather this week, which is *fabulous* because on Thursday we’re going to build our next caterpillar tunnel! This will be our second 50ft Gothic Pro caterpillar tunnel on the farm, which will allow us to grow more veggies in the cold winter months, and it will house more tomatoes and peppers in the summer. The tunnels come as a kit from Farmers Friend, and while they are pretty straightforward to put together, it definitely takes a full day or two, and you’ll want some extra hands to help! Thankfully there are helpful videos about constructing these tunnels from Farmers Friend and on Josh Sattin’s YouTube channel.

Each salve begins with organic coconut and olive oil infused with medicinal plants grown at the farm.

Each salve begins with organic coconut and olive oil infused with medicinal plants grown at the farm.

But until Thursday, there’s not much action going on at the farm this week. In the meantime, I’m whipping up new batches of Farmbelly herbal healing salves! Each ingredient in this salve has been thoughtfully chosen for its healing properties, and it works like magic for moisturizing dry skin and for soothing cuts, scrapes, burns, or rashes.

The salve is made from organic coconut and olive oil that has been infused with three powerful medicinal plants grown right on our farm – calendula, comfrey, and plantain. The infused oil is then blended with local beeswax, and then fortified with Vitamin E and high quality essential oils: tea tree, lavender, and frankincense.

PS – There are only a limited number of salves available at this time, and I’m giving Farmbelly Club members first dibs! You’ll receive an email on Thursday with a link to order, and there will be an option to pick up here at the farm, or I can ship anywhere in the US.

IMG_2121.jpg
IMG_2114.jpg

Kitchen Notes

IMG_3131.jpg

It’s Tuesday, and if you’ve been following along, you know that means it’s frozen pizza + big green salad night! The other culinary highlight that happens on Tuesdays is I usually get all kinds of baked goodies from my friend Kathleen, amazing chef/baker/owner of KatesGoods!

Fun fact – Kathleen and I both attended the same culinary school in Ireland, called Ballymaloe, aka heaven on earth! Kathleen was one of the first local vendors to join our weekly farmstand last year, and even while the farmstand is on still break (till mid-March), folks in the Triangle area can still snag her delish goods! Weekly orders are due by Sundays at midnight, with pickup on Tuesday afternoons at multiple locations – Burlington, our farm (Saxapahaw), as well as a pickup at Locopops in Durham . Even if you’re not local to this area, I highly recommend following along + getting inspired by Kathleen’s culinary creations on her instagram!

Today’s Stats

  • Low temp: 31F

  • High temp: 42F

  • Sunrise: 7:17am

  • Sunset: 5:45pm

  • Moon phase: Waning Gibbous

  • Additional notes: Cold, windy, and mostly cloudy.

February 1

FARM NOTES

Yesterday it was miserably cold and rainy all. dang. day. – though yesterday we had some clear weather and got outside to do a bit more clearing work in the “Back 5”! We finally have all the downed trees cleaned up, and we’ll have the area bush-hogged in the next few weeks.

On Saturday we also pulled back a tarp that we laid down almost a year ago in the Back 5, and it’s amazing to see how effective it was in killing the grass and weeds (see photo below). There is definitely still a “bank” of weed seeds in the soil that will come back, but I’m going to broadcast a native perennial wildflower mix in this area, which will hopefully begin to re-take the space and start re-seeding itself as a vibrant pollinator habitat.

IMG_3085.JPG
IMG_3103.jpg

KITCHEN NOTES

Time for #sundaysoup! I really needed some inspiration this weekend, so I went back through the Flagstone Pantry recipe archives and was reminded of this delish recipe for Pumpkin & Peanut Soup that is literally perfect for cold + rainy winter days. (For background about my time working in the Flagstone Pantry kitchen back when we lived in Santa Barbara, read this post from a few weeks ago). I love this soup because it comes together in less than 30 minutes, and the end result is velvety smooth and chock-full of flavor. And the leftovers are even better!

PUMPKIN & PEANUT SOUP

Serves 6

IMG_3114.jpg

INGREDIENTS

  • 2 tablespoons olive oil

  • 2 medium yellow onions, diced

  • 3 cloves garlic, minced

  • 1/2 teaspoon turmeric

  • 1 teaspoon paprika

  • 1 teaspoon chili pepper flakes

  • 2 15-ounce cans solid-pack pumpkin puree

  • 3 cups chicken or vegetable broth (possibly more)

  • 1 16-ounce jar roasted red peppers, drained

  • 2 tablespoons tomato paste

  • 2/3 cup natural peanut butter

  • 2 tablespoons apple cider vinegar

  • salt and pepper to taste

  • Yogurt (optional garnish)

INSTRUCTIONS

  1. Heat oil in a saucepan over medium-high heat. Add diced onion and cook, stirring, until no longer translucent and beginning to brown, 5-6 minutes. Add garlic and cook an additional 2 minutes.

  2. Add turmeric, paprika, and chili flakes; stir. Add pumpkin puree, broth, peppers, tomato paste, and peanut butter; whisk to incorporate and bring to a boil. Reduce heat, simmer for 5 minutes, then add apple cider vinegar along with salt and pepper to taste (start with 1 teaspoon salt and 1/2 teaspoon pepper).

  3. Remove the pot from heat. Using a stick/immersion blender, puree soup until smooth (or use a blender to puree in batches). Add additional broth as needed to achieve desired consistency.

  4. Taste again for seasonings, adding vinegar, salt and pepper to taste. This soup is especially nice topped with a dollop of plain yogurt, some fresh green herbs, and chopped peanuts or almonds.

TODAY’S STATS

  • Low temp: 30F

  • High temp: 40F

  • Sunrise: 7:18am

  • Sunset: 5:43pm

  • Moon phase: Waning Gibbous

  • Additional notes: Cold and rainy all. dang. day!

January 29

Farm Notes

This week was mostly spent inside “computer farming,” and I was able to put the finishing touches on our 2021 planting plan. The planting plan I make is a visual one – it’s a master spreadsheet that maps out on overhead view of each row of the garden, and for every month I make a new “sheet” to show how the rows will change over the course of the growing season. To help you visualize what I’m talking about (and to offer you a template to use if this is helpful for you), here is an excerpt of our planting plan, where you can see our plan for the months of March and April.

In the planting plan, I also include information about how a certain crop will be spaced within the row (for example, when we plant tomatoes, I include info that we will plant one row of tomatoes down the middle, and each plant is spaced 18” apart). I also mark on the spreadsheet the expected planting date – which I’ll update after we do the actual planting, as my expected planting dates aren’t always correct! I also have a “sheet” titled Seeding Calendar, where I keep track of when I need to start seeds to have them ready to transplant into the garden at the right time. While I work with other farms/nurseries to start the majority of our seedlings, I enjoy starting my own seeds for things that are a bit funky (like edible flowers), and for seeds that only take a few weeks to start (like anything in the cucurbit family - cucumbers, zucchini, etc). Not sure when to start seeds indoors? Here’s a great guide that is customized by zip code that is an awesome resource!

I find that this process of mapping out the whole season is incredibly helpful, and means that when thousands of seedlings arrive and are ready to be planted, I know exactly where they are going to go. It’s also useful for planning out next year (ie 2022), because I make sure to rotate different crop families - ex: I’ll make sure that I don’t plant our brassicas (broccoli, cabbage, kale, etc) in the same place two years in a row. The reason we rotate crops is to ensure we don’t deplete the soil of nutrients, and because it really helps with pest/disease management to move the different crop families around each season. For more information about crop rotation and why it’s important, check out this article.

If you have a home garden, you can definitely still make a planting plan, even if you have a much smaller space! Just create a layout for your garden space on a spreadsheet (or even with pen on paper) and start filling in details about where certain plants will go and when you plan to plant them.

If you have questions about this process, I’m happy to help! Feel free to leave a comment below, or submit your questions here, which I’ll do my best to answer at our next Zoom Q & A session (which will be on Sunday, February 21st @ 3pm EST).

A snapshot of our April planting plan.

A snapshot of our April planting plan.


Kitchen Notes

Most of our dinners start with the same question: What ingredient do we have a lot of in the pantry (or fridge)? Tonight, I realized we had heaps of polenta on our hands – and while I don’t have any concerns about the polenta going bad in the pantry – I immediately went to my mental list of recipes that involve polenta. The most delicious thing that popped into my head is exactly what I decided to make… it’s my take on Shrimp & Grits, which I call Saucy Shrimp & Polenta. If you’re new to polenta… they are just like grits (and in my potentially blasphemous opinion, better than grits)! Here’s a helpful article about polenta if you’re curious to learn more.

This isn’t the most “seasonal” meal (considering it’s the dead of winter and the main veggies are peppers and tomatoes), but thankfully I had a bunch of peppers and cherry tomatoes stashed in our freezer from the height of last summer’s growing season. But even if you don’t have home-grown veggies at hand, sometimes you just gotta make what you’re craving, even if it’s not exactly in season.. ya know? I firmly believe there should never be shame when it comes to home cooking.

So here’s my recipe – which, I’ll admit, looks way longer/more complicated than it actually is! When it comes to making the saucy shrimp, it’s all about creating layers of flavor – starting by cooking the bacon, and then the seasoned shrimp in the bacon fat, followed by the aromatics and veggies, and finally adding liquid to bring it all together together. With each step, you’re creating layers of complex flavor that will be totally worth it in the end, I promise!

Saucy Shrimp & Polenta

IMG_3080.jpg

INGREDIENTS

For the Polenta

  • 3 cups whole milk

  • 2 cups water

  • 1 tablespoon olive oil

  • 1 tablespoon kosher salt, plus more to taste

  • 2 cups polenta

  • 1/2 cup grated parmesan cheese

  • 2 tablespoons butter

  • Freshly ground pepper

For the Saucy Shrimp

  • 4 slices bacon, diced

  • 1 lb large shrimp, shelled and deveined, tails removed

  • 2 teaspoons Old Bay (or preferred seasoning mix)

  • 1 small yellow onion (or shallot), finely diced

  • 2 cloves garlic, minced

  • Salt

  • 2 tablespoons tomato paste

  • 1 teaspoon cumin

  • 1 teaspoon paprika

  • 1 teaspoon dried oregano

  • 1/4 teaspoon red pepper flakes

  • 2 yellow, red, or orange bell peppers, finely diced

  • 1/2 cup dry white wine

  • 1 cup chicken or vegetable broth

  • 1 tablespoon cornstarch (optional)

  • 2 cups cherry tomatoes, cut in half

  • 1-2 tablespoons red wine vinegar

  • 1/2 cup heavy cream or half & half (optional)

INSTRUCTIONS

For the Polenta

  • In a medium saucepan, combine the milk, water, olive oil, and salt and bring to a simmer over high heat. Be careful, as this mixture can boil-over quickly!

  • Reduce heat to low and slowly whisk in the polenta, stirring constantly until it thickens, 10-15 minutes, adding more water or milk as needed. 

  • Turn the stove off and stir in the parmesan cheese and butter. Taste and adjust seasoning as needed. If the polenta seems too thick, just add a bit more water or milk.

For the Saucy Shrimp

  • Begin by patting the shrimp dry and tossing in a bowl with 2 teaspoons of Old Bay (or your preferred seasoning) and set aside.

  • Cook the diced bacon over medium-high heat in a large non-stick skillet until crisp. Remove bacon with a slotted spoon, transferring to paper towels to drain. Set aside. Pour off all but 2-3 tablespoons of bacon fat.

  • Add the seasoned shrimp to the skillet and cook in the bacon fat over medium-high heat until only just cooked and no longer translucent – about 2 minutes total, stirring as needed to make sure all sides are cooked. Use a slotted spoon to transfer the shrimp to a bowl and set aside.

  • If the skillet looks try, add another tablespoon or two of bacon fat (or butter or olive oil). Add the diced onions, minced garlic, and 1/4 teaspoon salt into the skillet and cook over medium heat until softened and beginning to brown, 4-5 minutes.

  • Add the tomato paste, cumin, paprika, oregano, red pepper flakes, and a pinch of salt and stir until well combined and fragrant, about a minute. Stir in the diced peppers and coat in the tomato paste and spices and cook for another minute over medium-high heat.

  • Add 1/2 cup dry white wine to the pan and use a flat wooden spoon to loosen any brown bits from the bottom of the skillet (this is where the flavor lives)! Once the wine has reduced by about half, stir in 1 cup chicken or vegetable stock to the skillet. Bring to a simmer and stir in 1 tablespoon cornstarch (optional, but will help thicken the sauce). Allow the sauce to simmer over medium heat for 4-5 minutes to soften the peppers and reduce the liquid.

  • Add the bacon, shrimp, and halved cherry tomatoes to the skillet and stir to combine. Add 1-2 tablespoons red wine vinegar and 1/2 cup heavy cream (if using). Simmer gently for another few minutes, or until the sauce reaches a consistency to your liking. Taste and adjust seasoning as needed.

To Serve

  • Warm the polenta over very low heat, if needed. If the polenta is too thick, add a bit of milk or water to thin and stir well to combine.

  • Scoop the creamy polenta into bowls to serve an top with the saucy shrimp. Garnish with fresh green herbs (like chives or parsley) and enjoy!

Today’s Stats

  • Low temp: 28F

  • High temp: 41F

  • Sunrise: 7:20am

  • Sunset: 5:41pm

  • Moon phase: Waning Gibbous

  • Additional notes: COLD and clear all day.

January 27

Farm Notes

Well, the most exciting thing that happened today on the farm was an early morning delivery of pine “nuggets” (aka shredded pine bark, aka mulch)! We will be spreading this shredded pine bark around the blueberry patch over the next few weeks. I specifically chose pine bark for the mulch, because pine is naturally acidic, which the blueberries prefer.

And now, because I’m sure you’re just dying to see, here’s a photo of the pile of pine nuggets.. riveting stuff, I know! ;)

IMG_3047.JPG
IMG_3048.JPG

Kitchen Notes

If you’re a fan/follower of Alison Roman, than there is a 99% chance that you have made (or at least heard of) #thestew. If you have no idea what I’m talking about, I’ll explain… back in 2018, the cook/writer/instagram queen Alison Roman published a recipe in NY Times that basically broke the internet. And by that, I mean that for several weeks, seemingly everyone was cooking, talking/gossiping about, and posting photos of their versions of #thestew – not to mention there were shortages of cans of coconut milk and chickpeas in grocery stores nationwide (not kidding).

And while many still question whether it’s really a stew (or rather a curry? or just a plain soup?) most anyone who’s made the recipe will agree it’s a pretty foolproof, seriously flavorful recipe that is perfect for whipping up on a weeknight. It all comes together in less than an hour (and most of that time, it’s just simmering while you’re doing other things), and it calls for ingredients you likely already have in your pantry and fridge.

This is all a very longwinded way of saying that tonight I had a hankering for #thestew, so that’s exactly what I made. The one adaptation I make to the recipe is adding 2-3 cups of whatever extra veggie I have on hand (like chopped carrots, cauliflower florets, or potatoes), just to add a bit more veg in there. And it was perfect. And the leftovers tomorrow will be even better. See below for the recipe… and if you make it, let me know how it goes!

Alison Roman’s Spiced Chickpea Stew With Coconut and Turmeric

Photo credit: Michael Graydon & Nikole Herriott for The New York Times. Prop Stylist: Kalen Kaminski.

Photo credit: Michael Graydon & Nikole Herriott for The New York Times. Prop Stylist: Kalen Kaminski.

Ingredients

  • ¼ cup olive oil, plus more for serving

  • 4 garlic cloves, chopped

  • 1 large yellow onion, chopped

  • 1 (2-inch) piece ginger, finely chopped

  • Kosher salt and black pepper

  • 1 ½ teaspoons ground turmeric, plus more for serving

  • 1 teaspoon red-pepper flakes, plus more for serving

  • 2 (15-ounce) cans chickpeas, drained and rinsed

  • 2 (15-ounce) cans full-fat coconut milk

  • 2 cups vegetable or chicken stock

  • 2-3 cups cauliflower florets (or chopped carrots or quartered yukon gold potatoes).

  • 1 bunch Swiss chard, kale or collard greens, stems removed, torn into bite-size pieces

  • 1 cup mint leaves, for serving

  • Yogurt, for serving (optional)

Instructions

  1. Heat 1/4 cup oil in a large pot over medium. Add garlic, onion and ginger. Season with salt and pepper, and cook, stirring occasionally until onion is translucent and starts to brown a little at the edges, 3 to 5 minutes.

  2. Add 1 1/2 teaspoons turmeric, 1 teaspoon red-pepper flakes, and the chickpeas, and season with salt and pepper. Cook, stirring frequently, so the chickpeas sizzle and fry a bit in the spices and oil, until they’ve started to break down and get a little browned and crisp, 8 to 10 minutes. Remove about a cup of chickpeas and set aside for garnish.

  3. Using a wooden spoon or spatula, further crush the remaining chickpeas slightly to release their starchy insides. (This will help thicken the stew.) Add coconut milk and stock, and season with salt and pepper. If you’re going to add a few extra cups of veggies to this stew, now is the time to add them to the pot.

  4. Bring to a simmer, scraping up any bits that have formed on the bottom of the pot. Cook, stirring occasionally, until stew has thickened, 30 to 35 minutes. (Taste a chickpea or two, not just the liquid, to make sure they have simmered long enough to be as delicious as possible.) If after 30 to 35 minutes, you want the stew a bit thicker, keep simmering until you've reached your desired consistency.

  5. Add greens and stir, making sure they’re submerged in the liquid. Cook until they wilt and soften, 3 to 7 minutes, depending on what you’re using. (Swiss chard and spinach will wilt and soften much faster than kale or collard greens.) Season again with salt and pepper.

  6. Divide among bowls and top with mint, reserved chickpeas, a scoop of yogurt (optional) a sprinkle of red-pepper flakes and a good drizzle of olive oil.

Today’s Stats

  • Low temp: 41F

  • High temp: 51F

  • Sunrise: 7:21am

  • Sunset: 5:39pm

  • Moon phase: Waxing Gibbous

  • Additional notes: Cold and rainy morning, followed by a glorious blue sky + sunny afternoon.

January 25

Farm Notes

It was cold and rainy all day, which was a great excuse to get some “computer farming” done! Computer farming is my term for all the planning, estimating, calculating, ordering for the farm that often happens while staring at a computer screen. I’m someone who likes detailed plans and organized spreadsheets… even though my best laid plans can often go out the window once the growing season gets rolling!

Today my computer farming consisted of finalizing the quantities and varieties of all the tomatoes, peppers, and eggplant that we’ll grow this year. I’m working with a few local farmer friends who will be starting these seedlings, and believe it or not, seeding for these plants will need to begin in the next few days! A note that if you’re planning to start your own seeds, but haven’t purchased them yet, now is the time! Due to extraordinary demand this year, most seed companies (my favorites are Johnny’s, Territorial Seed, High Mowing, and Southern Exposure) are really delayed shipping out orders, and lots of seeds are sold out. If you can’t find what you’re looking for online, try visiting your local farm/garden store, as they will likely have seeds available for you.

Here’s a rundown of all the tomato, pepper, and eggplant varieties we plan to grow this year (which will get planted in early to mid April):

TOMATOES – A note that we grow the majority of our tomatoes inside our 50 foot caterpillar tunnels, as tomatoes like to be warm, but they don’t like to get wet (if they are constantly wet, they’re susceptible to fungus). We do usually grow a later succession of tomatoes outside, but we have the best luck focusing our energy in the tunnel.

IMG_9586.jpg

Cherry Tomatoes

  • Sakura

  • Sungold

  • Black cherry

  • Blush

  • Juliet

Heirlooms & Slicers

  • BHN 589 (slicers)

  • Brandywine

  • Caiman F1

  • Copia

  • Cherokee Purple

  • Marnouar

  • Striped German

  • Valencia

Paste Tomatoes

  • Plum Regal

  • Roma VF Paste Tomato

PEPPERS – We like to grow a variety of peppers – from sweet, to sometimes sweet/sometimes hot frying peppers, to super hot. We’ll grow some of these in our caterpillar tunnels (especially varieties that take a long time to ripen and are prone to rot if they get too wet), but most will be grown outside. Peppers require a lot of patience, as we plant them in mid-April and often don’t get ripe fruit until July or August.

IMG_9797.JPG

Sweet Peppers

Frying Peppers

  • Jimmy Nardello

  • Padron

  • Poblano

  • Shishito

Hot Peppers

  • Cayenne

  • Jalapeno

  • Serrano

  • Thai Chili

EGGPLANT – While I love eggplant, I’ve learned that most of our customers don’t want eggplant every week like I do! So this year, I’ve scaled back the number of varieties (and quantities) of eggplant that we will grow. Here are the classics that we’ll have this season:

IMG_0038.jpg


Kitchen Notes

Tonight we’re enjoying leftovers from yesterday’s #sundaysoup, which was a simple beef chili inspired by this recipe. I was able to use corn that we grew here last year and stashed away in the freezer, which added some summer brightness to a cold and dreary winter night!

TODAY’S STATS

  • Low temp: 36F

  • High temp: 45F

  • Sunrise: 7:23am

  • Sunset: 5:37pm

  • Moon phase: Waxing Gibbous

  • Additional notes: Cold and rainy all day.

January 21

FARM NOTES

Alright y’all, the blueberries are officially (finally) in the ground! It was a long day, and every muscle in my body is aching, but hot dang it we got it done. As I’ve mentioned in earlier entries, this is my first time really working with blueberries, so I did a lot of research and asked a lot of questions to make sure I didn’t f*ck it up. And so, hopefully any of you who would like to plant blueberries in the near future (whether it’s just one bush or a whole field of them) will find this info useful… keep scrolling for photos + explanations for how it all went down:

First things first, you gotta dig some holes. Each hole was (roughly) 18” deep and 2 feet wide. Next, we refilled each hole about halfway (so 9-10”) with 1/3 compost, 1/3 peat moss (to lower the pH in the soil), and 1/3 native soil (that was displaced when we dug the hole).

Holes dug 18” deep and 2 ft wide.

Holes dug 18” deep and 2 ft wide.

Each hole refilled halfway up with 1/3 compost, 1/3 peat moss, 1/3 native soil

Each hole refilled halfway up with 1/3 compost, 1/3 peat moss, 1/3 native soil

Next, we laid down a 4 ft wide strip of landscape fabric and stapled it down at the ends of the row. We decided to plant the blueberries into landscape fabric to help with weed/grass suppression (and I know I’m going to be thanking myself come July when alllllll the weeds are growing like crazy), but you could certainly skip this step. Then we took a handheld torch (like this one.. just $16! But don’t forget to buy some butane too) and burned and 1.5 foot wide holes in the fabric directly above where each hole was dug.

After that, it’s time to plant! We gently removed the blueberries from their pots and set them into the hole, reaching under the fabric to push back the displaced soil and refill any gaps, making sure to press everything in tightly. We also mulched around the top of each plant with an additional scoop of compost and peat moss, and then gave them a good drink of water with the hose. To finish off the row, we used 6” landscape staples to secure the long sides of the fabric down.

Burning holes into the landscape fabric.

Burning holes into the landscape fabric.

Time to plant!

Time to plant!

With the first row down, we got to do it all over again… twice! Lucky us. ;)

A note that we planted 9 blueberries in each row, spaced 5 ft apart (so each row is ~45 ft long). There is 10 ft in between each of the rows, to allow ample space to harvest from the bushes as they get older/bigger.

Starting on Row #2.

Starting on Row #2.

(Almost) finished!

(Almost) finished!

The final step that we didn’t quite finish today is laying down additional strips of landscape fabric in the pathways in between the rows. Once the fabric is stapled down, we will put down a nice layer of pine bark mulch – which is much nicer to look at than a bunch of landscape fabric, and will also help cut down on weed pressure.

Well friends, there you have it, blueberry planting 101. Happy to (try to) answer any additional questions you have in the comments!

KITCHEN NOTES

I’m really sure what got into me, but after a long day in the dirt I decided it was a good idea to whip up some butternut squash risotto for dinner, and dang it was SO GOOD. I’ll admit that when I usually think about making risotto, I assume it’s going to be a giant pain (ie lots of standing over a pot and constantly stirring) and I end up making something else. And sometimes, you just want a warm, creamy, salty bowl of risotto, ya know? So, while there was a good amount of stirring involved, I surprised myself with how quickly it all came together. I didn’t really use a specific recipe, but found this straightforward one from The Kitchn, which I’ve shared below in case any of y’all have a hankering for b-nut risotto now…

Butternut Squash Risotto

Photo via The Kitchn.

Photo via The Kitchn.

Ingredients

  • 8 cups low-sodium chicken or vegetable broth

  • 3 tablespoons butter, divided

  • 1 medium butternut squash (about 2 1/2 pounds), peeled and cut into 1/2-inch pieces (about 4 cups)

  • 1 1/2 tablespoons chopped fresh sage leaves

  • 1 teaspoon kosher salt, divided

  • 1/2 teaspoon freshly ground black pepper, divided

  • 1 large shallot (or white/yellow onion), finely chopped

  • 2 cups arborio rice

  • 1/2 cup dry white wine

  • 1 cup finely grated Parmesan cheese (about 2 ounces), plus more for serving

Instructions

  1. Place the broth in a medium saucepan over low heat and keep it at a very low simmer.

  2. Melt 1 tablespoon of butter over medium heat in a large, high-sided sauté pan or Dutch oven. Add the butternut squash, sage, 1/2 teaspoon of the salt, and 1/4 teaspoon of the pepper, and cook until the squash is lightly caramelized and tender, 10 to 12 minutes. Transfer the squash to a plate and set aside.

  3. Melt another 1 tablespoon of butter in the pan. Add the shallots (or onions) and sauté until fragrant and beginning to soften, about 4 minutes.

  4. Add the rice and cook, stirring until the edges have turned translucent but the center is still opaque, about 2 minutes. Add the wine and simmer, stirring constantly, until the wine has completely reduced and the pan is nearly dry, about 3 minutes.

  5. Begin incrementally adding the broth one ladle at a time, stirring constantly. Wait until the liquid has been almost completely absorbed by the rice before adding another ladle. After about 12 minutes, stir in the remaining 1/2 teaspoon salt and 1/4 teaspoon pepper and begin tasting the rice to gauge how far it has cooked.

  6. Continue adding broth until the rice is al dente (still has a bit of chew), the broth is creamy, and the dish has the consistency of thick porridge, 20 to 30 minutes total (you might not use up all of the broth). If you run your spatula through the risotto, the risotto should flow slowly to fill in the space.

  7. Remove the pan from the heat. Stir in the reserved squash, Parmesan, and remaining 1 tablespoon butter until melted. Taste and season with salt as needed. Serve immediately, garnishing each bowl with additional Parmesan cheese.

TODAY’S STATS

  • Low temp: 30F

  • High temp: 55F

  • Sunrise: 7:25am

  • Sunset: 5:33pm

  • Moon phase: Waxing Gibbous

  • Additional notes: Cold and cloudy in the AM, turning to blue skies in the afternoon.

January 19

FARM NOTES

Houston, we have blueberries! Today I picked up 27 blueberry plants from Finch Blueberry Nursery, based about 90 minutes east in Bailey, NC. I had to get a biiiit creative fitting them all into my little wagon, but we figured it out by wrapping each plant in a trash bag (to catch loose soil) and leaning them on their sides / popping them in every possible corner. For more details about the different blueberry varieties we’ve chosen, check out my journal entry from a week ago.

We’ll be planting these bbs on Thursday, so stay tuned for a full tutorial on our process for prepping the soil + planting.

IMG_2937.JPG
IMG_2935.jpg

KITCHEN NOTES

It’s Tuesday, which means it’s frozen pizza + Farmbelly salad night here at the farm. If you’re new around here and wondering what I’m talking about, head on over to my journal entry from January 5th. This is all to say that if you’re lookin for culinary inspiration from me today, well… I ain’t got nothin for ya. ;)

TODAY’S STATS

  • Low temp: 30F

  • High temp: 55F

  • Sunrise: 7:26am

  • Sunset: 5:31pm

  • Moon phase: Waxing Crescent

  • Additional notes: Cold and cloudy in the AM, turning to blue skies in the afternoon.

January 17

FARM NOTES

Sundays in the winter are for chainsawing and cleaning up the “back 5”! As I’ve talked about in previous posts, the back part of our property is semi-wooded and a bit wild, and we’re in the process of clearing some downed trees so that we can have the area bush hogged. We bush hog about twice a year, to keep this area in check from invasive plants like japanese stiltgrass and privet. I’ve accepted that unless we do an extensive application of roundup (something that I’m simply not willing to do), we will pretty much always be fighting invasive plants on our property. In the next year or two, we’d like to set up this space to have a few pigs each season, but in the meantime we will keep it wild and love that it is home to so much wildlife – from all kinds of birds to snakes, pollinators, insects, fungi, etc.

BEFORE

BEFORE

AFTER

AFTER

KITCHEN NOTES

Sundays are also for soup! This week’s #sundaysoup is inspired by my time working for Flagstone Pantry in Santa Barbara, a sweet little gourmet to-go spot where pretty much everything was scratch-made with whole, nourishing ingredients. It was a mostly female-run kitchen (which is very rare and very refreshing), and the owner, Kristen, taught me so much about running your own food business with attention to detail and integrity. Kristen has a wonderful website with over 400 (!) recipes for apps, salads, soups, sides, mains, and desserts that are all seriously delicious (and good for you)… go check it out!

There was always a rotation of scratch-made soups every day at Flagstone Pantry, and this Lentil Soup was always once of my favorites. It’s a humble, filling soup that is pretty darn easy to whip up, and you can easily make it vegan by using veggie broth and leaving out the sausage. Makes around 12 cups of soup.

LENTIL SOUP

IMG_2912.jpg

Ingredients

  • 1/2 pound brown lentils

  • 3 tablespoons olive oil

  • 2 yellow onions, diced

  • 3 cloves garlic, minced

  • 2 teaspoons kosher salt

  • 1/2 teaspoons freshly ground black pepper

  • 1 teaspoon ground cumin

  • 1 teaspoon dry thyme or rosemary, crushed

  • 2 cups celery (5-6 stalks), finely diced

  • 2 cups carrots (4-6 carrots), finely diced

  • 4 tablespoons tomato paste (about half of a 6oz can)

  • 6 cups chicken or veggie broth

  • 2-3 pre-cooked sausages, cut in 1/2 lengthwise and sliced 1/3-inch thick

  • 2 tablespoons balsamic vinegar

  • 1 Parmesan rind and freshly grated Parmesan, for serving, optional

Instructions

  1. Rinse lentils in a strainer and pick out any debris. Set aside.

  2. In a large stockpot over medium heat, heat the olive oil and sauté the onions, garlic, salt, pepper, cumin, and thyme for 8-10 minutes, or until the vegetables are translucent and tender.

  3. Add the celery, carrots and tomato paste. Mix to combine. Sauté for another 5 minutes.

  4. Add the chicken broth and lentils. If you’re adding a Parmesan rind to the soup, add it now. Bring to a boil, reduce the heat and simmer uncovered for about 30 minutes or until lentils are tender. Add the sausage and vinegar and simmer until heated through. Remove the Parmesan rind (if using). Taste and adjust seasonings as needed (I usually add some more salt). Serve sprinkled with grated Parmesan cheese.

TODAY’S STATS

  • Low temp: 30F

  • High temp: 48F

  • Sunrise: 7:26am

  • Sunset: 5:28pm

  • Moon phase: Waxing Crescent

  • Additional notes: Cold and sunny in the AM, becoming more cloudy in the afternoon.

January 14

FARM NOTES

This photo might not look like much, but believe it or not, this is is the “after” following an entire day’s worth of work:

Blueberry patch in progress.

Blueberry patch in progress.

As you can see, today Erin and I worked on the new blueberry patch. Before today, the only thing we’d done to prepare this area was put a tarp on it (about 4 months ago) to kill all the grass and weeds. If you haven’t noticed, we are ALL about tarps around here. Tarps are a simple, low-tech solution for preparing new land for planting, without needing to bring in a tractor or rototiller. Today we worked on measuring out the 24ft x 45 ft area, and then marked every 5ft where the blueberry plants will go within each row (see the stakes on the right side of the patch). Next, we took a broadfork and loosened the soil in a (roughly) 3ft x 3ft square where each blueberry plant will be planted.

We didn’t get to it today, but the next steps will be lining the outer perimeter of the patch with landscape fabric (to keep weeds/grass from creeping in), and adding compost + some soil amendments in the areas where each plant will go. When we plant the blueberries (hopefully in the next week or two), we will be planting them into landscape fabric to reduce weed pressure. More to come as we go through this process, so stay tuned!

KITCHEN NOTES

Dinner tonight was a just big old bowl of salad with some beautiful farm-grown greens and a simple homemade vinaigrette. Making your own vinaigrettes is super quick + easy, and only takes a few ingredients and a mason jar. To get the full run-down on how to make your own vinaigrettes, check out this video on my YouTube channel!

TODAY’S STATS

  • Low temp: 32F

  • High temp: 56F

  • Sunrise: 7:27am

  • Sunset: 5:25pm

  • Moon phase: Waxing Crescent

  • Additional notes: Cold and cloudy in the AM, blue skies and sunny in the afternoon.

January 13

Farm Notes

Woke up to a hard frost this morning, which made everything shimmer in the golden sunrise. (It also meant that the waterer for the chickens was frozen shut, because I forget to empty it out the night before, so that was fun.) It’s still pretty wet out from the record amount of rain we’ve received this month, so today was another “office” day. I’m excited to report that we’ve ordered our blueberries! This winter we are planting a small blueberry patch inside the market garden space, and I’ve been doing lots of research since I’m totally new to growing berries. So y’all are going to learn right along with me, ya dig?

IMG_4648.JPG

Well, first things first, I’ve learned that there are two main types of blueberries – rabbiteye and highbush, and in our area of North Carolina, rabbiteye varieties grow the best. Blueberries prefer to grow in low pH soil, on well-drained sites that get plenty of sunshine. We are going to plant 4 different rabbiteye varieties, which I’ve chosen because they will fruit at slightly different times throughout the summer, so we’ll have an extended harvest window. Here are the varieties we’ve chosen (with descriptions written by Finch Blueberry Nursery, where we sourced our plants from):

  • Climax – Climax is an early ripening berry that produces medium fruit with a sweet flavor and is best fr harvesting a larger quantity of berries. Climax growth is upright with intense green foliage. Pollinators: Alapaha, Austin, Premier

  • Premier – Premier is an early to mid season producer with large fruit that possesses excellent flavor. Premier is highly productive. Plant grows upright with good foliage.

  • Tifblue – Tifblue is a mid seasoning ripening plant with medium to large berries. Tifblue is an upright vigorous grower. Tifblue leaves turn red in the fall making it a good ornamental plant. Pollinator: Brightwell, Powder Blue

  • Powderblue – Powderblue is a late season, highly productive blueberry plant with medium to large sweet fruit. Plants tend to grow upright with good foliage. Pollinator: Tifblue

We’ve been prepping the 24ft x 45 ft space that we’re dedicating to the blueberry patch by laying down a tarp (to suppress grass/weeds) for several months, and over the next week or two we’ll build three 45ft long beds, by loosening the soil with a broadfork, and adding compost and other amendments.

IMG_2830.JPG
IMG_2832.JPG

Here’s a photo of a (very rough) layout for this space:

There will be 10ft between each row, and 5ft between the plants within each row (so 9 plants in each row). The key is to give the plants enough room for their foliage to expand in the summer months, and give yourself enough room to pick the berries.

We will be laying down landscape fabric and mulching around the plants and between the rows, to make the space as low-maintenance and weed-free as possible.

For a fabulous resource about growing blueberries here in North Carolina, here’s a great guide from NC State.

Do y’all have any specific questions about growing blueberries that I can help answer? As I mentioned, I’m new to this, but we can learn together!

IMG_2846.JPG

Kitchen Notes

Matthew is away for the night, which means I had a bowl of cereal for dinner, and it was AWESOME. I should mention that my bowls of cereal are a little #extra… i.e. I like to “season” cereal with Maldon salt, cinnamon, cardamom, a few dollops of greek yogurt, some granola, a banana, etc… anyone else with me?

Today’s Stats

  • Low temp: 27F

  • High temp: 56F

  • Sunrise: 7:28am

  • Sunset: 5:24pm

  • Moon phase: Waxing Crescent

  • Additional notes: Hard frost in the AM, blue skies and sunny.

January 11

Farm Notes

Today was yet another cold and dreary Monday in January, so not much time spent outside. Over the weekend, we had crystal clear blue skies and warm sunshine, so Matthew and I spent some time in “the back 5” (aka the back 5 acres of our property, which is semi-wooded and rather unruly) with my favorite new tool – an electric chainsaw! I’ve always had a big fear of chainsaws (which is normal, I think?!) so this is a big deal. There are several dead/downed trees in the the back 5, and we need to clear things out so we can have the area bush-hogged a few times a year.

After a doing a lot of research, we decided to go with a 14” electric chainsaw by Kobalt (the exact model is here). I’m all about using electric tools for the farm whenever possible (like our weed whacker), because I’ve found they have just as much strength as most gas-powered tools, but with a lot less maintenance and headache. We have plans to install solar panels in the near future, so eventually most of our power for the farm will be coming from the sun.

But back to the chainsaw. This model is super light and straightforward to use, and of course we take every precaution (like wearing gloves, safety goggles, hat, and making sure someone else is always working outside nearby) to keep all our limbs in tact. It’s probably not big enough to tackle really large trees/logs, but we figured that’s for the best, since we should probably leave large tree work to the experts anyway.

IMG_2796.jpg

Kitchen Notes

This year we’re trying to make a yummy soup every Sunday, which then means we have soup again for leftovers on Mondays (we are alllll about leftovers around here). Yesterday’s #sundaysoup was a Sweet Potato Chili with Ground Beef. I used a few different recipes as inspiration, but kind of made it up as I went… and dang, it turned out real good. And tastes even better the next day. Below is the basic recipe if you want to give it a try... it may look like a lot of ingredients, but I’ll bet they are all things that you have on hand. This recipe is very forgiving, so feel free to swap in/out based on the ingredients you have available. I don’t really like super spicy chilis, so if you want extra heat, go ahead and add more!

Sweet Potato Chili with Ground Beef

Ingredients

  • 2 tablespoons olive oil

  • 1 yellow onion, diced

  • 3 cloves garlic, minced

  • 1 pound lean ground beef (or turkey)

  • 2-3 sweet potatoes, chopped into ½ inch pieces

  • 1 (14 ounce) cans diced fire-roasted tomatoes

  • 3 (15 ounce) cans beans (pinto, kidney, black beans all work)

  • 2 cups vegetable or chicken broth (or water)

  • 1-3 teaspoons chili powder (depending on your heat tolerance)

  • 1 tablespoon ground cumin

  • 2 teaspoons smoked paprika

  • 1/2 teaspoon ground cinnamon

  • 1 teaspoon fine sea salt, plus more to taste

  • 2 tablespoons red wine vinegar, plus more to taste

  • 1/4 cup plain greek yogurt (optional)

IMG_2785.jpg

Instructions

  1. Add the olive oil to a large stockpot or dutch oven set over medium heat. When hot, add in the diced onion and a pinch of salt and pepper. Cook for about 5 to 7 minutes, until tender. Stir in the garlic and cook for 30 seconds, until fragrant.

  2. Add in the ground beef (or turkey) and cook, breaking it up with a wooden spoon, for about 5 minutes, until no longer pink and cooked through.

  3. Stir in the sweet potato, tomatoes, beans (I don’t drain the beans, as I find the liquid adds flavor and depth to the chili), broth, chili powder, cumin, paprika, cinnamon and salt. Increase the heat and bring the mixture to a simmer.

  4. Continue to simmer gently, adjusting the heat as needed and stirring occasionally, for about 30 minutes, until the chili has thickened and the sweet potatoes are tender (if you find your chili getting too thick, add in some extra broth a little at a time). Remove from the heat.

  5. Taste and add additional salt if needed. I also like to add a splash (or two) of red wine vinegar, to give it a bit of acid. Another secret is to add a big scoop of plain greek yogurt as the chili is cooling, which gives it a delicious tang and richness that I love (but is totally optional, and might be totally weird).

Today’s Stats

  • Low temp: 32F

  • High temp: 47F

  • Sunrise: 7:28am

  • Sunset: 5:23pm

  • Moon phase: Waning Crescent

  • Additional notes: Frost in the AM, cold and cloudy most of the day.

January 7

Farm Notes

Thursday is our most productive days here at the farm. On Thursdays, my friend and fellow farmer/trained cook/teacher Erin joins me and together we work on the bulk of the farm tasks for the week – from building beds to weeding, planting, trellising, pest management, chicken wrangling, etc etc! Today we tackled a big item on my to-do list… weeding + mulching the apple orchard. Last December, we planted 15 different apple trees from Century Farm Orchards, which are all old Southern + disease resistant varieties that grow well in our climate. I’m still very new to growing fruit trees, but I’m grateful to have several neighbors who are well-versed in caring for fruit trees in the South, so I have I feeling I’ll be leaning on them quite a bit these first few years.

Over the winter we (and by we, I mean ME) let the weeds around the apples get a bit out of control (see photos below), so today we went to town removing the grass/weeds and laying down new mulch. It’s amazing how much better the trees look, and I know they are much happier now that they don’t have to compete with all that plant matter to get nutrients from the soil. Now, if only we can keep them looking this way…

Kitchen Notes

Today was an exciting day in the kitchen, as we tested out our new pizza oven attachment that fits on our outdoor smoker grill. I’d say overall, it was a success, though the bottoms of the pizzas got pretty burnt (even though they were only in the oven for 2-3 minutes each). Looking forward to doing some more recipe testing in the coming months so we can perfect our recipe + method… y’all know I love my pizza! ;)

In the meantime, I’m happy to share my homemade pizza dough recipe with y’all:

IMG_2740.JPG

HOMEMADE PIZZA DOUGH

Makes 1 very large pizza or two 12” pizzas

INGREDIENTS

  • 3 cups (375 grams) all-purpose flour

  • Slightly heaped ⅛ teaspoon (Overnight), ¼ (All-Day) or 1/2 teaspoon (Part-Day) instant or active dry yeast

  • 1 1/2 teaspoons sea or kosher salt

  • 1 1/3 cup room temperature water

PREPARATION

  • In a very large bowl, mix all ingredients with a spoon. The dough will be craggy and rough; this is fine! Cover bowl with plastic and keep at room temperature for approximately 22 (for Overnight schedule), 12 (for All-Day schedule) or 6 (for Part-Day schedule) hours, or until the dough has more than doubled. This takes longer in a chilly room and less in a very warm one, but don’t fret too much over this, as the dough is generally forgiving of a loosened schedule.

  • About 30 minutes before the dough is ready, heat the oven to its highest temperature – usually 550F. Put a baking tray in the oven *upside down* while the oven heats up. If you have a pizza stone, use that instead. 

  • Tear off a sheet of parchment the same size as your pizza stone/baking tray, and sprinkle it with cornmeal. 

  • Flour your counter very well. Scrape dough out of the bowl onto a floured counter; in the time it has risen it should change from that craggy rough ball to something very loose, soft, sticky and stretchy. Flour the top of the dough, and divide dough in half (or more pieces, if you’re making smaller pizzas). Form them into ball-like shapes. Use floured fingers to press and nudge dough into a roughly round or rectangular shape. Pick up the dough and circle it around your fists, letting the gravity gently stretch the dough. 

  • Land the dough on your prepared sheet of parchment paper. Add desired fixings and bake for 12 to 15 minutes, rotating if it’s baking unevenly, until the top is blistered and the crust is golden. 

Do ahead option: Once risen and formed into ball-like shapes, the dough can be wrapped in plastic and refrigerated for up to 3 days.

Today’s Stats

  • Low temp: 30F

  • High temp: 47F

  • Sunrise: 7:27am

  • Sunset: 5:16pm

  • Moon phase: Waning Gibbous

  • Additional notes: Frost in the AM, cold and cloudy most of the day.

Janaury 5

Farm Notes

I spent most of this cold and dreary day inside and got a few big things checked off my to-do list… one of which was ordering our seed potatoes for this season. I order seed potatoes from our beloved local farm supply store, Country Farm & Home in Pittsboro, and they source them from a reputable grower in Idaho, Grand Teton Organics.

These are our seed potatoes from last season.

These are our seed potatoes from last season.

I love growing potatoes (and by that, I mean I love digging them up and eating them..), and I maaay have gone a bit overboard with all the varieties for this year (7 in all!), with a mix of yukon gold-type potatoes, two red-skinned varieties, some gorgeous purple potatoes, and two types of fingerlings. We have 50 ft rows at our farm, and I usually allot about 8 lbs of seed potatoes per 50 ft bed (with an average of 12” spacing inside the row, though it varies depending on the variety). Here’s a rundown of the different potatoes we will be growing in 2021:

  • German Butterball

  • Gold Nugget

  • Red Johnny

  • Dark Red Norland

  • Purple Majesty

  • French Fingerling

  • Banana Fingerling

If you’re hoping to grow potatoes this year, here’s a great guide/FAQ sheet about growing spuds from the team at Country Farm and Home.

Tuesday frozen pizza + salad + wine night. :)

Tuesday frozen pizza + salad + wine night. :)

Kitchen Notes

If you know me, then you know I have a soft spot for frozen pizza, and you probably also know that Tuesday is our weekly frozen pizza night. This may surprise some of you, but here’s the deal… eating like a farmer doesn’t mean you have to whip up gourmet, scratch-made meals every night. To me, eating like a farmer means getting creative with the ingredients you have at hand, eating with the seasons whenever possible, and not making meals overly complicated. So for us, that means on Tuesday we have frozen pizza (our fav brand right now is Freschetta) and a big green salad with greens + veggies from the farm. I’m all about shame-free cooking + eating, so you do you! Whether it’s scratch-made, frozen, take-out, or something in-between, I think the most important thing is taking time to sit down and enjoy your meals with intention and gratitude, hopefully around a table with people you love.

Today’s stats

  • Low temp: 31F

  • High temp: 50F

  • Sunrise: 7:23am

  • Sunset: 5:13pm

  • Moon phase: Waning Gibbous

  • Additional notes: Frost in the AM, cold and cloudy most of the day.

January 4

Farm Notes

After a seemingly endless string of cold rainy days, we finally got some blue skies this afternoon! We could use a lot more sun to dry up our soggy beds, because at this point it’s too wet and muddy to do much work without creating a big mess. Thankfully, it looks like we have a few more dry days coming up… though maybe our first snow on Friday?

IMG_5045.JPG

But maybe it’s better that I’m stuck inside, because there is a lot of planning and ordering happening right now. If you could see my “desk” (aka our kitchen countertop) right now, it’s strewn with seed catalogues, seed packets, receipts, planning spreadsheets, etc etc. I placed my big seed order for 2021 with Johnny’s last week, and this morning I sent in a big order of spring seedlings from Banner Greenhouses, based near Asheville, NC. We’ll do our first big planting of spring veggies in early/mid March, and some things will be planted from seed (radishes, hakurei turnips, sugar snap peas, carrots, arugula, etc), and some need to be planted as established starts (kale, broccoli, cabbage, swiss chard, beets, onions/scallions/leeks, lettuces, fennel, kohlrabi, etc).

Because we don’t have the capacity for a nice greenhouse right now, I order most of our seedlings through Banner or from other local farms. Growing nice starts is an art and requires constant attention and fine-tuning, and I’m happy to pass on that job to someone else while I focus on managing other aspects of our farm. I do have a few mini indoor greenhouse structures + grow lights that I use to start a small amount of plants – things like our specialty herbs and edible flowers, as well as quick-growing seeds like anything in the cucurbit family (zucchini/squash, cucumbers, melons, etc).

Kitchen Notes

It’s a leftovers kinda day here… we enjoyed some freshly baked sourdough bread from our neighbor, toasted and dipped into warm bowls of broccoli cheddar soup that I made last night. As I was making the soup yesterday (#sundaysoupnight), I realized I hadn’t ever made broccoli cheddar soup before, so I was pleasantly surprised by how it turned out! And now if you’ve now got a hankering for some broccoli + cheddar, here are a few good recipes that I used as inspiration: Smitten Kitchen / Bon Appetit / Cookie & Kate.

Today’s stats

  • Low temp: 35F

  • High temp: 48F

  • Sunrise: 7:23am

  • Sunset: 5:12pm

  • Moon Phase: Waning Gibbous

  • Additional Notes: Cloudy in the morning, finally sunshine and blue skies by the afternoon.

January 1

Farm notes:

Happy new year friends! Welp, we kicked off 2021 with some pretty dan miserable cold + rainy weather, so I spent very little time outside, mostly just to check on our chickens (aka “the ladies” aka “the dollys”). We have 34 laying hens (a red sexlink hybrid called novogen brown) and I’ve been impressed (and honestly surprised) by how consistently they are laying through the winter (we’re currently getting about 30 eggs a day).

I’m doing my best to rotate the ladies around the garden area so they can eat as much fresh grass as possible, but it’s tougher to have a constant supply of lush pasture since grass barely grows this time of year. To compensate for the limited grass, every day I throw in excess greens from our market garden (like extra lettuces, radishes, collard greens etc), which means our eggs will still have rich, orange-hued yolks, even in the dead of winter. If you’re curious to learn more about what determines the color of eg yolks (hint: it’s all about their diet!) here’s a helpful article that digs into all the nitty gritty.

Kitchen notes:

Dinner hit the spot on this cold, rainy night – polish sausages with apples, bacon and sauerkraut – a recipe from Andrea Bemis’ wonderful new cookbook, Local Dirt. I’ll always share my own recipes in these kitchen notes, but because this dish is from Andrea’s beautiful new book (which took her 2+ years to write and publish), I’m going to encourage you to snag yourself a copy so you can enjoy all her seasonal, simple, and nourishing recipes in your own kitchen! But if you really can’t wait, here’s a different recipe I found from Food & Wine that has a similar vibe. Sauerkraut is really the star of this dish, and I definitely recommend using homemade kraut if you can. Homemade kraut may seem intimidating if you haven’t made it before, but I promise you can do it! Here’s a great guide on all things homemade sauerkraut if you want to give it a try.

Today’s stats:

  • Low temp: 40F

  • High temp: 48F

  • Sunrise: 7:28am

  • Sunset: 5:14pm

  • Moon Phase: Waning Gibbous

  • Additional Notes: Foggy and rainy all day.