December 30

Farm Notes

Well friends, we’ve (almost) made it to the end of the holiday season.. let’s all let out a big collective sigh and take a deep breath. I know the holidays are a whirlwind of emotions and activity, and I just hope the past few weeks have brought some form of new joy, renewal, and deliciousness into your life.

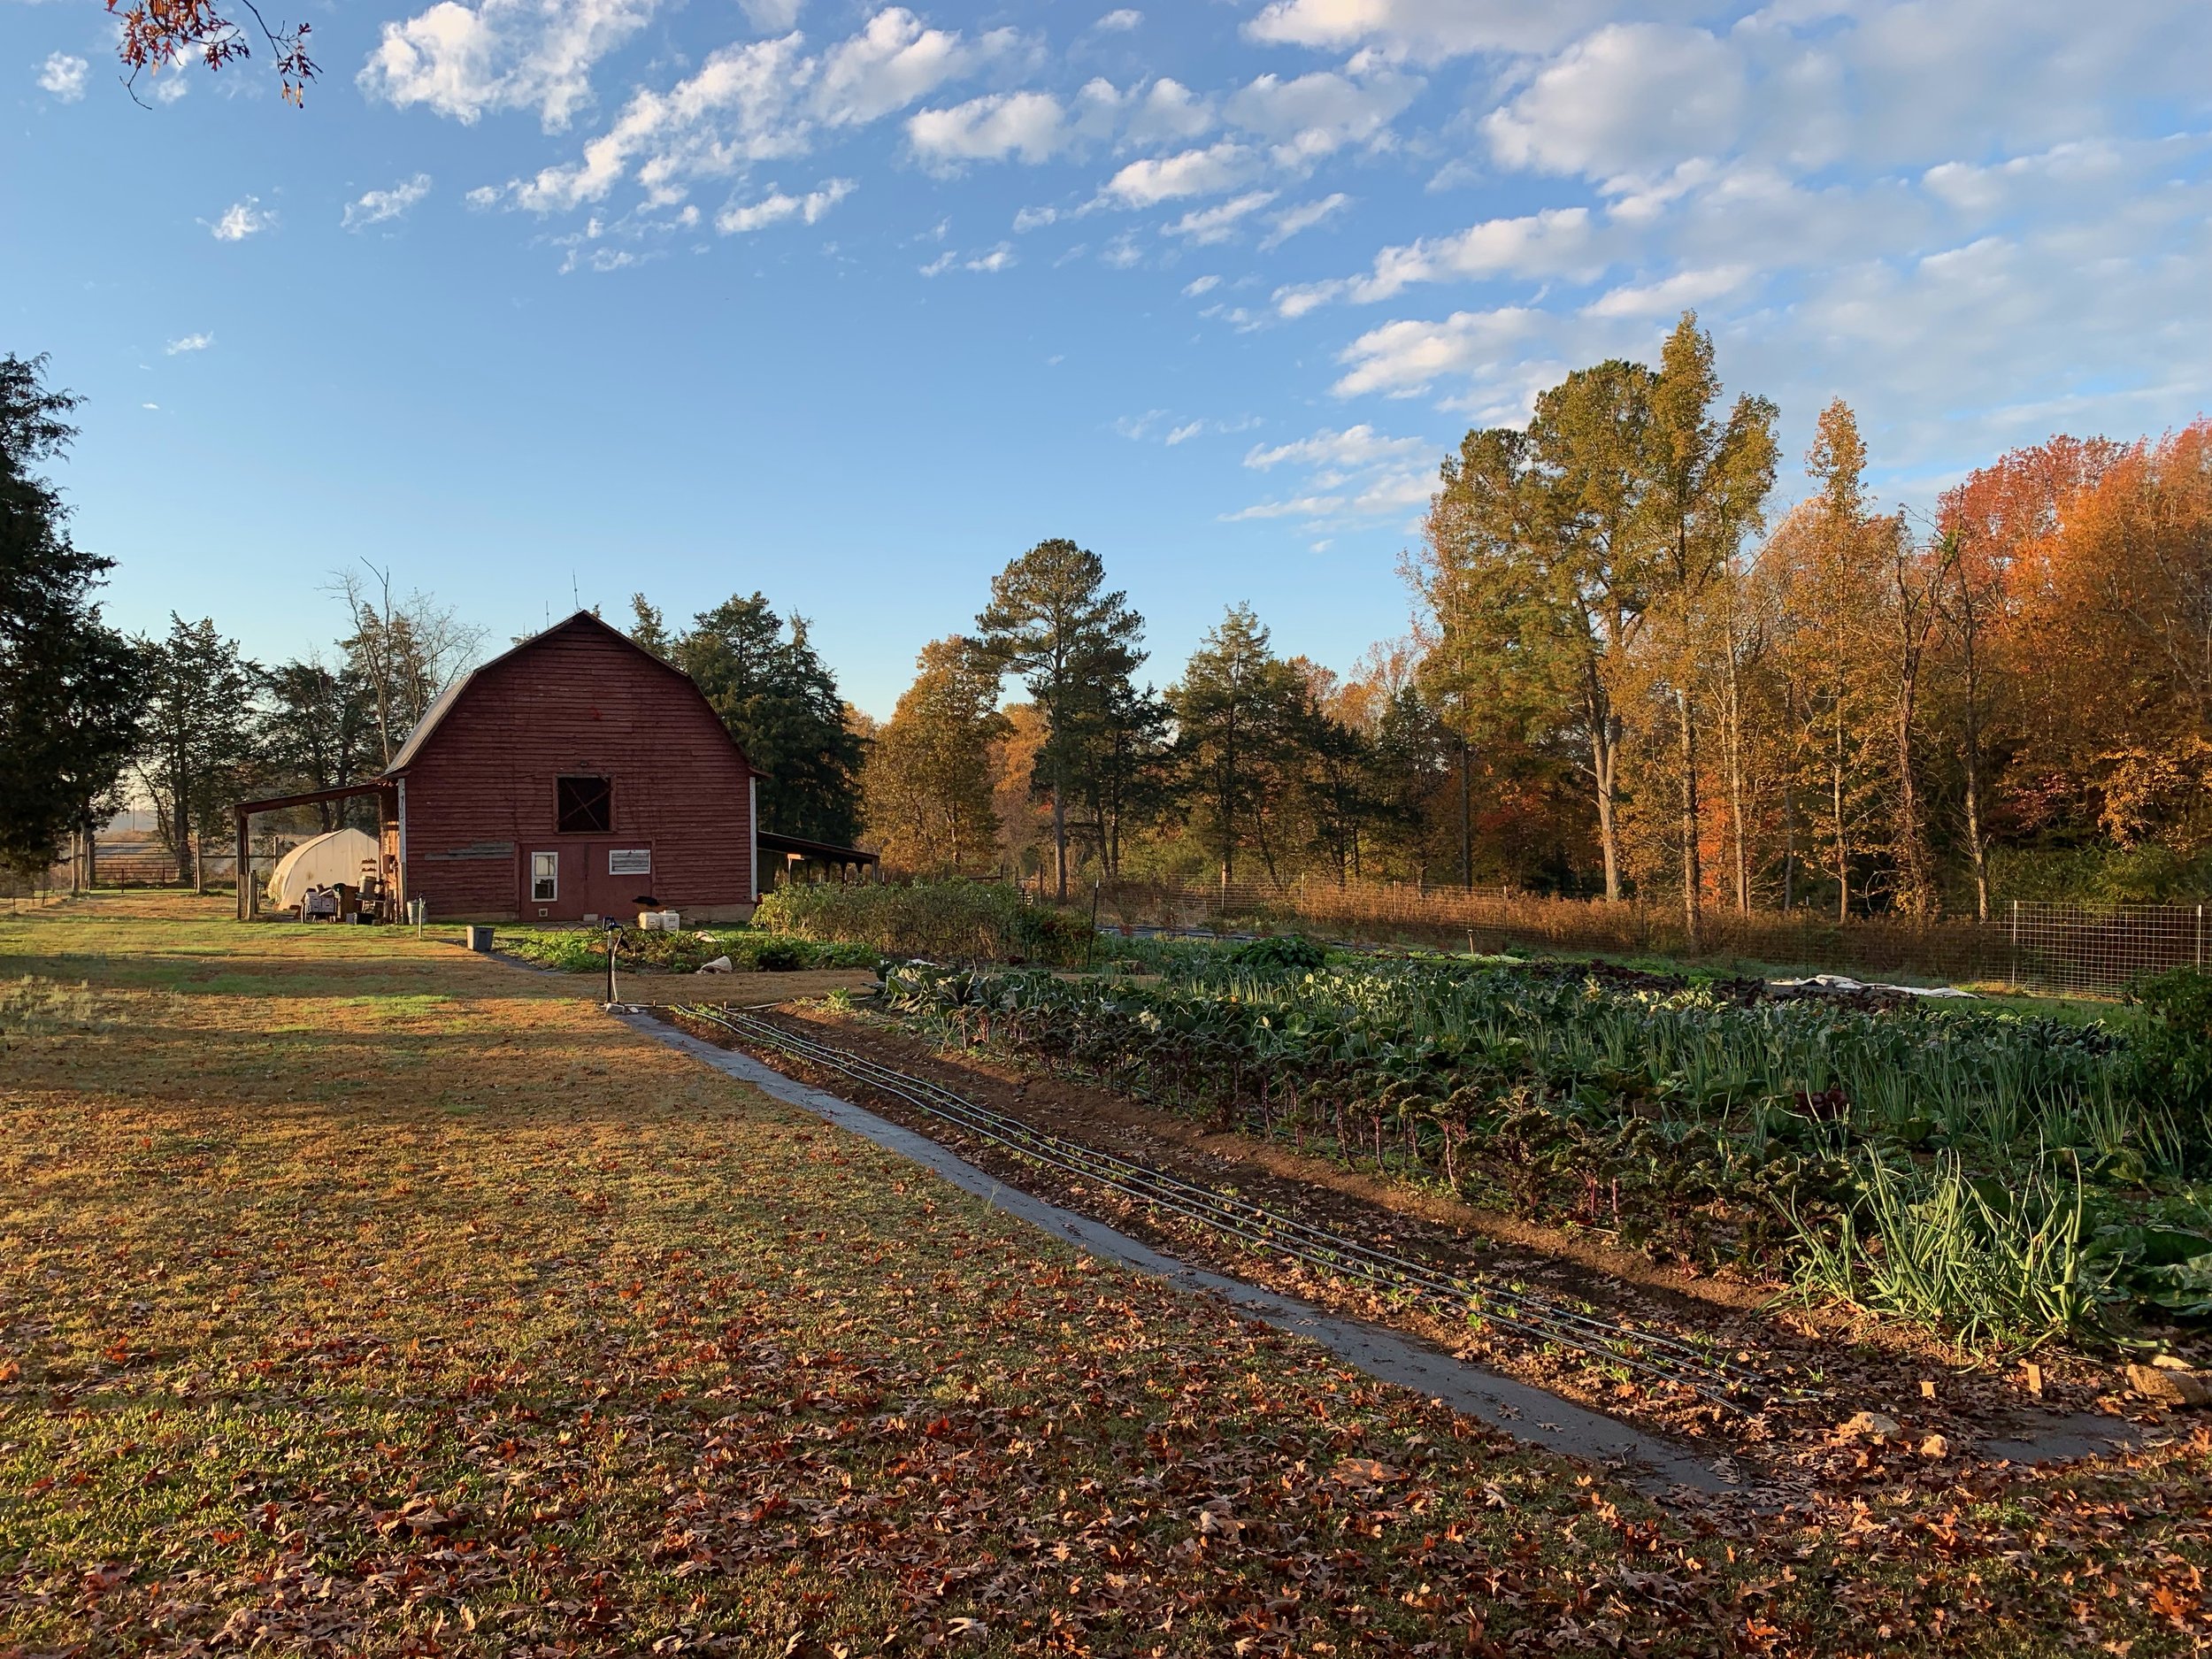
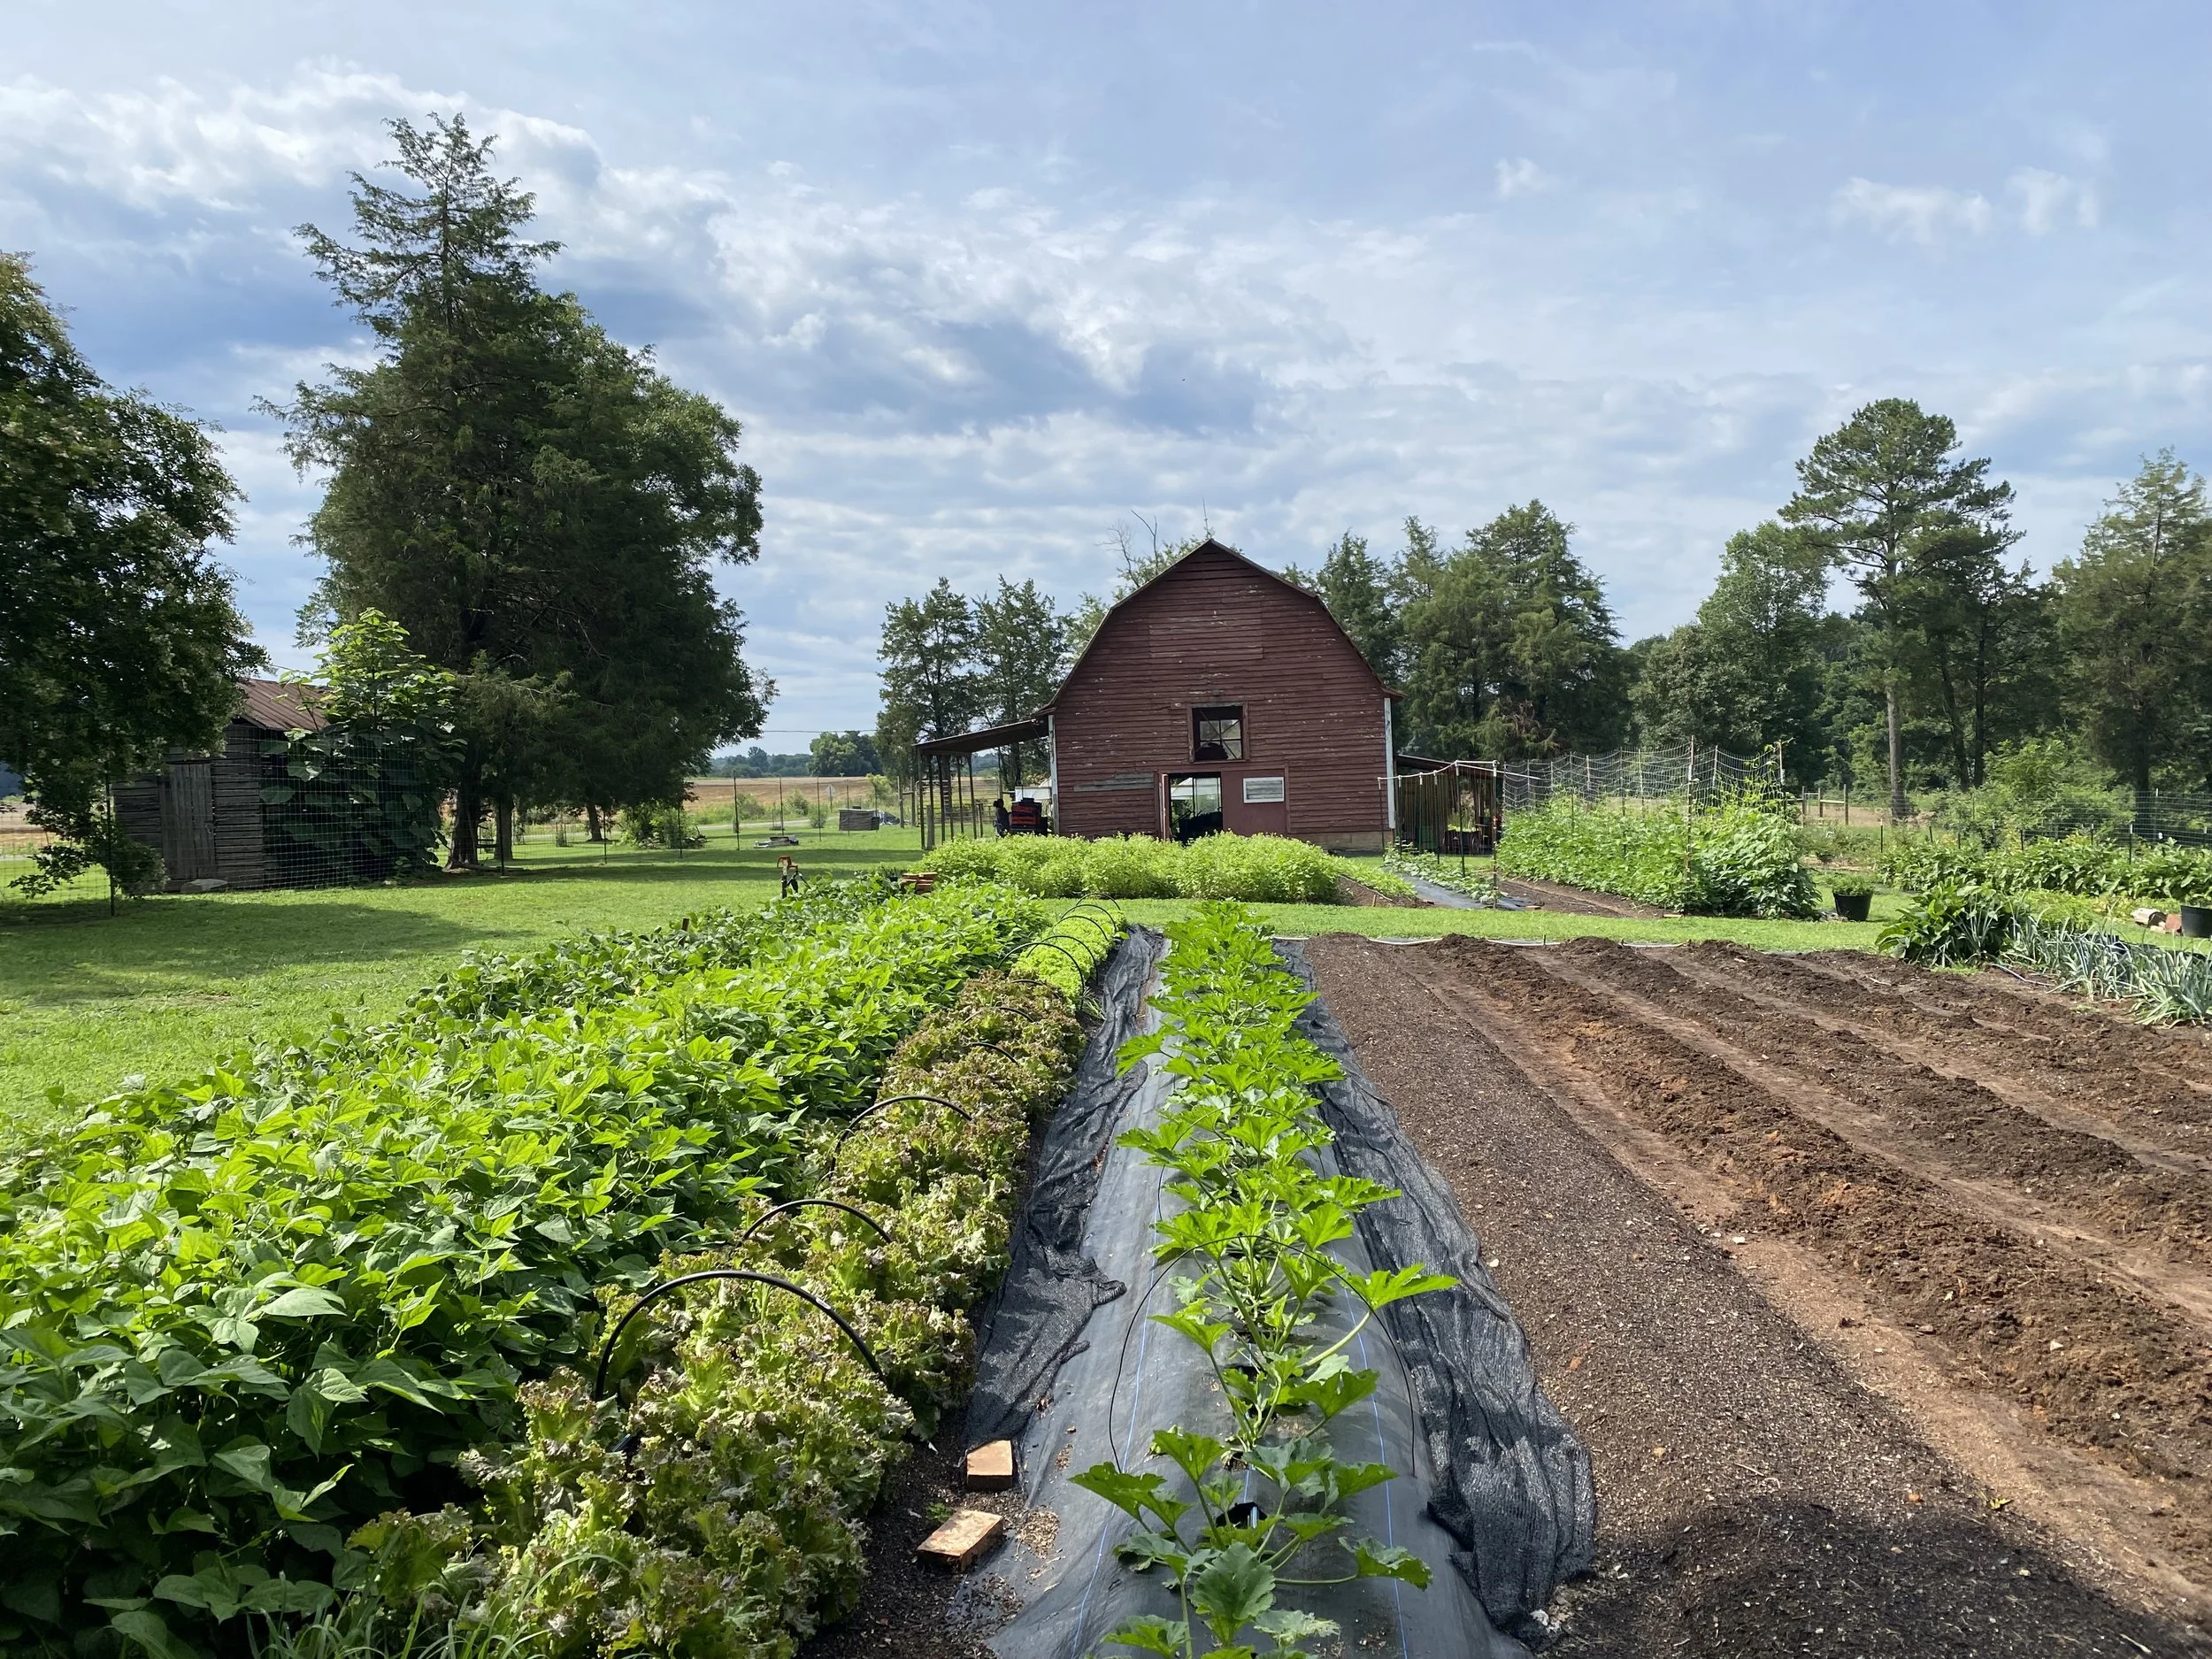
We’ve had a busy but really wonderful few weeks celebrating with our families, and we just returned from an epic road trip home from the midwest after our return flight was cancelled (like everyone else, it seems)! We decided to let Sawyer tell us how far we could drive, as we knew that a 13+ hour car ride with a 15-month old babe wasn’t ideal, but he was an absolute champ and we powered through, making it home around 1 AM. Even though it was a looong day in the car, we were so grateful to wake up at home and see our little farm out the window.

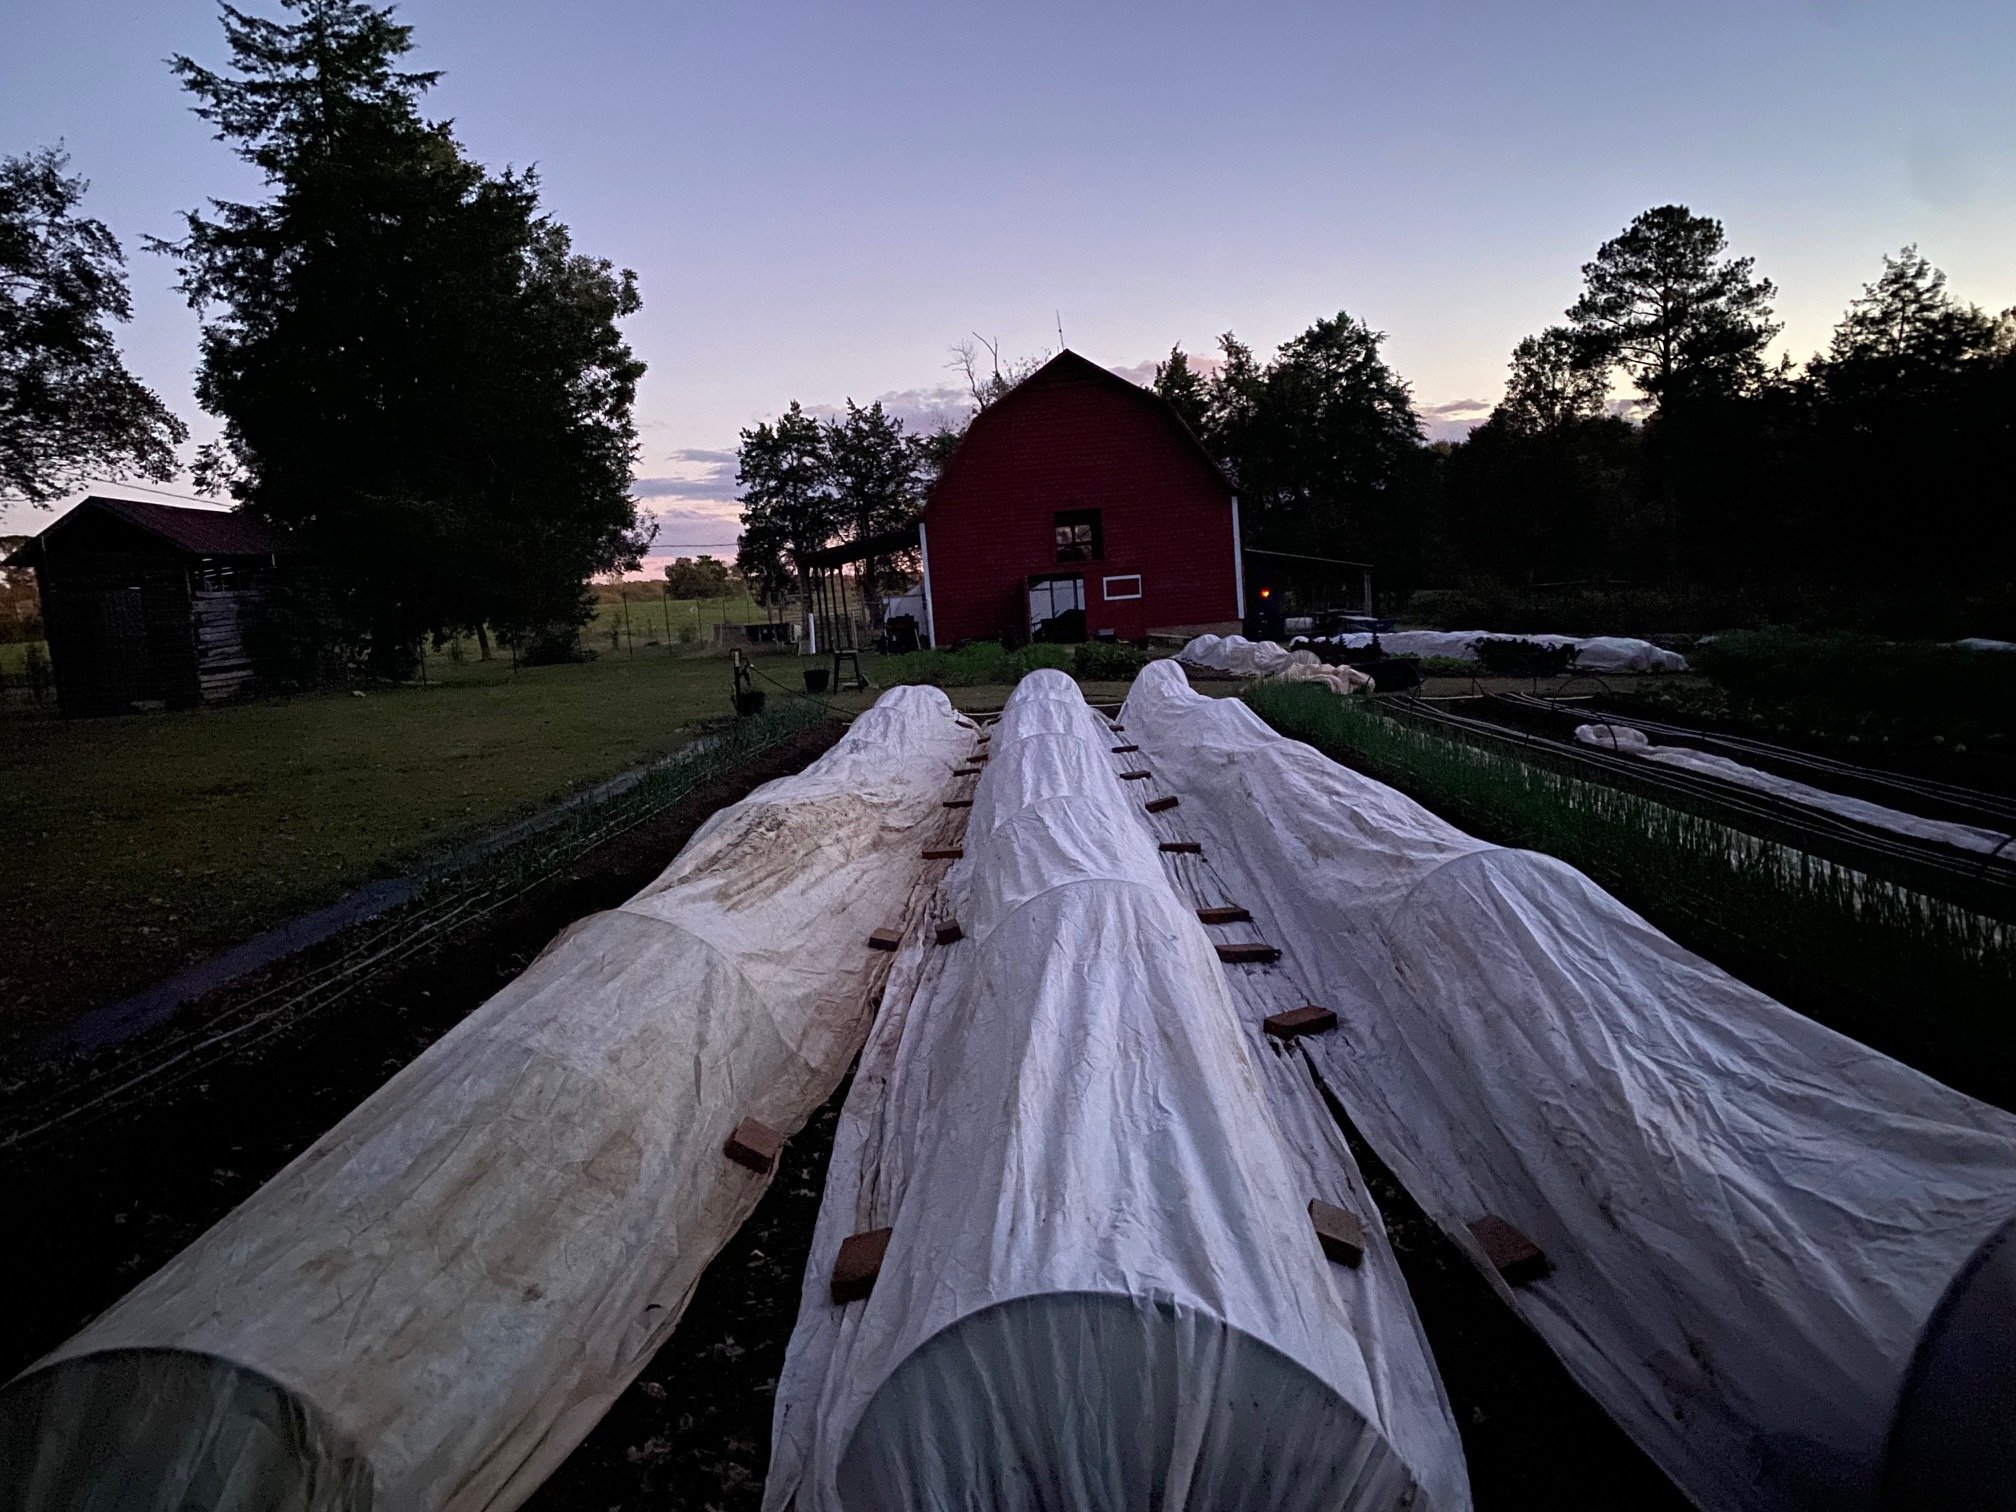
But because it’s never dull around here, when we got home our heat downstairs wasn’t working (and is still off, so I’m typing this wrapped under lots of blankets) and some frisky mice were running around like they owned the place. And then looking outside, there were tarps blowing around and the end walls on the tunnels ripped pretty badly from last week’s polar vortex… alas! None of that really matters, we are just so grateful to be safe and together and home.

An ending and a new beginning…

As I reflect on this year and look ahead to 2023, I’ve been thinking a lot about this space and how to best serve this community moving forward. And after a LOT of hard thinking, I have decided to end this chapter of the Farmbelly Club – with the intention of taking a step back and ultimately creating a more useful and engaging way to share all about life on our farm, and to keep sharing helpful information about growing, cooking, and eating good food with a broader community. 

I’ll be honest that when I first dreamed up the Farmbelly Club over two years ago, I envisioned a dynamic online space where I could share the behind-the-scenes from the farm, and it would be a place to foster engaging conversations, share recipes and resources, troubleshoot kitchen + garden questions, etc. And if I’m being honest, I know that the current form of the Farmbelly Club (which is hosted via my website provider, Squarespace), hasn't quite created the dynamic online community that I originally envisioned (and that I promised to you, my amazing Farmbelly Club members).

And so, at the end of 2022 I will officially close the Farmbelly Club as it currently exists – but with this end comes the opportunity of a new beginning, and I’m truly excited to re-work how to better show up and serve this awesome community moving forward. In January, I will be switching over to a Substack newsletter – which will go out once a month to anyone and everyone for free, and once a week to anyone who would like to continue supporting this work, for $5/month. I’ll be in touch again very soon to let you know once the new newsletter has launched, and I’d be honored to have you join me there! THANK YOU for joining me on this journey, and for your grace and understanding as Farmbelly continues to evolve and grow.

So what does this mean for your Farmbelly Club membership?

  • You will have access to your Farmbelly Club member account for 30 more days (January 31, 2023). After 30 days, the Farmbelly Journal and recipes will no longer be accessible – though if at any time you would like access to any of those pages, please just email me (michelle@farmbelly.com) and I will happily e-mail any and all resources/pages that have been posted over the past 2 years.

  • If you are on a monthly billing plan and were charged in the last 14 days, you will be refunded for the entire month.

  • If you are on an annual billing plan, I will pro-rate a refund for you based on when your annual renewal took place.

Still have questions? Please send me an email (michelle@farmbelly.com) and we will talk it out! Again, I so appreciate your understanding and continued support – it really means the world. Here’s to new beginnings and a delicious new season ahead!

with love,
Michelle

December 9

Farm Notes

It’s been a cold and dreary week around here, which means I’ve been inside doing lots of “computer farming” – i.e. planning for next year, seed organizing, and working on putting together some newly organized resources for y’all.

Speaking of which… I recently realized that I didn’t have an easy way for Farmbelly Club members to quickly find information on specific gardening / farming topics that I’ve covered in my journal entries over the past 2 years. So it’s about time we (and by we, I mean ME..) fixed that!

Behold! Here’s a brand spankin new Growing Tutorials & Resources page – where you can quickly find information on tons of different gardening topics, crop-specific tutorials, etc. This page will only continue to grow and become even more expansive with more entries over time. And if there is a specific growing topic that you don’t see that you’d like me to tackle, please let me know!

Sign up for a free Garden Consultation in 2023

As we look ahead to next year, I want to help YOU set goals + plans for your gardens! As a thank you for being part of the Farmbelly Club community, I’m excited to offer free 15-minute garden consultations in January for anyone who wants to dig in and make a game plan for a thriving garden in 2023. Whether you have just a few pots on your front porch or a big dedicated garden space (and everything in between) – let’s get you growing like a pro next season!

To sign up for your garden consult, please fill out this quick survey by December 31st. After submitting this form, you will be contacted within 1 week to schedule your consult, which will take place on the phone or via Zoom in January 2023. In addition to our Zoom call, you will receive a follow up email filled with helpful links, resources, and templates specific to our conversation.

And in case it’s helpful, I put together this printable 2023 Garden Goals Worksheet to help you start thinking about your growing goals for next year. Let’s get growing friends!

PS – Here’s a link to today’s virtual farm walk over on our Facebook group! A note that this will be the final farm walk of 2022, as we will be with family for the holidays the remaining weeks of the year. THANK YOU for following along and I’m excited to resume our virtual tours again in 2023!

Kitchen Notes

I’m going to be honest y’all… these days my culinary attention has been laser-focused on trying to come up with new, healthy meals that Sawyer wants to eat. Overall he’s a pretty good eater (there’s a reason he’s in the 80th percentile for his weight..), but he can definitely be a bit picky, especially whenever we introduce something new. One thing that I know he’ll always chow down? Muffins. Or literally any kind of baked good for that matter. So of course, I’ve made it my mission to find a muffin recipe he’ll be excited to eat, that is still healthy and chock-full of veggies. Thankfully, I found a great recipe over at the blog Yummy Toddler Food, making just a few tweaks of my own. I promise they are yummy enough that even if you don’t have a picky toddler to appease, you’ll enjoy them!

Healthyish Carrot Muffins

INGREDIENTS

  • ¾ cup all purpose or whole-wheat flour

  • ½ cup rolled oats

  • ¼ cup brown sugar (for sugar-free, omit and sub 2-3 tablespoons maple syrup)

  • 1 teaspoon cinnamon

  • 1 teaspoon baking powder

  • ¼ teaspoon baking soda

  • 1 cup applesauce (or any kind of veggie puree – sweet potato, winter squash, etc)

  • 1 cup grated carrots

  • 2 large eggs

  • 3 tablespoons canola oil (or melted coconut oil)

  • ¼ cup raisins

  • ¼ teaspoon salt

PREPARATION

  • Preheat the oven to 350 degrees F and coat a 24-cup mini muffin tin with nonstick spray. Don’t be shy with the non-stick spray, or else the muffins will definitely stick!

  • Add all ingredients to a medium bowl and stir together to combine thoroughly but gently.

  • Add a heaping 1 tablespoon of the batter to each prepared muffin cup and bake 18-22 minutes or until lightly golden brown around the edges and a cake tester inserted into the middle comes out cleanly.

  • Remove from oven, cool in the pan for 2 minutes, and use a paring knife to loosen the edges as needed. Tilt in the pan to allow air to circulate underneath or transfer to a wire rack to cool.

  • Serve warm, at room temp, or chilled.

Today’s Stats

  • Low temp: 40F

  • High temp: 51F

  • Sunrise: 7:16am

  • Sunset: 5:03pm

  • Moon phase: Waning gibbous

  • Additional notes: Cloudy and chilly

December 2

FARM NOTES

Happy December! I hope y’all had a delicious and (somewhat) restful Thanksgiving… we had a lovely and relaxing holiday weekend here at the farm with family, and we’re still working through alllll the yummy leftovers. Somehow I’d gone 33 years of life on this planet without ever cooking a turkey, and this year was my very first time!

I followed a fairly straightforward recipe from Bon Appetit, and while the big ole bird came out of the oven looking gorgeous, the taste was kinda… meh. I mean, it was fine, but definitely not the star of the show (I’m more of a honeybaked ham girl myself)… alas, I’ll have to try again next year.

Now that our CSA season is over, things have really quieted down out in the garden. We do still have a good amount of nice greens, root veggies, herbs, etc ready for harvest – so local friends, make sure you check out next week’s Winter Farm Box! Each box is filled with 7-8 different veggies + herbs, for $25/box, with pick up here at the farm on Tuesday afternoons between 2pm-7pm.

Our main focus these days is tackling my ever-growing winter projects list. First priority is putting our growing beds “to bed” for the winter – which means pulling out any remaining plants (and weeds), removing and storing irrigation drip lines, and covering each quadrant with silage tarps. If you’re also working to put your garden to bed for winter, I very highly recommend using tarps! They serve a multitude of purposes – weed suppression, preventing soil erosion, and helping to keep the soil warm to encourage beneficial biologic activity underground. It’s definitely worth investing in high quality silage tarps (I like to source ours from Farmer’s Friend)… I’ve made the mistake of purchasing cheaper tarps in the past, and they ripped to shreds the first big storm that passed through. A note that if you need any help with winterizing your garden, I’m happy to help advise, just send me a message.

Silage tarps in action!

Another favorite winter activity is digging into the 2023 seed catalogues! I love pouring through stacks of seed catalogues to dream + scheme for the growing season ahead, flush with fresh enthusiasm and optimism that a new season brings. Here are my go-to sources for purchasing seeds (if you go to their websites, you can usually request a physical seed catalogue to be sent to your home):

  • Baker Creek – a great source for rare/heirloom seeds

  • High Mowing Seeds – 100% organic source for a wide range of seeds

  • Southern Exposure Seed Exchange – seeds selected for the south/mid-atlantic region

  • Row 7 Seeds – experimental seeds bred in collaboration with chefs for maximum deliciousness

  • Johnny's Seeds – especially for larger-scale growers, Johnny's is a go-to for high quality seeds (and heaps of other growing tools)

  • Floret Farm – incredible source for a wide range of flowers

Wishing you all a cozy and delicious first week of December… keep reading for a go-to winter recipe that’s made for keeping you warm on chilly days and nights.

PS – I just took y’all on a virtual farm walk! Tune in via our private Facebook group HERE. :)

Kitchen Notes

Got winter squash? Run, don’t walk, and MAKE THIS SOUP.

This recipe is super straightforward, uses all easy-to-source pantry ingredients, and is packed with flavor thanks to warming fall spices, zesty ginger, bright lime juice, and cooling coconut milk. I used butternut squash most recently, but use whatever local winter squash you have access to – whether it’s pumpkin, acorn, kabocha, or funkier squash varieties like koginut. A note that the ingredients list may look long/intimidating, but I promise this soup comes together super quickly and easily!

Roasted Winter Squash Soup with Ginger, Lime & Coconut

INGREDIENTS:

  • 3 lbs unpeeled winter squash (such as butternut, acorn, kabocha, etc)

  • Olive oil

  • 1 large yellow onion, diced

  • 1 tablespoon minced fresh ginger

  • 1 teaspoon ground coriander

  • 1 teaspoon ground cumin

  • ½ teaspoon turmeric

  • ½ teaspoon cinnamon

  • Pinch roasted red chili flakes

  • 4 cups vegetable stock or water

  • 1 teaspoon salt, plus more to taste

  • Freshly ground black pepper to taste

  • Juice of 1 lime (~3 tablespoons)

  • 1 14-oz can coconut milk

  • ¼ cup fresh basil leaves, plus more to garnish

INSTRUCTIONS:

  1. Preheat the oven to 425°F.

  2. Peel the butternut squash and dice the flesh into ½” pieces. Toss the diced squash on a rimmed baking sheet with a few tablespoons of olive oil and a pinch of salt.

  3. Roast for 30-35 minutes, until the squash is soft and beginning to caramelize. Set aside.

  4. Heat 1 tablespoon olive oil in saucepot or dutch oven over medium heat. Add diced onion, a pinch of salt and cook until onions are soft and translucent, about 8 minutes.

  5. Add ginger, coriander, cumin, turmeric, cinnamon and chili flakes, and cook for another 2 minutes, stirring frequently.

  6. Add the cooked butternut squash, along with the vegetable stock or water, salt and pepper.

  7. Bring to a boil, then reduce heat to simmer and cook for 10 minutes.

  8. Stir in the lime juice and coconut milk, and simmer for another 2 minutes. Take the soup off the heat and add the fresh basil.

  9. Use blender to carefully puree soup in 2 or more batches, until smooth.

  10. Return soup to pot over low heat. Taste and adjust seasoning to balance the salty, pungent and citrus notes. Ladle into bowls and garnish with creme fraiche, toasted squash seeds, fresh herbs or anything else that inspires you. Enjoy!

Today’s Stats

  • Low temp: 42F

  • High temp: 53F

  • Sunrise: 7:10am

  • Sunset: 5:03pm

  • Moon phase: Waxing gibbous

  • Additional notes: Sunny and chilly

November 18

Farm Notes

Oooh boy, it feels like winter has ARRIVED this week! Overnight lows are in the mid-twenties this week, which means the garden is a sea of row cover protecting the plants from freezing temps. But thankfully, I only have one more week of worrying about keeping all the veggies alive, because next week is the FINAL week of our CSA for the 2022 season!

This was our third full growing season here, and I can say with confidence that it was our best and most productive yet. That’s not to say that I didn’t make mistakes and have failures.. trust me, there were still LOTS of those! But with every season that passes, our soil improves, my knowledge of this land gets deeper, I learn more about what our community wants in their boxes, and we work more efficiently. In the coming weeks, I’ll share more about the specific wins and losses this season, along with our goals for next year – and I’ll also share a helpful framework for asking yourself the same questions as you start to think about your growing season in 2023!

In preparation for the cold week we are having, last weekend I pruned, fertilized, and mulched our asparagus beds, tucking the plants for winter. In case any of you also have asparagus (or other perennials that could use some late fall pruning), below is a quick tutorial on how to prepare them for the winter months ahead. (PS – I also made a fun video tutorial of this process over on my instagram, which you can check out here).

PREPPING ASPARAGUS / PERENNIALS FOR WINTER

1) Once the asparagus (or other perennial plant) has died back and turned brown, prune back the stalks, leaving about 1” above the ground. It is generally not advised to leave the plant matter you’ve cut back on the bed, as there could be pests living in the plants that would then stay in your soil (so I just compost it).

2) Clear the growing bed of any weeds.

3) Add some good compost to the bed (a few inches thick), which will release nutrients to the soil throughout the winter.

4) Finally, mulch the plants with dead leaves, pine needles, or wood chips to help protect them from freezing temps (and keep weeds at bay).

For a full farm walk from today, check out my virtual tour around the farm from this morning here.

Asparagus bed pruned and weeded…

…and then fertilized with compost and mulched with leaves.

The other big news is that TODAY I’m releasing our line-up of Spring 2023 Workshops here at the farm! There's a little something for everyone – from Home Gardening 101, to Spring Salads, Knife Skills, Pickling & Fermenting, and many more.

All of our workshops are 100% hands-on, and include a full walking tour of the farm + you'll help harvest veggies and herbs that we will use to make and enjoy vibrant, seasonal dishes together. Farmbelly workshops take place outside on the farm (and under our nice big, shaded structure) with a max of 10 people, to ensure an intimate and safe experience for everyone. I know that most of you wonderful Farmbelly Club members are not local to NC, so I’m sorry that these workshops likely aren’t really accessible… but hopefully I’ll get to see many of you here in the new year!

Last but not least – only TWO days left to get your Farmbelly merch! Snag a vintage-inspired Farmbelly t-shirts, a super cozy + comfy sweatshirt, an extra big tote bag, or a stylin' baseball hat. Merch orders close at midnight this Sunday, Nov 20th.

PS – A note that you will likely receive a separate email that goes out to my entire mailing list about our Spring 2023 Workshops… I’m sorry about the double email, I promise it won’t happen often!

PPS – I took y’all on a virtual farm walk this morning, with lots of new veggies to see + helpful gardening info for you! For a full tour of the farm + tips for your own gardens, here’s the link to watch via our private Facebook group. :)

Kitchen Notes

This week I was looking for an excuse to cook with the big, beautiful heads of cauliflower that we grew this year (my first cauliflower crop ever, as I mentioned last week!) and I was inspired to whip up a big pot of curry with chicken and veggies. Curry dishes may seem complicated, as they tend to have a longer list of ingredients, but you most likely already have everything in your pantry/fridge, and curries really do come together quickly once you get going. Feel free to use different spices or veggies based on what you have on-hand, and you can absolutely omit the chicken if you’d prefer a vegetarian curry.

CHICKEN & VEGGIE CURRY

Photo Credit: EatWell101

INGREDIENTS

  • 2 tablespoons olive oil

  • 2 teaspoons curry powder

  • 2 teaspoons minced ginger root

  • 1 teaspoon turmeric

  • 3 cloves garlic, minced

  • 1 pound boneless skinless chicken thighs, cut into 1” cubes

  • 1 medium yellow onion, diced

  • 1 teaspoon kosher salt, plus more to taste

  • 1/2 teaspoon black pepper

  • 1 medium sweet potato, peeled and diced into 1/2 inch cubes

  • 2 cups cauliflower cut into florets (1 small head)

  • 1 tablespoon tomato paste

  • 2 cans (13.5 ounces) unsweetened coconut milk

  • Splash of fresh squeezed lime juice

  • Handful chopped cilantro leaves (optional garnish)

INSTRUCTIONS

  • Heat the olive oil in a pan over medium heat. Add the curry powder, turmeric, minced garlic and ginger root, and toast, stirring, until fragrant well combined, 1 to 2 minutes.

  • Add the chicken, onion, salt and pepper and toss until evenly coated in the spices. Cook, stirring occasionally, until chicken is cooked through, about 5 minutes.

  • Add the sweet potato, cauliflower, and tomato paste and toss into the mixture until evenly combined. Add the coconut milk and stir until well combined.

  • Bring the curry to a gentle simmer and cook, uncovered until sweet potatoes are fork tender, about 15-20 minutes. Add a splash of fresh lime juice, and taste and adjust seasoning as needed. Serve over rice and garnish with cilantro, if desired. Enjoy!

Today’s Stats

  • Low temp: 26F

  • High temp: 49F

  • Sunrise: 6:57am

  • Sunset: 5:07pm

  • Moon phase: Waning crescent

  • Additional notes: Sunny and chilly

November 11

Farm Notes

It’s a cozy, rainy day over here as Tropical Storm Nicole makes her way up the East Coast. Our fall veggies can use the rain and I can use a good excuse to stay inside and do some “computer farming” – aka planning our market garden and workshops for next year. I’ll be releasing our line up of Spring 2023 culinary workshops next Friday, so stay tuned! Hosting workshops again this season after a 2 year pandemic hiatus was such a joy – I loved having folks back out to the farm to learn all about growing + cooking good food, and I’m so excited to host heaps more classes in the new year.

It was a fairly quiet week around here, and we officially only have 2 more weeks left in our Fall CSA. One veggie that I’m especially thrilled to include in our boxes next week is CAULIFLOWER! I’ll be honest – I’ve been farming in one way or another for the past 15 years, and I’ve never even tried growing cauliflower. It can be a notoriously hard veggie to grow, and it takes quite a bit of time + space + energy to do well. Alas, back in August when that nasty groundhog was eating all our brassica plants, some farmer friends gave me a flat of extra cauliflower seedlings and I planted them with low expectations. I’d honestly forgotten about them until this week, and all of the sudden we have some gorgeous cauliflower on our hands! They are still a bit on the small side, but we should have enough over these next 2 weeks to give our CSA members a nice head or two, which is a total win in my book.

We’re predicting a few frosty nights this weekend, so yesterday the main item on my to-do list was harvesting our lemongrass, which is not frost-tolerant. Lemongrass was another new plant for me this season, and I was pretty amazed by how vigorously this fragrant herb grows. I started a few seedlings back in February, and they were still the tiniest little things when I planted them in May after the threat of frost had past. They were slow to start, but by July as the heat + humidity kicked into gear, the plants absolutely TOOK OFF (the photo below is just FOUR individual plants, so you can see how big they get).

So today I just want to share a few basics about growing, harvesting, and storing lemongrass (and keep reading for lots of recipe inspiration):

GROWING LEMONGRASS

  • Lemongrass usually grows 2 to 4 feet tall and 2 to 3 feet wide (though in tropical areas, it can grow to as tall as 9 feet). As a tropical grass, it’s hardy to USDA hardiness zones 10 to 11, though the roots may be hardy to zone 8. In cooler growing zones, lemongrass is often grown as an annual or can be overwintered indoors in pots.

  • Lemongrass prefers fertile, loose, well-drained loam soil that is moist but not too wet. It will tolerate average soil if it has enough moisture and good drainage, but does best in soil with a pH of 6 to 7.8. Plant it in a location with full sun or at least 6 hours of sun per day.

  • As a tender, tropical plant, lemongrass will not survive below freezing temperatures outdoors. If you’ve grown lemongrass in the ground, you can dig it up before the first frost, cut back the foliage and stalks to just a few inches tall, and plant it in one large pot or into several smaller pots. Keep your potted lemongrass as a houseplant near a bright, sunny window, ideally with southern exposure; in a heated greenhouse; or under artificial lights.

HARVESTING LEMONGRASS

  • Lemongrass is harvested for both the stalk and foliage. Wait until the stalks are at least 1/4” thick, before beginning to harvest them. The most tender part of the stalk is at the bast of the plant, so use a sharp serrated knife or clippers and cut the stalk as close to the ground as possible.

  • Once the stalks are harvested, remove the woody outer portion and the leaves (save the leaves to dry for teas/cooking, or compost them).

STORING LEMONGRASS

  • Freezing – Lemongrass stalks can be frozen whole or in smaller pieces for about 6 months. For easy use in cooking, portion out the stalks in amounts that you’d use them in your favorite recipes. Place them in a freezer bag or container labeled with the date and amount stored.

  • Drying / Dehydrating – To dry the stalks or leaves, cut them into pieces while the plant is still fresh, as they can become crumbly and difficult to cut when dry. Separate the leaves from the stalks, and lay them on paper towels or on a screen in a dry area out of direct sun. When completely dry, store in a jar in a cool, dark place. Dried lemongrass can be used for up to a year.

Last but not least… did y’all see the news?! Some brand spankin new Farmbelly merch is finally HERE and I’m so excited to share it with everyone over on the online shop. Inspired by our new logo, I've created two different vintage-inspired t-shirt designs, some super cozy + comfy sweatshirts, an extra big tote bag, and a stylin' baseball hat – just in time for the holidays.

I hope y'all dig these creations as much as I do... a lot of love + heart went into each piece, and everything is screen-printed locally by our new friends over at The Merch in Carrboro. In addition to all these rad screen-printed goodies, I also have my fan-favorite Heal-All Herbal Salve and local honey back in the shop... while supplies last! Orders must be placed by midnight Sunday, November 20th, and all orders will ship the week of December 5th to ensure delivery before the holidays.

Kitchen Notes

In the spirit of all things lemongrass, I’m going to share lots of different ways to enjoy this fragrant herb in your kitchen. I’ll be honest that until this season, I’d never grown OR cooked with lemongrass, so I totally get that this might not be an herb that you would usually use… but part of the fun of gardening and cooking is trying and learning about new ingredients and flavors, so I hope this will inspire you to give lemongrass a try!

Photo Credit: Healthy Nibbles and Bits

HOW TO PREP LEMONGRASS

  • First, slice off about ½ inch from the bottom of the stalk. Then, slice off the top of the stalk to trim away the thin leaves (and you can use those leaves for tea, simmering in soups/stocks, etc).

  • Next, peel off 1-2 outer layers of the stalk, until you get to the more tender and juicy part of the stalk. The amount of layers that you peel depends on the freshness of the lemongrass.

  • FOR SOUP / BROTH – slice the stalk into 3-inch sections. Then, bash each section with a kitchen mallet or meat tenderizer, until you see the stalk split open slightly. This technique releases the oils from the stalks.

  • FOR STIR FRIES – slice the stalk into very thin rings.

  • FOR SAUCE OR MARINADE – grate the lemongrass with a microplane so the herb can easily incorporate with the other ingredients.

COMMON USES FOR LEMONGRASS

In South and Southeast Asian cooking, lemongrass commonly conspires with ingredients like garlic, galangal (and/or ginger), cilantro, Thai basil, shallots, lime leaves, and coconut milk to create bold, complex flavors.

  • Lemongrass tea: This is the perfect way to use the parts of the lemongrass plant that is not flavorful enough for cooking. Steep a few pieces (cut into 1- or 2-inch lengths) of the fresh or dried leaves and/or outer woody stalks in a cup of boiling water for 5 minutes, or longer if you desire a stronger brew.

  • Ginger substitute: Substituting lemongrass for ginger will result a milder flavor profile for any dish.

  • Lemon juice substitute: Lemongrass can be used in cream sauces in place of lemon juice, without the risk of the sauce curdling.

  • Seasoning for broths, sauces and other dishes: Minced lemongrass stalks or leaves can be added to any dish that would be enhanced by a mild, lemony flavor.

LEMONGRASS RECIPES

Today’s Stats

  • Low temp: 56F

  • High temp: 75F

  • Sunrise: 6:50am

  • Sunset: 5:12pm

  • Moon phase: Waning gibbous

  • Additional notes: Rain!

November 4

Farm Notes

It’s been an exciting / nerve-wracking few days around here, culminating in a 150+ year old white oak tree coming down in our front yard just a few steps away from our house.

But let me back up… last fall, an ancient oak tree was struck by lightning in a bad thunderstorm (crazily enough, me and my family were sitting on our front porch just 20 feet away watching the storm roll through when the tree was struck… needless to say, it was quite a shock for all of us)!

Over the past year, we’ve watched as the tree began dying a slow death – we had several arborists come visit, and all agreed the majority of the tree as dead and severely compromised. Unfortunately, because the tree is so close to our house (and a major powerline along the road), it was becoming very dangerous and we made the tough decision to take the tree down. (Side note – we’ve learned a lot through this process, and found that taking down trees is very expensive. We were very fortunate that our power company was already doing work on our road to clear around power lines, and they agreed to cover the costs to take down this tree… which saved us thousands of dollars).

Trust me when I say I was heartbroken to have to take down this amazing tree… I keep thinking about what the world was like over a century and a half ago when it first starting growing, and imagining all that those roots and branches and that great big trunk have seen. So much has changed about our little corner of the world, and this tree has seen it all.

But after three full days with rockstar crew carefully taking the tree down piece by piece, we would come to learn that we absolutely made the right decision. Once the base of the trunk was cut down, we saw that the entire base of the tree was completely rotten and hollowed out on the inside. These photos don’t really do it justice… the extent of decay was some of the worst that the tree crew had ever seen. We realized it really wasn’t a question of IF but WHEN a strong enough storm would have caused the tree to come crashing through our house.

Rest assured that we’re making sure the tree has a purposeful second life – literally as I type this, a neighbor is here loading up truckloads of logs for firewood, and we are hoping to work with a local sawmill to turn the trunk (at least the parts that aren’t rotten) into beautiful milled boards for future projects.

Back on the farm, all our veggies are humming along and loving the recent warm, clear days and cool nights. While we had some frosts a few weeks ago, the weather has been unseasonably warm… though I’m not complaining, as it’s been lovely to have highs in the 70s along with blue skies and vibrant changing leaves. I haven’t been great about taking photos of our fall CSA shares, but this week’s full share boxes were just so dang pretty that I couldn’t pass up snapping a pic of the abundance:

One last note... keep your eyes out for a special email early next week, where I’ll be launching pre-orders for some brand spankin new Farmbelly merch! I’ve been working behind the scenes for the past few months to bring you some beautiful, high quality tees, sweatshirts, totes + baseball caps and can’t wait to share them with y’all. I’ll be taking pre-orders for about 2 weeks, and then everything should ship the week of December 5th, so you'll have plenty of time for holiday gifting!

Kitchen Notes

Whenever I have a mis-mash of various veggies hanging around, I love making these rainbow spring rolls. They come together in just a few minutes, and they are super flexible so you can just use whatever you have on hand – and if you have kids / grandkids, this is an awesome dish to make with them! And promise me you won’t skip the peanut miso dipping sauce… y’all, this dip is so freakin good, you’ll be licking your plate when you’re done!

RAINBOW SPRING ROLLS 

WITH PEANUT MISO DIPPING SAUCE

INGREDIENTS

  • 12” rice paper sheets

  • Fresh herbs – basil or mint leaves, or arugula works too!

  • Red cabbage, shredded

  • Carrots, julienned

  • Cucumber, julienned

  • Red, orange or yellow bell pepper, cut into thin slices

  • Avocado, sliced

Peanut Miso Dipping Sauce

  • 2 cloves garlic

  • 1/4 cup tahini

  • 1/4 cup peanut butter

  • 1/4 cup rice vinegar

  • 2 tablespoons white miso

  • 2 tablespoons maple syrup

  • 1 tablespoon liquid aminos (or soy sauce)

  • 1/2 teaspoon grated fresh ginger 

  • 1/4 teaspoon red pepper flakes

  • 1/4 cup water + additional to thin if necessary

PREPARATION

  • First make sure all over your veggie fillings are prepped and ready to go.

  • Dip your rice paper sheet into a bowl of lukewarm water and rotate for 5 seconds. 

  • Remove rice paper from water, shake off excess, and lay flat on a plate or cutting board. 

  • Make a thin bottom layer of basil, mint and/or arugula on top of the rice paper, leaving a 1-inch border empty along the edges. 

  • Fill the bottom third of the rice paper with your veggie fillings, making sure to leave a 1-inch border empty along the edges, and being careful not to overfill. 

  • When ready to roll, first fold in the sides (like a burrito). Then roll the rice paper around the filling, keeping everything together tightly. The rice paper should adhere to itself and keep everything contained. Have fun, get creative, get messy, and enjoy with a yummy dipping sauce!

  • To make the dipping sauce: Simply place all the ingredients for the dressing to a small food processor and blend until smooth and creamy. Taste and adjust seasoning as needed. If the sauce is too thick, add a bit more water.

Today’s Stats

  • Low temp: 58F

  • High temp: 74F

  • Sunrise: 7:43am

  • Sunset: 6:18pm

  • Moon phase: Waxing gibbous

  • Additional notes: Mostly sunny

October 28

Farm Notes

It feels like #peakfall around here, and I for one am loving it. Every year when fall rolls around, I’m like… give me all the sweaters, all the pumpkin spiced lattes, all the leaf piles, all the hearty soups, all the root veggies! Especially after a long and tiring (but still wonderful) summer, this time of year I can feel myself start to relax, take a breath, and even sleep in a bit (as much as one can with a toddler)…

After planting a few more successions of lettuce, asian greens, radishes, arugula, and baby kale over the past week, I can officially say that we are finished planting for the 2022 season! As this point, we (fingers crossed) should be able to cruise through the last 4 weeks of our fall CSA, which goes through the week of Thanksgiving.

Planting garlic into landscape fabric for weed control

But just as we finish planting for this season, it’s already time to start planting some of our crops for next year! Today I’m going to dig into all things garlic, because now is a great time to get your cloves in the ground. My rule of thumb for most climates around the US is to try and plant garlic between Halloween and Thanksgiving (you don’t want the ground to be so cold that it is frozen, but you also don’t want to plant the garlic too early, and risk getting too much growth too soon, which could get nipped and damaged by frigid winter temperatures).

To help control weeds over garlic’s long growing season (it won’t get harvested until next June) we plant them into landscape fabric – though you definitely don’t need to do that if you’re just growing a small amount of garlic in your home garden.

TYPES OF GARLIC

  • Hardneck garlic produce a stiff stem that grows up through the center of the bulb. Compared to softneck varieties, they have a sharper flavor, with more variation in flavor among the varieties. They are also hardier than softneck, so they are the best option for growing in cold climates. This is the variety that produces garlic scapes that need to be pulled (and then enjoyed!) in early summer before the garlic is harvested.

  • Softneck garlic don't produce a stiff central stem. Softneck garlic is the best choice for regions with mild winters, it has a more mild flavor than hardneck garlic, and it's the type to grow if you want to make garlic braids.

  • Elephant garlic resembles a giant head of garlic and, indeed, it does belong to the same genus, Allium. However, it isn't a "true" garlic but rather is more closely related to the leek.

Head of garlic

Garlic cloves

HOW TO PLANT GARLIC

  1. Plan to plant garlic in the fall, ideally between Halloween and Thanksgiving

  2. Prepare your soil by loosening it with a fork/broadfork, and work in a good amount of compost into the bed. Garlic is a “heavy feeder” and requires a lot of nutrients, so having good quality soil is important to get a good crop.

  3. Purchase garlic seed from your local farm/garden store (not the supermarket)! Just prior to planting, break up the garlic heads into individual cloves, leaving as much of the papery covering on each clove intact as possible.

  4. Plant cloves 3"-4" deep and 4”-6” apart, orienting them so the pointy ends face up and root end is pointing down.

  5. Water gently to settle the soil, and then cover the bed with a 4" to 6" layer of leaves or straw. You will likely see some green shoots starting to grow before the end of the year, which is great! They will really start to take off in the spring.

PS – I just took y'all on a virtual walk around the farm! It's a gorgeous day around here, and to see everything that's happening + get some tips for your gardens, you can tune in here.

PS – On a totally non-farming related note… an encouragement to everyone to put your civic duty to practice and VOTE! I voted early yesterday, and was in and out of my polling station in 5 minutes... it couldn’t be easier to make your voice heard! Folks in NC can find out your local polling station options here.

Kitchen Notes

Because I love any excuse for carrots and crispy chickpeas and herbs and a yummy tahini vinaigrette… here’s a delish salad/side recipe that is chock-full of awesome autumnal vibes. It may look like a lot of ingredients, but I promise they are all ones you (most likely) already have in your pantry/fridge, and this dish comes together super easily + keeps super well in the fridge (though the chickpeas get a little less crispy). This recipe is adapted from the always wonderful Deb Perelman, of Smitten Kitchen.

SHAVED CARROT SALAD WITH TAHINI, CRISPY CHICKPEAS AND FRESH HERBS

Photo Credit: Deb Perelman, Smitten Kitchen

INGREDIENTS

Roasted Chickpeas

  • 1 15-ounce can chickpeas, drained and patted dry on paper towels

  • 1 tablespoon olive oil

  • 1/2 teaspoon coarse sea salt

  • 1/2 teaspoon ground cumin

  • 1/2 teaspoon paprika

Salad

  • 2 pounds carrots, peeled and coarsely grated

  • 1/2 cup roughly chopped fresh parsley

  • 1/2 cup shelled, salted pistachios, coarsely chopped

Tahini Dressing

  • 1 large garlic clove, minced

  • 1/3 cup lemon juice

  • 1/3 cup well-stirred tahini

  • 3 tablespoons olive oil

  • 2-4 tablespoons water, plus more if needed

  • Salt and red pepper flakes to taste

PREPARATION

  1. Roast chickpeas: Heat oven to 425 degrees F. Toss chickpeas with one tablespoon olive oil, salt, cumin and paprika until they’re all coated. Spread them on a baking sheet or pan and roast them in the oven until they’re browned and crisp. This can take anywhere from 15 to 20 minutes, depending on the size and firmness of your chickpeas. Toss them occasionally to make sure they’re toasting evenly. Set aside until needed.

  2. Prep the salad: Grate the carrots, chop the parsley and pistachios, and combine in a bowl.

  3. Make the dressing: Combine ingredients together in a jar and shake until well combined, adding more water if needed to thin the dressing slightly. Taste and adjust seasoning – don’t worry if it tastes a little sharp on the lemon, it will marry perfectly with the sweet grated carrots.

  4. Assemble salad: Add the roasted chickpeas to the bowl of grated carrots, parsley, and pistachios. Mix in the dressing and stir gently to combine. Taste and adjust seasoning (adding more salt, lemon juice, etc) as needed. To serve, sprinkle with additional pistachios and parsley.

Today’s Stats

  • Low temp: 44F

  • High temp: 60F

  • Sunrise: 7:36am

  • Sunset: 6:25pm

  • Moon phase: Waxing crescent

  • Additional notes: Mostly sunny

October 21

Farm Notes

We’ve officially hit a major milestone in our growing season.. the first frost has arrived! After wrapping up our CSA boxes on Tuesday, I spent the rest of the day hustling around the farm, frantically preparing for the first frost of the season that evening. There were peppers and hibiscus to be harvested, tunnels to close up, hose/irrigation lines to empty, and row after row of veggies that needed to be tucked in with frost cover. I was outside long after the sun had set, scurrying around until it was so dark that I couldn’t see anymore, but I got it all done! When I woke up on Wednesday morning, everything was calm, quiet, frost-covered and sparkling in the morning sunlight.

Thankfully, all of our veggies fared well after two nights of hard frost, and even some of the rows that didn’t get covered that I was a bit worried about did just fine! For example – I wasn’t able to cover our fennel because it had gotten so big and tall, that I literally didn’t have frost cover that was wide enough to cover it… so I just said a little prayer and wished it good luck, and wouldn’t you know it did great. It goes to show that quite often, plants are far more resilient than I give them credit for, and if anything these chilly temps will make them even sweeter.

As our growing season winds down, this week I spent a lot of time reflecting on just how far we’ve come… it was about 10 years ago that I first began dreaming of having my own farm-based cooking school, and it’s been a long and winding and exhausting and wonderful journey to get where we are today.

The past few weekends I’ve been hosting cooking workshops here at the farm, and I’ve been overwhelmed with happiness seeing folks in the garden, helping to harvest fresh herbs and veggies that we’ll use to cook vibrant and nourishing dishes that we sit down and enjoy together. Seeing this crazy dream of mine finally coming to fruition after 10+ years has been pretty wild, and I could not be more grateful for all the support that I’ve received along the way. I’m especially thankful for this community of Farmbelly Club members – thank you for being here and for continuing to support and cheer me on! PS – If you want a glimpse behind the scenes of my journey the past 10 years, I made a reel on instagram that you can watch here.

One of the things I’m especially excited to offer more in the coming season is hands-on gardening / farming workshops. Thank you for the awesome response to my new Beginning Market Gardener Workshop on November 19th… the feedback has been amazing, and there is only one spot left! And while this workshop is geared more towards folks who are looking to take their growing to the next level (and potentially sell their produce), in Spring 2023 I will definitely be offering hands-on workshops focused more on small-scale home gardens in raised beds and pots.. so stay tuned!

And stay tuned for next week, when I’ll be digging into the nitty gritty of planting your own garlic.. I can’t believe it’s already time to get garlic in the ground, but here we are! Be well and stay warm everyone, have a delicious weekend. :)

PS – I took y’all on a virtual farm walk this morning, with lots of new veggies to see + helpful gardening info for you! For a full tour of the farm + tips for your own gardens, here’s the link to watch!

Kitchen Notes

Every year when the weather cools down, I crank up my oven and make this soup on repeat. By roasting the butternut squash, leeks + apples to bring out their natural sweetness and blending the sweet veggies and fruit with warming fall spices (plus a touch of apple cider vinegar), the end result is a luscious (and super simple) soup I highly recommend enjoying while cozied up in your PJ’s. Keep scrolling for the full recipe, which was inspired by and adapted from Sara Britton and her blog My New Roots.

ROASTED BUTTERNUT SQUASH, LEEK & APPLE SOUP

INGREDIENTS

  • 2 tablespoons olive oil

  • 3 leeks, sliced into thin rounds and rinsed

  • 1 large yellow onion, diced

  • 5 cloves garlic, peeled and left whole

  • 1 large butternut squash (2-3lbs), peeled and diced

  • 1 large Granny Smith apple, peeled and diced

  • 4 – 6 cups vegetable or chicken broth

  • 1 teaspoon kosher salt

  • 1 teaspoon ground cumin

  • ½ teaspoon ground cardamom

  • ½ teaspoon ground cinnamon

  • Apple cider vinegar, to taste (start with 2 tsp up to 2 Tbsp)

  • Fresh ground pepper, to taste

INSTRUCTIONS

  1. Preheat oven to 400°F.

  2. Prepare the vegetables into a large bowl: slice and rinse the leeks, dice the onion, peel garlic (but leave it whole), peel the butternut squash and dice into 1/2-inch cubes, peel and dice the apple. Add 2 tablespoons of olive oil and a pinch of kosher salt to the vegetables in the bowl and toss gently to coat.

  3. Pour the prepared vegetables out evenly onto two rimmed baking sheets. Set the trays in the oven to roast for 30-40 minutes until tender and beginning to brown, stirring halfway through and making sure the leeks don’t burn.

  4. While the veggies are roasting, pour 4-6 cups of vegetable or chicken broth into a saucepan along with the salt, cumin, cardamom, cinnamon and 2 teaspoons apple cider vinegar. Cover and bring to a low simmer.

  5. When the vegetables are roasted, blend the soup in batches by transferring a few cups of roasted vegetables into a standing blender, along with a few cups of the warmed broth, blending on high until completely smooth. As you work in batches, transfer the blended soup into a stockpot. Alternatively, you can combine the vegetable and broth in a stockpot and blend with an immersion blender.

  6. Once all the soup has been blended, taste and adjust seasoning as needed. Add additional stock if you prefer a thinner soup. This soup is delicious topped with toasted nuts or seeds, creme fraiche, and caramelized onions or leeks.

Today’s Stats

  • Low temp: 36F

  • High temp: 65F

  • Sunrise: 7:29am

  • Sunset: 6:33pm

  • Moon phase: Waning crescent

  • Additional notes: Clear skies and beautiful

October 14

Farm Notes

As the temperatures start to dip lower, our fall greens and root veggies are only getting sweeter! This week we picked our first harvests of big leafy collards and kale for our CSA members, and I’m so proud of how far they’ve come since they were first planted as tiny seedlings in the searing August heat + humidity. After a summer filled with tomatoes, peppers, squash, and eggplant, I hope that our CSA members are as excited about these leafy greens as I am… though I know they may not be the sexiest veggies out there! For anyone needing a little inspiration + information about cooking with dark leafy greens this fall and winter, here’s a great resource I found that’s filled with great ideas.

It looks like Tuesday night may be the first frost around here! October 15th is my rule of thumb for the first frost of the fall, so we’re pretty much on track for our area. A lot of our fall leafy greens like the collards and kale pictured above can handle a light frost without any problem, though I’ll definitely be covering our more tender lettuces, arugula, and baby radishes, turnips, etc with frost cover to protect them from frost damage.

Yesterday I checked on our main fall carrot crop, and as you can see (below) these beauties are ready! Carrots are always a tough one to grow – they are difficult to germinate (especially when they get planted in the heat of summer), they take 70+ days to mature, and they need loose soil rich in organic matter to get those nice, long, straight roots. Thankfully this batch of carrots seems to be a good one, and I’m excited to get to share them with our CSA members starting next week.

This week marked the halfway point in our Fall CSA – 6 weeks down, 6 weeks to go! Overall I’m feeling good about all the veggies we have still growing in the field to fill out the remaining weeks of the CSA… so many yummy greens, cabbage, broccolini, fennel, beets, carrots, herbs, etc still to come. I have one more big succession of greens, radishes, turnips etc to plant inside our tunnels, but after that, there’s really no more planting left for the fall (except our garlic, which is a whole other thing).

Today I’m also excited to announce something I’ve been working on behind the scenes, that Farmbelly Club members get to learn about before anyone else! Hopefully you all know by now that education is really important to me, and I’ve been itching to offer more gardening / farming workshops to focus more on the growing side of things.

So I’m thrilled to share that I’m hosting my first ever Beginning Market Gardener Workshop on Saturday, November 19th! This workshop will give beginning + aspiring market gardeners the tangible resources and hands-on knowledge to start a new farm/garden or to improve an existing growing space. This workshop is designed for current or aspiring market gardeners and/or home gardeners who are looking to take their growing to the next level – whether you are just growing for your family and friends or if you want to sell your produce. PLEASE NOTE: This workshop is not designed for home gardeners looking to grow in small raised beds or pots – as we will be focused on growing on a larger and potentially commercial scale.

Just in time for winter dreaming and scheming, this is a foundational class for beginning market gardeners. The entire workshop will be spent outside on our farm, digging into strategies for setting up a new farm/garden from scratch, as well as ideas for improving (and/or expanding) an existing garden space. Much of our time will be dedicated to demonstrating how to use key market gardening tools like the broadfork, tilther, and jang seeder – with built-in time for you to practice using all of the tools yourself! This workshop will be very intimate (max 10 people) to ensure that everyone has an intensive, hands-on experience.

The workshop will cover the following topics:

  • Strategies for starting a market garden from scratch on new ground (or expanding a current space)

  • How to build permanent raised beds (without a tractor or rototiller)

  • How to prep and/or “flip” a growing bed (ie using a broadfork, adding amendments, finishing with a tilther, etc)

  • Irrigation set up and strategies, with a focus on drip irrigation

  • Weed control and how to use landscape fabric

  • How to set up and use a jang seeder

  • How and when to use frost cover, shade cloth, and tarps to maximize your growing capacity

  • Wash-pack station set up tips and tools

  • Strategies (and access to my personal spreadsheets) for planning and mapping out your market garden space

Because there is only so much we can pack into a 2.5-hour workshop, this class will not be going in depth about soil science or deep-diving into how to grow specific crops (though I will be sharing a cheat-sheet on the spacing we use for various crops). A few days before the workshop, attendees will be asked to fill out a short survey asking about topics you would like to cover during this workshop, to make sure all of your questions get answered!

Space in this workshop is very limited, so secure your spot HERE. Farmbelly Club members get early access, and tickets will be open to the public on Monday.

PS – I just took y’all on a virtual farm tour, tune in HERE on Facebook to see what’s growing + get lots of tips for your own farms and gardens!

Kitchen Notes

This recipe is a perfect way to use up fall root veggies like beets, carrots, radishes, or turnips – turning them into something unexpectedly delicious. The sesame ginger vinaigrette is super simple to make, and gives the slaw a unique, asian-inspired flavor that pairs beautifully with the earthy fall veggies.

FALL VEGGIE SLAW WITH SESAME GINGER VINAIGRETTE

Photo Credit: Lavender and Macarons

INGREDIENTS

For the slaw

  • 2-3lbs assorted winter veggies (carrots, kohlrabi, beets, turnips, radishes, etc)

  • 1 bunch cilantro, roughly chopped

  • Sesame seeds, to taste

For the vinaigrette

  • 1 garlic clove

  • 1/4 cup rice vinegar

  • 2 teaspoons finely minced ginger

  • 2 teaspoons soy sauce 

  • 2 teaspoons yellow miso paste

  • 2 teaspoons honey

  • 5 tablespoons canola oil 

  • 2 tablespoons toasted sesame oil

  • 2 tablespoons toasted sesame seeds

PREPARATION

  1. To prepare the slaw, carefully shred the vegetables with a box grater into a large bowl (or use the shredding attachment on your food processor).

  2. One handful at a time, squeeze any moisture out of the shredded vegetables and place them in a separate bowl (this prevents the salad from getting watery).

  3. Add the chopped cilantro to the bowl with the shredded veggies. 

  4. To make the sesame ginger vinaigrette, combine ingredients together in a small processor and blend until smooth. Taste and adjust seasoning as needed. 

  5. Pour the vinaigrette into the salad bowl and toss together to combine. Taste and adjust seasoning as needed. Top with toasted sesame seeds and a bit more fresh cilantro and enjoy!

Today’s Stats

  • Low temp: 46F

  • High temp: 69F

  • Sunrise: 7:23am

  • Sunset: 6:42pm

  • Moon phase: Waning Gibbous

  • Additional notes: Clear skies and beautiful

October 7

Farm Notes

After a tumultuous weekend filled with wind and rain and no power thanks to Hurricane Ian, this week was the epitome of glorious fall weather here in the Piedmont of North Carolina. Blue skies and sunshine, zero humidity, chilly mornings + evenings and pleasantly warm afternoons… can it be like this ALL the time?

This week’s CSA boxes were filled with some gorgeous lettuce and some fun / less common fall veggies like watermelon radishes and kohlrabi. Somehow we still have some tomatoes and peppers and eggplant, though we are in the process of clearing out our tunnels (where those summer veggies have been growing) and will replace them with more successions of lettuce, arugula, baby kale, radishes, and turnips that we’ll harvest for the last few weeks of our CSA through the end of November. After a slow start, our leafy brassicas like kale and collards will finally be ready for harvesting next week, and in a few weeks our cabbage, broccolini, and fall carrots will be ready. For a full tour of what’s growing here at the farm, I just took y’all on a virtual farm walk – tune in via Facebook HERE, or later this weekend via our shared google drive HERE.

We haven’t had a frost yet, but tomorrow night will be the coldest yet, with the predicted low around 38F. If you are expecting frosts in your area and have tender plants that need to be protected, make sure to pick up some frost cover! The best place to pick of frost cover will probably be your local farm/garden store, but here’s a link to snag some online if needed.

Yesterday we had the most gorgeous evening for a hands-on cooking class here at the farm. After a tour around the garden, everyone helped harvest fall veggies like kale, kohlrabi, beets, watermelon radishes and cilantro, and then we whipped up three different yummy fall salads and some homemade vinaigrettes. It makes my heart so darn happy to be able to host these in-person farm to table events again… seeing folks get inspired to grow their own gardens and try new things in the kitchen is truly the best feeling, and is exactly why we have worked so hard to create this special space.

I only have one more cooking workshop on the calendar for the fall next Saturday (Oct 15), which will be focused on Knife Skills! There are still a few spots left, so if you’re local and would like to join us, here’s a link to more details and tickets.

Okay, one last piece of exciting news that you get to hear first as Farmbelly Club members… Farmbelly has a brand spankin new logo, with lots of fun swag (think t-shits, sweatshirts, totes and hats) coming soon! I have been working for months with some talented graphic designers to create a new logo that captures the spirit of Farmbelly, and I’m so happy with how the new designs turned out. Would love to hear what you think?!

Kitchen Notes

For yesterday’s cooking class, I think the biggest hit of the night was this salad! It’s a super flexible recipe – just use quinoa as the base (or rice, lentils, farro, etc) and whatever veggies, fruits, nuts/seeds you have on hand. The dressing is just a simple apple cider vinaigrette, which has a nice tang that pairs beautifully with the roasted butternut squash, tuscan kale, green apples, avocado, pepitas (pumpkin seeds) and goat cheese.

AUTUMN QUINOA SALAD WITH ROASTED BUTTERNUT SQUASH, TUSCAN KALE, GREEN APPLES, AVOCADO, PEPITAS & GOAT CHEESE WITH APPLE CIDER VINAIGRETTE

INGREDIENTS

  • 2 bunches of lacinato kale, de-stemmed and chopped

  • 4 cups cooked quinoa

  • 2 cups diced and roasted butternut squash

  • 2 green apples, diced

  • 2 avocados, diced

  • 1 bunch of parsley, finely chopped

  • 1 cup toasted pumpkin seeds/pepitas

  • 1/2 cup goat cheese, crumbled

Apple Cider Vinaigrette

  • 1/2 cup olive oil

  • 1/4 cup apple cider vinegar

  • 2 tablespoons Dijon mustard

  • 2 tablespoons maple syrup (or honey)

  • 1 clove minced garlic

  • Kosher salt and freshly ground pepper to taste

PREPARATION

  1. To cook the quinoa: Put 3 cups of water into a medium saucepan and bring to a boil. Add 2 cups uncooked quinoa, reduce heat to a simmer and put a lid on the pot and cook for 15 minutes. Turn off the heat and let sit for 5 minutes, then fluff with a fork and set aside until needed. 

  2. De-stem the kale, roughly chop, and set aside in a bowl. 

  3. Combine the ingredients for the vinaigrette in a jar and shake until well emulsified – taste and adjust seasoning as needed. Pour a few tablespoons of the vinaigrette into the bowl with the chopped kale. Using your hands, massage the kale for 1-2 minutes until the leaves are dark green and broken down. 

  4. In a separate large salad bowl, add the cooked quinoa and other ingredients – massaged kale, roasted butternut squash, diced green apples, avocado, parsley, pepitas, and goat cheese. 

  5. Pour remaining dressing over the salad and toss well to combine. Taste and adjust seasoning as needed.

Today’s Stats

  • Low temp: 50F

  • High temp: 80F

  • Sunrise: 7:17am

  • Sunset: 6:52pm

  • Moon phase: Waxing Gibbous

  • Additional notes: Blue skies and beautiful

September 23

Farm Notes

It’s really starting to feel like fall around here! Suddenly it’s dark by 7:45pm, which forces me to head inside and stop working, after being used to getting lots of things done outside in the evenings after Sawyer goes to bed. While the shorter days mean I don’t get quite as much accomplished, I’ll be honest that I’m actually grateful that Mother Nature is forcing me to slow down, come inside, and actually eat dinner before 8pm!

Last week we celebrated Sawyer’s first birthday with family and friends, and it was the most wonderful, joy-filled weekend. Over the past year, Sawyer has taught us so much – first and foremost, he’s taught us how to be parents (no joke, I had never changed a diaper before he was born..), but also how to be more patient, how to see the world with truly open eyes, and how to be silly + laugh without abandon. I’m definitely still figuring out how to balance being a mom and wife and farmer/small business owner, but it feels pretty awesome to have made it through the first year milestone, and I thank my lucky stars every day that I get to be Sawyer’s mom. :)

All the fall veggies are loving the cooler temperatures, while our summer tomatoes/peppers/eggplant/okra are singing their final swan song. Unfortunately, I’ve yet to catch the groundhog that seems bound and determined to eat all our brassicas, so I’ve had to resort to covering all our baby plants 24/7 with row cover (see photo below) to keep them from getting eaten. I’ve also been battling with moles, who apparently have a sweet tooth for fennel (see photo below)… moles are notoriously hard to get rid of, and I’m just hoping that I’ll still have fennel left for our CSA members before the moles get to them all!

Covering our plants to keep the groundhogs away…

…and apparently moles love fennel?!

Now that we’re in the second half of September (how did that happen?!), the majority of our fall crops are in the ground, though we are still planting successions of lettuce, arugula, baby kale, radishes, and turnips to keep us rolling in greens through the end of the year. So depending on the climate where you live (ie how soon your first frosts arrive), there is still time to get some more fall veggies in the ground! Not sure what your average first frost date is in your area? Here’s a great website where you can enter your zip code and find out average frost dates for your area.

For a full tour of what’s growing here at the farm, I just took y’all on a virtual farm walk – tune in via Facebook HERE, or via our shared google drive HERE.

PS – Many of you have asked for a health update… I’m very glad to report that the issues I was having with my left ear have improved significantly since my last update. I had a follow-up with my ENT doctor this week, and while my hearing isn’t fully restored (I still can’t hear low frequencies in my left ear), overall the ringing and pressure have pretty much gone away. There’s a chance that I may have a condition that is causing a fluid imbalance in my inner ear, which I’d need to regulate through diet, stress management, etc – but for now, I’m taking it one day at a time and just grateful to be feeling so much better… thanks for all the kind words and messages! :)

Kitchen Notes

If you’re never exactly sure what to do with shishito peppers (or any kind of frying pepper like padrons, habanadas, etc) THIS is my go-to recipe/method. All you gotta do is get a skillet nice and hot, and blister those puppies with some oil + salt + a little garlic and lemon (and a dusting of parmesan if you’re feeling extra). It all comes together in literally 5 minutes, and this makes for a finger-licking appetizer or awesome veggie side.

Blistered Shishito Peppers with garlic & Parmesan cheese

INGREDIENTS

  • 1/2 pound (3-4 cups) shishito peppers (or other frying pepper of choice), stems on

  • 1 tablespoon vegetable oil

  • 2 cloves garlic

  • 2 tablespoons lemon juice

  • Salt, preferably flaky sea salt or kosher salt, to taste

  • Freshly grated parmesan cheese (optional, but highly recommended)

PREPARATION

  1. In a large bowl, toss the peppers with 1 tablespoon vegetable oil.

  2. Heat a 12” skillet over high heat until it’s nice and hot (so hot water should sizzle), then add the peppers and a hefty pinch of kosher salt and let them cook in a single layer undisturbed for 2-3 minutes until nice and blistered on the bottoms. Toss and cook for another 2 minutes until blistered all around and tender.

  3. Remove the skillet from the heat and add the minced garlic and lemon juice – it will sizzle! Stir to incorporate the garlic in the juice and to coat the peppers. Taste and add additional salt if needed.

  4. Transfer the peppers to a serving plate and sprinkle with some freshly grated parmesan, a little flakey sea salt + extra lemon if desired. Enjoy!

Today’s Stats

  • Low temp: 46F

  • High temp: 71F

  • Sunrise: 7:06am

  • Sunset: 7:12pm

  • Moon phase: Waning Crescent

  • Additional notes: Clear and cool

September 11

Farm Notes

Goodness gracious, it’s been a week! Full of highs and lows, and lots in between. Usually I get these updates out on Fridays, but it’s just been one of those weeks, so I’m here just a few days late… but better late than never, I suppose.

On the bright side, this Tuesday we kicked off the first week of our Fall CSA, and it was a bountiful box full of fall greens and radishes, alongside some summer favorites like okra, peppers, eggplant and tomatoes. Over the course of the next several weeks, those summer veggies will fade away and our boxes will be bursting with all kinds of delicious greens… which I know I am very ready for! It was a beautiful week of weather, with some nice cool days this weekend with some much needed rain that our fall veggies are loving.

On the not so rosy side… we’ve been dealing with a lot of pest issues – especially a type of caterpillar called army worms who have been decimating our brassicas (kale, turnips, cabbage, broccoli, etc). While dealing with some health issues over the past few weeks (more on that later..), I took my eye off the ball a bit, and in a blink the army worms have gotten out of control (see below for a photo so you know what to look for in your gardens).

So now I’m doing my very best to get things back under control, while only using organic methods of course. I’m all about preventative pest management (things like crop rotation, having healthy soil, and companion planting to help keep pests away in the first place) – but in a situation like this, I need to be more proactive. The best solution for organically addressing most worms/caterpillars in the garden is a natural insecticide called Bt (short for Bacillus Thuringiensis), which is a naturally occurring bacteria in soil that is toxic for the unwanted pests, but perfectly safe for the plants (and for humans). Fingers crossed that the Bt treatments do the trick, and that our brassicas will bounce back quickly.

And there’s another pest that’s been wrecking havoc in our garden…. yesterday morning, I woke up to find nearly all of our broccoli decimated by a greedy ground hog. Now, it takes a LOT to make me angry, but walking through the rows and seeing all those baby broccoli plants bitten down to their roots made me furious, thinking of all the time and energy and money that went into those plants, only to have them disappear overnight. I’ve been farming long enough to know that this sort of thing happens every season, and I shouldn’t be surprised when it does. And yet! I am determined not to give up, and thanks to some incredibly kind and generous fellow farmer friends, today I’m picking up some extra broccoli that they aren’t using, so I can replant and start again. Farming can be heartbreaking, but thank goodness for our amazing community of fellow farmers who are there to pick each other up when we need a helping hand.

One other thing I want to share, just out of total transparency with y’all, is that for the past few weeks I’ve been dealing with some health issues that have been incredibly debilitating. Starting about 3 weeks ago, I suddenly had non-stop ringing in my left ear, along with significant hearing loss, headaches, and disorientation that just wouldn’t go away. I’ve never experienced anything like this before, and I wouldn’t wish it on anyone. I’ll spare y’all all the details, but it was very difficult to find an ENT (Ear, Nose & Throat) doctor who could see me quickly (most offices were booking out into October), but after a lot of persistence, I was finally able to see a doctor located over an hour’s drive away this week. After a bunch of tests and scans, we were able to rule out some pretty scary possible neurological reasons for my symptoms, I’m now on some new medicine that will hopefully address the issue and stop the ringing and get my full hearing back soon.

I share this experience not because I’m seeking any sympathy, but because as an otherwise healthy, young person, my eyes have been profoundly opened to how difficult and frustrating it can be to navigate the healthcare system in our country, and I recognize how privileged I am to have had the capacity (and access to good health insurance) to get care relatively quickly. Most of all, I have new and radical empathy for anyone currently trying to seek medical care for themselves or for someone they love – and if that is something that you are going through right now, my prayers and thoughts are very sincerely with you. Dealing with all this the past few weeks has put so much back in perspective for me… I’ve been reminded that quality time with our family and friends and community are the most precious things in life, and that I can’t let the stresses of the farm (even army worms and ground hogs!) steal my joy. I know that’s easier said than done, but even after this week full of ups and downs, I’m choosing to feel only gratitude for ALL of it.

That’s all I’ve got for today friends… thanks for listening and being part of this community, I’m so grateful for each of you!

Today’s Stats

  • Low temp: 69F

  • High temp: 80F

  • Sunrise: 6:57am

  • Sunset: 7:30pm

  • Moon phase: Waning Gibbous

  • Additional notes: Rain!

September 2

Farm Notes

Fall planting is officially in full force here at Farmbelly! Last Wednesday, we received thousands of fall seedlings from Banner Greenhouses – this time they had to be shipped in boxes, which made me pretty nervous about the condition they would arrive in, but thankfully the plants were all in great shape when it came time to unpack the boxes. We were also lucky to get some incredible weather last week for planting… with a few cool and cloudy days that were perfect for getting our plant babies in the ground.

A big part of making sure that these big planting pushes go smoothly is making sure our growing beds are ready for planting. Bed preparation takes a lot of time and energy, which is why we take these few weeks off our CSA, so we can focus on getting all the fall plants in the ground. Today I want to go through our process for preparing a bed for planting, in case it is helpful for anyone! Note that our bed prep process is specifically for planting directly in the ground (vs in raised garden beds)… but many of the steps still apply whether you are growing in-ground or in a raised bed.

Below is a photo gallery where I illustrate each of these steps:

  1. Apply compost to your bed (for our 50 foot beds we usually add 2-3 full wheelbarrows of compost). We source our compost by the giant truck-load from a local compost company, Brooks. If you are growing in raised beds, I recommend going to your local garden store and asking what compost/soil amendment mixture they recommend for raised beds.

  2. Next I use a square-nosed shovel to “shape” the beds and to scoop any dirt that has fallen into the pathways back on to the bed. This is an important step that serves a few purposes – it keeps the beds nice and straight, puts any precious compost and soil that has fallen into the pathway back onto the bed, and it helps keeps our pathways tidy and weed-free.

  3. Next we use a tool called a broadfork – basically a giant pitchfork that is the width of our 30” beds – to aerate and loosen the soil. This step helps break up any compaction in the soil, allowing plant roots to expand and water + nutrients to move more freely. If you are growing in a raised bed, simply use a pitchfork for this step and twist the tines to loosen up your soil.

  4. Next we apply two additional amendments to our beds – feathermeal (which is rich in nitrogen) and Harmony, an organic composted chicken manure mixture that has a broad range of macro-nutrients that plants need to thrive. If you are growing in raised beds and have already added compost to your soil, you can skip this step… because we “flip” our beds multiple times through the season, we need to do a bit more work to put nutrients back into our soil.

  5. The last step for our bed preparation is my favorite… tilthing! We use an amazing tool called a tilther, which is powered by a cordless drill and does an amazing job working our compost + amendments into the soil, and creating a nice smooth bed. This tool would not be practical for raised bed growing – if you are growing in beds, I think the best tool is your hands to work in the compost with the rest of the soil, and to break up any clods to create a nice smooth bed.

A reminder that after planing your new fall babies, make sure to give them some extra love to give them the best chance at success! I just fertilized all our new plants with organic fish emulsion, which you simply dilute in water and apply either with a watering can or 1 or 2 gallon sprayer.

I just led a full virtual farm tour this morning, so you can see all the new fall planting that we’ve been up to via our private Facebook group here. Later this weekend I’ll upload it to our private Google drive folder here.

As always, if you have any questions or need some inspiration in the garden or in the kitchen as we head towards fall, please don’t hesitate to reach out! Happy growing + cooking + eating friends!

PS – I just added two more culinary workshops here this fall… Superpower Salads for Fall on Oct 6th and Knife Skills 101 on Oct 15th. Snag your spot while they last!

Kitchen Notes

Right now our basil is still growing like crazy, and while I may be feeling sick of basil now.. I know that in a month or two, I’ll be missing all these fragrant summer herbs, so NOW is the time to preserve them while we can! Making herb salt is one of the easiest ways to preserve fresh herbs, and they are seriously amazing for seasoning meat, veggies, eggs, etc. In this recipe I’m making basil salt, but feel free to use whatever herbs you have on hand – I like to use a 1:1 ratio of fresh herbs to kosher salt. When it comes to the salt, my favorite brand of kosher salt is Diamond. Pro tip: Cute little jars of herb salt also making great gifts from your garden!

HOMEMADE BASIL SALT

INGREDIENTS

  • 1 cup loosely packed mixed fresh basil leaves (or any herb of choice)

  • 1 cup kosher salt

  • Optional additions: a teaspoon lemon zest and/or minced garlic


PREPARATION

  1. Preheat your oven to the lowest temperature (usually around 180F).

  2. Combine fresh basil leaves and salt together in a food processor and blend until the herbs are fully incorporated into the salt (this usually takes a minute or two).

  3. Spread the herb salt onto a rimmed baking tray, and put into your preheated oven for 45-60 minutes. Stir the salt mixture (or if it’s easier, use your hands to break/mix everything up) every 20 minutes until the salt is fully dry, making sure it doesn’t burn.

  4. Let the herb salt cool fully, then store in a jar with a lid in a cool, dry spot in your pantry, where it will keep for several months.

Today’s Stats

  • Low temp: 68F

  • High temp: 89F

  • Sunrise: 6:44am

  • Sunset: 7:53pm

  • Moon phase: Waning Crescent

  • Additional notes: Mostly sunny, slight chance of showers

August 19

Farm Notes

The past few days (and the next few days ahead) have been abnormally cool and less humid than usual for mid-August in North Carolina… I know it’s fleeting, as there is still lots of hot/humid summer weather to be had, but I’ll take it for as long as it lasts!

Last weekend, thanks to lots of support from our parents / Sawyer’s grandparents, Matthew and I took our first baby-free trip away from the farm! We went to Montreal for 4 days, and it was such a breath of fresh air to explore a new city together. We had an amazing time in Montreal (my first time to Canada!) but we were also ready by the end of the trip to get back home to see baby Sawyer and our sweet puppy Arlo (and the veggies and chickens too). As always, leaving the farm is stressful, and coming back home is always a bit overwhelming… thankfully, we’re on a break from our CSA for the next few weeks, so while there is a ridiculous amount of work to do prepping + planting for fall, the workload is considerably less as we aren’t packing 50+ boxes of veggies over the course of the week.

So I’ll be honest, I don’t have as many farm updates this week! I spent all of yesterday catching up on harvesting (okra, tomatoes, peppers, eggplant, beans, cucumbers, etc) and then I focused on getting beds prepped for a big fall planting push that will happen next week! On Tuesday we’ll receive hundreds (maybe even thousands?) of baby veggie seedlings from Banner Greenhouses, so right now we are hustling to get our beds ready for all the new plant babies! Next week I’ll give a detailed look at exactly how we prepare our beds for planting, along with lots of helpful tips for planting your own fall gardens.

Looking ahead as the weather cools down and we get through this last fall planting push, I’m so excited to host more events here at the farm! Local friends, don’t miss my next workshop, Pickling & Fermenting 101 on Sunday, September 11th @ 3-5pm.

This is one of my favorite classes to teach, and it’s super hands-on as everyone helps harvest veggies that we’ll use to make homemade quick pickles and sauerkraut that you’ll get to take home. Also included in the workshop is a walking tour of our farm, and lots of delicious pickled + fermented dishes to sample and enjoy. More details + tickets available HERE.

PS – I just took y’all on a virtual farm walk, with lots of new things going on around here! For a full tour of the farm + tips for your own gardens, here’s a link to watch! You can also check it out in our private Google Drive folder here (video will be posted here later today).

Kitchen Notes

Let’s talk peppers! Peppers of all kinds are in abundance right now in gardens and farmers markets pretty much everywhere, and there are SO many different varieties of peppers that it can be confusing to know how to best use them all, so I’m here to help break it down! Here are some pepper basics, as well as descriptions + recipe ideas for a range of some of my favorite sweet, mild, and hot peppers.

1) PEPPER BASICS

  • Peppers range from sweet to very spicy, and a lot in between! In general, peppers will be spicier later in the growing season, and if the weather has been especially dry/hot while the peppers were growing.

  • Capsaicin (kap-say-sn) is the active component in peppers that make them hot. 

  • The Scoville scale is the scientific measure of a chili’s spice/heat, which ranges from 0 (no heat) to 1-2 million (very, very hot)!

    • A trick to reduce heat is to remove inner pith/membrane (which have highest amount of capsaicin)

  • Store peppers in the warmest part of your fridge (usually the front, in a bag, making sure there is no moisture). Or if using in next few days, it’s okay to leave peppers out on your counter.

2) SWEET, MILD, & HOT PEPPER OVERVIEW (+ recipes)

SWEET PEPPERS

MILD to MEDIUM FRYING PEPPERS

HOT PEPPERS

Today’s Stats

  • Low temp: 67F

  • High temp: 82F

  • Sunrise: 6:39am

  • Sunset: 8:02pm

  • Moon phase: Waning Gibbous

  • Additional notes: Partly sunny, chance of showers

August 12

Farm Notes

And just like that, our Summer CSA has come to a close! This season has definitely been our most abundant yet, though I’m already scheming and dreaming of ways to nourish our soil and grow even better next year. I’ve been farming in one way or another for the past 15 years, and every year I get a little better… AND I also make tons of new mistakes, because somehow, there seems to be no shortage of ways to screw things up no matter how long you’ve been farming.

Overall, it’s been a great season, though I’d be lying if I didn’t say that I am TIRED. I opened up a bit about August burnout over on my instagram (which you can read here), and I was honestly blown away by the reaction and how many people reached out in support + solidarity. I just think it’s important to keep it real about what it’s REALLY like to run a small farm, because it’s so easy to just show all the beautiful, fun, instagram-perfect stuff… all while sweeping the ugly parts under the rug. Now that our Summer CSA is behind us, and with a bit of a break these next few weeks, I’m already feeling more energized for fall… anyone else ready for sweater weather? Just me?!

CSA Week 10 (Full Share)

Speaking of fall… our 12-Week Fall CSA is officially sold out (thank you!) and now we’re in a 3 week “break” between CSA seasons, which allows us to take a much needed deep breath (!) and to flip most of our growing beds, removing summer veggies and replacing them with cool weather crops like lettuces, kale, radishes, turnips, arugula, etc. I should mention there are a few crops that will stay in the ground and continue pumping out veggies through the fall… things like okra, eggplant, peppers, and some tomatoes – so we aren't quite finished with the summer goodness just yet!

In other news, have you seen our big barn reveal?! Over the summer one of our big projects was giving our barn a #glowup, and we worked with a local team who painstakingly replaced all the rotten boards, chipped away the peeling paint, and gave everything a fresh coat of paint and WOW… what a world of a difference! Our family feels incredibly privileged to be the stewards of this land, and part of that stewardship means taking care of the structures that have been here for decades, and that are a crucial part of the fabric of this farm.

Barn before…

…and after!

Last but not least… as we look ahead to fall, I’m excited to announce a new workshop hosted here at the farm… local friends, I hope you’ll join us on Sunday, September 11th for my Pickling & Fermenting class!

This is one of my favorite classes to teach, and it’s super hands-on as everyone helps harvest veggies that we’ll use to make homemade quick pickles and sauerkraut. Also included in the workshop is a walking tour of our farm, and lots of delicious pickled + fermented dishes to sample and enjoy. More details + tickets available HERE.

PS – I just took y’all on a virtual farm walk, with lots of new things going on around here! For a full tour of the farm + tips for your own gardens, here’s a link to watch! You can also check it out in our private Google Drive folder here (video will be posted here later today).

Kitchen Notes

In honor of my upcoming pickling + fermenting class, I thought it would be fitting to share a family recipe for pickled green beans, aka dilly beans! I’ll be honest that until I met my husband Matthew and his family, I had never even heard of dilly beans… but now I’m making up for lost time, especially since these days we are swimming in green beans. Even if you are new to canning, this recipe is very straightforward... though the process is even more fun when you have some helping hands! | MAKES 8 16-oz jars

DILLY BEANS (PICKLED GREEN BEANS)

Photo Credit: Wyse Guide

INGREDIENTS

  • 6 cups water

  • 6 cups white vinegar

  • 1/4 cup kosher salt

  • 4-5 pounds fresh green beans | ends trimmed

  • 1 teaspoon chopped fresh dill

  • 1/4 teaspoon dill seed

  • 1/4 teaspoon celery seed

  • 1/8 teaspoon alum (keeps the beans crisp)

  • 1/2 teaspoon dry red pepper flakes

  • 2 cloves garlic

INSTRUCTIONS

  1. Start by sterilizing 8 pint-size mason jars by boiling them for 10 minutes in a large stockpot. Boil the lids for 10 minutes in a separate smaller saucepan. Remove with rubber tongs, set aside and allow to dry until needed. Keep the stockpot filled with water on the stove, as you will need it again to seal the jars once they are packed with beans and brine.

  2. Quickly blanch the green beans by bringing salted water to boil in a medium saucepan. Add green beans, cook at a medium boil uncovered for two minutes, then immediately refresh the beans in an ice bath.

  3. Next, make the brine by combining the water, vinegar, and salt in a saucepan and bringing to a gentle boil. Lower the heat to keep a very low simmer. 

  4. Meanwhile, pack the fresh dill, dill seed, celery seed, alum, red pepper flakes, and garlic into your sterilized jars. Next, pack the beans tightly in the mason jars and ladle in the hot brine to just cover the beans (leave 1/2” head space). Fasten the lids to each jar and carefully place the jars back into the stock pot with boiling water to seal the jars. After 10 minutes in the hot water bath, remove jars with rubber tongs and gently place on your countertop, as they cool you should hear each jar “pop” as the lid seals. Store for at least two weeks before eating.

Today’s Stats

  • Low temp: 60F

  • High temp: 82F

  • Sunrise: 6:32am

  • Sunset: 8:12pm

  • Moon phase: Full Moon

  • Additional notes: Mostly sunny, finally less humid!

July 29

Farm Notes

A week off the farm at the beach with family did this tired mama farmer some good! It was quite a hustle to get the farm ready / everyone packed up and out the door, but it’s always so worth it to get away, unplug, and wash away a summer’s worth of dirt and grime in the ocean.

Alas! Mother Nature never seems to take a vacation, so coming back to the farm after being away also means there’s a lot of catching up to do… harvesting, weeding, mowing, trellising, etc. We’re still deep in summer abundance, and this week’s CSA had all the hits, with heaps of colorful tomatoes to peppers, eggplant cucumbers, zucchini, okra, beans, and fragrant herbs.

Summer CSA Week 8

As I was harvesting like crazy all week, I realized it might be helpful to share a few notes/tips for harvesting some of your favorite summer veggies. A question I often get is “how do I know when to harvest ____ (fill in the blank)"?” The answer really depends on what you are harvesting, and for veggies like cucumbers, zucchini, and okra - it’s mostly based on size. So here’s a photo showing the ideal size (in my opinion!) for when these three crops are ready for harvest (using my hand for scale).

It’s also important to use the right tool for harvesting! Here’s a link for my favorite garden pruners for harvesting cucumbers, okra, tomatoes, etc – and here’s a link for my go-to harvest knife for crops like zucchini, lettuces, etc.

My favorite pruners and knife for harvesting (see above for links)

So overall, it’s been a busy week, but I feel like most of the chaos has been reined in, and now with just two weeks left in our Summer CSA (!), my mind is fully focused on gearing up for fall. Earlier this week we planted our first succession of lettuce for the fall, and I’m excited to have some leafy greens back in the rotation. Speaking of fall, early access to sign up for our Fall CSA will go live @ 9am on Monday, August 1.

As Farmbelly Club members (and any current Summer CSA members), you get first dibs! A heads up that we do scale back our production a bit in the fall (compared to the summer season), so shares will be limited. You will receive an email from me at 9am on Monday with all the details for the Fall CSA + the link to sign up.

I just took y’all on a virtual farm walk… so for a full tour of the farm + tips for your own gardens, here’s a link to watch! You can also check it out in our private Google Drive folder here.

Until next week (aka AUGUST?!), happy growing and cooking and eating friends! :)

Kitchen Notes

Ratatouille is my go-to recipe to clean out my fridge (and my garden) in this season of deep-summer abundance. A good long roast in the oven transforms a motley medley of eggplant, peppers, zucchini, tomatoes, and fresh herbs into a hearty stew, which I love serving over creamy polenta. Traditional ratatouille calls for cooking each ingredient one at a time… but ain’t nobody have time for that! This roasting method is super simple and just requires a bit of chopping at the beginning. Don’t forget to add the splash of balsamic vinegar before serving, as the sweet + tangy balsamic kicks up the dish to a whole new level of deliciousness.

ROASTED RATATOUILLE

INGREDIENTS

  • 2 red onions, cut into 1/4-inch-thick half-moons

  • 2 sweet bell peppers (any color is fine), cored, seeded, and cut into 1-inch dice

  • 1 pound eggplant, unpeeled and cut to 1-inch dice

  • 2 medium zucchini (1 pound), cut into 1/2-inch rounds

  • 6-8 whole cloves garlic, peeled and smashed

  • 1 tablespoon chopped fresh rosemary and/or thyme

  • 1 teaspoon dried oregano

  • 1/3 cup extra-virgin olive oil

  • Kosher salt and pepper

  • 4 medium ripe tomatoes, any kind is fine (1 pound total) cut into 1/2-inch chunks (or use 2 cups halved cherry tomatoes)

  • Splash balsamic vinegar

  • Handful thinly sliced fresh basil

INSTRUCTIONS

  1. Preheat the oven to 425 degrees.

  2. Place the chopped onions, bell peppers, eggplant, zucchini, garlic, rosemary.thyme, oregano, olive oil, 2 teaspoons kosher salt, and 1 teaspoon freshly ground black pepper in a large bowl and toss to combine. Pour the vegetables onto two rimmed baking trays. Roast for 30-35 minutes, tossing occasionally, until the vegetables are tender and beginning to brown.

  3. Lower the oven to 400 degrees, divide up the tomatoes equally onto the two pans and roast for another 20 minutes. Scrape all the vegetables and any juices into a serving bowl and toss with a splash (start with 1 tablespoon) of the balsamic vinegar and the fresh basil. Taste and adjust seasoning as needed, and serve warm.

Today’s Stats

  • Low temp: 73F

  • High temp: 94F

  • Sunrise: 6:22am

  • Sunset: 8:25pm

  • Moon phase: Waxing Crescent

  • Additional notes: Mostly sunny, chance of storms in the afternoon/evening

July 15

Farm Notes

It’s been a fairly quiet and uneventful (knock on wood!) week here at the farm… filled with heaps of tomatoes, green beans, okra, sunshine as well as some much-needed rain to replenish our thirsty soil. We just wrapped up Week 6 of our Summer CSA, and it was another bountiful week filled with summer favorites like tomatoes, peppers, eggplant, beans, basil, etc – and the okra harvesting has officially begun!

Okra is a crop that generally needs to be harvested every other day, as the pods grow incredibly quickly and can easily become too large and tough. I feel like people have strong opinions about okra… you either love it or hate it! I’m personally a big fan – you just have to either embrace okra’s inherent slimy-ness and cook it in a stew or succotash, OR if you aren’t a fan of the gooey texture… just fry or roast the okra until it’s nice and crispy!

Full Share CSA Week 6

Wondering what you can still plant in your garden now that we’re in the dog days of summer? While this time of year is mostly good for reaping what you’ve sown earlier in the spring/summer, here are some things that most climates in the US can plant this time of year:

  • Heat tolerant lettuces (varieties like Muir and Cherokee are especially heat tolerant)

  • Bush & pole beans (plant from seed)

  • Zucchini (I suggest planting as a seedling to give the plants a head start against pests)

  • Cucumbers (I suggest planting as a seedling to give the plants a head start against pests)

  • Carrots (plant from seed, Romance is a good Summer variety)

  • Herbs like rosemary, thyme, basil, parsley, dill, and basil

  • Tomatoes – if you live in a southern climate with late frosts, you can probably still sneak in a late tomato planting 

  • If you’re looking to plant a cover crop to nourish your soil, buckwheat is a perfect choice!

As always, if you have any questions or need help trouble-shooting in your summer garden, don’t hesitate to reach out!

Even though there are still several weeks left in our Summer CSA (4 weeks, to be exact)… I’m thinking a few steps ahead and finalizing details for our 2022 Fall CSA! For all our local Farmbelly friends, you’re the first to know about details for our Fall CSA, and you get first dibs when I open sign-ups on Monday, August 1st.

Our Fall CSA will run for 12 weeks, starting the week of September 5th and running through the week of Thanksgiving. For the Fall, we will only have one pickup day, which will be on Tuesday afternoons. (A note that in the summer months, we have so much abundance getting picked every day that it makes sense to have multiple CSA pickup days… though in the spring/fall the crops don’t need to be picked as frequently, and it’s easier to just have one CSA pickup day per week). We will still offer two different sized shares – Regular Shares for $30/week and Small Shares for $18/week.

CSA members can expect a lot more greens in their Fall shares… from lettuce to arugula, baby and full size kale, asian greens, etc. We will also have heaps of cabbage, carrots, winter squash, beans, fennel, kohlrabi, leeks, scallions, fresh herbs, and much more. As I mentioned, Farmbelly Club members (and current CSA members) get first dibs on spots on our Fall CSA, which will open up on August 1st. Stay tuned for more details, but hopefully this helps get you excited about fall!

Looking ahead to next week… our family will be taking a much-needed vacation, so you won’t hear from me next Friday. I’m excited to take this time to rest, reflect, and return rejuvenated to finish the summer season strong. I’ll be back in two weeks with plenty more updates from the farm, growing tips for your home gardens, and recipes!

Last but not least, congrats Laura Pritchard for winning our July giveaway! I’ll be in touch with you directly to coordinate sending over your new cookbook, Deep Run Roots. :)

Kitchen Notes

I’m not sure the world needs another recipe for tomato and basil soup… BUT I’ve gotta to say, this might be the best thing I’ve cooked all summer! We’re spoiled by an abundance of tomatoes AND basil right now, and earlier this week I had a craving for a classic bowl of tomato soup with some gourmet grilled cheese on the side. I think going the extra (but still very simple) step in this recipe of first roasting the tomatoes packs SO much more flavor into the soup.

I’m already planning to make this soup again this weekend… except I plan to quadruple the recipe and freeze several big jars, so when it’s December and I need some summer goodness in my belly, we can just grab a jar from the freezer and we’ll be instantly transported back to some wild and wonderful summertime deliciousness.

Roasted Tomato & Basil Soup

INGREDIENTS

  • 3 pounds roma tomatoes, halved

  • Salt and freshly ground black pepper

  • ¼ cup extra-virgin olive oil

  • 2 tablespoons butter

  • 2 medium yellow onions, diced

  • 1/2 cup chopped carrots

  • 2 tablespoons tomato paste

  • 4 garlic cloves, minced

  • 3 cups vegetable broth (or water)

  • 1 tablespoon balsamic vinegar

  • 1/2 teaspoon thyme or dried oregano leaves

  • 1 loose-packed cup basil leaves (plus more for garnish)

INSTRUCTIONS

  1. Preheat the oven to 375°F and place the halved tomatoes cut-side up on a rimmed baking sheet, drizzle with 1/4 cup olive oil, 1 tablespoon kosher salt, and freshly ground pepper. Roast for 1 hour or until the edges begin to shrivel and the insides are still juicy.

  2. Heat 2 tablespoons butter in a large pot over medium heat. Add the onions, carrots, and ½ teaspoon salt and cook until soft, about 8 minutes. Stir in the tomato paste and minced garlic and cook for 1-2 minutes.

  3. Stir in the tomatoes (and any remaining liquid from the baking sheet), vegetable broth (or water), balsamic vinegar, and thyme (or oregano) leaves and simmer for 20 minutes.

  4. Let cool slightly and puree the soup using an immersion/stick blender, or a standing blender, working in batches if necessary. Blend until smooth. Add the basil and pulse until combined. Taste and adjust seasoning as needed.

  5. Garnish the soup with basil leaves and serve with crusty bread.

Today’s Stats

  • Low temp: 68F

  • High temp: 88F

  • Sunrise: 6:12am

  • Sunset: 8:34pm

  • Moon phase: Waning gibbous

  • Additional notes: Mostly sunny and lovely

July 8

Farm Notes

This week we hit #peaktomato, and it’s all I can do to keep up with harvesting. I’ll be honest that every year, growing tomatoes stresses me the heck out. I’ve yet to meet a person who doesn’t love a good locally grown tomato.. they are so juicy and vibrant and filled with flavor, just begging to be sandwiched between two mayo-slathered pieces of toasted bread. So you can imagine that as a farmer, there’s some pressure to deliver a bounty of ripe tomatoes all summer long!

We plant our tomato seedlings in mid-April, and for months they require lots of care and attention, hours spent pruning and trellising and fertilizing with fish emulsion, etc. And then finally.. finally! Assuming that no pest or fungus or other natural disaster has taken them out, by July the tomatoes are usually hitting their stride. Which means we are eating a lot of tomatoes around here! Make sure to keep scrolling to today’s recipe, for a tomato & corn galette I made last weekend that was a hit at our house.

In addition to allll the tomatoes, this week our CSA members got an assortment of peppers, eggplant, green beans, basil, etc! Looking ahead to next week, I’m excited to start adding some okra and garlic to the mix, along with some of our hot peppers like seranos and jalapenos.

Overall, it’s been a busy, hot, sweaty, and otherwise uneventful week at the farm, and we’re looking forward to a quiet weekend to catch up on sleep, farm chores, and to visit with friends at go to Saturdays in Saxapahaw. By this time in the season, most all of our summer veggies are planted and producing, and now I’m focused on keeping up with the harvesting (and the weeds!) and planning + prepping for fall. Earlier today I seeded an experimental few rows of carrots, in hopes that we’ll get an early fall harvest. I’ve never tried planting carrots this time of year (usually I just plant them in the spring and fall when it’s not so hot), so we’ll see what happens!

For any of our local friends looking for a fun, farm to table experience next weekend, join me for our next hands on workshop here at the farm! There are still a few spots left in my Eat Like a Farmer Workshop on Saturday, July 16th @ 4-6:30pm. We’ll do a full farm tour, and everyone will get to help harvest veggies which we will use to whip up a few delicious summer salads, all while working on our knife skills and making homemade vinaigrettes. More details + tickets can be found here.

For a full tour of what’s growing on the farm this week + helpful growing tips, tune into my virtual farm walk from earlier today HERE on Facebook or in our google drive folder HERE. In today’s farm walk I dig into everything from how to trell eggplant and peppers, to how to deal with japanese beetles, how to properly harvest basil, and lots more.

Okay, now it’s time for our July giveaway! Inspired by all things tomatoes, this month I’m going away one of my favorite cookbooks, which has a whole chapter dedicated to tomatoes… Deep Run Roots, by North Carolina native Vivian Howard. If I could only own 5 cookbooks, this one would definitely make the cut – Vivian is an incredible writer, and I love how the book is organized in chapters dedicated to specific ingredients – ie a chapter on Corn, Blueberries, Pecans, Peaches, and of course.. Tomatoes!

TO ENTER THE GIVEAWAY – There are two ways that you can enter this giveaway (just choose 1):

  1. Comment on this post in our private Facebook Group and share your favorite dish/recipe to make using tomatoes! If you aren’t already a member of our private Facebook Group, just request access here.

  2. OR Click the “Comment” button at the bottom of this journal entry and share your favorite dish/recipe to make using tomatoes!

You have until Thursday, July 14th @ midnight to enter, and I’ll announce one randomly selected winner on Friday, July 15th.

Kitchen Notes

I’m pretty sure that galettes are my spirit dish… a little rough around the edges, but there’s goodness on the inside! Galettes are great because they are meant to look rustic, so there’s no need to strive for perfection… the more imperfect, the better. I also love that galettes can evolve with the season –all you need is a good basic pie dough recipe on hand, and you can fill it with whatever veggie (or fruit!) combination that strikes your fancy. There are a million different pie dough recipes out there, so feel free to use whatever recipe you like best (I like this one from Fine Cooking). I whipped up this tomato + corn galette last weekend and I’m already looking forward to making it again. Recipe adapted from David Lebovitz in Fine Cooking.

Summer Tomato & Corn Galette

INGREDIENTS

  • 2 tablespoons olive oil

  • 1 large yellow onion, diced

  • Salt and freshly ground black pepper

  • 2 cloves garlic, minced

  • Kernels removed from 2 ears of corn (about 2 cups)

  • 1 recipe pie dough (I like this one, but use whatever recipe you like!)

  • 1/2 cup gruyère or aged gouda cheese, shredded (plus more for garnish)

  • 1 large or 2 medium ripe tomatoes (about 1 lb total) cut into 1/3-inch slices, drained on paper towels

  • 1 large egg yolk mixed with a splash of milk or cream

  • Handful fresh basil, finely chopped (for garnish)

PREPARATION

  1. Heat the olive oil in a large nonstick sauté pan over medium heat. Add the diced onion and cook, stirring frequently, until lightly browned, about 8 minutes. Season with salt and pepper. Lower the heat a bit and add the garlic and corn and cook for a minute or two (just make sure the garlic doesn’t burn). Transfer the mixture to a bowl and set aside to cool.

  2. Adjust an oven rack to the center position and heat the oven to 375°F. Line a baking sheet, preferably one without sides, with kitchen parchment. (If your baking sheet has sides, flip it over and use the back.)

  3. Roll the dough on a floured surface into a 15-inch round, lifting the dough with a metal spatula as you roll to make sure it’s not sticking. If it is, dust the surface with more flour. Transfer it by rolling it around the rolling pin and unrolling it on the lined baking sheet.

  4. Spread the onion and corn mixture over the dough, leaving a 2-inch border without filling (I also reserve a little of the corn mixture to sprinkle on top of the tomatoes, but that is optional). Sprinkle the cheese over the onion and corn mixture. Arrange the tomatoes in a single layer over the onions and corn and season them with salt and pepper. If desired, top the tomatoes with some of your reserved corn mixture.

  5. Lift the edges of the dough and fold them inward over the filling, pleating as you go, to form a folded-over border. Pinch together any tears in the dough. Brush the egg yolk and milk mixture over the exposed crust.

  6. Bake until the crust has browned, 35 to 45 min. Slide the galette off the parchment and onto a cooling rack. Let cool for 10 minutes. Cut the galette into wedges, garnish with a bit more cheese and the chopped fresh basil, and serve.

Today’s Stats

  • Low temp: 72F

  • High temp: 90F

  • Sunrise: 6:07am

  • Sunset: 8:37pm

  • Moon phase: Waxing gibbous

  • Additional notes: Hot & humid

July 1

Farm Notes

Somehow it’s been two weeks since my last update, and suddenly it is July! We’re in the thick of summer now, and even though there’s still light in the sky until 9pm, somehow there's still not enough time in the day to do all the things. I’m clearly still learning how to balance managing the farm, raising a sweet 9 month old baby, making sure we all have clean clothes to wear, food to eat, and clean dishes to eat off, and still making time for friends and family and REST. I know most everyone knows this feeling, and we’re all just trying to find the right balance (do we ever find the right balance? If you’ve figured it out, please let me know).

What I do know is that one variable I’m able to control is how much we grow here at the farm each season, and as I think ahead to next season… either I need to scale back a bit, or I need more help, or maybe a little bit of both! This year we’re growing more than we ever (by a LOT), and it’s been amazing to see just how much this little farm can produce. But finding the right scale for our family (and our CSA community) is something I’m still trying to figure out, and every year I hope we can get a little closer. I know that our farm will need to expand and contract depending on the season, and I’m okay with that. And I’m thankful for each one of you for joining me on this journey as we figure it out!

Okay, back to vegetables. The past two weeks of the CSA have been so beautiful and bountiful… tomatoes, peppers, eggplant, cucumbers, etc are rolling in and I spend most of my day just trying to keep up with the harvesting. Coming up in the next week or two will be the first of our green beans, okra, and bell peppers! Here’s a peak at what went inside our full share boxes for the last two weeks:

Summer CSA Week 3

Summer CSA Week 4

At this point in the season, the only things we are planting are a few additional successions of cucumbers, squash, beans, and lettuce – as all of our main summer crops (tomatoes, peppers, eggplant, okra, etc) have been in the ground since April. Our next big planting push will be in in mid-August, when we put all of our fall seedlings in the ground.

In other news, last weekend we hosted a hands-on workshop here at the farm, and it was a blast! It was my “Eat Like a Farmer” workshop, which is chock full of information about growing, harvesting, storing, and cooking with fresh, local produce. Everyone got to help with harvesting veggies, and together we sharpened up our knife skills, made vinaigrettes, and whipped up a few different fresh salads to enjoy together. I absolutely love teaching this class, and it’s been a dream of mine to be able to create a hands-on learning experience for folks to come and learn about growing + cooking good, nourishing food here at our farm.

The workshop was so much fun (and sold out so quickly..) that I’m hosting it again in a few weeks! As Farmbelly Club members, y’all get first dibs on tickets for our next Eat Like a Farmer Workshop on Saturday, July 16th @ 4-6:30pm. More details + tickets can be found here!

For a full tour of what’s growing on the farm this week + helpful growing tips, tune into my virtual farm walk from earlier today HERE on Facebook or in our google drive folder HERE.

Kitchen Notes

A galette, aka a rustic pie, is the ideal vehicle for containing ripe, juicy, sweet summer fruits for a perfectly imperfect dessert. Use this recipe as a guide for whatever fruits you have on hand – raspberries, blackberries, cherries, peaches, pluots, etc – don’t overthink this folks. Galettes are best after sitting for several hours or overnight (allowing all those juices to settle and firm up a bit), so they’re a great make-ahead dessert for summer dinner parties. All you need is a scoop of vanilla ice cream (or whipped cream or creme fraiche) to top it all off! Recipe adapted from Bon Appetit.

Blueberry-Ginger Galette with Pecan Crust

INGREDIENTS:

Pecan Galette Dough

  • ½ cup pecans

  • 1 cup plus 2 tablespoons all-purpose flour

  • 2 teaspoons sugar

  • ½ teaspoon kosher salt

  • ¼ teaspoon ground cinnamon

  • ½ cup (1 stick) chilled unsalted butter, cut into pieces

Blueberry Filling

  • 12 ounces blueberries (about 2 cups)

  • 1 tablespoon tapioca flour (or cornstarch)

  • 2 teaspoons fresh lemon juice

  • 1/2 teaspoon grated fresh ginger (or more, if you really like ginger)

  • 1/3 cup sugar, plus more for sprinkling

  • All-purpose flour (for surface)

  • 2 tablespoons half-and-half or heavy cream

INSTRUCTIONS:

Make the dough

  1. Preheat oven to 350°. Toast pecans on a rimmed baking sheet, tossing once, until fragrant and slightly darkened, 10–15 minutes; let cool. Pulse pecans in a food processor until the consistency of coarse meal.

  2. In the same food processor as the ground pecans, add flour, sugar, salt, and cinnamon and pulse just to combine. Add cold, chopped butter and pulse until mixture resembles coarse meal with a few pea-size pieces remaining. Drizzle with 4 tablespoons ice water and pulse a few more times to mix.

  3. Transfer the dough to a large bowl and mix quickly with your hands, adding another tablespoonful of water if needed, just until the dough comes together in a ball. Pat dough into a 6"-diameter disk, wrap in plastic wrap, and chill for at least 30 minutes.

Filling and Assembly

  1. Preheat oven to 375°. Toss blueberries, tapioca flour (or cornstarch), lemon juice, grated ginger (I use a microplane to grate ginger) and 1/3 cup sugar in a large bowl.

  2. While the berries macerate in their juices, roll out the chilled dough on a lightly floured piece of parchment paper to a 12" round, 1/8" thick. Carefully transfer the parchment paper with the rolled-out dough onto a baking sheet. Mound the blueberries in center of the dough, leaving a 2" border. Carefully lift and fold the edges up and over the filling, allowing the dough to naturally pleat at 1-2 inch intervals as you fold. Brush dough with cream and sprinkle with sugar.

  3. Bake galette until crust is dark golden brown and filling is bubbling, 45–55 minutes total, rotating the pan halfway through baking. Allow to cool before enjoying. Just before serving, top with scoops of your favorite vanilla ice cream, whipped cream, or creme fraiche for the ultimate galette experience.

Today’s Stats

  • Low temp: 69F

  • High temp: 91F

  • Sunrise: 6:04am

  • Sunset: 8:38pm

  • Moon phase: Waxing crescent

  • Additional notes: Sunny & warm

June 17

Farm Notes

Hot dang y’all, it is HOT out here. Spring came and disappeared in a blink, and now we’re officially deep in the throes of the hot + humid North Carolina summertime. There’s a certain amount of surrender and tolerance for discomfort that is required to farm in the South in the summer, and by this point in the season I’m pretty acclimated to the heat and can just muscle through it. Also… I keep thinking about how last year at this time, I was farming all summer while in the third trimester of my pregnancy, and if I could do THAT, then I can do just about anything.

Thankfully most of the veggies are loving the heat, and this week was another bountiful one for our CSA members… new to our boxes this week are cherry tomatoes, eggplant, cucumbers, and red onions, with LOTS more coming soon (like all the peppers, beans, okra, etc etc).

Week 2 Summer CSA Full Share

There were some exciting new things to harvest this week… starting with our blueberries! After watching these little plants grow over the past year and a half, it’s wildly rewarding to be able to pick sweet, sun-warm berries and enjoy them right there in the field. This week we also finished pulling out all our garlic, which is now drying out on racks for the next several weeks, which will help the garlic be shelf stable over the next several months. I also started harvesting the first of our shishito peppers and fairytale (aka mini) eggplant, which are two of my favorite summer veggies. Last but not least… this week we finished digging up the rest of our potatoes.

Overall, it was a great year for potatoes, and even the experiment growing potatoes in grow bags worked fairly well. By far the most productive (and best looking) potato variety we grew was called Gold Nugget, with a close second being the Upstate Abundance potatoes from Row 7 Seeds.

As we head deeper into summer, suddenly we have a lot of empty beds on the farm as we remove the plants that grew all spring (like kale, cabbage, broccoli, potatoes, onions, garlic, etc). As a general rule, I try to never leave beds empty for long, because bare soil is going to quickly become depleted of organic matter and key nutrients. So today I planted several rows with buckwheat, which is a super easy and quick summer cover crop that’s also great for pollinators!

My process is very straightforward – first make sure your row is clear and free of weeds, then scatter the seed by hand (I use a 32 oz yogurt cup to broadcast the seeds, using about 3 of those 32-oz scoops per 50-foot bed), then use a rake to cover up the seed with soil, and finally water everything in with a cheap backyard sprinkler.

The buckwheat usually germinates very quickly, and after 4-6 weeks once the flowers bloom I’ll use a weed whacker to cut everything down, and then I’ll cover the rows with a tarp for several weeks so the plant matter can decompose and add organic matter back to the soil. And just like that, we will have super happy and nutrient-rich beds ready for fall planting! If you have any questions about cover crops, don’t hesitate to reach out… it' really is such a great and simple way to drastically improve the health of your soil (and then in turn, have healthier plants).

Wondering what veggies you can still plant this time of year? For most climates (around the US at least) you can probably still get in a late crop of tomatoes, peppers, or eggplant. You should also be able to plant more cucumbers, squash, beans, corn, okra, basil, etc. Now's the time y'all!

Kitchen Notes

When it’s hot and the last thing you want to do is turn on your stove/oven, chilled soups are your best friend! I absolutely love this super simple, but still flavor-packed recipe for a chilled cucumber and avocado soup. It’s as easy as throwing a few ingredients together in a blender, and it has surprisingly complex flavors for such a straightforward recipe. Happy cooking!

CHILLED CUCUMBER & AVOCADO SOUP

WITH FRESH SUMMER HERBS

Serves 4

Photo Credit: Crowded Kitchen

INGREDIENTS

  • 2 slicing cucumbers | peeled and diced  (1/4 cup reserved for garnish)

  • 2 avocados | pitted, peeled, and diced  (1/4 cup reserved for garnish)

  • 1 tablespoon fresh lemon juice

  • 1/2 teaspoon finely grated lemon zest

  • 1/4 cup coarsely chopped fresh cilantro

  • 2 tablespoons chopped fresh basil

  • 1 scallion/green onion | coarsely chopped

  • 1/2 jalapeno | seeded and coarsely chopped

  • 1 cup nonfat plain yogurt

  • 1 cup cold water

  • 1 teaspoon kosher salt

  • 1/4 teaspoon freshly ground pepper

PREPARATION

  • Puree ingredients in a blender until very smooth. Taste and adjust seasoning as needed.

  • Chill in the fridge for at least 30 minutes, then divide among 4 bowls and top with reserved cucumber, avocado, and a few sprigs of cilantro.

Today’s Stats

  • Low temp: 70F

  • High temp: 96F

  • Sunrise: 6:00am

  • Sunset: 8:36pm

  • Moon phase: Waning Gibbous

  • Additional notes: Sunny & warm